I still remember the pit in my stomach when I opened my utility bill three months after getting my first EV. I expected a bump, sure, but this was a mountain. I had done everything by the book, or so I thought. I spent hours troubleshooting connectivity issues and checking my charging app, but the math just wasn’t adding up. My car said I used 300 kWh, but the meter insisted I consumed 500. Where was that ghost power going? It turns out, I had fallen into the neutral wire trap—a subtle, expensive mistake that even some pros overlook when they are rushing an installation.
Stop Paying for Electricity You Never Actually Use
We often treat electrical wiring like a simple plumbing pipe where power goes in and power comes out. But electricity is a bit more temperamental. When I first started tinkering with my garage setup, I made a classic rookie move: I didn’t respect the torque settings. I thought tight enough was good enough for the neutral bus bar. According to the Electrical Safety Foundation International (ESFI), improper or loose connections are a leading cause of residential energy loss through heat. That heat isn’t just a fire hazard; it is literally money evaporating off your wires before it even reaches your car’s battery. If you have noticed your electricity bill doubled after getting an EV, you might be dealing with more than just standard charging costs.
The trap happens when a high-draw appliance runs on a circuit where the neutral isn’t perfectly seated or is improperly shared. This creates resistance. Resistance creates heat. And your meter? It counts every single bit of that wasted energy. I spent weeks chasing software bugs before I realized the problem was a physical one hiding behind my panel cover. You might even find your main lugs are loose after a year of heavy charging cycles, which only makes the problem worse. Today, I’m going to show you how to spot these efficiency killers before they drain your bank account any further.
Is this just another way for electricians to overcharge me?
I get it. You hear the phrase panel issues and you immediately see dollar signs and a week of contractors tracking mud through your house. But here is the truth: catching a loose neutral or an imbalanced load early is the cheapest upgrade you will ever do. You don’t always need a full panel upgrade to fix a massive spike in your bill. Sometimes, it is simply about detecting a loose neutral wire and tightening things down to the right manufacturer specs. Have you ever touched your panel cover and felt a warm spot, or heard a faint buzzing while the car is plugged in? If so, you are likely caught in the trap right now.
In the next section, we are going to walk through the exact steps to verify your setup. We will look at why using the wrong gauge wire acts like a bottleneck and how to ensure your system is actually code compliant and efficient. It is time to stop the bleed and start charging the right way.
Stop the Heat Before It Costs You a Fortune
I learned this lesson the hard way. Last summer, I noticed a faint, ozone-like smell coming from my garage wall while my car was pulling its full 48 amps. I opened my panel and found that the wire insulation on my EV circuit was starting to char and discolor. I had tightened it until my wrist hurt during the initial install, so I assumed it was fine. But after finally investing in a proper tool, I realized my ‘hand-tight’ effort was actually nowhere near the 45 inch-pounds the manufacturer demanded. This is the forgotten torque test that prevents panel fires and saves you from the literal heat loss that pumps up your monthly utility bill.
Grab a Torque Wrench Instead of a Screwdriver
Electricity flowing to your car is a high-volume, high-heat process. If your connection is loose by even a fraction of a millimeter, that microscopic gap creates an arc or high resistance. Think of it like a garden hose with a tiny kink; the water still flows, but the pressure builds up at the kink until something bursts. In your panel, that pressure is heat. You need to look up the specific torque wrench settings for a wall connector or your specific breaker brand. Tightening to spec isn’t just a code requirement; it’s the difference between 98% efficiency and 85% efficiency. When connections are loose, your meter spins faster just to overcome the resistance at the terminal.
Why That Long Wire Run Needs Thicker Copper
If your charger is more than 50 feet from your main panel, you are likely losing significant power through voltage drop. I’ve seen DIY installations where people use the bare minimum wire size to save fifty bucks at the hardware store. But over a year of daily charging, that ‘savings’ is quickly eaten up by the resistance of the thin wire. You should always verify the specific wire gauge that prevents voltage drop over long runs. If the conduit or the wire feels warm to the touch midway through a charging session, you are literally paying to heat your garage drywall instead of charging your car battery. Thicker copper stays cool and ensures the voltage leaving your panel is the same voltage hitting your car.
Balance Your Load Without Rebuilding the Panel
Most of us don’t have a 400-amp service sitting in our garage ready for heavy equipment. When I added my second EV, I thought I was headed for a five-figure utility upgrade. Instead, I looked into how to squeeze a level 2 charger onto a 60-amp service by using smart load management. This is the ‘traffic cop’ approach to home energy. You can stop your breaker from tripping every time the dryer and EV run by using a smart splitter or a charger that monitors your total home draw. It’s about being surgical with your power rather than just throwing more hardware at the problem. If you still hear a buzzing noise after tightening everything, you should investigate how to stop the annoying hum coming from your charger, which is often a sign of harmonic distortion or a shared neutral wire that shouldn’t be there.
Protect Your Sensitive Electronics from Grounding Fails
Intermittent charging errors are the bane of any EV owner’s existence. I spent a full week rebooting my car’s software and checking the app before I realized my grounding rod connection had become slightly loose after a heavy rainstorm and soil shifting. Using the grounding trick that fixes intermittent charging errors can save you from a mid-night charging failure that leaves you stranded. A solid ground doesn’t just protect you from shocks; it provides the clean reference point your charger’s onboard computer needs to communicate with the car. Furthermore, when you are looking at your neutral bar, don’t just look for loose wires; look for shared neutrals. Knowing how to detect a loose neutral wire before your electronics fry is a skill that pays for itself the first time a minor power surge hits your home.
Building on that, I’ve found that even ‘perfectly’ installed systems often hide inefficiencies because homeowners mistake a green inspection tag for a certificate of excellence. Most people assume that once the inspector signs off, the job is perfect. In my experience, that’s a dangerous assumption. Building codes are designed for the absolute minimum standard of safety, not necessarily for peak efficiency or the longevity of your battery. While you must verify code compliance for your EV charger installation, you shouldn’t treat it as the finish line. An inspector looks for fires that haven’t happened yet; they don’t look for the subtle voltage drops that cost you money every single month.
The Dangerous Myth of the Passed Inspection
Everyone says that if it passes inspection, it’s efficient. That is simply false. For instance, the National Fire Protection Association (NFPA) 70, Article 625, specifies that EV charging is a ‘continuous load.’ This means your system must be capable of handling the current for three hours or more without overheating. However, many installers aim for the 80% rule as a suggestion rather than a hard boundary. If your charger is pulling 40 amps on a 40-amp breaker, it might not trip immediately, but it is violating code and generating massive amounts of heat. This is a common entry in ev-charger-troubleshooting-expert-tips-for-common-issues because heat creates resistance, and resistance slows down your charging speed while inflating your bill.
Why Your 200-Amp Panel Might Still Be Overwhelmed
I’ve seen dozens of people skip the math because they think a 200-amp service is a bottomless well of power. This ‘oops’ moment usually happens in January when the heater, the oven, and the car all try to run at once. This is exactly why your ev-permit-application-requires-a-load-calculation-worksheet. Without it, you are just guessing. Even if you aren’t upgrading your panel for better ev-charging-performance right now, knowing your total demand prevents your main breaker from fatiguing over time. If you ignore the load calc, you might find your entire house goes dark just because you plugged in your car after a grocery run.
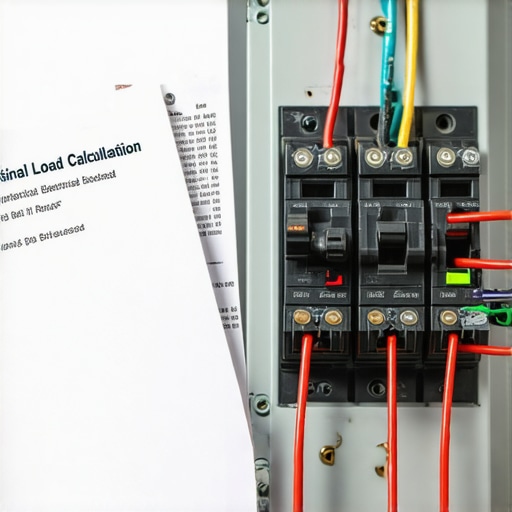
Does My Inspector Actually Care About My Charging Speed?
The short answer is no. An inspector cares about safety, but they won’t tell you that your wire choice is making your car charge 15% slower than it could. One of the most frustrating troubleshooting-ev-chargers-common-compliance-pitfalls-and-fixes involves the GFCI paradox. If you have an outdoor charger with built-in ground-fault protection, but your local code requires a GFCI breaker in the panel, they can actually interfere with each other. This leads to nuisance tripping where the charger shuts off for no reason. Understanding why your outdoor charger needs a specific type of GFCI—and how to coordinate it with your hardware—is the difference between a reliable morning commute and a dead battery. Furthermore, don’t cut corners on the physical path; ignoring the specific conduit-size-needed-for-a-50-amp-circuit makes the wires run hotter, further decreasing efficiency. Have you ever fallen into the ‘it passed so it’s fine’ trap? Let me know in the comments.
I realized recently that most EV owners treat their charging setup like a toaster—plug it in and assume it works forever. But your charger is more like a high-performance engine. It needs a check-up. The constant cycling of 40 to 60 amps through your panel causes copper to expand and contract. Over time, those “rock solid” connections can migrate. This is exactly why your main lugs might be loose after a year of charging, even if they were perfect on day one. I’ve made it a habit to pop my panel cover every six months just to look for the tell-tale signs of thermal creep.
Stop Guessing with a Thermal Camera
If you really want to stay ahead of a meltdown, put down the screwdriver and pick up a thermal imager. I personally use a FLIR One that sticks right into my phone’s charging port. When my car is pulling its peak load, I scan the breaker and the neutral bar. If I see a bright purple-to-white hot spot on a specific wire, I know I have a high-resistance connection. This is one of those ev-charger-troubleshooting-expert-tips-for-common-issues that the pros use but rarely mention to homeowners. It catches failures before they trip a breaker or, worse, start a fire behind your drywall.
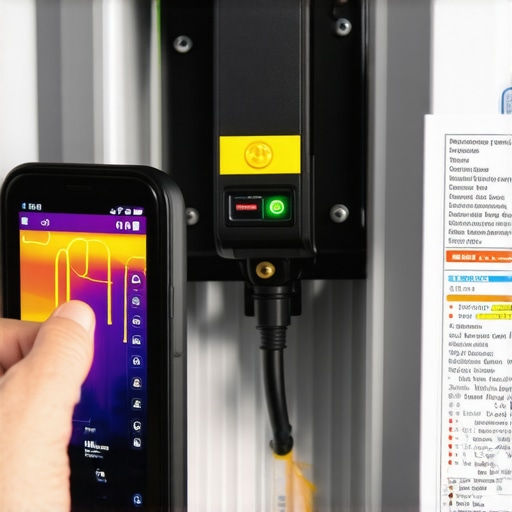
Beyond heat, you need to be obsessed with torque. I don’t mean “I’m strong so I’ll crank it down” tight. I mean using a calibrated Wiha or Wera torque screwdriver. According to the National Electrical Code (NEC) Section 110.14(D), if a torque value is provided on the equipment, you are legally required to use a calibrated tool to meet it. Failing this is the fastest way to fail how to verify code compliance for your EV charger installation. It’s also why I always warn people about the 3-hidden-costs-of-diy-ev-charger-wiring; buying a specialized torque wrench just for one job feels expensive until you realize it’s cheaper than a new panel.
How do I keep my charger running for a decade?
Maintenance isn’t just about the wires; it’s about the physical interface. I’ve seen chargers fail because spiders built nests in the handle or because of salt-air corrosion on the pins. If you notice why your charger handle feels sticky after a rainstorm, it’s time to clean those contacts with specialized electronic contact cleaner—never WD-40. I also highly recommend looking into how to install a dedicated sub-meter for your EV charging costs. Having a physical meter separate from your car’s app helps you spot efficiency drops. If the meter says you’re pulling 10kW but the car only sees 8.5kW, you’ve got a resistance problem in the line that needs immediate attention.
Why V2G is the Next Big Panel Headache
Looking ahead, the next five years will be dominated by Vehicle-to-Grid (V2G) and Vehicle-to-Home (V2H) tech. Your charger won’t just be a straw; it will be a two-way street. This means your panel will face double the stress as it pushes power back into your house during peak hours. If you aren’t already thinking about panel-upgrade-strategies-to-meet-ev-charging-code-requirements-in-2025, you might find your current compliant setup is obsolete by 2026. My best advice? Next time you have an electrician out, ask them to perform the forgotten torque test that prevents panel fires on your entire main bus bar, not just the EV breaker. It takes five minutes and could save your home. If you’re feeling overwhelmed by the technical specs, don’t hesitate to reach out to us for a professional load evaluation.
The Most Expensive Lesson I Learned at the Neutral Bar
After years of tinkering, I realized the biggest threat to your wallet isn’t the price of gas—it’s the ‘set it and forget it’ mentality. I used to think that once the lights were on, the job was done. But I’ve learned that copper behaves like a living thing, expanding and contracting with every charge cycle. If you don’t stay ahead of it, you’re just waiting for a failure. I’ve also learned that while we all want to save money, the 3-hidden-costs-of-diy-ev-charger-wiring can easily outweigh the price of a professional install if you miss a single torque setting. My biggest lightbulb moment? Realizing that knowing how to verify code compliance for your EV charger installation is only about half the battle for long-term reliability and peak efficiency.
The Gear That Actually Saved My Sanity
I don’t recommend products lightly, but a few tools changed everything for me. First, a thermal imaging camera is non-negotiable if you want to see where your money is leaking out as heat. Second, stop using standard screwdrivers; get a calibrated torque tool to ensure you’re meeting the specific torque wrench settings for a wall connector. Finally, I always keep a bottle of high-grade electronic contact cleaner handy to prevent why your charger handle feels sticky after a rainstorm from turning into a corroded, high-resistance mess. These aren’t just gadgets; they are the frontline defense for your home’s electrical health.
Stop Stressing and Start Charging with Confidence
It’s easy to feel overwhelmed by wire gauges and load calculations, but remember that you’re already ahead of the curve just by paying attention to the details. Most people wait for the smell of smoke to check their panel, but you’re building a system that’s efficient, safe, and ready for the future of V2G technology. If you’ve followed the steps for ev-charger-troubleshooting-expert-tips-for-common-issues, you’re in a great spot. Don’t be afraid to take that panel cover off and do a quick visual check once or twice a year. You’ve got the knowledge to stop the ghost power and enjoy the true benefits of going electric. If you ever hit a technical wall, you can always reach out to us for a professional second set of eyes on your setup. Have you noticed any strange hums or unusual heat coming from your charger lately? Let me know in the comments below!