I remember standing on a rickety ladder in my garage, sweat stinging my eyes, trying to pull three thick runs of 6-gauge wire through a 3/4-inch conduit that I was absolutely convinced was big enough. It wasn’t. Halfway through the second bend, the wires jammed hard. No amount of pulling lube or frantic tugging was going to save me. I ended up stripping the insulation off a wire, effectively ruining forty dollars worth of copper in about ten seconds. Choosing the right conduit size for a 50-amp circuit isn’t just about following some arbitrary rule; it’s about making sure your house stays safe and your arms don’t fall off during the installation. Today, I am going to walk you through the math and the reality of conduit fill so you can ensure code compliance without the Saturday afternoon meltdown I had.
Stop Fighting Your Wires and Get the Volume Right
When you are setting up a 50-amp circuit, typically for a heavy-duty EV charger or a workshop sub-panel, the physical space inside that pipe—what we pro-sumers call conduit fill—is your best friend or your worst enemy. If you are like I was, you probably want to grab the cheapest, smallest option at the big-box store. But trust me, even the best conduit materials won’t save you if you don’t have enough air volume for the heat to dissipate. I once made the rookie mistake of ignoring the ‘40% fill’ rule because I thought it was just a suggestion. I ended up with a circuit that ran so hot it actually felt warm through the drywall. That is a massive red flag. By correctly sizing the pipe, you ensure that the specific wire gauge you are using can breathe. The National Electrical Code (NEC) Chapter 9, Table 4 is the gold standard here, and it explicitly limits how much of that pipe’s interior can be occupied by copper and plastic.
Is that extra quarter-inch really worth the extra money?
You might be looking at the price of 1-inch conduit versus 3/4-inch and thinking, ‘The chart says 3/4-inch works, so why spend the extra cash?’ It is a fair question, but it is often a trap. While 3/4-inch EMT can technically hold three #6 THHN wires, it leaves almost zero room for those tricky bends or any future-proofing. If you ever decide on upgrading your panel for better performance, or if your electrician recommends a 60-amp circuit later on, that 3/4-inch pipe is a dead end. According to data from the NFPA, crowded conduits are significantly more prone to arcing if the insulation degrades over time. Have you ever had to rip out perfectly good conduit because it was just too tight to pull a new ground wire through? It is a gut-punch of a realization that I want to help you avoid. Making the right choice now means your 50-amp setup will be robust, cool-running, and ready for whatever the next generation of tech throws at it.
Execute Like a Pro and Stop Guessing
When you move from the planning phase to actually cutting pipe, the physics of electricity takes over. For a 50-amp circuit, you are likely dealing with #6 AWG wire. Think of your conduit like a busy highway. If every lane is packed bumper-to-bumper, a single breakdown causes a massive heat-sync. In electrical terms, that heat degrades your insulation. To keep things safe, you need to how to verify code compliance by ensuring your ‘fill’ doesn’t exceed 40% of the pipe’s interior area. I once ignored this while helping a neighbor. We tried to jam three #6 conductors and a ground into a 3/4-inch PVC run with four 90-degree bends. Halfway through the pull, the friction was so high the wire literally fused to the inside of the plastic. We had to cut the whole thing out and start over with 1-inch EMT. It was a $150 mistake that taught me a valuable lesson: space is cheap, but labor and ruined copper are expensive.
Give Your Wires Room to Breathe
The NEC tables aren’t just there to make your life difficult; they account for the fact that wires expand and contract as they heat up under load. Before you buy your materials, you must perform a quick check. If you are using THHN wire, which is common for conduit runs, three #6 wires plus a #10 ground will technically fit in a 3/4-inch conduit, but you are at the absolute limit. If your run involves the safest way to route conduit through a finished ceiling, you will likely encounter turns that make a tight fit impossible. Stepping up to 1-inch conduit gives you nearly double the internal volume. This extra air gap acts as a thermal buffer, preventing the kind of heat buildup that triggers nuisance trips or, worse, melting. 
Master the Art of the Pull
Once you have sized the pipe correctly, the actual ‘pull’ is where most DIYers fail. Use a high-quality wire pulling lubricant—don’t use dish soap, as it can actually corrode the insulation over time. When I was working on my own garage setup, I found that ‘feeding’ the wire into the conduit while someone else pulls from the other end is the only way to prevent kinks. If you feel significant resistance, stop. This is often the first sign that you missed a step in your the hidden cost of skipping a panel load calculation or chose the wrong material for the environment. Smooth pulls mean the insulation stays intact, ensuring your car gets a clean, steady stream of power without the risk of a ground fault.
Pass Your Inspection on the First Try
Inspectors look for more than just the pipe size. They want to see that you have secured the conduit every few feet and that your connections are tight. Remember, why your ev permit application requires a load calculation worksheet—it’s because they need to know your main service can handle the draw. When you terminate the wires at the breaker and the charger, why your charger needs a specific torque setting to pass inspection becomes your next priority. A loose wire in a 50-amp circuit is a fire hazard, period. Using a torque screwdriver ensures that the vibration of the current won’t loosen the connection over the next five years. If you find your current service is maxed out, you may need to look into panel upgrades for ev chargers to ensure the entire system is robust enough for the 50-amp load you are adding.Most DIYers and even some general contractors assume that if you pass inspection, your job is done forever. I’m here to tell you that “code compliant” is the absolute minimum standard for safety, not necessarily the gold standard for long-term performance. A common belief in the community is that as long as you have a 50-amp breaker for your 40-amp charger, you’re golden because of the 80% rule. But in my experience, the math on paper often ignores the reality of thermal fatigue in specific hardware. If you’re using a lower-end, residential-grade breaker, the constant heat of a 10-hour charging session can cause internal components to weaken over time. The biggest trap I see is people ignoring the difference between residential and industrial grade wire. They see #6 copper and think it’s all the same, but the insulation chemistry matters significantly when you’re pushing 40 amps of continuous load for years. According to the NFPA 70 (National Electrical Code) Section 625.41, EV charging loads are classified as continuous, which means the branch circuit and overcurrent protection must be sized at 125% of the maximum load. This isn’t just a suggestion; it’s a recognition of how heat behaves over long durations.
Why does your brand-new breaker keep tripping when the math adds up?
This is where the true nuance of modern electrical systems lives. You might have carefully executed panel upgrade strategies to meet requirements, yet you still face intermittent failures. Often, the culprit is why the GFCI in your panel keeps nuisance tripping. Most EVSEs (Electric Vehicle Supply Equipment) have their own built-in ground-fault protection. When you pair that with a GFCI breaker—which 2020 and 2023 NEC codes often require for garage outlets—the two systems can effectively “fight” each other, leading to phantom trips. If you are struggling with expert tips for common issues, check your breaker brand first. Some are notorious for sensitivity; specifically, the specific breaker brands that hate constant loads can ruin your charging experience even if your conduit fill and wire gauge are perfect.
Protect Your Connections from the Invisible Heat Trap
Another hidden trap is the “set it and forget it” mentality. High-current loads cause wires to expand and contract physically. This thermal cycling can actually loosen the mechanical lugs over time. I’ve seen cases where your main lugs might be loose after just 12 months of daily charging sessions. It’s one of those common compliance pitfalls and fixes that an inspector won’t be around to catch a year later. A loose connection at 50 amps isn’t just an efficiency problem; it’s a high-resistance heater inside your panel. This is why the latest code updates have increased the emphasis on using calibrated torque tools for all terminations. Have you ever fallen into this trap where everything looked perfect on day one but started acting up months later? Let me know in the comments.I used to think ‘hand tight’ was a measurement until I saw a charred terminal block in a neighbor’s garage that looked like it had been through a small war. The culprit wasn’t a faulty charger; it was a lug that was just a few inch-pounds loose. If you are serious about DIY electrical, the one tool you cannot skip is a calibrated torque screwdriver. While many people think they can feel the right tension, the NEC 110.14(D) now explicitly requires using a torque tool where a value is specified. For instance, the official Tesla Wall Connector Installation Guide mandates exactly 4.5 N-m (40 lb-in) for the terminal block. Without this precision, you are essentially gambling with the thermal stability of your home. Using a proper tool is how you ensure code compliance and, more importantly, sleep soundly while your car draws 40 amps for eight hours straight. 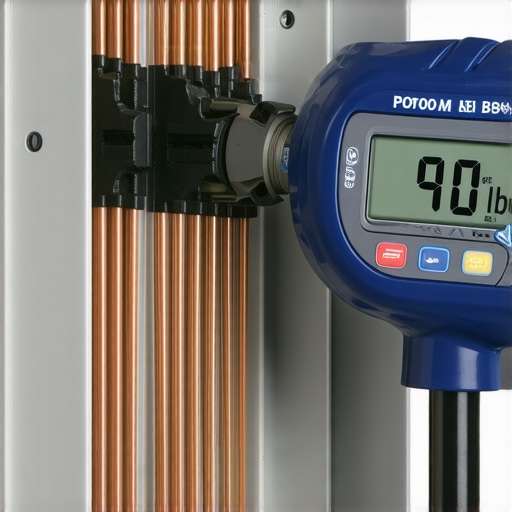
How do I maintain my high-power charging circuit over time?
Maintenance isn’t just for the car; it’s for the fuel line, too. Every six months, I make it a habit to do a quick visual inspection. I’m looking for any discoloration around the breaker or the charger’s internal terminals. If you see even a hint of brown or black, you need to investigate why your ev plug contacts look burnt before the damage becomes permanent. I also recommend a quick ‘sniff test’—if your panel smells like ozone or burnt plastic, shut it down immediately. This is one of those expert tips for common issues that saves you a $1,000 repair bill later. Over time, the constant vibration of 60Hz current can slightly loosen even the best connections, so verifying that your charger needs a specific torque setting is still met can prevent a lot of grief. Looking forward, the trend is moving toward bidirectional charging (V2H). As we start using our cars to power our houses during peak hours, the strain on our wiring will essentially double. This is why I always suggest upgrading your panel for better performance now, rather than waiting until your system is stressed to its limits. If you have the space, your garage needs a sub-panel to handle the inevitable second EV. My advanced tip for you: Go buy a cheap infrared thermometer. Once a month, while the car is charging, point it at your breaker. If it’s significantly hotter than the others, you’ve caught a loose connection before it caught fire. It’s a ten-second check that offers total peace of mind.
Hard-Won Lessons from My Own Garage Floor Meltdown
Reflecting on those early DIY disasters, a few truths stand out that you won’t always find in a standard manual. First, the fit is never as easy as the math suggests. While a table might say four wires fit in 3/4-inch conduit, those tables don’t account for a slightly off-center bend or a humid day where the insulation gets tacky. Second, always prioritize thermal headroom over saving five dollars on pipe. If your conduit feels hot to the touch, you are losing energy and stressing your equipment. I’ve learned that the difference between residential and industrial grade wire isn’t just marketing; higher-spec insulation is much more forgiving of the intense heat cycles a 40-amp continuous load generates. Finally, don’t let the permit process scare you. It is your best safety net, ensuring your hard work doesn’t become a liability later.
Gear That Keeps My Garage Safe and My Wires Cool
If you are going to do this yourself, there are three items I never start a project without. A calibrated torque screwdriver is non-negotiable; as we discussed, your charger needs a specific torque setting to maintain a low-resistance connection that won’t burn out over time. Next, invest in a polymer-based wire pulling lubricant. Unlike soap, it won’t dry into a glue-like substance or degrade your wire coating. I also highly recommend a simple infrared thermometer. It is the ultimate tool for expert tips for common issues because it lets you see heat before you can smell it. These tools shift you from guessing to knowing that your 50-amp circuit is performing exactly as intended.
Build a System That You Can Actually Trust
Taking the time to size your conduit correctly and pull your wire with care isn’t just about meeting a standard—it’s about the peace of mind that comes when you plug in your car and walk away. When you focus on ensuring code compliance, you aren’t just jumping through hoops; you are building a robust infrastructure for your home’s future. You’ve done the research and learned from my mistakes, so now it’s time to pick up the tools and get to work. Have you ever struggled with pulling thick gauge wire through a tight bend, or did you find a trick that made the job easier? Let me know in the comments below!