I remember the day my garage felt like a convection oven. It was mid-August, the kind of afternoon where even the concrete seems to breathe heat. I walked into the garage, expecting the usual quiet hum of my car topping off, but instead, I was greeted by the reason your ev charger smells like burnt plastic—that acrid, chemical scent that every DIYer fears. I looked up at the run of standard Schedule 40 PVC I’d installed near the ceiling. It wasn’t straight anymore. It had developed a lazy, drunken sag between the straps, baking under the trapped heat of the rafters. That was my ‘lightbulb moment.’ I realized that while PVC is great for many things, high-output EV charging in a 110-degree garage is a different beast entirely. We aren’t just moving power; we are managing thermal stress.
Heat Is the Silent Killer of Your Garage Wiring
Today, I’m going to help you avoid the expensive (and potentially dangerous) mistake I made. We are going to dive into which conduit materials actually stand up to the literal pressure of a high-heat garage environment and why your choice matters for long-term safety. If you are planning a high-amperage install, you cannot treat the garage like any other room in the house. When a charger runs at 48 amps for six hours straight, it generates internal heat. Combine that with a garage that’s already sweltering, and you have a recipe for failure. Have you ever noticed your charger slowing down or the wall feeling hot during a summer afternoon? I’d love to know if you’ve seen these red flags in your own setup.
Is ‘heavy duty’ conduit actually worth the extra money?
Many folks think that as long as the wires are covered, they are safe. That’s a dangerous assumption. According to the NFPA 70 (National Electrical Code), ambient temperature corrections can drastically reduce how much current a wire can safely carry. If your conduit can’t dissipate heat or, worse, starts to deform, you’re looking at a code violation at best and a fire hazard at worst. I learned the hard way that cutting corners on material leads to exactly why the city inspector failed your garage wiring during my first major renovation. You want to pass the first time.
Stop Using Standard PVC in a 100-Degree Garage
When I first started, I grabbed the cheapest gray pipe I could find. It seemed logical. But in a high-heat environment, you have to consider expansion and contraction. Standard PVC expands significantly when it gets hot. If it’s strapped too tight, it buckles. If it’s too loose, it sags. For my next project, I switched to EMT (Electrical Metallic Tubing). It doesn’t just look more professional; it acts as a giant heat sink, helping to pull warmth away from the conductors inside. This is especially critical when you are trying to figure out the exact wire gauge you need for a 50 amp ev circuit, because heat increases resistance, and resistance is the enemy of efficiency. Using metal conduit in a hot garage isn’t just about ‘over-engineering’; it’s about ensuring that your home remains a safe place to park your expensive EV.
Once you’ve ditched the flimsy PVC for EMT, the real work begins inside the walls. Think of your home’s electrical panel like a coffee pot. If you’re already running the toaster, the microwave, and the AC, trying to brew a full pot of 48-amp charging is going to overflow the circuit. This is why you cannot ignore the hidden cost of skipping a panel load calculation. It’s the difference between a smooth morning and a dark house. I remember my first dual-charger setup; I assumed I had plenty of room because I had a 200-amp main. I was wrong. Between the heat of the garage and the simultaneous draw of two cars, I quickly realized why a 100 amp service isnt always enough for two evs when you factor in the ‘continuous load’ rules.
Run the Right Metal Through the Pipe
In a hot garage, wire choice is your second line of defense. Think of electricity like water flowing through a hose. If the hose is too narrow or made of cheap material, it creates friction—and friction is heat. In the EV world, this means choosing between copper and aluminum. While aluminum is cheaper, it expands and contracts at a different rate than the connectors in your charger. For high-heat environments, I always advocate for copper. You need to understand the difference between copper and aluminum for ev wiring because copper handles thermal stress significantly better. I once saw a DIY job where the owner used aluminum for a 50-amp run; the terminals had literally started to ‘creep,’ loosening the connection until it began to arc. Now, I always double-check the work to verify your electrician actually used copper wire for the install as promised.
Tighten Every Connection to Spec
Loose wires are the leading cause of electrical fires in garages. When you’re pulling massive amounts of power for hours, any gap in a connection becomes a hotspot. You can’t just ‘hand-tighten’ these breakers. You need a torque screwdriver. This isn’t just me being pedantic—it’s code. Following the specific torque settings that prevent panel fires during high load charging is the only way to ensure that the heat generated by the electricity doesn’t cause the metal to expand and pull away from the contact points.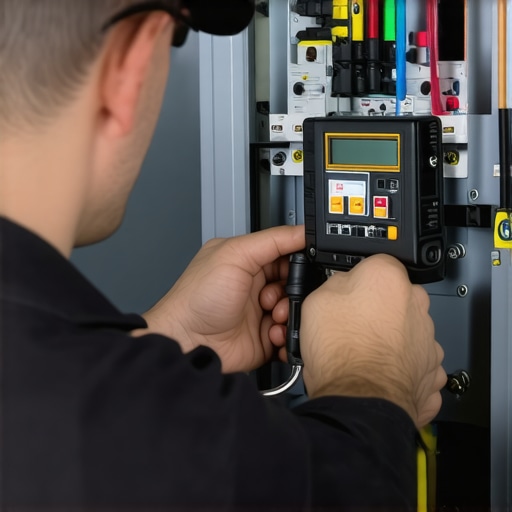
Stop Nuisance Trips Before They Start
If your garage is already pushing 100 degrees, your breaker is already under stress. Breakers work on a thermal-magnetic principle, meaning they trip when they get too hot. If the ambient air is hot and the current is high, you’ll run into the real reason your circuit breaker trips at 90 percent charge. It’s not necessarily a short circuit; it’s often just the environment. To combat this, you might need to look into ev charger troubleshooting expert tips for common issues, like upgrading to a higher-tier breaker brand or ensuring there is a small air gap between high-load breakers in the panel. Also, be wary of internal conflicts. Many chargers have built-in safety sensors that clash with panel components, leading to why the gfci in your panel keeps nuisance tripping your charger. Solving these early saves you from the frustration of waking up to a car that only charged five percent.
People often assume that hiring a licensed electrician is a ‘get out of jail free’ card for compliance. However, EV charging is such a specialized field that many general residential electricians haven’t kept up with the rapid changes in the National Electrical Code (NEC). I’ve seen ‘pros’ install chargers on shared circuits or skip the mandatory labeling, leading to a massive headache when verifying code compliance for your ev charger installation later on. The biggest myth is that you always need a bigger panel immediately. Everyone tells you to upgrade to 200 amps the moment you buy a car, but in my experience, that’s often a $3,000 solution to a $500 problem. You can frequently use smart tech to add an ev charger without a 200 amp panel upgrade, which is a nuance most contractors won’t mention because they want the bigger job.
The ‘oops’ factor usually comes down to the specific breaker brand. We’ve been taught that if a breaker fits the slot, it works. But as the Electrical Safety Foundation International (ESFI) notes, high-continuous-load devices like EVs put a unique thermal strain on panel bus bars. Certain older panels simply aren’t designed to dissipate heat from a 48-amp draw for eight hours straight. I’ve had to warn clients about the specific breaker brands that are known to overheat with evs, as some ‘value’ brands can literally weld themselves to the bus bar over time. If your electrician tells you a generic breaker is ‘just as good,’ that’s your cue to ask for a second opinion.
Why does my 50-amp breaker trip when the car only draws 40 amps?
It’s the most frustrating call I get. The homeowner is doing everything right—charging at the 80% limit—and the breaker still pops. The nuance here is ambient temperature inside the panel. When your panel is crowded, or located in a hot garage, the thermal element in the breaker reaches its trip point faster than its rated capacity. This is why ensuring code compliance when installing ev chargers involves more than just wire size; it involves air gaps and panel placement. If your breaker is sandwiched between a dryer circuit and an AC unit, it’s going to fail. You need to understand why your breaker gets hot to the touch during charging before you start replacing expensive hardware. Often, simply moving the breaker to a cooler spot in the panel solves the ‘unsolvable’ trip.
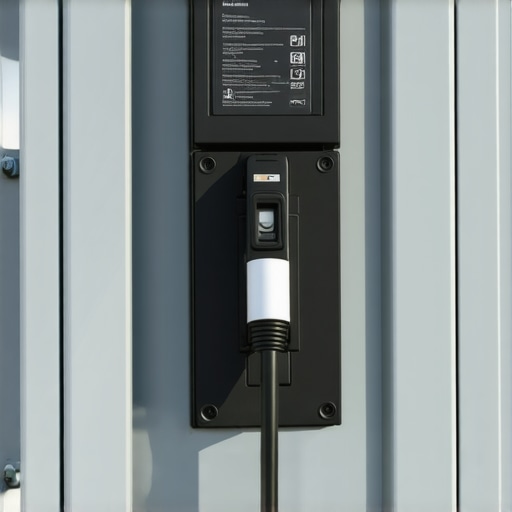
Another advanced mistake is skipping the neutral wire when it’s required for smart features. Even if your charger says it’s 240V-only, newer smart features and load management systems often require a stable reference. I’ve spent hours troubleshooting ev chargers only to find that your new charger requires a neutral wire to prevent motherboard logic errors or communication drops. It’s these small, code-adjacent details that separate a ‘working’ install from a ‘reliable’ one. Everyone says ‘go big or go home’ when it comes to amperage, but charging at 32 amps is significantly easier on your home’s infrastructure than 48 amps and still gets you a full battery overnight. If you are struggling with space, how to use load shedding devices to avoid a full service upgrade is the true expert’s secret. These devices pause your charger when the oven kicks on, keeping you safe without a full panel upgrade for ev chargers. It’s about working smarter, not harder, with the electricity you already have. Make sure you find an electrician who actually understands ev codes because a standard residential guy might push for an unnecessary $5,000 service change when a $400 load shedder would suffice. Have you ever fallen into this trap or had a ‘pro’ give you bad advice? Let me know in the comments.
Once the dust settles and your car is finally pulling those sweet kilowatts, it’s easy to think the job is done. But I’ve learned that an EV install is a living system. If you want to avoid future headaches, you need to treat it with the same respect you’d give your car’s engine. I personally keep a small kit of the essential spare parts to keep for your home charging unit, including a spare J1772 holster and a high-quality terminal block. Over time, the physical weight of the heavy cable can actually stress the wall mounts, so I make it a habit to check for wall-anchor creep every few months. This is particularly vital for ensuring code compliance when installing ev chargers in older garages where the drywall might be brittle.
How do I maintain my home charging setup over the long haul?
Beyond just looking for loose screws, I recommend a ‘digital’ checkup every quarter. I’ve seen countless neighbors complain about slow speeds only to realize they missed a software patch. Knowing how to update the firmware on your smart charging station is as important as checking your tire pressure. These updates often optimize the thermal management of the charger itself, which can prevent the unit from throttling down to a crawl when the garage gets stuffy. If you notice your app is lagging or giving weird readings, don’t ignore it; troubleshooting ev charger connectivity problems early can prevent a full system lockout during a mid-winter cold snap.
The cheap tool that prevents a house fire
If you want to move from a DIYer to a pro-level homeowner, buy a $200 thermal imaging camera attachment for your phone. Every six months, I open my panel while the car is charging at full blast and scan the breaker. According to the International Association of Electrical Inspectors (IAEI), circuit breakers operating at their continuous load limit for hours are susceptible to ‘thermal fatigue’ if airflow is restricted. If the camera shows a bright white glow at the connection point, I know it’s time to re-torque the lugs using the specific torque settings that prevent panel fires during high load charging. Seeing the heat before you smell the smoke is the ultimate peace of mind. 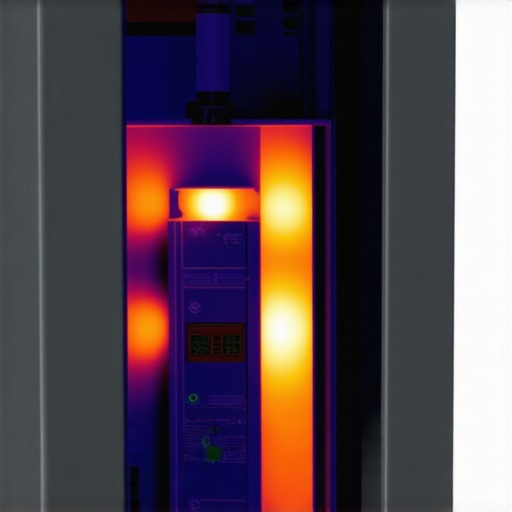
Prep your panel for the two-EV future
I guarantee you’ll eventually want a second electric car. The biggest mistake I see is people filling up their panel space without a growth plan. When I was upgrading your panel for better ev charging performance last year, I made sure to leave physical space for a subpanel. If you’re already at your limit, start looking into panel upgrade strategies to meet ev charging code requirements in 2025, which will likely lean heavily on dynamic load management. I predict that within five years, we won’t even talk about ‘200-amp upgrades’ because smart software will juggle our appliances for us. If you’re worried about current capacity, learning how to load test your house before adding a second charger is a great weekend project.
Don’t wait for a failure to check your work
I’ve spent too many nights troubleshooting ev chargers for friends who skipped the ‘final’ check. Even if your car is charging today, take ten minutes this weekend to walk the line. Check the conduit for sagging, feel the breaker for excessive heat, and ensure you’ve followed the steps for verifying code compliance for your ev charger installation. My best tip? Use a torque screwdriver to verify your breaker connections haven’t vibrated loose over the last year. It sounds overkill, but it’s the secret to a system that lasts twenty years instead of two. If you find anything that looks charred or feels ‘crunchy’ when you tighten it, stop immediately and reach out to a professional through our contact us page.
Hard Truths from the Frontlines of Garage Charging
Looking back at my first few years of EV ownership, I realized that the biggest mistakes don’t happen during the install; they happen in the planning phase. Here are a few lightbulb moments I wish I had on day one:
- The 80% Rule is a Floor, Not a Suggestion: Charging at 48 amps on a 60-amp circuit isn’t just about code; it’s about giving your equipment room to breathe. I’ve seen the aftermath of the mistake that causes ev charger motherboards to fry during storms because people pushed their limits too far.
- Don’t Trust Your Fingers: You might think you’ve tightened a lug nut enough, but thermal expansion is a relentless force. A tiny vibration over six months can turn a ‘tight’ screw into a fire hazard.
- Label Everything: It sounds like busy work, but when you are troubleshooting ev charger connectivity problems or a tripped breaker at 2 AM, a clear panel map is your best friend.
#IMAGE_PLACEHOLDER_E#
The Pro-Grade Kit I Never Step into the Garage Without
If you want to move beyond ‘plug and play’ and into true home energy management, these are the resources I personally vouch for. First, I never install a plug-in unit without knowing how to pick a nema 14-50 outlet that wont melt under pressure—industrial grade is the only way to go. Second, invest in a dedicated torque screwdriver; it is the only way to meet code compliance essentials for ev charger installations in 2025. Finally, download your charger’s specific engineering manual, not just the ‘quick start’ guide. The deep specs on thermal throttling will tell you exactly how the unit behaves when your garage hits triple digits.
Take Pride in a System Built to Last
Setting up your home for an electric future is one of the most rewarding DIY or contractor-led projects you can tackle. It is not just about the convenience of a ‘full tank’ every morning; it is about the peace of mind that comes from ensuring code compliance when installing ev chargers correctly. When you treat your electrical panel with respect, it rewards you with years of trouble-free performance. Don’t be afraid to take it slow and double-check those connections. Your car, your home, and your family are worth the extra ten minutes of diligence. Have you ever noticed your charger slowing down during a heatwave, or did you find a loose wire during a routine check? Let me know in the comments below!