I will never forget the smell of warm insulation. It was a Saturday afternoon, and I had just finished what I thought was a textbook installation of my first Level 2 charger. I had snagged a deal on some 8-gauge wire and figured, “Hey, it is thick enough, right?” Wrong. Twenty minutes into the charging session, the breaker was humming and the conduit felt like a heat lamp. I had made the classic rookie mistake of ignoring the continuous load requirements for a 50-amp circuit. If I had not checked on it when I did, I might have been looking at a much more expensive repair—or worse. If you have ever stood in the electrical aisle of a big-box store feeling completely overwhelmed by the different colors and numbers on those spools, I have been there. Choosing the wrong wire is not just a common wire sizing error that causes voltage drops; it is a legitimate fire hazard. Today, I am going to strip away the jargon and tell you exactly what gauge you need for a 50-amp EV circuit so you can sleep soundly while your car juices up. Have you ever felt the wires in your panel during a charge and wondered if they were supposed to be that warm?
My Near-Miss with a Hot Copper Mess
When I first started tinkering with my home electrical, I thought 50 amps was just 50 amps. But EV charging is different. Unlike a clothes dryer that runs for forty minutes and then stops, an EV draws high current for hours on end. This is what the National Electrical Code (NEC) calls a continuous load, and it changes the math entirely. According to the NFPA 70 Article 625, EV charging equipment is considered a continuous load, meaning the circuit must be sized at 125% of the charger’s output. For a 40-amp charger on a 50-amp breaker, your wire needs to handle that sustained heat without breaking a sweat. I learned the hard way that the difference between copper and aluminum wiring matters immensely here. While aluminum is cheaper, it requires even larger gauges and specific torque settings to be safe.
Is this heavy-duty wire really worth the extra cost?
I get it. When you see the price of a 50-foot coil of 6-gauge copper, you might start looking for shortcuts. You might wonder if you can just get by with 8-gauge because it is easier to pull through the conduit. But here is the reality: electricity generates heat, and heat generates resistance. If your wire is too thin, it becomes a literal heating element in your walls. I spent an extra $150 to re-pull my entire run with the correct 6 AWG copper, and the peace of mind alone was worth every penny. You should always verify your electrician actually used copper wire and the correct gauge before they close up the walls.
Don’t Settle for Just Thick Enough
We are not just trying to pass an inspection; we are trying to build a system that lasts a decade. The right gauge ensures your car charges at full speed without tripping the breaker or melting your lugs. The choice often comes down to the environment—whether you are running wires through a hot attic or buried underground. In the next section, I am going to break down the specific distances and wire types—like THHN vs. Romex—that will determine whether you need 6-gauge or even 4-gauge wire to get the job done right.
The Math Behind the 125% Buffer
Think of your electrical panel as a water pump and the wire as a garden hose. If you try to force too much water through a narrow hose for a long time, the pressure builds up and the hose gets hot. In the world of electricity, we call this the 80% rule in reverse. Because your charger is a continuous load, you cannot use a wire that is rated exactly for 40 or 50 amps. You have to over-engineer it. Ensuring code compliance when installing EV chargers means taking your charger’s max output—say, 40 amps—and multiplying it by 1.25. This gives you 50 amps. To handle those 50 amps safely for eight hours straight, 6 AWG copper is usually the gold standard. I once tried to explain this to a friend who thought he could use 10-gauge wire because it was ‘only’ a few amps over. I had to show him a melted plastic outlet from a space heater to prove that ‘close enough’ is a recipe for a 2:00 AM fire department visit.
Why Distance Forces You to Go Bigger
If your garage is right next to your electrical panel, you are in luck. But if you are like my neighbor Dave, whose panel is in the basement on the opposite side of a 100-foot ranch house, the rules change. Electricity loses energy as it travels through long stretches of copper, a phenomenon known as voltage drop. This is a common wire sizing error that causes voltage drops during charging. When we did Dave’s install, the calculator told us 6-gauge was fine for 50 amps, but at 120 feet, we were looking at a 4% drop. Your car hates that; it makes the onboard charger work harder and generate more heat. We decided to upsize to 4 AWG copper. It was like wrestling a python into the conduit, but his charging speed stayed rock-solid and the wires stayed cool to the touch.
Pick the Right Jacket for the Job
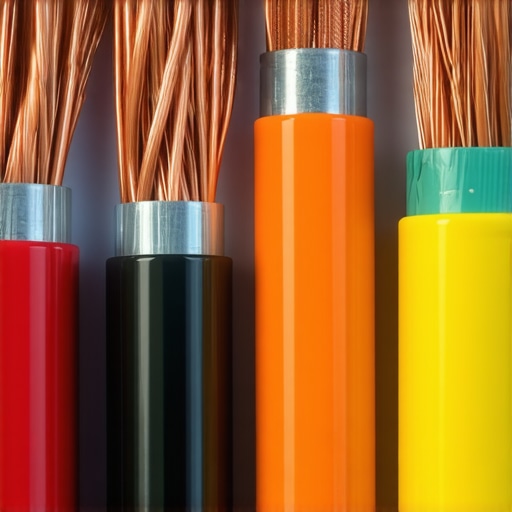
It is not just about the thickness of the copper; it is about how that copper is wrapped. If you are running wires inside a wall, you might reach for NM-B (commonly called Romex). But wait—Romex has a lower heat rating (60°C) than individual THHN wires (75°C or 90°C) pulled through conduit. For a 50-amp circuit, 6-gauge Romex is technically only rated for 55 amps, which is cutting it very close once you factor in the ambient heat of a summer garage. I prefer using THHN in 1-inch EMT conduit. It allows the wires to ‘breathe’ a bit more. Plus, if you ever need to upgrade your service, pulling new wires through existing conduit is a breeze compared to tearing out drywall. If you are going the DIY route, always double-check the difference between copper and aluminum for EV wiring before you buy your materials, as aluminum requires a much larger gauge to handle the same current.
The Final Tighten That Saves Your House
You can have the thickest wire in the world, but if the connection at the breaker or the charger is loose, you are going to have a bad time. High current creates vibrations (on a microscopic level) and heat expansion. Over time, a ‘hand-tightened’ screw can wiggle loose, creating an arc. I always use a torque screwdriver. It sounds like overkill until you realize the specific torque settings that prevent panel fires during high load charging are written right on the side of the breaker. When I finished my own install, I torqued the lugs to exactly 45 inch-pounds. Six months later, I opened the panel to check, and they hadn’t budged. Before you even start pulling wire, you should look into panel upgrades for EV chargers to ensure your main busbar can actually handle the extra 50-amp draw without melting. Also, don’t forget the conduit depth rule that fails more garage inspections than anything else if you’re running lines under a slab.
Beyond just the wire thickness, there is a nuance most DIYers—and even some general electricians—miss: the terminal temperature rating. You might have bought 6 AWG wire rated for 90°C (like THHN), but if your circuit breaker or the charger’s terminals are only rated for 60°C or 75°C, you are legally and safely required to size the wire based on that lower temperature rating. This is a common reason the reason your circuit breaker trips at 90 percent charge; the heat builds up at the weakest link—the connection point—not necessarily along the wire itself. Most people assume that ‘better wire’ fixes everything, but if your terminations aren’t matched to the wire’s insulation rating, you’re essentially bottlenecking your safety margin.
The 75-Degree Trap Most People Ignore
Everyone tells you to buy 6-gauge wire for a 50-amp circuit, but in my experience, the ‘oops’ factor usually happens at the panel. I’ve seen homeowners install beautiful 6 AWG copper only to shove it into a legacy breaker that isn’t rated for the heat of a continuous 40-amp draw. This leads to that dreaded sound: why your main breaker hums when the ev is plugged in. It isn’t just a noise; it is the sound of thermal expansion causing micro-vibrations because the connection isn’t handling the load profile. According to the NFPA 70 Handbook, the ‘weakest temperature link’ rule is one of the most frequent code violations in residential EVSE installs. If you’re using Romex (NM-B), you must use the 60°C column in the ampacity table, which limits 6 AWG to exactly 55 amps. If you’re in a hot garage in Phoenix or Miami, that 5-amp margin disappears fast. Have you ever fallen into this trap? Let me know in the comments.
Don’t Let Your 100-Amp Panel Scare You
The biggest myth I encounter is that a 100-amp service is an automatic ‘no’ for a Level 2 charger. Most ‘experts’ will tell you that you need a $4,000 service upgrade before you even buy the car. I disagree. While panel upgrades for ev chargers are sometimes necessary, you can often find a more elegant solution. Many modern chargers support ‘dynamic load management’ or ‘load shedding.’ This technology monitors your home’s total power usage and throttles the car’s charging speed if you turn on the oven and the AC at the same time. It’s a perfectly legal way to maintain how to verify code compliance for your ev charger installation without digging up your front yard for a new utility line.
Can smart load shedding save you from a $4,000 service upgrade?
In many cases, yes. By using a system that talks to your main lugs, you can prioritize your home’s essential loads while still getting a full charge overnight. If you are determined to avoid a full swap, look into how to load balance your home electrical system without a full panel swap. This isn’t just about saving money; it’s about efficiency. The National Electrical Code (NEC) 2023 update has paved the way for these energy management systems to be used in calculating load, which is a game-changer for older homes. Before you commit to a massive construction project, you should always check panel upgrade strategies to meet ev charging code requirements in 2025 to see if a simple smart-module is a viable alternative for your specific layout.
Stop guessing and start measuring with an infrared tool
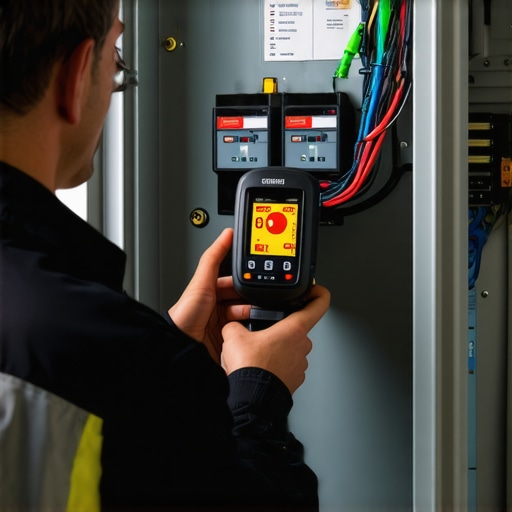
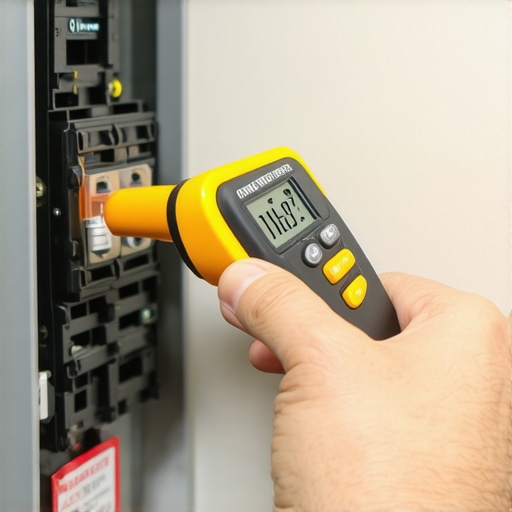
I do not just rely on my ears to listen for humming; I rely on my eyes—specifically, infrared ones. One of the best investments I ever made for my home shop was a decent handheld infrared (IR) thermometer. Once a month, while the car is pulling its full 40-amp load, I open the panel and scan the main breaker and the EV breaker. If I see a 30-degree difference between phases or a lug hitting over 140°F, I know I have a loose connection or a failing component. This is how you catch the issues that lead to why your breaker gets hot to the touch during charging before the plastic starts to char or the insulation fails. It is a proactive way of ev charger troubleshooting that goes beyond just waiting for a fault light to blink on your dash.
How do I keep my charger from failing in five years?
Long-term reliability is more than just looking at the panel; you need to inspect the business end of the cable. I have seen chargers that look brand new on the outside but have pitted, oxidized pins inside the handle because they were left hanging in a damp garage or exposed to the elements. I highly recommend you learn how to clean the pins on your charging handle safely using specialized electronic contact cleaner and a lint-free swab. As highlighted in the Schneider Electric ‘Technical Guide for EV Charging Infrastructure’, terminal degradation caused by environmental contaminants is the leading cause of residential equipment failure over a five-year window. If those pins get dirty, resistance goes up, and your charging speed might drop or, in extreme cases, the handle could even fuse to your car’s port. This simple five-minute task twice a year is the difference between a ten-year lifespan and a frustrating two-year warranty claim.
Software is the new hardware
We often think of electrical work as ‘set it and forget it,’ but modern Level 2 units are essentially outdoor computers. If your car isn’t starting its session or the reason your smart charger app keeps losing connection is driving you crazy, it is probably a firmware issue rather than a wire problem. I make it a habit to check for software updates every quarter. Manufacturers are constantly patching bugs that improve thermal management and communication protocols with newer car models. You can usually how to update your charger software without calling a technician right through the manufacturer’s smartphone app. This keeps your system aligned with the latest how to verify code compliance for your ev charger installation standards as they evolve over time.
The future is bidirectional
Looking ahead, we are moving toward a world where your car is not just a consumer of power, but a backup battery for your house. This technology, known as V2H (Vehicle-to-Home), is going to put even more stress on your home’s wiring. When you are planning your current install or maintenance schedule, think about the space around your panel. Future-proofing today means checking panel upgrade strategies to meet ev charging code requirements in 2025 so you do not have to redo your conduit when you decide to buy a bidirectional power hub in a few years. I always recommend leaving at least six inches of clearance around the charger for future hardware additions. My advice? Go out to your garage right now with a torque screwdriver and verify the specific torque settings that prevent panel fires during high load charging on your breaker lugs—it is the single most important thing you can do for your safety this weekend.
Lessons from the Trenches of High-Voltage Installs
After years of tinkering with circuits, I realized that the hardest part isn’t the physical labor; it’s the mental discipline to not take shortcuts. One ‘lightbulb moment’ I had was realizing that undersized wire doesn’t just get hot—it actually wastes money. High resistance means you’re paying for heat in your walls instead of miles in your battery. I also learned that the most common DIY mistakes in home charger installations usually involve skipping the permit process because people are afraid of inspectors. In reality, that second pair of eyes is your best insurance policy.
Another reflection: always label your panel clearly. It seems minor, but the specific circuit labels required by the electrical inspector aren’t just for code; they are for the next person (or you, three years from now) who needs to cut the power in an emergency. Finally, never assume a new breaker is a good breaker. I have seen ‘out of the box’ failures that only showed up under a full load, so how to spot a dying breaker before it shuts down your charging session is a skill every EV owner should have.
The Gear That Keeps My Garage From Smoking
If you’re going to do this right, you need more than just a pair of pliers. I swear by my digital torque screwdriver—it’s the only way to ensure you’re hitting those exact manufacturer specs. I also recommend keeping a copy of the NFPA 70 Handbook nearby; it’s the definitive guide to ev charger troubleshooting and compliance. For a more modern approach, a simple handheld thermal camera has saved me from at least two potential panel fires by highlighting ‘hot spots’ that weren’t visible to the naked eye. Lastly, check out the troubleshooting ev chargers common compliance pitfalls and fixes guide to stay ahead of the curve.
Turning Your Garage Into a Powerhouse
Building a safe, efficient charging setup is a badge of honor for any EV owner. By choosing the correct 50-amp wire gauge and following the 125% rule, you aren’t just following a rulebook—you’re protecting your home and your investment. Don’t be afraid to pull that heavy 6 AWG copper; the extra effort today means years of worry-free mornings with a full battery. You’ve got the knowledge to how to pass your electrical inspection on the first visit, so go out there and build something that lasts.
Have you ever noticed your lights flickering when your car starts its charging cycle? Let me know in the comments below!