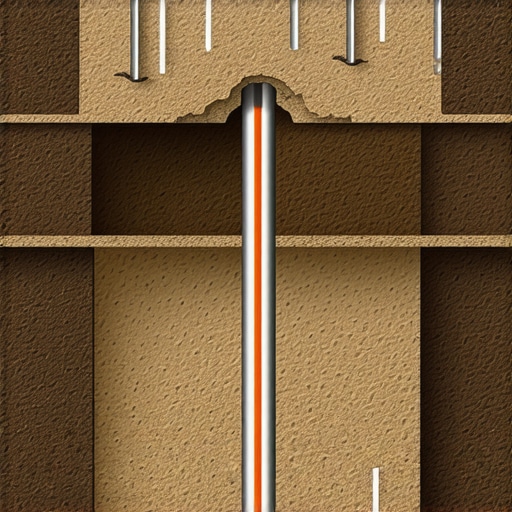
I stood there with a shovel in one hand and a ‘Notice of Non-Compliance’ in the other, feeling like a total amateur. It was supposed to be a simple weekend project—running some pipe for my new Level 2 charger—but I’d underestimated the one rule that trips up more homeowners than any other: conduit burial depth. If you’ve ever felt the sting of having to re-dig a trench you already filled, you know exactly why I’m writing this. I thought I had done enough, but the code has a way of humbling even the most prepared DIYer. [image_placeholder_1]
Stop Guessing and Start Digging the Right Way
When I first started messing with home wiring, I thought ‘close enough’ was the gold standard. I was wrong. The inspector didn’t care that the ground was full of rocks or that I’d worked until sunset. He cared about the 18-inch requirement for Schedule 40 PVC. We often focus so much on the specific panel space requirements for a level 2 install that we overlook the literal ground beneath our feet. My mission today is to help you navigate these depth rules so you can focus on ensuring code compliance without the headache of a failed inspection. I made the mistake of thinking I could cheat the depth by using a thicker pipe, but the NEC (National Electrical Code) is very specific about protection from physical damage. According to the NFPA 70, failure to meet minimum cover requirements is one of the most frequent reasons for residential electrical citations during the rough-in phase. This isn’t just about following rules for the sake of it; it’s about making sure your home stays safe for decades.
Does an Extra Two Inches Really Matter?
You might be thinking that a slight deviation won’t hurt, but for an inspector, it’s a major safety hazard. If you’re wondering about the most common DIY mistakes, this is easily in the top three. A shallow conduit is a target for future gardening projects or driveway repairs. Believe me, you don’t want to be the person who finds a live wire with a pickaxe three years from now. I once used a thinner wall conduit in a high-traffic area thinking it wouldn’t matter—total rookie move that I had to fix on my own dime later. I want to know—have you ever had an inspector look at your hard work and tell you it’s just not deep enough? It’s a gut-punch, but it’s entirely avoidable if you know the table values before you break ground. Let’s make sure you pass your electrical inspection on the first visit by getting the trenching right from the start. We are going to look at the different depth requirements for PVC versus rigid metal, and why your garage floor thickness might actually be working against you.
Pick Your Pipe Before You Pick Your Shovel
The first thing you need to realize is that the material you choose dictates how deep you have to sweat. If you use Rigid Metal Conduit (RMC), the code usually lets you get away with just 6 inches of cover in many residential settings. Think of RMC like a tank; it is tough enough to handle a stray shovel hit or even a heavy vehicle passing over it. However, most of us reach for Schedule 40 PVC because it is cheaper and significantly easier to work with. The trade-off is that you are going down a full 18 inches. When I was prepping my first install, I did not account for the difference between copper and aluminum wiring for high load circuits, and I ended up trying to pull heavier wire through a conduit that was buried far too shallow. It was a disaster. You need to verify your code compliance essentials for ev charger installations in 2025 before the glue even dries on those PVC joints.
The 12-Inch Shortcut That Actually Works
There is a middle ground that many DIYers overlook. If you are running a 120V or 240V circuit protected by a GFCI, and you bury it under a residential driveway or a thick slab, you might see different requirements, but generally, for EV chargers, you want to stick to the 18-inch rule for PVC under soil. I remember a neighbor who thought he could skip the deep trench by running the conduit right under his decorative pavers. One heavy winter freeze later, the ground shifted, and he had a cracked pipe and a dead charger. This is where troubleshooting ev chargers common compliance pitfalls and fixes becomes a full-time job instead of a weekend hobby. If you are struggling with rock-hard soil, do not kill your back; consider renting a power trencher. It is the difference between a two-hour job and a two-day backache.
Make the Wire Pull Look Easy
Once the trench is deep enough to satisfy the most cynical inspector, you have to actually get the electricity to the station. Do not forget how to ground your ev charger according to the latest standards; a shallow ground rod or a missed bonding jump is an instant fail during the rough-in. I usually tell people to treat the conduit like a highway—keep the turns wide. Every 90-degree bend adds friction that you will regret later. The NEC limits you to 360 degrees of total bends between pull points. In my garage, I hit 270 degrees just getting around the workbench and down the wall. If I had added one more “just in case” bend, pulling that thick 6-gauge wire would have been like trying to pull a wet noodle through a straw. Use plenty of wire lube and have a partner at the other end to feed the wire while you pull.
Prepare the Panel for the New Load
While you are waiting for the trench inspection, look at your breaker box again. You might need to implement panel upgrade strategies to meet ev charging code requirements in 2025 if your current service is already maxed out by your HVAC and kitchen appliances. I once saw a homeowner finish a perfect 24-inch deep trench only to realize his 100-amp panel could not handle the sustained 50-amp draw of his new Level 2 unit. He had the perfect pipe, but nowhere to plug it in safely. Avoid that heartbreak by doing a full load calculation before you even buy the shovel. It is much easier to swap a breaker or upgrade a panel while the trench is open than to realize you are under-powered after the cement is poured.
The 200-Amp Myth That Costs You Thousands
Many homeowners are told by the first electrician they call that a Level 2 charger requires a full 200-amp service upgrade. This is a common misconception that often results in a $3,000 bill before the charger is even unboxed. In my experience, you can often avoid this by using how to use a 100 amp panel for ev charging without a costly upgrade. By performing a proper NEC 220.87 load calculation—which looks at your actual peak demand over the last 12 months rather than a theoretical maximum—you might find your existing 100-amp or 125-amp service is perfectly adequate. A study published in IEEE Power & Energy Magazine suggests that residential electrical infrastructure is frequently underutilized, meaning that expensive upgrade might just be an unnecessary upsell. Challenging the status quo here is about ensuring code compliance through data rather than through brute-force hardware replacements.
The Distance Trap Most People Ignore
There is a specific ‘oops’ factor I see with DIYers who successfully pass their trench depth inspection but fail the final performance test: voltage drop. If your charger is at the end of a long driveway, 50 feet or more from the panel, standard wire sizing might not cut it. Even if your breaker is sized correctly, the resistance over a long run can cause your voltage to sag, leading to excessive heat and frustratingly slow charge times. I once helped a friend troubleshoot a station that kept erroring out; the culprit was the common wire sizing error that causes voltage drops during charging. He had followed the minimum gauge requirements for the amperage but ignored the physical length of the run. To keep your system efficient, you must sometimes upsize the conductor beyond what the minimum code requires to compensate for that distance. 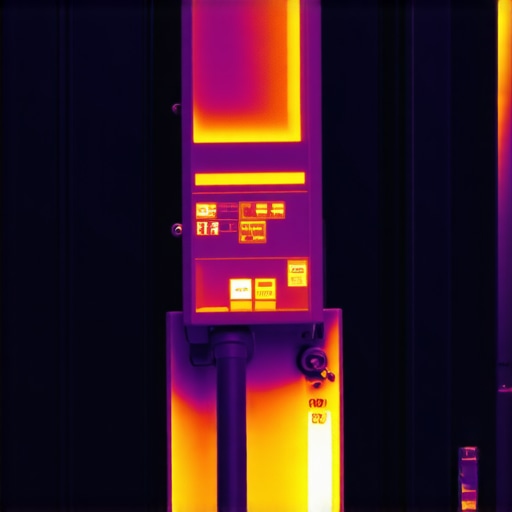
Why Does My Main Breaker Hum at Night?
If you start hearing a low-frequency buzz coming from your service equipment while your car is plugged in, do not ignore it. This often happens because of harmonic distortion or a breaker that is reaching its thermal limit during the sustained high-amperage draw of an EV. This is one of those troubleshooting ev chargers common compliance pitfalls and fixes that people rarely talk about until it is too late. You can read more about why your main breaker hums when the ev is plugged in to understand how mechanical vibrations and heat affect your panel’s longevity. It is a sign that your system is under stress, and while it might pass a basic ‘is it deep enough’ inspection, it is failing the longevity test. Have you ever fallen into this trap of following the letter of the law but missing the bigger picture of system performance? Let me know in the comments. By focusing on these hidden nuances, you move from being someone who just ‘followed instructions’ to someone who actually understands the electrical dynamics of their home. If you are still feeling unsure about your setup, a quick how to verify code compliance for your ev charger installation check can save you from a very expensive second visit from the inspector.
Your Torque Wrench is Your Best Friend
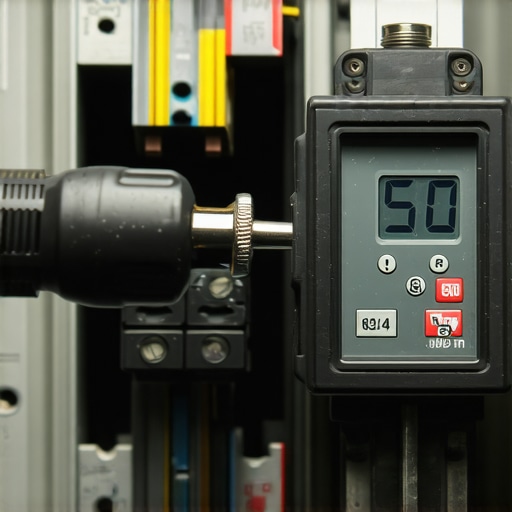
That inspector’s visit isn’t the finish line; it’s just the starting gun for the long-term life of your home’s electrical system. The reality of high-amperage charging is that heat is your constant enemy. I carry a small thermal camera—nothing fancy, just a mobile attachment—to check the breaker temperatures after an hour of charging. If I see a hotspot, I know something is loose. This is one of those ev charger troubleshooting expert tips for common issues that professionals use but DIYers ignore. A torque wrench is non-negotiable. The National Electrical Code (NEC) Section 110.14(D) actually mandates the use of calibrated torque tools for any terminal that specifies a tightening value. I personally use a digital torque screwdriver because it provides an audible beep when you hit the target value—usually between 20 and 50 pound-inches for residential breakers. If you aren’t tightening those lugs to exactly what the manufacturer specifies, you’re inviting a melt-down. You can learn more about how to spot a dangerous heat build up in your ev charging cable before it becomes a hazard. This is a core part of code compliance essentials for ev charger installations in 2025.
The Invisible Maintenance You’re Skipping
Beyond the physical connections, your station is basically a computer with a heavy-duty relay. One of the most annoying things I’ve dealt with is when the app stops talking to the unit. I spent three hours re-checking my wiring once only to find out the firmware was simply out of date. Now, I make it a habit to check for updates every few months. Knowing how to update your charger software without calling a technician is a skill that saves you $150 on a service call. If the software is fine but you’re still seeing errors, check the physical interface. Dust, spider webs, or oxidation on the J1772 pins can cause resistance. I always keep a can of electronic contact cleaner handy to clean the pins on your charging handle safely. It takes thirty seconds and prevents those frustrating ‘Charger Fault’ red lights at 2 AM. If the app is still failing, you might be troubleshooting ev charger connectivity problems related to your home Wi-Fi signal strength in the garage.
How do I keep my charger running like new for years?
The secret to longevity isn’t just about cleaning; it’s about managing the thermal load. If you are constantly pushing your system to its absolute maximum limit, the internal relays will wear out faster. I recommend setting your car to charge at 80% of the maximum allowed current unless you’re in a rush. For example, if you have a 48-amp charger on a 60-amp circuit, try running it at 32 or 40 amps for daily use. This significantly reduces the heat stress on your panel and the internal components of the charger itself. This is a key part of how to load balance your home electrical system without a full panel swap. By not red-lining your electrical service every night, you are effectively upgrading your panel for better ev charging performance through smart usage rather than expensive hardware.
The Future is Two-Way Power
Looking ahead, we are moving toward a world where your car is a giant battery for your house. Bi-directional charging (V2G) is the next big thing, and it will require even stricter adherence to code because power will be flowing both ways. If you’ve spent the time ensuring code compliance when installing ev chargers now, you’ll be in a much better position to integrate these smart-grid features later. Always perform a final how to verify code compliance for your ev charger installation check to be sure your hardware can handle the future of the grid. My challenge to you: go grab a screwdriver today and check the tightness of your charger’s mounting bracket and cable holster. It’s the simplest bit of maintenance that everyone forgets, but it prevents the mechanical fatigue that leads to expensive replacements.
The Reality Check Every DIYer Needs
After years of tinkering with residential electrical systems, I’ve realized that the most expensive mistakes aren’t the ones where you buy the wrong part; they’re the ones where you assume the rules don’t apply to your specific situation. Here are a few lightbulb moments I wish I had before I ever touched a shovel:
- The Permit is Your Shield: Many homeowners skip the paperwork to save $150, but a permit is the only thing standing between you and a denied insurance claim if a fire happens. It’s also the best way to ensure you are ensuring code compliance from the start.
- Depth Equals Insurance: Even if the inspector only requires 18 inches for PVC, going to 20 or 22 inches costs you nothing but ten minutes of extra digging, yet it protects your line from almost every standard landscaping tool on the market.
- Labels Save Lives: Use the specific circuit labels required by the electrical inspector immediately. Trying to remember which breaker does what six months from now is a recipe for a dangerous mistake during a simple repair.
- Torque is King: I used to hand-tighten until it felt ‘snug.’ That is a fast track to a melted terminal. The mechanical stress of an EV drawing 40+ amps for eight hours straight is relentless.
Tools That Make the Job Actually Possible
I don’t believe in buying every gadget at the hardware store, but when it comes to high-voltage work, these four things are non-negotiable for me. First, a Digital Torque Screwdriver is the only way to satisfy NEC 110.14(D) and ensure your connections won’t vibrate loose over time. Second, I always keep the NFPA 70 Handbook nearby; the diagrams are much easier to follow than the raw code text. Third, a Mobile Thermal Camera is my favorite way to perform ev charger troubleshooting expert tips for common issues by spotting loose wires before they smoke. Finally, I trust a Fluke 117 Multimeter for verifying that my ground is actually grounding. These tools ensure you aren’t just guessing while upgrading your panel for better ev charging performance.
The Peace of Mind You Can Only Get From Doing It Right
There is a specific kind of satisfaction that comes from plugging in your car and knowing that every inch of wire—from the panel to the port—is safe, secure, and built to last for decades. Taking the time to master code compliance essentials for ev charger installations in 2025 isn’t just about avoiding a fine; it’s about taking pride in the infrastructure of your home. You’ve done the hard work of researching, digging, and wiring. Now, you get to enjoy the reward of seamless, reliable energy for your vehicle. If you ever hit a snag, remember that a quick how to verify code compliance for your ev charger installation check is always your best first step. Have you ever found an unexpected rock bed or a forgotten utility line while trying to dig your trench? Let me know your digging horror stories in the comments below!