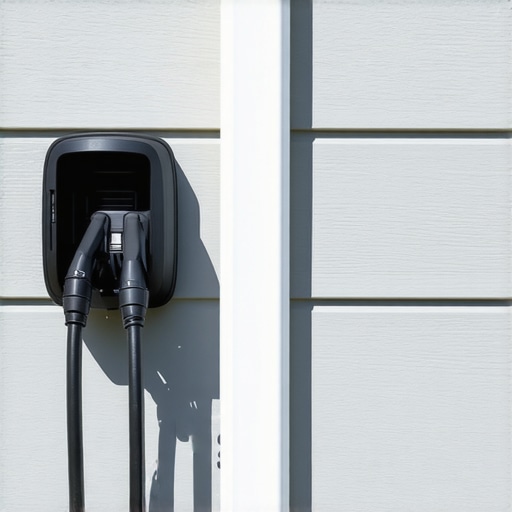
I stood on my driveway, coffee in hand, staring at the silver metal snake I’d just bolted to my exterior wall. I thought it looked industrial chic. My HOA board thought it looked like a zoning violation. Three days later, I was holding a $150 fine and a sternly worded demand to restore the aesthetic harmony of the neighborhood. It was a classic rookie mistake. I’d focused so much on ensuring code compliance that I completely forgot I lived in a community where even the wrong shade of mulch can cause a scandal. If you’re about to run power to your garage, don’t just bolt and go. You need a strategy to make that conduit disappear before the neighbor with the clipboard does their morning lap. Today, we are going to solve the problem of making your EV installation invisible to the prying eyes of the board.
The Dreaded Letter in the Mailbox
I remember the panic of trying to justify my installation. I had spent weeks researching panel upgrades for EV chargers, making sure my home could handle the massive draw of a Level 2 unit. I did everything by the book—or so I thought. The failure wasn’t in the wires; it was in the presentation. Early in my DIY journey, I made the mistake of using standard galvanized straps that started rusting against my white siding within a month. It looked like a construction site. According to the Community Associations Institute, nearly 74 million Americans live in HOA communities, and architectural discordance—like visible utility lines—is one of the top three reasons for violation notices. Have you ever had a run-in with your HOA over your electric vehicle setup? It is a stressful, expensive headache that we can easily avoid with a little bit of foresight and some paint. We aren’t just talking about making it look okay; we are talking about making it look like it was built with the house.
Is Hiding the Conduit Truly Worth the Extra Effort?
Some people tell me that it is just a pipe and the HOA should get over it. But let’s be realistic: fighting an HOA is like wrestling a pig in the mud—you both get dirty, but the pig likes it. Skeptics often worry that hiding conduit or how to hide EV charger wires might interfere with the safety of the installation. I’m here to tell you that as long as you are meeting the latest electrical standards, there is zero reason you can’t have a system that is both safe and stylish. It’s not just about the fine; it’s about your home’s resale value. A messy electrical job suggests a messy homeowner.
Stop Making Your Charger Look Like a Construction Site
The first step is to stop thinking like an electrician and start thinking like a landscaper. Most installers just want to get from Point A to Point B in the shortest line possible. That usually means a diagonal run across your siding that stands out like a sore thumb. When I first started, I didn’t realize that simply following the natural lines of the house—like tucking the pipe behind a downspout or running it along the trim—could save me hundreds in penalties. You need to consider the material. Using EMT is great for durability, but it’s a beacon for HOA inspectors unless it’s treated properly. Before you even pull the first wire, you need to look at your exterior and plan a route that mimics the existing architecture. Trust me, spending an extra hour on the layout is much cheaper than paying a recurring monthly fine for an eyesore.
Route Your Lines Along the Natural Shadows
The secret to an invisible installation is avoiding the ‘beeline’ mentality. If your electrical panel is on the opposite side of the house from your driveway, do not just run a pipe straight across the middle of the wall. Think of your conduit like a chameleon; it needs to follow the existing lines of your home. I always look for ‘architectural valleys’—those 90-degree corners where two walls meet or the space directly alongside a vertical downspout. By tucking the pipe into these crevices, you use the house’s own shadows to mask the hardware. If you are struggling with the layout, how to hide EV charger wires for a clean garage look involves more than just interior organization; it starts with exterior routing that mimics the trim.
Match the Paint or Face the Fine
Never leave raw galvanized steel or grey PVC exposed. It screams ‘utility work.’ I once tried a shortcut by sliding my conduit inside a plastic downspout extension I bought for ten dollars. It looked clever for about two weeks, but the summer sun warped the plastic into a sagging, melted mess that looked worse than the pipe itself. The board was at my door within forty-eight hours. The right way is to scuff the conduit with a fine-grit sandpaper, apply a metal-etching primer, and use the exact same exterior latex paint used on your siding. When the color matches perfectly, the eye simply stops seeing the pipe. While you are focusing on the look, you must remain obsessed with ensuring code compliance when installing EV chargers, because a pretty pipe that isn’t strapped every three feet is still a violation in the eyes of an inspector.
Verify the Grounding Before the Inspector Arrives
An installation that looks great but fails an inspection is a double tragedy. One of the most common reasons DIYers fail is improper grounding. It is like building a beautiful car and forgetting the brakes—it might look fast, but it is dangerous. You need to know how to ground your ev charger according to the latest standards to ensure that any fault current has a safe path to the earth. Inspectors will look at your ground wire gauge and its connection point before they even look at how straight your pipe is. If your ground is loose or the wrong size, you are looking at a mandatory ‘stop-work’ order.
Secure the Internal Wires to Stop the Hum
If you hear a subtle buzzing coming from your panel once the car starts drawing power, you likely have a loose connection. I’ve seen homeowners spend thousands on upgrading your panel for better EV charging performance only to have the system fail because a single lug wasn’t torqued to spec. High-amperage charging generates heat, and heat causes metal to expand and contract. Over time, this can lead to the hidden danger of loose neutral wires in your electrical panel, which can fry your expensive car’s onboard charger or even start a fire. Use a torque screwdriver—not just a regular one—to meet the manufacturer’s specific settings. It is the difference between a professional-grade setup and a ticking time bomb.
Avoid the Heat with Proper Load Planning
Finally, stop the ‘phantom trips’ before they start. If your breaker trips the moment your AC kicks on while the car is charging, your load calculation was off. This falls under troubleshooting ev chargers common compliance pitfalls and fixes. You cannot just keep resetting a hot breaker. You have to balance the phases in your panel so that the heavy hitters aren’t all drawing from the same bus bar at the same time. A balanced panel runs cooler, lasts longer, and won’t leave you with a half-charged battery in the morning.
The Danger of the It Works Fine Mentality
Most homeowners assume that if the green light is on and the car is charging, the job is done. I used to think the same until I realized that electrical systems don’t always fail with a bang; sometimes they fail with a slow, silent sizzle. A common myth is that your circuit breaker is a perfect safety net. In reality, a breaker is a mechanical device that can lose its calibration over time. If you are constantly pushing a circuit to its limit without how to verify code compliance for your EV charger installation, you might be operating in a dangerous ‘grey zone’ where the wire is overheating but the breaker hasn’t reached its trip point yet.
Why Your Breaker Stays Hot Without Tripping
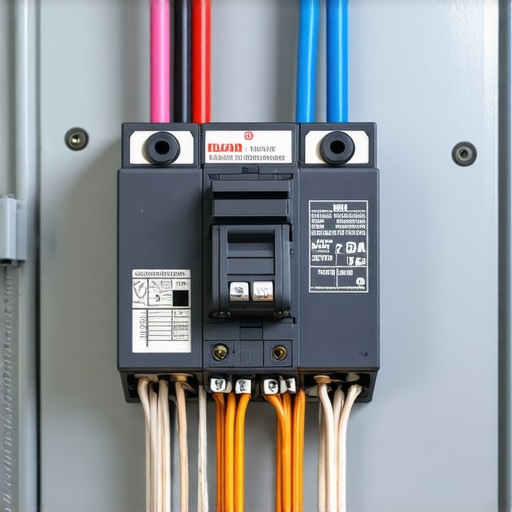
This is where the ‘Oops’ factor usually kicks in. I’ve seen many DIYers use a 50-amp breaker for a 50-amp draw, forgetting the 80% rule for continuous loads. Because an EV charger runs for hours, it’s considered a continuous load. This leads to why your breaker gets hot to the touch during charging. According to research from the National Fire Protection Association (NFPA), nearly half of home electrical fires involve distribution and lighting equipment, often due to overloaded circuits that don’t trip immediately. If you didn’t size your components for that extra 25% overhead, you aren’t just flirting with a code violation; you’re flirting with a structural fire.
Is a 100-Amp Panel Really the Hard Ceiling for Two Cars?
I get asked this constantly by people looking into panel upgrades for EV chargers. The conventional wisdom says you need at least 200 amps to support two electric vehicles, but that is a simplification that costs people thousands of dollars. You can often skip the massive upgrade by learning how to load balance your home electrical system without a full panel swap. Using smart energy management systems or ‘load shedders’ can allow two chargers to share a single circuit, dynamically adjusting the power based on what else is running in the house. It’s about being smart with your current, not just buying a bigger bucket.
The Copper vs. Aluminum Trap Most DIYers Ignore
The final nuance that separates the pros from the amateurs is the material choice. While aluminum is cheaper, the difference between copper and aluminum for EV wiring is massive when it comes to thermal expansion. If you use aluminum without the proper anti-oxidant paste or specific AL/CU rated lugs, the connection will loosen over time. This leads to the common wire sizing error that causes voltage drops during charging, which makes your charger run less efficiently and generates even more heat. Have you ever fallen into this trap? Let me know in the comments. It’s better to catch a loose connection now than to smell melting plastic at 3 AM.
I’ve learned that the ‘set it and forget it’ mentality is the quickest way to end up with a charred service panel. If your car is pulling 48 amps for six hours every night, your electrical system is under more stress than a typical home sees in a week. To stay ahead of the curve, I’ve started using a FLIR thermal imaging camera once every quarter. It’s not just for ghost hunters; it allows me to see heat signatures on the breakers that the naked eye would miss. If I see a breaker glowing orange while the car is charging, I know a connection is loosening. This is one of those expert tips for common issues that separates the amateurs from the pros.
How do I maintain my EV charging setup over time?
Maintaining your setup isn’t just about cleaning the dust off the box. You need a physical and digital checklist. Physically, I go back and check the torque on my lugs. According to the National Electrical Code (NEC) Section 110.14(D), installers are required to use a calibrated torque tool for any terminal that has a specified torque value. Most DIYers ignore this, but metal creeps and shifts with temperature changes. A quick turn with a torque screwdriver can prevent a catastrophic failure. Digitally, you should regularly update your charger software without calling a technician to ensure you have the latest safety patches and load-balancing algorithms. If you have an exterior setup, remember there are 3 maintenance tasks that keep your outdoor charger running through winter, including checking the seals on your conduit for moisture intrusion.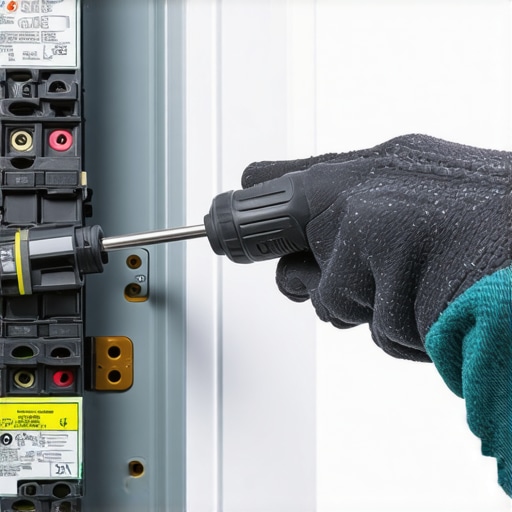
Prepare Your Panel for the Two Car Future
The next big trend isn’t just bigger batteries; it’s bidirectional charging. Your car will soon act as a backup battery for your home. This means your panel won’t just be pushing power; it will be receiving it. Before you add a second vehicle to the mix, you must load test your house before adding a second charger. We are moving toward a world where AI-driven energy management systems will handle the heavy lifting, but the physical infrastructure—the wires and the lugs—still needs a human touch. My advanced tip for you: don’t wait for a smell or a trip. Buy a torque screwdriver today, set it to the manufacturer’s specs (usually found on the inside of the panel door), and give those EV breaker connections a check. It’s the single best way to ensure your ‘industrial chic’ setup remains a safe, invisible part of your home for the next decade.
The Expensive Lessons My HOA Taught Me About Curb Appeal
Reflecting on my journey, the most important thing I realized is that compliance is a two-way street. It isn’t just about satisfying the city inspector; it is about respecting the visual harmony of your community. One major lightbulb moment was discovering that the most common DIY mistakes in home charger installations often have nothing to do with the wires and everything to do with how the conduit is mounted. I also learned that heat is the ultimate enemy of electrical longevity. By using the specific torque settings that prevent panel fires during high load charging, I turned a potential fire hazard into a rock-solid system that I can trust while I sleep. Don’t underestimate the power of a thermal camera—seeing a hot breaker before it trips is like having X-ray vision for your home’s safety.
My Must-Have Toolkit for Professional-Grade Power
If you are serious about doing this right, you need more than just a standard set of pliers. I swear by my calibrated torque screwdriver; it is the only way to ensure every terminal is tightened to the exact inch-pound required by the manufacturer. To stay ahead of potential issues, I recommend reading up on how to verify your electrician actually used copper wire for the install, as material choice changes everything. I also keep a copy of the latest NEC handbook handy—specifically the sections on EVSE (Electric Vehicle Supply Equipment). For those looking to breeze through the final sign-off, following a guide on how to pass your electrical inspection on the first visit is the best investment of your time.
Your Path to a Stress-Free Charging Experience
Installing an EV charger is more than just a home improvement project; it is your first step into a future of energy independence. While the technical details can feel overwhelming, remember that every step you take toward ensuring code compliance when installing EV chargers makes your home safer and more valuable. Don’t let the fear of a technical error stop you from upgrading your lifestyle. With the right tools, a bit of paint to keep the HOA happy, and a commitment to safety, you’ll have a charging setup that works flawlessly for years to come. Have you ever had a neighbor or HOA official question your electrical setup? Let me know in the comments below!