I remember standing in my garage, chest puffed out, looking at my brand-new Level 2 charger. It looked perfect. The conduit was straight, the wires were tucked, and I’d cranked down on those terminal screws until my knuckles turned white. Then the city inspector showed up. He didn’t just glance at it; he reached into his bag and pulled out a calibrated torque screwdriver. My stomach dropped. I’d always figured ‘tight is tight,’ but within thirty seconds, he’d flagged two connections for being over-torqued and one for being too loose. It was an embarrassing rookie mistake that cost me a reinspection fee and another week of waiting. [IMAGE_PLACEHOLDER] Today, I’m going to show you exactly why that little number printed on the side of your breaker or terminal block is the difference between a passed inspection and a potential fire hazard. We’re going to dive into the science of why metal expands and why ensuring code compliance when installing EV chargers starts with the right amount of pressure. Have you ever faced the frustration of a failed inspection over a detail like this?
The Inspector Isn’t Just Being Picky
If you think your local inspector is just trying to justify their paycheck by checking torque, I’ve got some news for you: they’re actually saving your house. I learned the hard way that when you’re pushing 40 or 50 amps through a wire for eight hours straight, things get hot. When they get hot, metal expands. If those screws aren’t set to the exact manufacturer specification, that expansion and contraction cycle will eventually lead to a loose connection. This is often the reason your ev charger smells like burnt plastic after a few months of use. According to the National Fire Protection Association (NFPA), poor electrical connections are a leading cause of home fires, which is why the NEC Section 110.14(D) explicitly requires the use of a calibrated torque tool for any terminal where a torque value is marked. It’s not about being ‘tight enough’; it’s about meeting a calculated engineering standard. I’ve seen DIYers—and even some pros who should know better—ignore this, leading to why your main lugs might be loose after a year of charging.
Is a $100 Torque Screwdriver Actually Necessary?
You might be looking at the price of a professional torque driver and thinking, ‘Can’t I just use a regular screwdriver and some muscle?’ I used to think the same thing. I figured my ‘calibrated elbow’ was good enough. But after seeing a connection fail because I over-tightened it and actually crushed the wire strands—limiting their current-carrying capacity—I realized the investment is non-negotiable. If you don’t want to buy one, how to find an electrician who actually understands ev codes becomes your next most important task. They’ll come equipped with the right tools to ensure your the permit error that stops home charger installs in their tracks isn’t a simple loose screw. When you over-torque, you risk stripping threads or cracking the terminal housing. When you under-torque, you create an air gap that causes arcing. Neither of those situations ends well for your car or your peace of mind.
Look for the Label Before You Grab the Wrench
Every electrical component, from the breaker in your panel to the terminal block inside your charger, has a specific torque rating. This number is usually expressed in inch-pounds (in-lb) and is often stamped right onto the plastic housing. I remember once trying to save ten minutes by using a standard cordless drill on a NEMA 14-50 outlet. I thought the clutch setting was ‘close enough.’ I ended up stripping the internal threads of a high-end receptacle, turning a $50 component into scrap metal instantly. This is why you must learn how to pick a nema 14-50 outlet that wont melt under pressure and treat every screw with the respect the manufacturer demands. If you can’t find the number on the device, check the installation manual; skipping this step is how you end up with the specific screws you should never use for an electrical box in a high-heat environment.
Master the Click on Your Torque Driver
When you finally get your hands on a calibrated torque screwdriver, the technique is just as important as the tool. You want to apply pressure in a single, smooth motion. Don’t jerk it or ‘double-click’ it like you might with a lug nut on a car tire. If you jerk the tool, the inertia can actually cause you to over-tighten beyond the set limit. 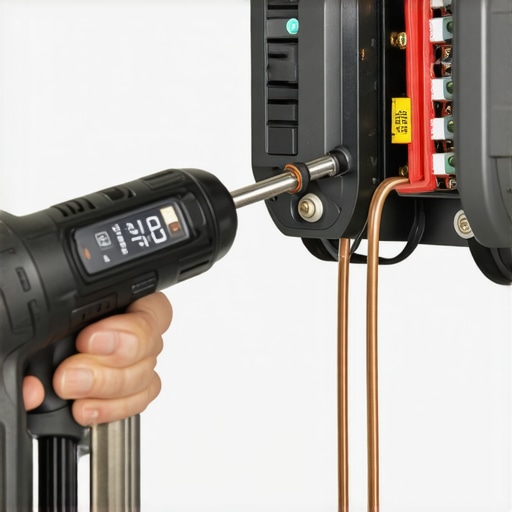 This precision is a cornerstone of how to verify code compliance for your ev charger installation. Once you hear or feel that distinct ‘click’ or ‘slip,’ stop immediately. This tactile feedback is your only insurance against the expansion and contraction cycles that occur when your vehicle starts drawing heavy current in the middle of the night.
Treat Your Wire Like a Bridge Not a Sponge
When you strip the insulation off your wire, you need to be surgical. If you nick the copper strands, you’ve essentially created a bottleneck in your electrical highway. Think of it like a four-lane bridge where two lanes are suddenly closed; traffic—or in this case, current—bunches up and generates heat. Nicking even a single strand reduces the effective gauge of the wire. If you’re using 6 AWG copper for a 48-amp charge, and you cut several strands while stripping, that wire can no longer safely carry the heat generated by the continuous load. This is especially critical when navigating the difference between copper and aluminum for ev wiring. Aluminum is softer and more prone to ‘cold flow,’ meaning it can actually change shape under pressure over time. If your torque isn’t perfect, that aluminum wire will eventually wiggle itself loose, increasing resistance and risking a meltdown.
Balance the Load to Save Your Main Breaker
Even if your connections are torqued to perfection, your charger is part of a larger ecosystem. If you just slap a 50-amp breaker into a crowded panel without checking the math, you’re asking for a nuisance trip—or worse. I’ve seen homeowners ignore the hidden cost of skipping a panel load calculation only to have their main breaker trip the second the dryer and the EV charger run at the same time. In many older homes, the safest route is to realize why your garage needs a sub-panel for multiple chargers to keep the high-demand circuits isolated and manageable. This ensures your home’s electrical ‘heart’ doesn’t stop beating just because you wanted a full battery by morning. Taking that extra thirty seconds to reset your stance and pull the torque wrench slowly makes all the difference between a system that lasts decades and one that fails in months.Most folks think the solution to every EV charging bottleneck is just “more power.” I see it all the time on forums: “Just upgrade to a 200-amp service and you’re good.” But here’s the contrarian truth: you probably don’t need to spend $3,000 on a full service upgrade. In fact, many 100-amp panels are perfectly capable of handling a Level 2 charger if you use a bit of logic instead of just brute force. The “experts” will tell you a 200-amp panel is the gold standard, but with modern tech, that’s becoming an outdated (and expensive) assumption.
Can You Run a Level 2 Charger Safely on a 100-Amp Service?
The short answer is yes, but it requires more than just an empty slot in your breaker box. This is where the hidden cost of skipping a panel load calculation really bites you. According to a study by the Pecan Street Research Institute, residential energy loads are shifting; we’re using more efficient appliances but adding high-demand EV chargers. The trap most people fall into is looking at the physical space in the panel rather than the electrical capacity. If you don’t want to rip out your entire service, how to use load shedding devices to avoid a full service upgrade is the secret weapon you need. These devices automatically pause your car’s charging if the water heater and oven both kick on, ensuring you stay within the 80% continuous load limit required by the NEC. 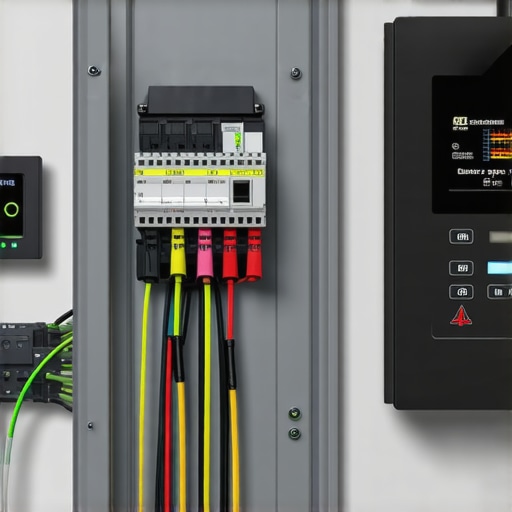 Another massive “oops” I see involves the neutral wire. A lot of seasoned DIYers and even some “old school” sparkies think that because an EV charger is 240V, you only need two “hots” and a ground. But then they buy a smart unit and realize why your new charger requires a neutral wire even for 240v. Many modern chargers use that neutral to power their internal Wi-Fi motherboards or secondary 120V outlets. Skipping it doesn’t just mean your app won’t work; it can lead to ev charger troubleshooting expert tips for common issues becoming your nightly reading material as you try to figure out why the unit keeps rebooting. Don’t let the simplicity of three wires fool you into complacency. Whether it’s managing your load or ensuring code compliance essentials for ev charger installations in 2025, the nuance is where the safety lives. If you’re struggling to diagnose a weird hum or a clicking sound, check out why your ev charger is making a clicking sound but not charging before you call for an emergency repair. Have you ever fallen into this trap or been told you *must* upgrade your panel when you didn’t really need to? Let me know in the comments.
Keep the Heat Out of Your Breaker Box
If you think the job is done once the inspector signs off, you’re setting yourself up for a surprise in eighteen months. One tool I never go into a garage without is my FLIR One thermal camera. It’s a small attachment for my phone, but it shows me exactly what my eyes can’t see: heat signatures. I’ve caught breakers that were running ten degrees hotter than they should be, simply because a wire had slightly shifted due to the thermal expansion cycles I mentioned earlier. This is precisely why your main lugs might be loose after a year of charging. I make it a habit to open my panel once a year (with the main power off, of course) and do a visual check for any discolored insulation or ‘weeping’ plastic. If you’re not comfortable doing that, how to find an electrician who actually understands ev codes is your best bet for a quick annual health check. Don’t forget that why your ev charger needs a surge protector in the panel is a long-term play; one lightning strike nearby can fry the motherboard of a $600 charger in a heartbeat.
How do I maintain my charger setup over the long haul?
Maintenance isn’t just about screws and wires; it’s about the software running the show. I recommend checking for firmware updates every quarter. Most people forget that these are essentially computers hanging on their walls. I’ve seen updates that literally change the charging logic to prevent overheating during summer months. Learning how to update the firmware on your smart charging station can solve bugs you didn’t even know you had. According to the NFPA 70B (Recommended Practice for Electrical Equipment Maintenance), regular inspection and cleaning of electrical connections are vital to prevent failure. I use a can of compressed air to blow out the dust from the charging handle and the port. If dust builds up, it creates resistance, and resistance creates heat—the enemy of your battery’s health. 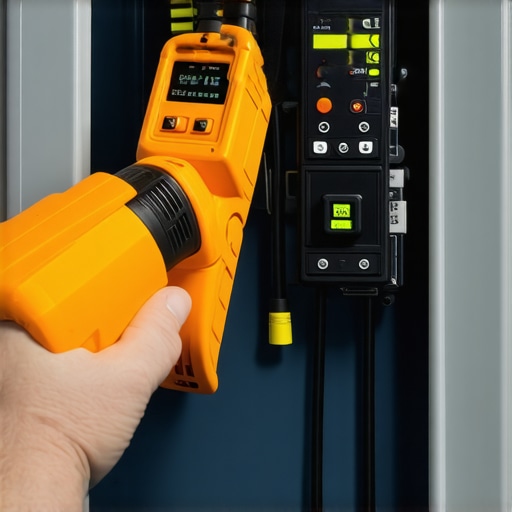
Prepare Your Panel for the Two-Car Future
If you’re already pushing the limits of your service, you need to start thinking about scaling. We are moving toward a world of bidirectional charging (V2G), where your car might actually power your house during a blackout. This requires more than just a standard circuit. You might find that upgrading your panel for better ev charging performance now saves you from a massive headache when you add a second EV in three years. I often suggest clients look into why your garage needs a sub-panel for multiple chargers as a way to future-proof their setup. It’s much cheaper to run one heavy-gauge line to the garage once than it is to keep adding individual circuits every time the tech changes. If you’re seeing weird errors on your dash, don’t panic—usually, ev charger troubleshooting expert tips for common issues can point you to a simple software conflict or a loose ground. My best advice? Buy a cheap infrared thermometer today and scan your breaker while the car is charging at full power. If one breaker is significantly hotter than the others, you’ve found your first maintenance task.
The Hardest Lessons I Learned So You Don’t Have To
After years of tinkering and a few failed inspections, I realized that electrical work isn’t just about making things turn on; it’s about making sure they stay on safely. One lightbulb moment for me was realizing that code compliance essentials for ev charger installations in 2025 are actually there to prevent the slow-burn degradation of your home’s infrastructure. Another realization? Your panel is a living organism. If you don’t keep an eye on it, those main lugs might be loose after a year of charging, especially with the high vibration and thermal cycles of heavy EV loads. I also learned that the best defense is a good offense; instead of waiting for a smell, I now do a heat check every six months. Finally, don’t let a small panel scare you off. You can often add an ev charger without a 200 amp panel upgrade if you are smart about logic-based load management.
[IMAGE_PLACEHOLDER]
Tools That Saved My Sanity and My Garage
If you are serious about DIY or even just overseeing a pro, these are the items I swear by personally. First, a calibrated torque screwdriver is the only way to be certain you’ve hit the exact manufacturer spec. Second, a thermal camera attachment for your smartphone is non-negotiable for catching hotspots before they become fires. Third, if you’re feeling stuck on a specific error code, ev charger troubleshooting expert tips for common issues is a guide I keep bookmarked for late-night repairs. Lastly, always keep the contact info for a trusted electrician on speed dial; sometimes, you just need a second pair of eyes to verify your work is truly bulletproof.
Step Into the Electric Age with Confidence
Installing a charger is a rite of passage for the modern homeowner. It is the final piece of the puzzle that turns your house into a self-sustaining energy hub. By focusing on ensuring code compliance when installing EV chargers and treating your panel with the respect it deserves, you are not just fueling a car; you are building a safer future for your family. Don’t be intimidated by the torque values or the wire gauges—once you master the basics of thermal management, the rest is just following the roadmap. Have you ever discovered a loose wire or a hot breaker in your panel that surprised you? Let me know in the comments below!