I was sitting in my favorite armchair, nursing a lukewarm coffee, when it happened. My TV didn’t just flicker; it surged with a brightness that felt like a localized supernova before going pitch black. At the same time, my phone charger started emitting a high-pitched whine that I can only describe as a cry for help. I had just finished a weekend project, feeling proud of my DIY spirit, only to realize I had overlooked something so simple, yet so catastrophic. I thought I was being efficient, but I was actually playing Russian roulette with my home’s electrical system. This wasn’t a power outage from the utility company; it was a ghost of my own making, living right inside my breaker box. Have you ever noticed your lights getting brighter when the vacuum kicks on? If so, you’re not seeing things—you’re seeing a disaster in slow motion. Today, I’m going to show you exactly how to spot a loose neutral before it turns your expensive OLED screen into a very expensive paperweight. [image placeholder]
Stop the Surge Before the Smoke Starts
When I first started messing with my own electrical work, I made a classic rookie mistake. I focused entirely on the ‘hot’ wires, thinking as long as the power was flowing, I was golden. I completely ignored the neutral. In a balanced system, that white wire is the unsung hero that carries the return current back to the source. But when that connection gets shaky—maybe because of thermal expansion or a screw that wasn’t torqued to spec—everything goes sideways. This creates what we call a ‘floating neutral,’ where your 120V outlets suddenly start seeing 200V or more. It is a silent killer for electronics. According to the Electrical Safety Foundation International (ESFI), nearly 51,000 home fires are caused by electrical failures each year, and many of these stem from poor connections that heat up over time. If you’ve recently added a high-draw appliance, you might even find why your EV charger is causing your TV to flicker is directly related to this instability.
Is this just a scare tactic to sell more panel upgrades?
I get it. Every time you call a pro, they want to talk about a panel upgrade. You might wonder if your house is actually at risk or if they are just looking for a payday. The reality is that modern electronics—your laptops, smart fridges, and EV inverters—are incredibly sensitive. Unlike an old incandescent bulb that just burns a bit brighter, a circuit board will literally fry in milliseconds when the voltage spikes. I learned this the hard way when I ignored a humming sound in my garage and ended up needing expert troubleshooting for my charger. It’s not about fear; it’s about physics. Have you ever felt the cover of your electrical panel and noticed it was warm to the touch? That was my first warning sign, and I walked right past it. Don’t be like me. Checking for surge protection needs is a great step, but it won’t fix a loose wire that’s already arcing behind the bus bar. We are going to dive into the physical signs you can look for right now, without even needing to grab a multimeter yet.Start by opening your main service panel—but keep your hands back for a second. You are looking for ‘witness marks’ of heat or oxidation. I remember working on a neighbor’s subpanel after they complained of a ‘fishy’ smell near the garage, which is a classic sign of burning electrical insulation. When I pulled the cover, the white neutral wire wasn’t just loose; it had actually started to char the plastic casing of the adjacent breaker. The screw was so loose I could turn it with my fingernail. This wasn’t necessarily a bad initial install, but rather a result of ‘creep’—the physical deformation of the wire under pressure and heat over hundreds of charging cycles. This is exactly why your main lugs might be loose after a year of charging. The constant expansion and contraction of the wire as your car pulls 40 or 50 amps can literally back a screw out over time if it wasn’t torqued perfectly. 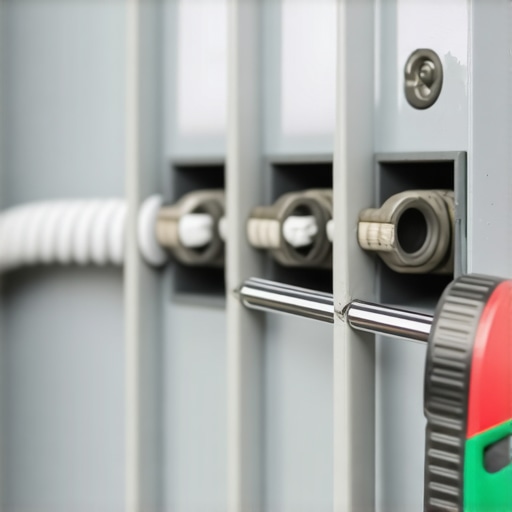
Grab Your Tools and Check These Specific Points
First, you need to understand that a visual check isn’t enough to guarantee long-term safety. You have to verify that every connection meets the specific manufacturer’s torque requirements. I once thought I could ‘feel’ the right amount of tension with a standard screwdriver. I was wrong. When I finally invested in a proper torque screwdriver, I realized half my connections were dangerously under-tightened. This is why your charger needs a specific torque setting to pass inspection. If a lug is too loose, it creates an arc; if it’s too tight, you crush the copper strands and create a high-resistance weak point that will eventually fail.
Stop Mixing Grounds and Neutrals in Subpanels
This is where most DIYers and even some general contractors trip up. In your main service panel, the ground and neutral bars are bonded together. However, the moment you run a line to a subpanel in the garage or a detached shed, they must be strictly separated. I’ve seen countless installs where someone just jammed the neutral and ground onto the same bar because ‘it all goes to the same place eventually.’ That mistake creates a parallel path for current, which can accidentally energize the metal casing of your charger or your car’s chassis. Learning why your subpanel needs a separate ground bar for ev circuits is the difference between a functional charger and a literal electrocution risk.
Verify Every Inch of the Electrical Path
Beyond the panel itself, you need to check every junction box along the run. If you used wire nuts, ensure they are specifically rated for high-wattage continuous loads. Standard wire nuts often can’t handle the persistent heat generated by an 8-hour charging session and will eventually melt or become brittle. You should also be looking at how to verify code compliance for your ev charger installation to ensure your wire gauge actually matches your breaker size. Even if your internal wiring is perfect, understanding why your ev circuit needs a dedicated neutral in some jurisdictions can be the sticking point that causes an inspector to fail your project. Finally, if you are worried about your total house load, look into how smart chargers use dynamic balancing to prevent blown fuses. This technology allows the charger to throttle your car’s intake when heavy appliances like the dryer or AC kick on, taking the thermal stress off those critical neutral connections during peak demand.But here is where the ‘experts’ often get it wrong, and it’s a hill I’m willing to die on: you don’t always need a massive panel upgrade just because you’re adding a Level 2 charger. Most people are told that a 200-amp service is a hard requirement, but that is a costly misconception. By using smart [how to use load shedding devices to avoid a full-service upgrade](https://brightsparkzelectric.com/how-to-use-load-shedding-devices-to-avoid-a-full-service-upgrade), you can often stay within your existing capacity while maintaining total safety. I’ve seen homeowners drop five grand on [upgrading-your-panel-for-better-ev-charging-performance](https://brightsparkzelectric.com/upgrading-your-panel-for-better-ev-charging-performance) when they could have spent a fraction of that on a simple load manager. The National Fire Protection Association (NFPA) notes in NEC 2023 Article 625.42 that Energy Management Systems (EMS) are now a formally recognized way to control load without upsizing your service. If you skip [the hidden cost of skipping a panel load calculation](https://brightsparkzelectric.com/the-hidden-cost-of-skipping-a-panel-load-calculation), you are essentially guessing with your family’s safety.
Cheap Outlets Are the Achilles Heel of Home Charging
Here is the biggest ‘oops’ factor I encounter: the $15 big-box store outlet. People assume a NEMA 14-50 is a NEMA 14-50, but for an EV, that’s a dangerous lie. Those cheap receptacles are designed for dryers that run for 45 minutes, not a Tesla pulling full power for ten hours straight. I’ve pulled out dozens of melted ‘residential grade’ plugs that simply couldn’t handle the thermal soak. You absolutely must learn [how to pick a nema 14-50 outlet that wont melt under pressure](https://brightsparkzelectric.com/how-to-pick-a-nema-14-50-outlet-that-wont-melt-under-pressure). This is also why I’m a huge advocate for [the real difference between hardwired and plug-in charging stations](https://brightsparkzelectric.com/the-real-difference-between-hardwired-and-plug-in-charging-stations); hardwiring eliminates that plug-to-socket failure point entirely.
Will your utility meter actually survive the midnight surge?
Even if your internal panel is a masterpiece, you have to look further upstream. I once helped a client who did everything right inside the house, but their [utility meter couldn’t handle the extra load](https://brightsparkzelectric.com/how-to-tell-if-your-utility-meter-can-handle-the-extra-load). The heat from the constant draw actually de-soldered a connection inside the meter base. This is part of [troubleshooting-ev-chargers-common-compliance-pitfalls-and-fixes](https://brightsparkzelectric.com/troubleshooting-ev-chargers-common-compliance-pitfalls-and-fixes) that most people overlook until it’s too late. You also need to ensure you know [how to find an electrician who actually understands ev codes](https://brightsparkzelectric.com/how-to-find-an-electrician-who-actually-understands-ev-codes) because the average ‘handyman’ won’t check for things like voltage drop over long runs or torque-specific lugs. Have you ever been told you absolutely needed a $5,000 panel upgrade before you could charge? Let me know in the comments—I’m curious to see how many of you were upsold unnecessarily. If you’re feeling overwhelmed by the technicalities, [ensuring-code-compliance-when-installing-ev-chargers](https://brightsparkzelectric.com/ensuring-code-compliance-when-installing-ev-chargers) is much easier when you have a professional roadmap to follow.
I don’t just rely on my eyes anymore when it comes to electrical safety; I rely on heat signatures. Every six months, I grab my handheld infrared thermometer—a tool I think every EV owner should own—and I point it directly at my breaker and the charging receptacle while the car is pulling its peak load. If I see a temperature reading climbing north of 140°F (60°C), I know a connection is starting to fail. This is the ultimate early warning system to identify the reason your ev charger smells like burnt plastic before the actual melting begins. I’ve caught two loose lugs this way in the last three years that looked perfectly fine to the naked eye. According to the NFPA 70: National Electrical Code (NEC) 2023 Handbook, Article 625.41 mandates that overcurrent protection for EV charging must be sized at 125% of the maximum load. This ensures that even during those long overnight sessions, your equipment stays within its thermal limits. Following these code compliance essentials for ev charger installations in 2025 is the only way to sleep soundly while your car gulps down kilowatts in the garage. 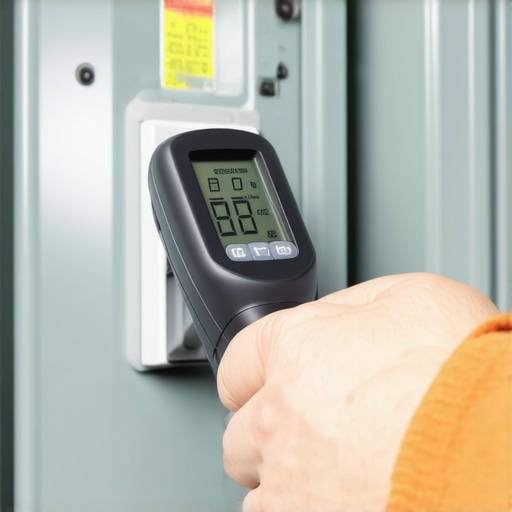
How do I maintain my home charging station over time?
Maintenance isn’t just about physical wires; it’s about the silicon inside. Your charger is essentially a high-powered computer, and ignoring software is a recipe for connectivity headaches. I make it a habit to check for updates once a quarter. Learning how to update the firmware on your smart charging station can fix intermittent communication errors with your car and even improve charging efficiency. Beyond the software, I keep a small kit of the essential spare parts to keep for your home charging unit, including a spare J1772 holster and a high-quality terminal cleaner. Over time, the silver-plated contacts on your plug can oxidize, leading to increased resistance. A quick spray of contact cleaner once a year prevents that friction-induced heat from damaging your car’s charging port.
Prepare Your Garage for the Multi-EV Future
Most of us start with one electric car, but the second one is usually right around the corner. If you’re already seeing your current setup struggle, you need to look into panel upgrade strategies to meet ev charging code requirements in 2025. I recommend looking at dual-head chargers or smart load-sharing systems now, rather than later. You can learn how to upgrade your homes service for dual ev charging without necessarily ripping out your entire main service line if you use the right power management tools. The future of home charging is dynamic; soon, our cars won’t just take power, they’ll give it back to the house during peak hours. If you want to stay ahead of the curve, my best advice is this: get a torque wrench, set it to the manufacturer’s spec (usually 20-50 inch-pounds for most lugs), and re-verify your connections every year. It takes ten minutes and could save you a five-figure repair bill. Try doing a thermal scan during your next charging session and see if any ‘hot spots’ surprise you.
What I Learned After Nearly Frying My Entire Home Network
Looking back at that flickering TV and the whining charger, I realize that the biggest threat wasn’t a faulty product, but a lack of respect for sustained thermal load. Here are the core truths I live by now. First, tight isn’t the same as torqued. I used to think a good ‘grunt’ with a screwdriver was enough, but it is not. Using a calibrated tool to prevent creeping lugs is the only way to sleep through the night. Second, a loose neutral is significantly more dangerous than a standard short circuit. While a short trips a breaker instantly, a loose neutral raises the voltage and quietly destroys your most expensive possessions while the breaker stays perfectly happy. Finally, you must check the thermal signature when the system is working at its hardest. Don’t just look at it while it’s idle; you need to see how the panel handles heat during a peak 48-amp pull. Often, troubleshooting-ev-chargers-common-compliance-pitfalls-and-fixes reveals that problems only manifest after an hour of heavy draw.
Gear Every EV Owner Should Keep in Their Toolbox
If you want to avoid ev-charger-troubleshooting-expert-tips-for-common-issues calls at 2 AM, I highly recommend picking up a few items. First, a digital torque screwdriver is non-negotiable for anyone doing their own checks; it’s the only way to know you aren’t crushing your wire strands or leaving them too loose. Second, an infrared thermometer allows you to see the invisible heat that precedes a fire. I also keep a physical copy of the electrical code nearby to double-check code compliance essentials for ev charger installations in 2025 whenever I make a tweak. Finally, a can of electrical contact cleaner is perfect for keeping your J1772 pins from building up resistance over years of daily use in dusty garages. These simple tools turn guesswork into a data-driven maintenance routine.
The Peace of Mind That Comes from a Rock-Solid Connection
Taking the time to verify your home’s electrical health isn’t just about passing an inspection—it’s about protecting your family and your biggest investment. Whether you are ensuring code compliance when installing ev chargers for the first time or managing a complex multi-car setup, the physics remains the same. A well-maintained system doesn’t just run more efficiently; it runs silently and safely in the background, allowing you to enjoy the benefits of electric driving without the constant anxiety of a potential failure. When you finally get that perfect, cool-running circuit verified by how to verify code compliance for your ev charger installation, you’ll realize the extra effort was worth every minute of scrutiny. Have you ever checked your breaker panel during a charging session and felt an unexpected hot spot? Let me know in the comments below!