I spent three days sweatily wrestling conduit through my attic, thinking I had nailed the perfect home EV setup, only to have a city inspector tell me my subpanel was a ticking time bomb. My mistake? I assumed a subpanel worked exactly like the main service entrance. I had bonded the neutral and ground wires together on the same bar—a classic rookie error that nearly cost me my permit and potentially my safety. If you are setting up a charging station, you need to understand why that second ground bar is not optional. Today, I am going to show you exactly how to avoid the ground-loop trap so your car charges safely every single night.
Stop Mixing Your Neutrals and Grounds in the Garage
When you install a subpanel to handle a high-draw Level 2 charger, you cannot just copy-paste the wiring layout from your main breaker box. In your main panel, the neutral and ground wires are bonded together on a single bus bar, but the moment you move downstream to a subpanel, those two paths must be strictly separated. This is not just about being a stickler for the rules; it is about basic physics. When you how to ground your ev charger according to the latest standards, you are ensuring that electricity has a clear, isolated path back to the source if a fault occurs. If you share that bar in a subpanel, you risk objectionable current flowing through the metal casing of your equipment. It is a hidden danger of loose neutral wires and improper bonding that many DIYers overlook until they feel a tingle when touching the charger handle.
Is a second ground bar actually worth the extra five bucks?
It feels like a bit of a scam, right? Buying a separate piece of copper just to screw it into the back of a metal box. But the National Electrical Code (NEC) Section 250.24(A)(5) is incredibly clear: load-side grounding must be separate from the neutral. According to data from the Electrical Safety Foundation, improper grounding remains a leading cause of residential electrical fires. I learned the hard way that ensuring code compliance when installing ev chargers is not about satisfying bureaucracy; it is about making sure your car does not trip the breaker every time the humidity spikes.
Why the Neutral-Ground Bond is a Disaster for EV Circuits
When I first started, I thought, “Hey, it all goes to the same earth eventually, right?” Wrong. Modern EV chargers are sensitive, high-tech beasts. They constantly monitor the health of the ground connection before they even start the flow of power. If you have a noisy ground because your neutral current is piggybacking on it, your smart charger might simply refuse to work. This leads to those frustrating mornings where you find your charger trips the GFCI even when not in use. Have you ever woken up to a dead car because your subpanel was not wired with a dedicated ground? Let me know—I have been there, and it is a total day-ruiner. We need to look at specific panel upgrade strategies that will keep your garage safe and your charging speeds consistent.
Give Your Ground Wires Their Own Dedicated Lane
Imagine the neutral and ground wires like two different commuter groups. In your main service panel, they share a carpool lane because the utility company wants a single path back to the transformer. However, in a subpanel, mixing them is like forcing a high-speed train onto a narrow bike path. You must physically remove the “bonding screw”—usually a green-headed bolt—that connects the neutral bar to the metal casing of the subpanel. Then, you bolt in a separate ground bar directly to the metal box. This creates a dedicated “expressway” for fault current that doesn’t interfere with the normal return path of your charger’s electricity. Fixing this is one of the most code compliance essentials for ev charger installations in 2025 that separates a professional setup from a fire hazard.
Stop Guessing on Those Lug Screws
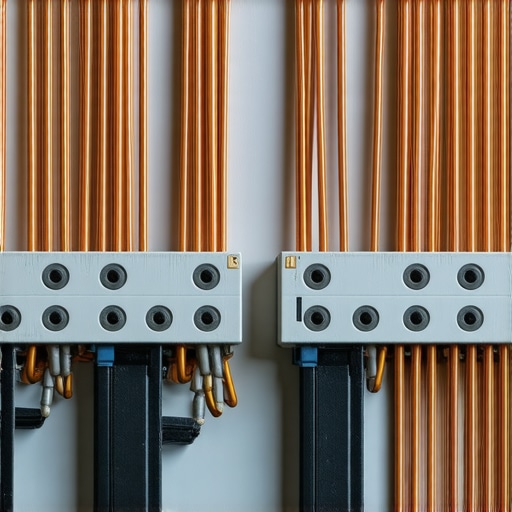
I used to think that “hand-tight plus a quarter turn” was the gold standard for electrical work. I was wrong, and I eventually found a charred 50-amp breaker to prove it. High-draw appliances like Level 2 chargers pull massive current for hours on end, causing the wires to expand and contract with the heat. If your connections are not tightened to the exact inch-pound specification required by the manufacturer, they will eventually wiggle loose. This creates a microscopic gap where electricity jumps—an arc—that generates enough heat to melt a plastic housing before the breaker even thinks about tripping. You must use a calibrated torque screwdriver. Following the specific torque settings that prevent panel fires during high load charging is the only way to sleep soundly while your car gulps down kilowatts. It is one of the most common diy mistakes in home charger installations that is incredibly easy to avoid if you simply read the label on the side of the breaker housing.
Use Real Copper for High-Draw Circuits
Aluminum wire is a budget-friendly choice for main service entrances because it is light, but for the “last mile” to your garage charger, I always advocate for copper. Aluminum requires significantly larger diameters to carry the same current and is prone to oxidation, which increases electrical resistance over time. When you are looking at the difference between copper and aluminum for ev wiring, remember that copper is a much better thermal conductor. In my own home setup, I actually swapped out a run of aluminum for copper because the lugs were getting uncomfortably warm during mid-summer charging sessions. If you are already pushing the limits of your electrical capacity, you might also want to how to load test your house before adding a second charger to ensure your subpanel doesn’t sweat when the AC and the car are running simultaneously. It is about upgrading your panel for better ev charging performance and long-term reliability.
Hide Your Wires Without Violating Code
Running conduit through a finished ceiling or a garage wall is where many DIYers get caught by the inspector. I once tried to tuck a cable behind a piece of trim just to avoid a difficult 90-degree bend, but a professional inspector will fail that instantly for lack of mechanical protection. You need to know how to run ev charging conduit through a finished ceiling using the correct hangers and support intervals. If your project involves going underground, pay close attention to the conduit depth rule that fails more garage inspections than anything else—typically 18 inches for PVC. Cutting corners here means digging it all up again later when the city refuses to sign off on your permit.
The 80 Percent Rule is Not a Suggestion
Many homeowners think that if they have a 50-amp breaker, they can safely pull 50 amps for eight hours straight. This is a dangerous misconception that frequently leads to scorched busbars. In the world of electrical code, EV charging is classified as a continuous load. According to the National Fire Protection Association (NFPA) 70, any load that runs for three hours or more must be derated by 20%. This means your 50-amp circuit is actually only rated for a 40-amp continuous draw. If you try to push 48 amps through a 50-amp breaker, you aren’t just pushing your luck; you are violating how to verify code compliance for your ev charger installation guidelines. Have you ever fallen into this trap? Let me know in the comments.
Why does your charging speed drop when the AC kicks on?
If you notice your car suddenly takes twice as long to charge during a heatwave, it might not be a glitch in the car’s software. Modern smart panels and energy management systems are designed to protect your home from an overload. This is the reason your charging speed drops when your ac kicks on. The system detects that the total household draw is approaching the main breaker’s limit and throttles the EV charger to prevent a total blackout. Understanding these troubleshooting ev chargers common compliance pitfalls and fixes can save you from calling an electrician for a ‘broken’ charger that is actually just doing its job to protect your house.
Stop Buying Service Upgrades You Do Not Actually Need
The standard advice from most electricians is that if you want to add an EV charger to a 100-amp or 125-amp panel, you must upgrade your entire service to 200 amps. I’m going to challenge that. While a service upgrade is the ‘cleanest’ solution, it is often a $3,000 expense that you can avoid. You can often implement how to load balance your home electrical system without a full panel swap by using a Load Management Device (LMD). These devices monitor your main service wires and only allow the EV charger to pull power when there is ‘headroom’ available. It is a sophisticated way of upgrading your panel for better ev charging performance without the utility company having to dig up your front yard.
The Cheap Outlet Trap
If you decided to go with a plug-in Level 2 charger rather than a hardwired unit, listen closely: your $15 big-box store outlet is a fire hazard. Standard NEMA 14-50 outlets are designed for dryers or ovens that cycle on and off. They are not built for the intense, sustained heat of an EV. I have seen dozens of these ‘residential grade’ outlets melt or even catch fire within six months of use. You must invest in an industrial-grade receptacle. Learning how to pick a nema 14-50 outlet that wont melt under pressure is perhaps the most important safety step for any DIYer. These high-end outlets use heavy-duty copper contacts that can handle the thermal stress of a 40-amp draw for ten hours every single night. It’s a small price to pay for the peace of mind that comes with a truly ensuring code compliance when installing ev chargers setup.
Invest in a Thermal Camera to See What Your Eyes Miss
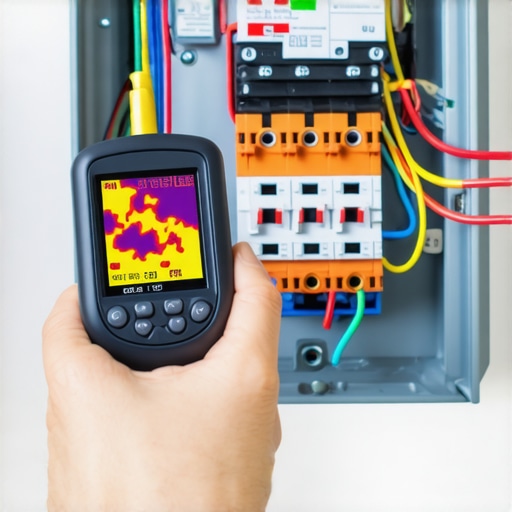
Once you have that heavy-duty outlet in place, the real work shifts toward long-term reliability and monitoring. Most homeowners never look at their electrical panel again after the permit is signed, but that is a mistake. I personally use a compact thermal imager—specifically a FLIR One or a similar sensor—to scan my subpanel and charger handle twice a year. High-load charging generates consistent heat, and a thermal scan can reveal a loose connection or a failing breaker long before you smell burning plastic. If you see a hot spot where one wire is significantly warmer than its neighbors, you are looking at a potential fire hazard. This proactive approach is one of the best ev charger troubleshooting expert tips for common issues because it catches problems while they are still invisible to the naked eye. It helps you how to spot a dying breaker before it shuts down your charging session and protects your vehicle investment.
How do I maintain my home charging station over time?
Maintenance is not just about the wires; it is about the physical environment where your hardware lives. If your charger is outdoors, you need to perform 3 maintenance tasks that keep your outdoor charger running through winter, such as inspecting the plug for spider nests and ensuring the enclosure gaskets are not cracking from UV exposure. I recommend applying a small amount of dielectric grease to the pins of a NEMA 14-50 plug to prevent moisture-induced corrosion. Inside the panel, the the specific torque settings that prevent panel fires during high load charging should be re-verified after the first month of heavy use. Copper expands and settles under thermal load, and a quick check ensures everything remains rock solid. This is a core part of ensuring code compliance when installing ev chargers for the entire lifespan of your equipment.
Get Ready for the Bidirectional Charging Revolution
We are moving toward a future where your car doesn’t just take power from the house—it gives it back. New technical standards like ISO 15118-20 are paving the way for Vehicle-to-Home (V2H) technology. In just a few years, your EV charger will double as your home’s backup generator. To prepare for this, focus on upgrading your panel for better ev charging performance now, ensuring you have the physical space for the specialized inverters these systems require. Even if you aren’t ready for V2H today, knowing how to load balance your home electrical system without a full panel swap is the foundation for an energy-aware home. According to the NFPA 70B standard for electrical equipment maintenance, regular thermal inspection and cleaning are non-negotiable for systems under continuous heavy stress like EV circuits.
Your Next Move for a Bulletproof Setup
If you want to move beyond the basics of troubleshooting ev chargers common compliance pitfalls and fixes, here is my advanced tip: install a dedicated whole-house surge protector directly on your main panel. A single utility surge can fry the sensitive logic boards in both your charger and your car’s onboard converter. It is a small insurance policy for an expensive vehicle. Before you wrap up your project, use a multimeter to perform how to verify code compliance for your ev charger installation checks on your voltage drop under load. If your voltage drops more than 3 percent when the car starts charging, your wire gauge might be insufficient. Fix it now, and you will never have to worry about a charging error again.
The Hardest Lessons I Learned in the Attic Trenches
After years of tinkering with subpanels and high-draw circuits, I’ve realized that the most dangerous mistake isn’t a lack of effort—it’s a lack of awareness. Here is what I wish I had known before I started: Heat is the ultimate tattletale. Even if your wiring looks beautiful, a single loose lug can cause a thermal event that melts components without ever tripping a breaker. I also learned that electrical ‘noise’ is real; a poorly grounded charger can actually cause interference with your home’s Wi-Fi or smart devices. Finally, never underestimate the physical weight of a heavy 6-gauge copper cable. Over time, the mere weight of the wire can pull on your terminals if they aren’t properly secured with cable clamps, leading to the exact loose connections we’ve been trying to avoid. Troubleshooting these expert-level issues requires a shift in mindset from ‘getting it done’ to ‘maintaining it forever.’
Tools That Saved My Sanity and My Safety
You don’t need a truck full of equipment, but three specific things changed the game for me. First, a calibrated torque screwdriver—specifically one that measures in inch-pounds—is the difference between a fire hazard and a professional install. Second, I cannot recommend a basic thermal imaging camera enough; it allows you to see the heat profile of your panel under full load. Lastly, the NEC Handbook is my constant companion. If you aren’t sure about your local requirements, I highly suggest you learn how to find an electrician who actually understands ev codes to review your work. For a final layer of defense, consider 3 signs you need a whole house surge protector for your ev to keep your car’s expensive computer safe from external grid spikes.
Build a Garage That Powers Your Future
Setting up your own charging infrastructure is one of the most rewarding home improvement projects you can tackle. It transforms your garage from a simple storage space into a high-tech fueling station for the next generation of transport. By focusing on how to verify code compliance for your ev charger installation, you aren’t just checking a box for the city inspector—you are building a reliable system that will serve your family for a decade or more. Don’t be intimidated by the conduit or the grounding bars; take it one step at a time, respect the amperage, and you’ll have a setup that rivals any professional job. Have you ever run into a situation where a city inspector asked for something totally unexpected in your subpanel? Let me know in the comments below!