I still remember the sinking feeling in my stomach as I looked from my shiny new Tesla to the perfectly smooth, painted drywall of my garage ceiling. I’d just spent a weekend researching panel upgrades for EV chargers, only to realize the hardest part wasn’t the wiring—it was the obstacle course hidden behind that plaster. If you are like me, the idea of cutting a dozen holes just to get power to your car feels like a betrayal of your home’s aesthetic. I almost settled for an ugly, surface-mounted pipe until my ‘lightbulb moment’ happened: I realized that with the right fish tape and a bit of patience, I could keep the conduit hidden and the marriage intact. Today, I’m going to show you how to thread that needle so you can hide EV charger wires for a clean garage look without losing your mind. Have you ever stared at a wall and wondered if there was a secret tunnel you were missing? Let me know in the comments if you’ve been paralyzed by the fear of a ‘Swiss cheese’ ceiling!
Stop Staring at Your Ceiling and Start Fishing
Running conduit through a finished space is basically a high-stakes game of Operation. One wrong move and you hit a joist or a plumbing line. Early on, I made the classic rookie mistake of not checking for fire blocks, which meant my wire got stuck exactly halfway through. It was frustrating and entirely avoidable. Ensuring code compliance essentials for EV charger installations means you can’t just drill blindly. According to the National Electrical Code (NEC), you have to be incredibly careful about where and how you notch or drill into load-bearing joists to maintain structural integrity. I learned the hard way that a small inspection camera is your best friend when navigating these tight spaces.
Is Hiding the Conduit Really Worth the Extra Effort?
Some folks will tell you to just slap some EMT on the surface and call it a day. While that’s faster, it’s also a constant reminder of a job done halfway. If you’re worried about the most common DIY mistakes in home charger installations, failing to plan your route is number one. We’re going to dive into the tools and the specific ‘sneaky’ techniques that make this possible without requiring a full ceiling renovation later. Trust me, the extra hour spent fishing the line is worth every second when you see that clean finish.Running a wire through a finished ceiling is like navigating a maze in the dark. Before you even touch a drill, you need to map out the joist direction. Most garage joists run perpendicular to the house, but don’t bet your drywall on it. I once spent a grueling Saturday afternoon chasing what I thought was an open channel, only to realize I was trying to fish through a solid 4×12 header. If I had just used an inspection camera or even a small pilot hole, I wouldn’t have turned my ceiling into a polka-dot pattern of ‘oops’ holes. This is where you really need to how to verify code compliance for your ev charger installation because every hole you cut weakens the fire barrier of your garage. 
Find the Gaps Where Your Wires Can Hide
You can’t just shove Romex into a wall and hope it comes out the other side. You need a fiberglass glow rod or a steel fish tape. Think of the glow rod as your guide dog in the dark attic space; it is rigid enough to push through insulation but flexible enough to bend around slight obstructions. While you are at it, make sure you are using the exact wire gauge you need for a 50-amp ev circuit to avoid overheating later. Many DIYers try to use thinner wire because it is easier to fish, but that is a recipe for a melted garage panel.
Cut Small and Save the Drywall Scraps
If you hit a fire block—those horizontal pieces of wood between studs—you are going to have to make an access hole. Don’t cut a giant square. Use a 2-inch hole saw to create a clean circle. Save the ‘puck’ of drywall you cut out! It makes the patch job five times faster. This is also the perfect time to ensure you are upgrading your panel for better ev charging performance so that once the wire is through, the system actually works. When you finally reach the mounting point, remember the tips on how to mount a charger on drywall without it ripping out because a heavy Level 2 station needs more than just a prayer and a plastic anchor to stay on the wall.
How to Turn Corners Without Losing Your Mind
The biggest headache is the 90-degree turn from the ceiling down into the wall. This is where most people give up and go surface-mount. If you are struggling, you can use a ‘long-sweep’ elbow hidden behind a slightly larger access panel. Keeping things tucked away is great, but don’t ignore the conduit depth rule that fails more garage inspections than anything else if any part of your run goes near the floor or outside. Also, when choosing your conductors, understand the difference between copper and aluminum for ev wiring because the physical thickness of aluminum makes it significantly harder to fish through tight bends than copper.Once you’ve mastered the art of fishing wire, you enter the realm of the ‘advanced’ installer—the person who knows that what happens inside the panel is just as important as how straight the conduit looks on the wall. Most homeowners assume that once the car starts charging, the job is a success. However, I’ve seen countless ‘pro’ installs fail because they ignored the invisible ‘Oops’ factor: thermal expansion under continuous load.
Stop Guessing at Your Breaker Torque
You might think you have a strong grip, but a circuit breaker lug requires a very specific amount of pressure to handle 48 amps for hours on end. If you don’t use a torque screwdriver to hit the specific torque settings that prevent panel fires during high load charging, the metal will expand and contract as it heats, eventually loosening the connection. According to a report by the Electrical Safety Foundation International (ESFI), nearly 15% of residential electrical fires involve faulty wiring or overloaded circuits where termination issues are a major contributor. This is one of those the most common diy mistakes in home charger installations that leads to melted plastic and expensive repairs. Have you ever fallen into this trap of ‘hand-tightening’ your lugs? Let me know in the comments if you’ve noticed your panel feels warm to the touch! 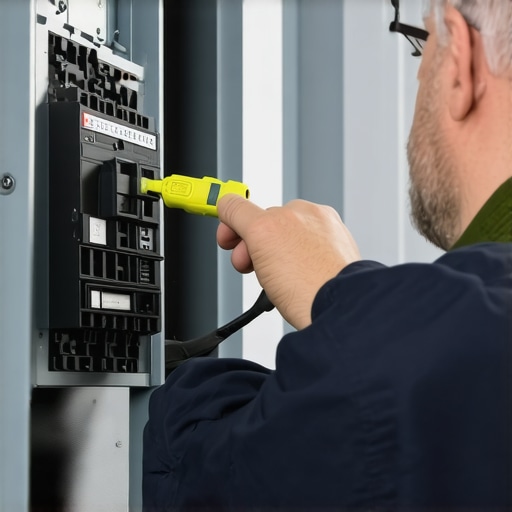
The 200-Amp Myth That Costs You Thousands
A common belief is that adding a Level 2 charger requires an immediate $3,000 service upgrade to a 200-amp panel. In my experience, this is often unnecessary. You can often save a fortune by learning how to load balance your home electrical system without a full panel swap. Using a smart energy management system allows your charger to ‘talk’ to your panel, slowing down the car’s draw when the electric range or dryer is active. This is the sophisticated way to stay within your power budget while still getting a full charge by morning.
Why Does My Breaker Trip When I’m Not Even Charging?
This is the ultimate troubleshooting nightmare. If you’ve installed a GFCI breaker for a charger that already has its own internal GFCI protection, you’ve likely created a ‘nuisance trip’ scenario. It’s a frequent headache when you try to how to verify code compliance for your ev charger installation because the latest codes demand GFCI for garage outlets, but manufacturers’ internal safety checks often trigger external breakers. Understanding why your ev charger trips the gfci even when not in use is critical to avoiding the frustration of a dead battery. These are the ev charger troubleshooting expert tips for common issues that go beyond the manual. If you’re seeing ghost trips, it’s time to stop looking at the wire and start looking at the communication between your safety devices.I’ve learned the hard way that an EV charger isn’t a ‘set it and forget it’ appliance like a toaster. It’s a high-performance machine pulling massive amounts of current through your home’s arteries for hours. To sleep soundly, I swear by a tool most DIYers overlook: a handheld thermal imager. I’m not talking about an expensive industrial rig; even a plug-in smartphone attachment works. Once a month during a heavy charging session, I scan my panel. If I see a bright white glow around a lug, I know I have a loose connection before it becomes a fire hazard. This is the best way to see why your breaker gets hot to the touch during charging and catch it before the plastic starts to bubble.
The Maintenance Routine That Stops Mid-Night Failures
Beyond the panel, the charging handle itself takes a beating. Rain, dust, and even spiders can get into those ports. I make it a habit to inspect the pins every season. If they look dull or blackened, you’re looking at resistance, which equals heat. I use a specific electronics cleaner and a soft brush because knowing how to clean the pins on your charging handle safely can add years to the life of your car’s expensive charging port. For those of you with exterior setups, don’t ignore the weatherproofing. There are 3 maintenance tasks that keep your outdoor charger running through winter, including checking the seal on your NEMA enclosure for condensation. 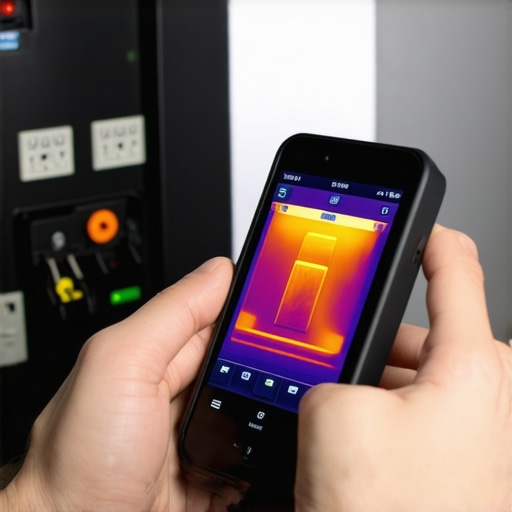
How do I maintain my charging speed over years of use?
Software is the hidden variable. Just like your phone, your charger needs updates. I’ve seen charging speeds drop by 30% simply because the station’s onboard computer was running an outdated handshake protocol with the car’s BMS. Learning how to update the firmware on your smart charging station is a non-negotiable skill now. Also, keep an eye on your home’s overall health. If you start noticing lights dimming, it might be time for 3 signs you need a whole house surge protector for your ev to shield that $600 wall connector from grid spikes.
Plan for the Second EV Before You Need It
The most common question I get is: ‘What if we buy another electric car?’ If you’re already at the limit of your 100-amp service, you’ll need a strategy. You don’t necessarily need a second service drop, but you might need to look into how to upgrade your homes service for dual ev charging using a shared-circuit load manager. According to the NFPA 70B, Standard for Electrical Equipment Maintenance, regular visual and thermal inspections are the primary defense against electrical failure in continuous-load systems. My prediction? Within five years, smart panels with built-in thermal sensors will be the standard for any home with an EV. For now, we have to be the sensors. If you want to stay ahead of the curve, I highly recommend buying a torque screwdriver and re-checking your breaker lugs exactly 30 days after your first charge—you’d be surprised how much they can settle.
The Stealthy Lessons I Learned After the Inspection Passed
Getting that green tag from the city inspector is a great feeling, but the real test starts when you plug in your car for the first time. I realized quickly that the work isn’t truly done until you’ve verified the system under a full 10-hour load. One of my biggest lightbulb moments was realizing that even if you followed all the ensuring code compliance when installing ev chargers tips, things can still shift. I make it a point to check my garage lights; if I notice them dimming, I look into how to stop your garage lights from flickering when the car starts charging because it’s usually a sign of a voltage drop or a loose neutral.
I also learned that documentation is your best friend for resale value. Keep a folder with your permits and photos of the wiring before the drywall went back up. This prevents troubleshooting ev chargers common compliance pitfalls and fixes later when a future buyer asks how the work was done. It turns a simple DIY project into a legitimate home upgrade that adds real equity.
Tools That Saved My Garage From a Meltdown
If you want to move beyond a basic DIY setup, there are three items I never go without. First, a high-quality torque wrench is non-negotiable for those breaker lugs; hand-tight isn’t a measurement. Second, a non-contact voltage tester is a twenty-dollar lifesaver when you’re working in crowded panels. Finally, I highly recommend a thermal camera attachment for your phone. Being able to see heat signatures helps you identify the forgotten inspection step that voids your charger warranty if a connection is running hot. These tools allow you to execute panel upgrade strategies to meet ev charging code requirements in 2025 with surgical precision rather than guesswork.
Own Your Home’s Energy Future Today
Upgrading your garage isn’t just about convenience; it’s about making your home ready for the next decade of technology. When you take the time to hide those wires and balance the load correctly, you’re creating a space that feels intentional and modern. Don’t be intimidated by the complexity of how to verify code compliance for your ev charger installation; once you have the right tools and a clear plan, you’ll be amazed at how much you can accomplish on your own. Have you ever started an electrical project only to find a surprise waiting behind your drywall? Let me know about your biggest “oops” moment in the comments below!