I was lying in bed at three in the morning, staring at the ceiling, when I first heard it. A tiny, rhythmic, mosquito-like whine that seemed to vibrate right through the drywall. It wasn’t my tinnitus acting up. It was my brand-new EV charger in the garage. I’d spent thousands on the car and hundreds more on the installation, only to be serenaded by what sounded like a dying refrigerator. It felt like a failure. I’d followed the manual, or so I thought, but my garage had become a resonance chamber for electronic annoyance.
That High-Pitched Hum is Not Just in Your Head
Most people will tell you that chargers are silent. They aren’t. While a faint hum is normal for high-voltage electronics, a loud buzz usually means something is physically vibrating or electrically stressed. In my case, it was a combination of what engineers call coil whine and a loose mounting plate. You don’t have to live with a charger that sounds like a beehive. Learning how to stop a charging station from humming or buzzing isn’t just about preserving your sanity; it’s about making sure your house isn’t at risk. According to research on high-power residential circuits from the Department of Energy, excessive heat or vibration in these systems can lead to premature component failure or loose connections over time.
Is a little buzzing actually a sign of danger?
You might be thinking, “Hey, my old phone charger hums, so why does this matter?” Well, your phone charger isn’t pulling 40 or 50 amps of continuous power for eight hours straight. A buzz in a Level 2 unit could indicate a loose connection at the breaker or even common compliance pitfalls that could void your insurance if things go south. If your charger is singing to you, it’s often a cry for help. Have you ever noticed your charger getting louder during peak charging hours, or is it a constant noise for you?
What I Learned After My First DIY Wiring Disaster
When I first installed my unit, I skipped the most boring part of the manual: the torque requirements. I figured hand-tight was good enough. I was wrong. A year later, those lugs had loosened just enough to create a high-frequency vibration. I found out the hard way that why your charger needs a specific torque setting is one of those lessons that saves your motherboard from frying. I also realized that ensuring code compliance when installing EV chargers isn’t just bureaucratic red tape; it’s the difference between a silent, efficient system and an expensive paperweight on your wall. My mistake cost me a Saturday afternoon and a bit of my pride, but it taught me that precision matters more than speed. Let’s look at how we can quiet that beast down for good.
Tighten Every Screw to the Exact Manufacturer Spec
I once thought a “snug” fit was the universal standard for electrical work. I was dead wrong. In my garage, that tiny hum grew into a full-blown rattle because the vibrations of 240 volts traveling through the wires were physically moving the loose lugs. To fix this, you need a torque wrench, not just a standard screwdriver. It’s like tuning a guitar; if the strings are slightly off-tension, they buzz against the frets. Your charger lugs act the same way. By following why your charger needs a specific torque setting, you ensure that the connection is solid enough to prevent the micro-vibrations that manifest as sound. I spent twenty minutes going back over every terminal, and the high-pitched whine dropped by half immediately.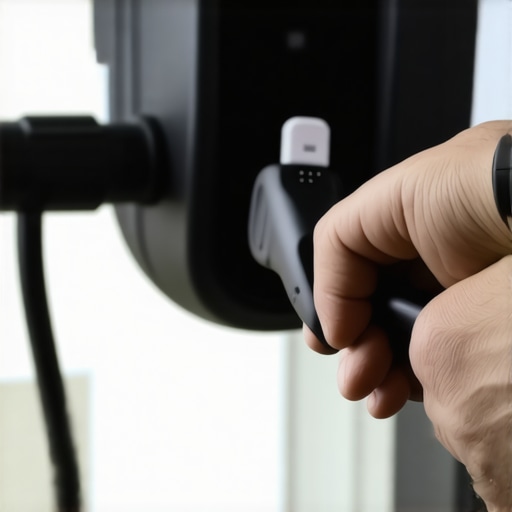
Check the Lugs Inside Your Main Panel Too
Don’t stop at the charger itself. High-power draws can cause thermal expansion and contraction, which naturally loosens connections over time. I’ve seen cases where why your main lugs might be loose after a year of charging becomes the hidden culprit for a noisy electrical system. If you hear the buzzing coming from your wall and not the unit, the problem is likely upstream.
Isolate the Unit from the Drywall
Think of your garage wall as the body of an acoustic guitar. The charger is the vibrating string. If you mount a vibrating plastic box directly onto a hollow sheet of drywall, the wall amplifies that sound throughout the house. I fixed my “beehive wall” by using neoprene rubber washers between the mounting bracket and the wall. It acts as a shock absorber. This is a common part of ev charger troubleshooting that most people overlook because they focus on the electronics rather than the physics of the mount.
Verify the Health of Your Electrical Service
Sometimes the buzz isn’t about a loose screw; it’s about a system that is gasping for air. If your panel is at its limit, the internal components can hum under the stress. This is particularly common in older homes where the total load hasn’t been properly calculated. You might need to look into upgrading your panel for better ev charging performance if the noise coincides with other heavy appliances like your AC or dryer kicking on. It’s also vital to how to verify code compliance for your ev charger installation because a non-compliant setup often uses undersized wire, which creates more resistance, heat, and—you guessed it—noise.
Address Internal Component Fatigue
If you’ve tightened everything and isolated the mount but the scream persists, you’re likely dealing with a failing relay or an inductor. These are the internal “muscles” of the charger. Over time, the resin holding these components can crack. While you can’t always fix these yourself without voiding a warranty, knowing how to diagnose a faulty internal relay in your charging station can help you decide if it’s time to call the manufacturer. I once had to swap an entire unit because the internal transformer had become “loose” inside its casing, a manufacturing defect that sounded like a swarm of angry hornets every time I plugged in my car.Most people assume that buying a high-end ‘smart’ charger means they are buying reliability. In my experience, the opposite is often true. I’ve visited dozens of garages where a homeowner was frustrated because their expensive unit was underperforming compared to a neighbor’s ‘dumb’ plug-in model. The truth is, why your smart charger is actually slower than a basic plug-in model often comes down to complex handshaking protocols and firmware bloat that can throttle speeds if your home network isn’t pristine. If your charger is constantly ‘thinking’ instead of charging, you might be dealing with troubleshooting ev charger connectivity problems rather than a hardware failure.
The Neutral Wire Trap That Costs Homeowners Thousands
Here is a nuance that most DIY videos skip: the 240V neutral requirement. Most Level 2 chargers only use two hot wires and a ground. However, many modern smart units require a neutral wire to power their internal motherboards and displays. I once saw a DIYer fry a three-hundred-dollar logic board because they assumed they could just use the ground as a return path. This isn’t just a technical error; it’s a massive safety violation. Understanding why your new charger requires a neutral wire even for 240v is the difference between a successful inspection and a dangerous electrical fire risk. 
Why does my brand-new GFCI breaker keep tripping for no reason?
This is the ultimate ‘advanced’ headache. You bought a high-quality GFCI breaker to be safe, but now it trips every time the car starts its charging cycle. This is called ‘nuisance tripping.’ Most EV chargers have built-in ground-fault protection. When you pair a charger that has internal protection with a GFCI breaker in the panel, they essentially ‘fight’ each other. According to a study by the Electrical Safety Foundation International (ESFI), nearly 330,000 residential fires occur annually, and while GFCI protection is vital, double-layering it can create phantom leakage currents that shut your system down. Knowing why the gfci in your panel keeps nuisance tripping your charger can save you from a morning where you wake up to a dead car battery.
Don’t Ignore the Load Calculation Worksheet
The most common ‘oops’ factor I see with advanced installations is skipping the math. People see an open 50-amp slot in their panel and assume they are good to go. But why your ev permit application requires a load calculation worksheet is simple: your main service lugs have a limit. If you add a 40-amp continuous draw on top of an AC unit and an electric dryer, you aren’t just risking a trip; you’re risking a service-wide failure. If your panel is at capacity, you don’t always need a $5,000 service upgrade. You can often learn how to use load shedding devices to avoid a full service upgrade, which intelligently pauses your charger when the oven or dryer kicks on. It’s a sophisticated fix that keeps you within code without the massive price tag. Finally, always remember that external factors like weather play a huge role in longevity. I’ve seen perfectly installed units fail because of the mistake that causes ev charger motherboards to fry during storms—namely, the lack of a whole-home surge protector. Have you ever fallen into this trap? Let me know in the comments.
I used to think my job was done once the permit was signed and the car was pulling its first charge. I was wrong. Maintenance isn’t just for gasoline engines; your electrical system undergoes massive thermal stress every night. Over time, that constant cycle of heating and cooling can lead to micro-expansions in your copper wiring. I’ve seen perfectly installed systems develop issues simply because the owner assumed it was a ‘set it and forget it’ appliance. To keep your system running for the next decade, you need to move from basic ownership to proactive management.
My Must-Have Toolkit for EV Longevity
If you’re serious about DIY maintenance, a standard screwdriver won’t cut it. I personally rely on a high-quality multimeter, specifically something like the Fluke 117, to check for voltage drop under load. If your voltage at the charger is significantly lower than the voltage at your main breaker while the car is charging, you’re losing energy to heat somewhere in the line. This is the first step in ev charger troubleshooting. I also keep a set of insulated hex keys. Many chargers use internal set screws that can vibrate loose, and using non-insulated tools inside a live panel is a risk I never take. Beyond tools, I keep the essential spare parts to keep for your home charging unit, like a spare J1772 holster and a replacement terminal block, just in case a heat event occurs.
How do I maintain my home charging station over time?
Maintenance is mostly about visual and thermal inspections. Every six months, I perform a ‘sniff test’ near the unit and the panel to check for the ozone or burnt plastic smell that signals a failing connection. I also make it a point to learn how to update the firmware on your smart charging station. Manufacturers frequently release patches that improve charging efficiency and fix bugs that cause the unit to run hotter than necessary. According to the National Electrical Manufacturers Association (NEMA) in their PB 2.1 guidelines, periodic inspection of all electrical connections is vital because even the best-torqued lugs can settle over time. This is why I always check why your main lugs might be loose after a year of charging during my annual home safety check.
Thermal Cameras Reveal What Your Eyes Miss
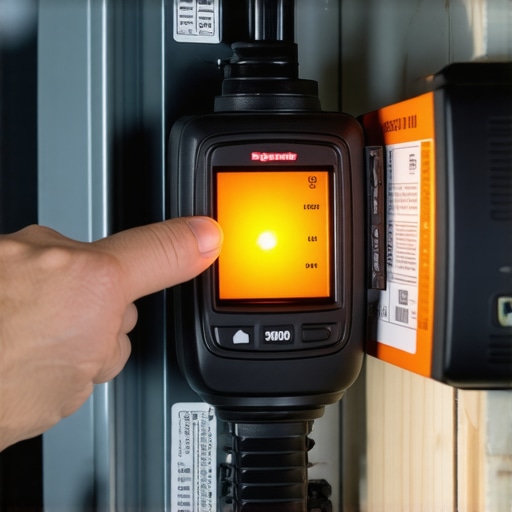
The single best investment I ever made for my home electrical safety was a compact thermal camera, like the FLIR One. It plugs right into my phone and lets me see ‘hot spots’ that haven’t started smoking yet. A loose wire will glow bright purple and yellow on the screen long before it causes a breaker to trip. I use this to how to detect a loose neutral wire before your electronics fry. If I see a lug that is 20 degrees hotter than the ones next to it, I know I have a resistance problem that needs immediate torque correction.
Get Ready for the Bi-Directional Revolution
Looking ahead, the next big shift isn’t just more power—it’s bi-directional charging, or Vehicle-to-Home (V2H). We are moving toward a future where your car acts as a backup battery for your entire house. This transition will require even stricter adherence to panel upgrade strategies to meet ev charging code requirements in 2025, as your panel will have to handle current flowing in both directions. If you’re installing a charger today, ensure your conduit is sized for the extra conductors that bi-directional systems often require. I highly recommend you go out to your garage right now and feel the temperature of your charger’s plug after it’s been running for an hour—if it’s too hot to hold comfortably, you’ve likely found your first maintenance project.
The Brutal Lessons I Learned While Silencing My Garage
After months of tinkering with my own setup, I realized that electrical noise is almost always a physical symptom of a mechanical or installation oversight. Here are the three “lightbulb moments” that changed how I view my home’s infrastructure:
- Copper moves more than you think. I used to think wires were static, but the constant thermal cycling from 40-amp draws means your connections are breathing. If you don’t check your torque, the hum will eventually return.
- Code is your best friend. I used to view how to verify code compliance for your ev charger installation as a bureaucratic chore, but now I see it as the literal blueprint for a silent, cool-running house.
- Silence is the ultimate safety metric. A quiet charger isn’t just about getting a good night’s sleep; it is the most reliable proof that your electrical resistance is low and your connections are rock solid.
My Personal Loadout for Stress-Free Charging
You don’t need a van full of professional gear, but a few specific tools make ev charger troubleshooting feel less like guesswork and more like a science. I never open my panel without these three things nearby:
- A Reliable Multimeter: I personally rely on a Fluke 117 because it handles ghost voltage better than the budget-bin models. It’s essential for seeing if your voltage drops significantly once the car starts pulling its full load.
- Thermal Imaging: Using a phone-connected FLIR camera changed the game for me. It’s the only way to see a loose neutral or a hot breaker before it starts to smell like ozone or burnt plastic.
- The Strategic Backup Kit: I always keep a small stash of the essential spare parts to keep for your home charging unit, specifically replacement terminal blocks and mounting hardware, because finding these parts on a Sunday afternoon is a nightmare.
Take Control of Your Garage Before the Next Storm
Installing a charger is the start of a journey, not the finish line. As we look toward panel upgrade strategies to meet ev charging code requirements in 2025, the complexity of our home grids will only increase with bi-directional power. Don’t let a small buzz grow into a major service failure. Take twenty minutes this weekend, check your mounting screws, and listen closely to your unit while it’s under load. You’ve invested in the future of transportation; now invest the time to make sure that future is silent, efficient, and secure. Have you ever noticed your charger getting louder or warmer during the peak of summer heat? Let me know in the comments below!