I’ll never forget the faint, acrid scent of ozone and melting plastic that started wafting from my garage last July. I’d spent all weekend installing my brand-new Wall Connector, feeling pretty proud of my DIY prowess. I had the conduit straight, the wires pulled, and I’d tightened those terminal screws until my knuckles turned white. "Good enough," I thought. But three weeks of pulling 48 amps through those connections proved me wrong. When I finally popped the cover back off, one of the lugs was discolored, and the insulation on my wire was starting to char. I’d fallen into the most common trap in the EV world: I ignored the torque specs. It’s a humbling moment when you realize your "hand-tight" was actually a fire hazard. Today, I am going to save you from that same headache by breaking down exactly why those inch-pound numbers in the manual aren’t just suggestions—they are the only thing standing between a full charge and a fried motherboard. Have you ever noticed your charger getting unusually hot to the touch or smelled something "electronic" during a charging session? If so, you might be dealing with the same loose connections I did.
Get the Tension Right Before You Flip the Breaker
Most folks think that as long as the wire doesn’t wiggle, it’s secure. That is a dangerous myth. When you are dealing with the high-continuous load of an EV, thermal expansion is your biggest enemy. As electricity flows, the wire heats up and expands; when it stops, it cools and contracts. This "breathing" can slowly loosen a connection that wasn’t torqued to spec. This is precisely the reason your ev charger smells like burnt plastic after a few months of use. In fact, why your main lugs might be loose after a year of charging often comes down to this same lack of precision during the initial setup. If those lugs aren’t tight enough, you get high resistance, which leads to heat. If they are too tight, you can actually crush the wire strands or strip the lug, which is just as bad. Getting this balance right is why your charger needs a specific torque setting to pass inspection. Professional inspectors don’t just look at the wires; they often check for the tell-tale marks of a torque screwdriver.
Is a fancy torque wrench actually worth the money?
You might be tempted to skip the $60 tool and just use your favorite screwdriver. I get it. But according to the National Electrical Code (NEC) Section 110.14(D), using a calibrated torque tool is now a mandatory requirement for electrical connections where a torque value is provided by the manufacturer. It isn’t just about being a perfectionist; it’s about meeting code compliance essentials for ev charger installations in 2025. If there is a failure and the fire marshal sees you didn’t follow the manufacturer’s torque settings, your insurance company might start asking very uncomfortable questions. I learned the hard way that "feeling" 50 inch-pounds is impossible for the human hand. Now, let’s look at the actual numbers you need to set on your tool to ensure a rock-solid connection.
Stop Guessing with Your Family’s Safety
I used to think I had “calibrated fingers” until I bought an actual torque screwdriver. I remember helping my neighbor, Dave, with his 48-amp setup. He was convinced he’d tightened his lugs enough because he “cranked them down” until the tool left a dent in his palm. When we put a real torque wrench on it, the tool clicked immediately at 25 inch-pounds, but the manufacturer spec required 50. We were exactly 50% short on pressure. That gap is where fire starts. This is exactly how to verify code compliance for your ev charger installation—by proving the numbers, not just the effort. If you aren’t using a calibrated tool, you are essentially gambling with your garage. Think of your electrical connections like the lug nuts on a car wheel; “tight-ish” isn’t an option when you’re doing 70 mph down the highway, and it’s not an option when you’re pushing 11 kilowatts for eight hours straight.
Read the Fine Print on the Breaker
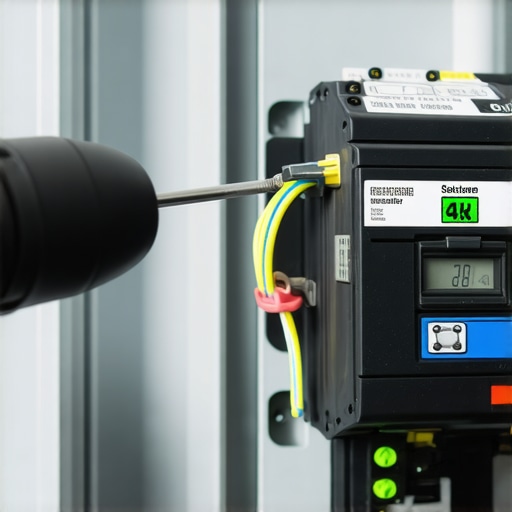
To do this right, you have to look for the torque value printed directly on the side of the breaker or inside the charger’s installation manual. It’s usually expressed in inch-pounds (in-lbs) or Newton-meters (Nm). You set your tool, tighten until it clicks, and you’re done. No more worrying if you’ve over-tightened and stripped the threads or left it too loose. This simple step is one of the most overlooked troubleshooting ev chargers common compliance pitfalls and fixes. While you’re in there, look for any signs of discolored copper. If the wire looks like it’s been through a toaster, you’ve already had a heat issue. You might also want to learn how to detect a loose neutral wire before your electronics fry, as a loose neutral in your main panel can cause voltage swings that kill your charger’s motherboard before you even finish the first charge.
Does Your Main Service Have the Muscle?
Before you even worry about the torque, you have to ensure your home can actually handle the load. Installing a 48-amp charger on a 100-amp service that is already running an electric range and an AC unit is a recipe for a tripped main breaker. This is why pros talk about panel upgrade strategies to meet ev charging code requirements in 2025. You cannot just keep adding straws to the camel’s back. Most homeowners ignore the hidden cost of skipping a panel load calculation until they find themselves sitting in the dark because the whole house shut down. A load calculation isn’t just math; it’s a map of your home’s electrical limits. If your panel is older, the heat generated by the EV’s continuous draw can cause ancient busbars to warp. It’s a physical reality: high current equals heat, and heat requires high-quality, perfectly seated connections to stay contained.
The 200-Amp Myth That Costs Homeowners Thousands
Common wisdom says if you do not have a 200-amp main service, you are stuck with slow Level 1 charging. I am here to tell you that is simply not true anymore. I have seen homeowners spend thousands on utility upgrades when they could have just used a smart management system. Learning how to add an ev charger without a 200-amp panel upgrade is a game-changer for older homes. By utilizing how smart chargers use dynamic balancing to prevent blown fuses, your car can actually listen to the rest of the house. When your HVAC kicks on, the charger throttles down for a few minutes. It is elegant, safe, and significantly cheaper than a full service overhaul. This approach is central to ensuring code compliance when installing ev chargers without tearing your walls apart.
Stop the Nuisance Trips Before They Start
One of the most frustrating traps for DIYers is the double-GFCI conflict. Most high-end chargers have a sensitive Ground Fault Circuit Interrupter built right into the motherboard. If you install that charger on a GFCI-protected breaker, the two systems often fight each other, resulting in a charger that shuts down for no reason at 2:00 AM. This is exactly why the gfci in your panel keeps nuisance tripping your charger. According to the NFPA 70: National Electrical Code, specific requirements for GFCI protection vary by jurisdiction, and in some areas, why your ev circuit needs a dedicated neutral in some jurisdictions becomes a factor in how those faults are detected. If you are seeing a red ring on your unit, it is likely a ground-monitoring conflict, not a hardware failure.
Why is my 48-amp charger only pulling 32 amps?
This is the most common advanced complaint I hear. You bought a 48-amp unit, you have a 60-amp breaker, but the car says 32 amps. Usually, this is not a hardware failure; it is a configuration oversight. Most smart chargers require you to set the maximum current via an internal DIP switch or an installer app. If you skip this, the unit defaults to a safe, low setting. This is a core part of troubleshooting ev chargers common compliance pitfalls and fixes. Always verify that your software settings match your physical wire gauge and breaker size. Have you ever fallen into this trap or spent money on an upgrade you did not actually need? Let me know in the comments below.
I’ve come to realize that the “set it and forget it” mentality is a recipe for a future service call. If you really want to be the master of your garage, you need to invest in a decent torque screwdriver—I personally swear by the Wera Kraftform Kompakt. It’s calibrated to +/- 6% and gives you that unmistakable physical click when you hit the mark. Using this tool is the difference between a professional-grade install and a DIY disaster. When I am ensuring code compliance when installing ev chargers, I always record the torque values in a little logbook inside the panel door. It might seem obsessive, but when you’re pulling massive current for years, that log is your best defense against thermal failure. High-end electrical equipment manufacturers like Schneider Electric specifically note in their technical bulletins that even a 10% deviation from manufacturer torque specs can lead to a 30% increase in terminal temperature over time.
#IMAGE_PLACE_HOLDER_D#
How do I keep my charging setup safe for the long haul?
Maintenance isn’t just about the wires; it’s about the software and physical cleanliness too. I make it a habit to check how to update the firmware on your smart charging station every quarter. Manufacturers often push updates that improve thermal management or fix bugs that could lead to ev charger troubleshooting expert tips for common issues. Physically, you should inspect your plug every few months. If you notice the plastic around the pins looking slightly discolored or pitted, you need to read up on why your ev plug contacts look burnt and what to do next immediately. Most of the time, this is caused by grit or oxidation increasing resistance. A quick blast of non-conductive electronic contact cleaner can save you a $500 cable replacement. Also, keep an eye on your panel’s health. If you’re adding more gadgets, you might need panel upgrade strategies to meet ev charging code requirements in 2025 to ensure you aren’t redlining your service and causing premature aging of your breakers.
Why Your Next Car Might Power Your Entire House
The industry is rapidly moving toward a world of bi-directional charging (V2G and V2H). Within the next few years, your EV won’t just be a sink for electricity; it’ll be a giant backup battery for your home during peak hours. This means your installation needs to be even more robust than it is today. If you’re already feeling the squeeze on your current setup, consider why your garage needs a sub-panel for multiple chargers or a dedicated sub-panel now. It’s much cheaper to over-build today than to retro-fit a finished garage tomorrow. This trend will turn the home garage into a mini-power plant, making precision even more critical. Before you call it a day, I want you to try one thing: after your next full charge, safely check the temperature of your charging handle. If it’s uncomfortably hot to the touch, it’s time to dive into troubleshooting ev chargers common compliance pitfalls and fixes and verify those internal connections. Don’t wait for the smell of ozone to tell you something is wrong.
The Hardest Lesson I Learned About 48-Amp Loads
After years of working on home projects, I realized that EV charging is the ultimate stress test for any electrical system. The biggest lightbulb moment for me was understanding that a loose connection doesn’t just fail; it stays active and cooks itself slowly. I used to think code compliance was just about bureaucracy, but after seeing that charred wire in my own garage, I realized it is actually about the physics of continuous high-amperage heat. Always remember that your charger is likely the only appliance in your house running at maximum capacity for eight hours straight. If you are feeling overwhelmed by the technical requirements, learning how to verify code compliance for your ev charger installation is your best roadmap to total peace of mind.
The Tools That Saved My Sanity and My Garage
I do not leave my charging setup to chance anymore, and you should not either. I highly recommend investing in a calibrated torque screwdriver like the Wera Kraftform; it is the only way to meet code compliance essentials for ev charger installations in 2025 reliably. I also keep a digital multimeter handy to check for voltage drops that might indicate a high-resistance connection. Lastly, don’t sleep on the value of a professional load calculation—if your panel looks like it is struggling, you should explore panel upgrades for ev chargers what you need to know to see if your home needs more electrical headroom before you upgrade to a faster unit.
Your Journey to a Safer, Faster Charge Starts Today
Taking the time to do this right is not just about avoiding a fire; it is about building a home infrastructure that is ready for the future of transportation. Whether you are tightening lugs to exact specs or ensuring code compliance when installing ev chargers, you are taking a massive step toward energy independence. Do not be afraid of the technical details—once you have the right tools and the right knowledge, you will sleep much better knowing your car is charging safely in the next room. If you hit a wall or find a wiring situation that doesn’t look right, do not hesitate to contact us for expert guidance. Have you ever checked the torque on your breaker lugs after a year of heavy charging? Let me know what you found in the comments below.