It was 11:45 PM on a Tuesday, and the rain was doing that annoying sideways mist thing. I plugged in my car, expecting that familiar, satisfying click and the green glow of progress. Instead? Nothing. A cold, dead, blinking red ring of rejection. I did what any panicked person does—I unplugged it and shoved it back in harder, which, for the record, is exactly how you break pins. My mistake back then was thinking that more force equaled more electricity, but I’ve learned the hard way that these machines are more like finicky computers than garden hoses. If you have ever felt that sinking feeling in your gut when your range is low and your charger is unresponsive, I’m going to share the specific reset sequence I’ve used to save dozens of service calls.
That Moment Your EV Decides to Ghost You
Dealing with a non-responsive port isn’t just about the car; it’s about the trust you have in your commute. When I first started diving into ev charger troubleshooting, I used to think a dead port meant a dead car. I once spent four hours on a Saturday afternoon tearing apart my garage setup only to realize the software handshake had simply timed out. It’s a common frustration, and honestly, even the pros get caught off guard by how sensitive these communication protocols are. Before you call an electrician or assume you need a massive panel upgrade, you need to understand that the ‘reset’ isn’t just turning a switch; it’s a specific sequence of clearing the digital cobwebs. Have you ever been stranded in your own driveway because the charger simply refused to ‘talk’ to your car?
Wait, can a simple reset actually fix a hardware problem?
I get the skepticism. In the world of high-voltage electrical work, ‘turning it off and on again’ sounds like a lazy cop-out. However, data from J.D. Power indicates that software-related communication errors are among the leading causes of charging station ‘failures’ reported by consumers. We aren’t just flipping a breaker; we are forcing the On-Board Charger (OBC) and the Electric Vehicle Supply Equipment (EVSE) to re-negotiate their safety handshake. If your charger won’t click into place or the lights stay dark, the problem is often a ‘hung’ logic board, not a melted wire.
The Magic Sequence That Rescues Your Charge
The trick lies in a staggered power-down that clears the residual capacitance in the charging handle itself. Most people just flip the breaker and flip it back, but that’s rarely enough time for the internal relays to fully discharge. You have to be patient. You also need to ensure you aren’t dealing with connectivity problems that might be sending conflicting signals to your smartphone app while you’re trying to fix the hardware. I’m going to walk you through the exact timing and the specific ‘hidden’ button combinations on popular home units that act as a factory override, getting you back to a green light without the $200 diagnostic fee.Think of your charging system as a conversation between two very nervous diplomats—the car and the wall unit. If one of them mishears a single ‘word’ of the safety protocol, the whole thing shuts down to prevent a fire. To fix this, you need a hard reset that actually clears the memory. I once spent forty minutes swearing at a Level 2 unit in a client’s garage, only to find out that the ‘reboot’ they did lasted exactly three seconds. That’s like trying to restart a computer by blinking. You have to kill the breaker and literally set a timer on your phone for five minutes. This isn’t superstition; it’s physics. You are waiting for the capacitors on the control board to bleed off their stored energy so the internal relay can truly drop back to its ‘zero’ state. During one particularly frustrating service call, the homeowner was convinced their unit was fried. We waited out the full five minutes, and the satisfying clack of the relay resetting was the sweetest sound I had heard all day.
Reset Your Charger Without Calling an Electrician
Give the Capacitors Time to Bleed
The most common mistake people make is flipping the breaker off and on too quickly. Modern chargers are essentially high-powered computers with heavy-duty switches inside. These components hold a residual charge even after the main power is cut. By waiting a full five minutes, you ensure the logic board completely loses power, forcing it to reload its firmware from scratch when you flip the switch back. This is often the only way to clear a ‘latching fault’ that prevents the car from initiating the handshake.
Check for Meltdown Evidence on the Pins
While you are waiting for the power to drain, grab a flashlight and look inside the charging handle. You are looking for any discoloration or pitting. If you see black charring or melted plastic around the copper pins, do not plug it back in. This is often caused by burnt contacts resulting from a poor connection. In many cases, I have found that the original installer skipped a crucial step: the specific torque setting for the wire lugs inside the unit. Over time, the heat from high-amperage charging causes wires to expand and contract. If they aren’t torqued to spec, they wiggle, they arc, and eventually, they cook. 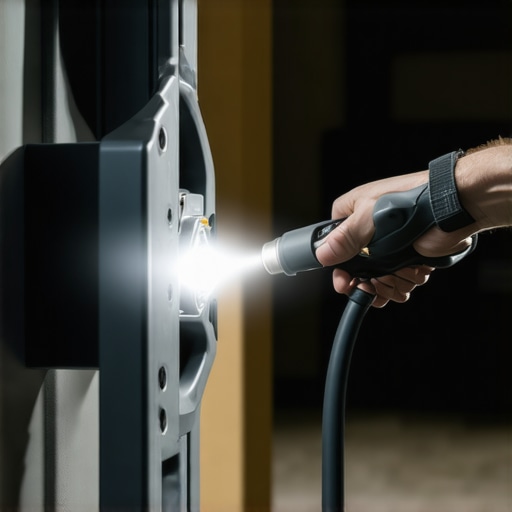
Fix the Wireless Handshake Errors
Sometimes the hardware is fine, but the ‘brain’ is confused because it can’t find your home network. If your unit has a status ring that is pulsing blue or purple, it is likely a lost Wi-Fi connection. Many ‘smart’ chargers will refuse to initiate a charge if they cannot ‘phone home’ to check for firmware updates or peak-utility schedules. I have seen chargers get stuck in a loop because a neighbor’s new router was causing signal interference. The best move here is to toggle the Wi-Fi on your phone and try to reconnect the station through its native app. If you are still seeing errors after a full power cycle and a network reset, you might be dealing with a loose neutral wire in your main panel that is causing voltage fluctuations—a ‘dirty’ signal that the car’s sensitive onboard charger simply refuses to accept for safety reasons.
You’ve done the five-minute power cycle and you’re back online. Great. But if you’re finding yourself resetting the unit every few weeks, you aren’t fixing the problem—you’re ignoring a symptom. Most people think ‘if it charges, it’s fine,’ but there’s a massive difference between a system that works and one that is truly optimized for longevity. In my years of ev charger troubleshooting, I’ve seen that the ‘ghost in the machine’ is usually a violation of the 80% rule or a thermal bottleneck hiding behind the drywall. Have you ever fallen into this trap of constant resets? Let me know in the comments.
Stop Assuming You Need a Massive Panel Upgrade
The biggest myth in the EV world is that a full breaker box requires a $4,000 service overhaul. Everyone says you need more ‘space,’ but space isn’t always the issue—it’s the load calculation. I’ve helped homeowners find the secret to getting faster charging without a new panel by using dynamic load balancing. Instead of upgrading your panel for better ev charging performance, you can often use a smart gateway that ‘watches’ your oven and AC, throttling the car only when the house is at peak demand. It’s a cleaner, cheaper, and more elegant solution than just throwing more copper at the problem.
The One Tool Most DIYers Skip
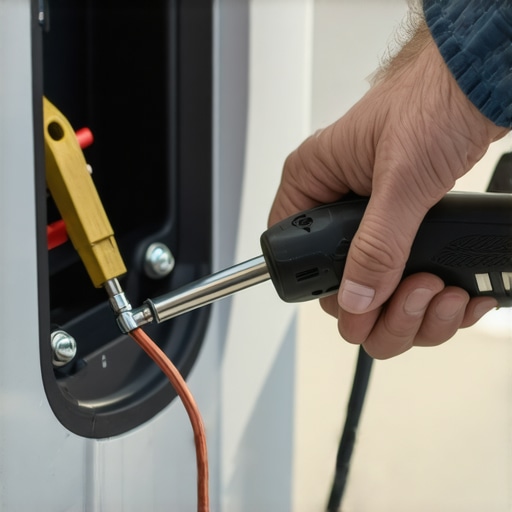
Here is the ‘oops’ factor that keeps me up at night: the missing torque wrench. When you’re pulling 40 or 48 amps for eight hours straight, ‘hand-tight’ isn’t good enough. Metals expand when they get hot. If those lugs aren’t set to the exact inch-pounds specified by the manufacturer, they will eventually wiggle loose. This creates an arc, which creates heat, which creates a fire. I call this the forgotten torque test that prevents panel fires. If your electrician didn’t pull out a calibrated torque wrench during the install, you might be sitting on a ticking thermal clock. Don’t be fooled by a pretty faceplate; if the internals are loose, the unit is a hazard.
Is your current breaker actually legal for continuous use?
This is where the nuance of ensuring code compliance when installing ev chargers gets tricky. According to the National Fire Protection Association (NFPA) 70, also known as the National Electrical Code, an EV is a ‘continuous load.’ This means you must de-rate the circuit by 20%. It’s why your electrician recommends a 60-amp circuit for a 48-amp charger. If you try to pull 50 amps through a 50-amp breaker for six hours, that breaker will eventually trip—not because of a short, but because of thermal fatigue. I’ve seen countless ‘faulty’ chargers that were actually just victims of 4 signs your electrician used the wrong gauge wire or undersized breakers. Don’t fall into the trap of thinking a bigger number on the box means a faster charge; it usually just means a safer one. If you’re still seeing issues, you might be dealing with 3 hidden costs of cheap internet bought chargers that lack the robust shielding needed for modern homes.
If you have followed the safety rules and secured a high-quality unit, the job still isn’t quite finished. I like to think of a home EV station as a high-performance athlete; it requires regular checkups to prevent a total blowout. One of the most overlooked parts of the ‘set it and forget it’ lifestyle is the environmental and thermal toll on the hardware. Even the best units can fail if you aren’t looking for the right warning signs during your routine garage sweep.
How do I keep my charging setup healthy for the next decade?
It starts with a simple visual inspection every six months. I’ve seen people lose entire charging heads because they ignored a bit of green crust or grit on the pins. Knowing how to spot corrosion inside your outdoor charging pedestal is a skill that saves you $600 in replacement cables alone. But if you want to go pro, get your hands on an infrared thermometer. High heat is the universal precursor to electrical failure. I follow the strict maintenance guidelines from the Electrical Safety Foundation (ESFI), which emphasizes that high-current circuits like EV chargers should be periodically checked for ‘hot spots’ that indicate a loosening connection or micro-arcing. 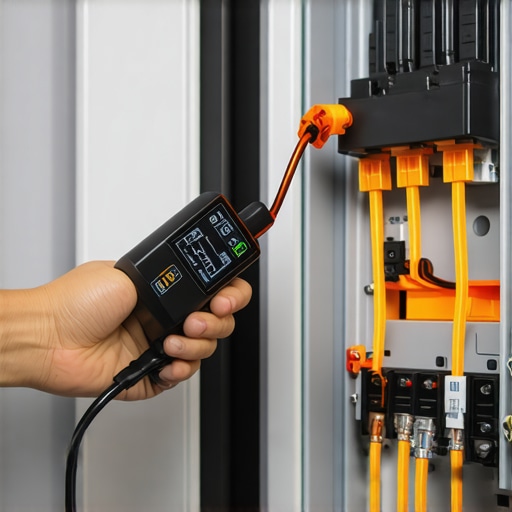
Scaling up without tearing down your walls
Eventually, your household will likely transition to a second EV, and this is where most homeowners panic about their 200-amp service capacity. Before you commit to a massive overhaul, look into how to share a single circuit between two evs safely. Modern ‘smart’ chargers can communicate with one another to split the load dynamically, ensuring you don’t trip the main breaker while you sleep. If you are managing multiple vehicles, you’ll also need to learn how to load balance your fleet without tripping the main feed. It’s a significantly cheaper and more elegant solution than requesting a secondary service drop from the utility. Also, do not overlook the ‘invisible’ protection that guards your investment. I always tell my clients that understanding why your main service panel needs a surge protector for your ev isn’t just a sales pitch—it’s vital insurance for the sensitive $2,000 computer sitting in your car’s chassis.
The silent enemy hiding behind your drywall
Most of the degradation happens where you can’t see it. Behind the drywall, the constant heat from an 8-hour charge cycles through the copper wiring. If your installer took shortcuts, the wire insulation will eventually brittle and fail. Knowing the 4 signs your electrician used the wrong gauge wire is your first line of defense against a long-term fire hazard. Looking ahead, the trend is moving toward ‘V2H’ or Vehicle-to-Home technology. In five years, your charger won’t just be a power straw; it will be a bidirectional bridge, letting your car’s massive battery power your house during a blackout. This makes getting the specific torque wrench settings for a wall connector right today even more vital. You aren’t just charging a car anymore; you’re building a mini-grid infrastructure. Take five minutes this weekend to run a flashlight over your charging pins—if you see even a hint of discoloration or black soot, it’s time to re-torque those lugs before they cook your entire setup.
The Hidden Truth About Why Most Home Chargers Fail
After years of hands-on ev charger troubleshooting, I’ve realized that the most common failures aren’t due to bad hardware, but a lack of respect for the continuous load. One major lightbulb moment was discovering that a ‘nuisance trip’ is usually a cry for help from a heat-damaged wire. I once saw a DIYer try to bypass a tripping breaker by simply upsizing it—a move that nearly caused a structure fire because the wire gauge couldn’t handle the current. Another hard-earned lesson: never trust a factory-tightened lug. Shipping vibrations can loosen them, and a loose lug is the fastest way to melt your expensive new hardware. Always double-check your connections against the manufacturer’s specs. If you are worried about your setup, reviewing the 3 hidden costs of diy ev charger wiring can help you spot where shortcuts might have been taken early on.
My Personal Checklist for a Bulletproof Garage Setup
If you want to move beyond basic ev charger troubleshooting and handle your own maintenance, you need three specific things. First, a high-quality calibrated torque wrench. I personally use one that measures in inch-pounds because getting the specific torque wrench settings for a wall connector right is the only way to sleep soundly knowing your home is safe. Second, I recommend the NFPA 70 Handbook; it’s the gold standard for ensuring code compliance when installing ev chargers. Lastly, an infrared thermometer is a game-changer. It allows you to see heat buildup in your panel before you smell smoke, which helps you decide if you really need to be upgrading your panel for better ev charging performance or simply tightening a lug. #IMAGE_PLACEHOLDER_E#
Build a Charging Infrastructure That Lasts for Decades
Setting up your home for an electric future is one of the most rewarding homeowner projects you can tackle. It transitions your house from a simple shelter into a self-sustaining power hub. While the technical requirements can be intimidating, taking it slow and following the safety protocols we discussed will put you miles ahead of the average owner. You’ve got the tools, the sequence, and the knowledge to keep your car—and your home—safe and powered up. Don’t be afraid to ask for a professional’s eyes if something feels off; a safe installation is a permanent asset. I’m excited to see how your setup evolves into a reliable energy node.
Have you ever run into a situation where a simple reset didn’t work and you found a loose wire instead? Let me know in the comments below.