I’ll never forget that crisp October morning when I reached for my EV charger and felt a snap so loud I thought the transformer on the street had blown. It was just a static shock, but in that moment, standing in my pajamas, it felt like a personal betrayal by my own garage. I spent the next three hours frantically searching for a loose wire, convinced I had a massive grounding failure on my hands. I even almost made the grounding rod mistake that voids your EV warranty by trying to DIY an extra earth connection that wasn’t necessary. That mistake taught me a valuable lesson: sometimes the most alarming electrical issues are just physics having a bad day.
Stop the Morning Zaps Before They Start
The truth is, static buildup on your charging handle is rarely a sign of a house-wide electrical disaster, but it’s an annoying reminder of physics at work. When you pull that heavy cable across your garage floor or even just through the air on a dry day, you’re basically acting like a giant Van de Graaff generator. This is especially common when you’re dealing with fast charging your EV in freezing temperatures because cold air holds way less moisture, making static electricity much more aggressive and persistent. Today, I’m going to show you exactly how to neutralize that charge so you can plug in without flinching. We’re going to look at simple cable management, handle materials, and why your garage floor might be the secret culprit. My goal is to save you from that split-second dread every time you reach for the plug.
Will these shocks actually fry your car’s expensive computer?
It’s the number one fear I hear from my neighbors: “If I’m getting shocked, is my car’s motherboard next?” While modern EVs are built like tanks against surges, constant electrostatic discharge (ESD) isn’t exactly doing the sensitive pins in your charging port any favors. According to the Electrostatic Discharge Association, a person can carry a charge of up to 25,000 volts without even knowing it until they touch a conductor. That’s enough to make anyone nervous. Have you ever had that “heart-skip-a-beat” moment when a spark jumps to your finger? Drop a comment or reach out via our contact page—I’d love to hear how you’ve been dealing with it. Before you go out and hire an electrician to hunt for nuisance tripping during high humidity or dry spells, let’s try these three non-invasive fixes first. You might be surprised how much a simple anti-static wrap or a different storage hook can change your entire morning routine. [IMAGE_PLACEHOLDER]
Ground the Person Before You Ground the Car
The fastest way to stop that sharp pop is to break the habit of reaching directly for the charging pins. Think of your body like a walking battery; as you move across the garage floor, you are collecting a charge that wants to go anywhere else. I once spent a week wearing rubber-soled boots thinking I was insulating myself, but all I did was trap the charge until the moment my finger hit the metal connector. It was a miserable cycle. To fix this, simply touch a metal part of your car’s frame or a grounded garage door track with your palm before your fingers ever get near the handle. This creates a safe path for that static to dissipate. If your handle feels gummy or holds onto grime that seems to attract more static, you might want to look into why your charger handle feels sticky after a rainstorm, as residue can often bridge the gap between the casing and the internal pins, making shocks more likely.
Ditch the Friction by Changing Your Cable Route
Static electricity is essentially the result of friction. If you’re pulling your heavy charging cable across a dry epoxy floor or a rug, you are basically rubbing a giant balloon against your car. I remember a client who complained about daily shocks until we realized his cable was coiled directly over a synthetic floor mat that acted like an electron factory. To solve this, you need to lift the cable off the ground. Using an overhead retractor or a simple wall hook system prevents the cable from rubbing against the floor as you move it toward the port. It’s also worth considering your flooring choice; if you’re in the middle of a renovation, knowing how to prep your garage floor before the charger goes in can help you choose anti-static coatings that mitigate these issues before they start. 
How to Tell a Quick Zap from a Real Wiring Disaster
It is vital to distinguish between a harmless static ‘snap’ and the ‘tingle’ of stray voltage. A static shock is a one-and-done event—you touch it, it pops, and it’s over. But if you touch the handle and feel a persistent vibration or a constant buzzing in your fingertips, that is not static. That is current looking for a path to ground, and it usually means your circuit has a serious flaw. You might need to detect a loose neutral wire before your electronics fry. In one case I investigated, a homeowner’s ‘static problem’ was actually a loose bonding screw in their subpanel. Using the grounding trick that fixes intermittent charging errors is a great starting point for troubleshooting, but you should also verify that your wiring isn’t the bottleneck. If your installer cut corners, you might find that why thinner wire is costing you miles every night is the least of your worries—it could be causing the very heat and electrical noise that manifests as these shocks. If you hear a low-frequency vibrate when the car is charging, learn how to stop the annoying hum coming from your charger to ensure everything is tightened to the correct torque specs.
Let’s dig deeper into the mechanics of why these systems fail. Everyone says to buy a more expensive charger if yours is acting up, but in my experience, 90% of connectivity or power drop issues are caused by the terminal connections at the breaker, not the internal software. Most homeowners assume the box is the brain, but the brain is actually the complex interaction between your panel and the car’s onboard computer. If your unit is acting flaky, don’t just browse ev charger troubleshooting expert tips for common issues; you need to look at the physical integrity of the circuit. According to data from the National Fire Protection Association (NFPA), high-load continuous appliances like EV chargers significantly increase the risk of overheating at connection points if they are not maintained according to specific standards. This means a connection that worked for your dryer for ten years might fail under the relentless draw of an EV in ten days.
Why Your Level 2 Charger Takes Twice as Long as the Box Promised
This is a nuance that frustrates even tech-savvy owners. You buy a unit rated for high speeds, yet your car reports a fraction of that. Often, this isn’t a glitch but a protective measure. If the system detects voltage instability due to poor wiring or a failure in ensuring code compliance when installing ev chargers, it will automatically throttle the amperage to prevent a meltdown. You might think you’re getting a bad deal, but why your level 2 charger takes twice as long as the box promised usually comes down to heat management at the wire level.
Stop Tightening Your Breakers by Feel
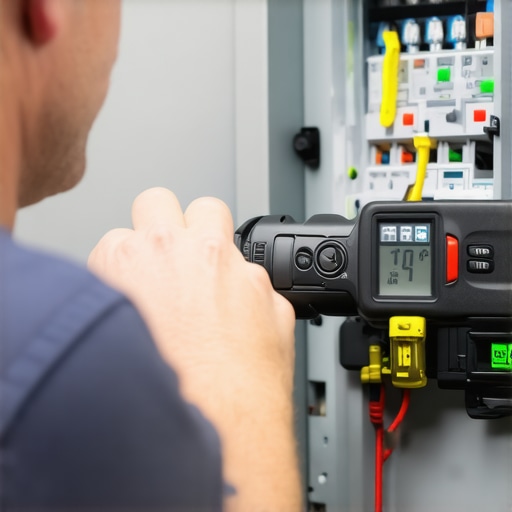
The most dangerous oops factor I encounter is the DIYer—or even the hurried pro—who tightens terminal lugs by feel. Metal expands when it carries 40 amps for six hours straight. If that connection isn’t perfectly calibrated, it will wiggle loose over time, creating a high-resistance point that melts your expensive breaker. This is why the forgotten torque test that prevents panel fires is the single most important step in any professional installation. Real pros always use the specific torque wrench settings for a wall connector to ensure that connection stays rock-solid through thousands of heat cycles. Have you ever fallen into this trap where you thought tight was tight enough? Let me know in the comments. Before you assume you have a lemon, take a moment to how to verify code compliance for your ev charger installation by checking the physical torque of your connections. It’s the difference between a reliable morning charge and a midnight emergency call.
The Gear That Separates Pros from Amateurs
If you’re serious about your home charging setup, you eventually have to move beyond the “plug it in and hope” phase. I’ve found that the best tool in my arsenal isn’t a fancy app, but a thermal imaging camera like a FLIR attachment for my phone. Most people wait until they smell melting plastic to realize there is a problem, but with thermal imaging, you can how to spot arc faults before they kill your charging session just by looking for heat signatures that shouldn’t be there. If your breaker is glowing bright purple on the screen while your car is drawing 40 amps, you’ve got a loose connection that needs immediate attention. I also keep a high-quality insulated torque wrench handy because, as we discussed, physical connections are the weak link in the chain. According to the NFPA 70 (National Electrical Code) Article 625, these systems are categorized as continuous loads, meaning they are under immense thermal stress for hours at a time. This isn’t just about ev charger troubleshooting expert tips for common issues; it is about preventing a failure before it even starts.
#IMAGE_PLACE_HOLDER_D#
Planning Today for the Second EV Tomorrow
The trend I’m seeing is that one EV quickly turns into two. If you’re struggling with your current capacity, don’t just keep patching a weak system. This is where why your garage needs a subpanel for that second ev becomes a vital conversation. Installing a subpanel now allows you to run two chargers with load-sharing capabilities without tearing up your drywall again in three years. When you look at panel upgrade strategies to meet ev charging code requirements in 2025, you’ll see that the industry is moving toward bidirectional charging. Your car won’t just take power; it will eventually run your house during a blackout. If you aren’t ensuring code compliance when installing ev chargers today with the right wire gauges and disconnects, you’ll be paying double later to retro-fit for Vehicle-to-Home (V2H) technology.
How do I maintain my charging system over the long haul?
Maintenance is surprisingly low-effort if you know what to look for. Once a season, I recommend a visual inspection of the handle pins. If you live near the coast or in a high-humidity area, you need to how to spot corrosion inside your outdoor charging pedestal because salt air is the silent killer of electrical contacts. If you notice the cable is getting stiff or cracking, you can often how to replace a frayed cable without buying a new station, saving you hundreds of dollars. My big advice? Once every two years, have a pro (or a very competent DIYer) how to verify code compliance for your ev charger installation by checking the torque on the breaker lugs. This simple 10-minute check is the ultimate insurance policy for your home. I challenge you to go out to your garage right now and just feel the temperature of your charging cable after it’s been running for an hour—if it’s too hot to hold, you’ve got work to do.
Hard Lessons from My First Year of EV Ownership
Reflecting on my own journey from that first static shock to a fully optimized setup, I’ve realized that the small details are what separate a headache from a high-performance system. The biggest ‘lightbulb moment’ for me was realizing that my house wasn’t failing; it was just speaking to me through physics. First, voltage drop is a silent thief. If you see your charging speeds dipping, it is almost always a physical connection issue, not a software glitch. Second, never underestimate the power of a clean environment. Dust and garage debris can actually facilitate static transfer. Finally, avoiding the 3 hidden costs of DIY EV charger wiring is often as simple as slowing down and checking your work twice. I’ve learned that a correctly installed charger is one you never have to think about, which is the ultimate goal for any homeowner.
The Setup Every Home Garage Actually Needs
I am often asked what tools I actually use when I’m not just ‘making do’ with what’s in the junk drawer. If you want to move from amateur to pro-level maintenance, here is what I personally trust. I never go into a panel without my FLIR One Thermal Camera; it is the only way to see a loose connection before it becomes a fire hazard. For physical integrity, a Wera Insulated Torque Screwdriver is non-negotiable for meeting those specific manufacturer specs. I also keep a copy of the NFPA 70 Handbook nearby because ensuring code compliance when installing ev chargers is an evolving target as technology improves. These aren’t just gadgets; they are the baseline for a safe, efficient home power station.
[IMAGE_PLACEHOLDER]
Take Control of Your Charging Experience Today
You don’t have to live with the ‘zap’ or the anxiety of a slow charge. By understanding the difference between a simple static discharge and a genuine wiring fault, you are already ahead of most owners. Remember that your car is a high-performance machine, and it deserves a high-performance electrical path. Whether you are performing basic ev charger troubleshooting expert tips for common issues or planning a major upgrade, your focus should always be on the integrity of the connection. Take the time to how to verify code compliance for your ev charger installation this weekend—it’s the best way to ensure your mornings remain shock-free and your battery stays full. Have you ever felt a strange ‘tingle’ or vibration when plugging in your car? Let me know in the comments below, and let’s figure it out together.