I will never forget the acrid, metallic tang that filled my garage at three in the morning just three years ago. I had just brought home my first electric vehicle, and like many of us, I figured Level 1 charging was basically no different than plugging in a floor lamp. The problem? My garage outlet was about four feet too far from the car’s charging port. Being a ‘resourceful’ neighbor, I grabbed a thick, orange heavy-duty extension cord from my workshop and figured I was good to go. I woke up to a melted lump of plastic fused to my wall and a very expensive lesson in electrical resistance. I had completely ignored the risks because I wanted a quick fix, and I nearly paid for it with my home. Today, I want to walk you through why that ‘temporary’ setup is actually a ticking time bomb and how we can get your setup to be both safe and efficient without cutting dangerous corners. Have you ever walked out to your garage and felt a weird heat coming off your plug, or noticed those tiny brown scorch marks around the outlet?
That Burning Plastic Smell Is Not a Good Sign
Resistance is a silent killer when it comes to your home’s wiring. When you use an extension cord for Level 1 charging, you are essentially asking a cable designed for intermittent use to handle a massive, continuous load for ten or twelve hours at a time. I made the mistake of thinking ‘heavy duty’ meant ‘indestructible,’ but the truth is that every inch of extra cord adds resistance, which generates heat. According to the U.S. Consumer Product Safety Commission, extension cords are one of the most dangerous electrical items in the home when used improperly, contributing to over 3,000 residential fires annually. I was lucky I caught mine before the drywall ignited, but many people aren’t. If you are struggling with a setup that doesn’t quite reach, it is much better to look into panel upgrades for EV chargers rather than risking a fire.
Is a heavy-duty cord actually safe to use?
You might see ‘pro’ cords at the hardware store rated for 15 or 20 amps and think they can handle the car. The reality is that the constant draw of an EV charger will eventually find the weakest point in that chain—usually the plug connections—and start to oxidize the metal. Once that happens, the heat spirals out of control. I used to think I was saving a few hundred bucks by skipping a professional install, but I was actually risking thousands in property damage.
Your Wall Outlet Is Tired of the Abuse
Most standard household outlets aren’t ‘commercial grade.’ They are held together by plastic tension that loosens over time. When you plug in a heavy EV cord, and then add the weight of an extension cord dangling from it, you’re creating a mechanical strain that leads to loose connections. Before you try to bypass the manufacturer’s warnings, check out these expert tips for common issues. Dealing with a burnt EV plug contact is a headache you don’t want, and it all starts with that simple extension cord. Let’s look at how to do this the right way so you can sleep soundly while your car tops up.
Math Before Money
Charging an EV is like running three clothes dryers at the same time for eight hours straight. Most people don’t realize their home’s electrical system has a budget. This is why why your ev permit application requires a load calculation worksheet is the first thing you need to look at. If you skip this, you’re just guessing how much room is left in your electrical capacity. I remember trying to help a friend how to squeeze a level 2 charger onto a 60 amp service in an old 1940s bungalow. We thought we were being clever by just swapping the breaker, but within twenty minutes, the main lugs were so hot you could smell the insulation cooking. It was a messy, dangerous realization that led to a mandatory upgrading your panel for better ev charging performance before we could safely charge anything larger than a smartphone.
When Your Electrical Panel Reaches Its Limit
Think of your electrical panel as the heart of your home. If you keep asking it to pump more than it was designed for, it is going to fail. You need to know how to tell if your panel is actually a fire hazard before you even think about drilling holes in the wall for a new unit. If your panel is a brand like Federal Pacific or Zinsco, you are looking at a mandatory replacement because they are notorious for not tripping when they should. 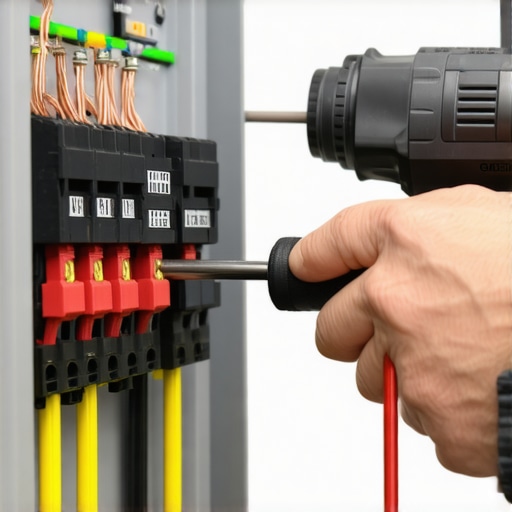
The Real Secret to Passing Inspection
Most DIYers fail their final walkthrough for two simple reasons: torque and wire size.
Why Your Screwdriver Isn’t Enough
Electrical connections expand and contract as they heat up and cool down. If they aren’t tightened to the exact inch-pound specification, they wiggle loose over time. That is why your charger needs a specific torque setting to pass inspection. It is not just about being tight; it is about being precise. I once ignored the torque wrench and just cranked it down by hand, only to find the terminal block discolored and brittle six months later. Use a calibrated torque wrench, or you are just inviting a future service call or a fire.
Get the Right Copper for the Job
Voltage drop is the hidden enemy of efficiency. If your garage is far from your panel, you cannot just use standard Romex and hope for the best. You need the specific wire gauge that prevents voltage drop over long runs to ensure your car actually gets the power you are paying for. This is a core part of ensuring code compliance when installing ev chargers. If the wire is too thin, it acts like a bottleneck, wasting energy as heat in your walls before it ever reaches your battery. Always size up if you are in doubt; the extra twenty bucks in copper is cheaper than a house fire.
Most homeowners look at their electrical panel, see an empty plastic knockout at the bottom, and assume they have ‘space’ for a high-powered charger. This is arguably the most dangerous assumption in the DIY world. An empty slot is just a physical location; it doesn’t mean your main service has the amperage to support it. I’ve seen panels with plenty of physical room that were already 20% over their safe capacity because of heat pumps and electric ranges. If you just slap a 50-amp breaker in there, you aren’t just pushing your luck; you are inviting a catastrophic failure of the main bus bar.
The Empty Slot Trap
In my experience, the biggest ‘oops’ factor is ignoring the difference between peak load and continuous load. According to NFPA 70 (National Electrical Code), electric vehicle charging is classified as a continuous load. This means the circuit must be sized at 125% of the charger’s output. If you want to charge at 48 amps, you can’t just use a 50-amp breaker. You actually need a 60-amp circuit. This is why your electrician recommends a 60-amp circuit for a 48-amp charger. It’s not an upsell; it’s a heat management strategy. If you ignore this, the breaker will eventually ‘heat trip’ even if there isn’t a short circuit, simply because the internal springs have lost their tension from constant thermal stress.
Why does my brand-new charger keep tripping for no reason?
This is the most common advanced troubleshooting question I get. Often, it’s not a fault in the car or the charger—it’s a ‘GFCI conflict.’ Many modern building codes require a GFCI breaker for garage outlets, but most Level 2 chargers already have sensitive ground-fault detection built into the unit itself. When you put a GFCI charger on a GFCI breaker, they ‘talk’ to each other in a way that causes nuisance trips. You have to know why the gfci in your panel keeps nuisance tripping your charger to solve this without compromising safety. It’s a delicate balance of how to verify code compliance for your ev charger installation while ensuring the thing actually stays on overnight.
Don’t Skip the Post-Install Checkup
Even if everything looks perfect on day one, the vibration of current moving through those wires can cause connections to settle. I’ve gone back to jobs a year later and found that why your main lugs might be loose after a year of charging is a very real phenomenon. Thermal expansion is a beast. This is why troubleshooting ev chargers common compliance pitfalls and fixes should be an annual ritual. If you haven’t checked your torque settings since the day you installed the unit, you’re essentially driving on a tire with loose lug nuts. Have you ever fallen into this trap where you thought ‘more is better’ or ‘it fits, so it’s fine’? Let me know in the comments.
If you are serious about this, you need more than a generic screwdriver from a junk drawer. I keep a CDI 1/4 inch Drive Micro-Adjustable Torque Wrench in my kit because most EV terminals require precision that your ‘calibrated elbow’ just cannot provide. Getting the specific torque wrench settings for a wall connector right is the difference between a ten-year reliable connection and a melted terminal block in six months. But the real game-changer for me was buying a thermal imaging camera. Every six months, I pop the cover off my main panel and my charger and look for ‘hot spots.’ According to the NFPA 70B Standard for Electrical Equipment Maintenance, infrared thermography is one of the most effective ways to identify loose connections before they become catastrophic. If I see a lug glowing bright purple on the screen, I know it is time to re-torque it. It is how I figured out how to tell if your panel is actually a fire hazard before my wife even smelled the ozone.
How do I keep my charger healthy for the long haul?
Beyond the internal guts, look at the physical cable. I have seen people let their heavy cables get run over by lawnmowers or dragged through salt-slush all winter. Eventually, the insulation cracks. Knowing how to replace a frayed cable without buying a new station can save you six hundred bucks. I also keep a small kit of the essential spare parts to keep for your home charging unit, mostly spare fuses and a replacement handle holster. If the holster breaks, the handle hits the concrete, the pins get dented, and suddenly you are dealing with why your ev plug contacts look burnt and what to do next. 
Your Car Will Soon Power Your Entire House
The future of this technology is going to be even more hands-off. We are moving toward ‘V2H’ (Vehicle-to-Home) where your car won’t just take power; it will provide it during blackouts. This means your panel needs to be smarter, utilizing how smart chargers use dynamic balancing to prevent blown fuses. We are also seeing more issues with software; troubleshooting ev charger connectivity problems is becoming as common as fixing a leaky faucet. If you see weird numbers on your screen, do not panic—it might just be why your smart charger app is giving you wrong data. Go grab a thermal camera for your phone tonight. Seriously, walk around your house and look at your high-draw appliances while they are running. You will be shocked at what you find.
The Truth About Those Empty Breaker Slots
If I could go back to that 3:00 AM garage scare, I would tell myself that an empty slot in the panel is just a physical vacancy, not a guarantee of electrical capacity. The most common pitfall I see today is the ‘plug and pray’ method. Real efficiency comes from respecting the math of continuous loads. Remember, your home was likely built for appliances that cycle on and off, not a vehicle that gulps power for eight hours straight. I have learned that stopping your breaker from tripping every time the dryer and EV run isn’t about luck; it is about load management. Also, never underestimate the power of a loose wire. Thermal expansion is real, and a connection that felt ‘tight enough’ in June can become a glowing heat source by December. Finally, following code compliance essentials for EV charger installations in 2025 is not just about passing an inspection—it is about ensuring your family sleeps safely while the car charges.
Tools That Make the Difference Between a Pro and a Fire Risk
I do not step into a garage without my ‘big three’ safety tools. First, a high-quality digital torque wrench. You cannot feel 20 inch-pounds with your wrist, and that precision is what prevents terminal meltdowns. Second, I highly recommend a thermal imaging attachment for your smartphone. It allows you to see the heat signatures of a grounding fail that ruins EV permits before it causes a hardware failure. Lastly, keep a physical or digital copy of the NFPA 70 (NEC). It is the gold standard for electrical safety and will help you verify that your installer—or your own DIY work—is actually up to par. I trust these tools because they remove the guesswork from a high-voltage environment.
#IMAGE_PLACEHOLDER_E#
Sleep Better Knowing Your Charging Setup Is Bulletproof
Transitioning to an electric vehicle should be an exciting milestone, not a source of anxiety every time you smell something slightly warm in the garage. By taking the time to calculate your load, torque your connections, and respect the limits of your panel, you are doing more than just fueling a car; you are upgrading your home for the next generation of technology. Plus, there is a financial silver lining: the real reason your home value increases with a pro EV setup is that savvy buyers now look for high-capacity, safe electrical systems as a premium feature. Take it slow, do it right, and enjoy the silence of a safe, efficient charge. Have you ever noticed your lights flickering when your EV starts its charging cycle? Let me know in the comments below.