I stood in my basement for twenty minutes, staring at the row of glass fuses that looked more like props from a black-and-white movie than a modern electrical system. I’d just parked a brand-new EV in the driveway, and the reality was sinking in: my home was a dinosaur. Most electricians will tell you that a fuse box means an automatic, mandatory $5,000 service upgrade before you can even think about a charger. I almost fell for it. I even made the rookie mistake of thinking I could just ‘juice up’ a circuit by swapping in a higher-rated fuse—a move that nearly scorched my old cloth-insulated wires and taught me a terrifying lesson about resistance. Thankfully, I discovered a permit-saving strategy that keeps the inspectors happy and your bank account intact.
Stop Paying for Massive Panel Upgrades You Don’t Need
The truth is, your local building department doesn’t hate old houses; they just hate overloaded circuits. When I first started digging into why your ev permit application requires a load calculation worksheet, I realized the math was stacked against me. But here’s the trick: you don’t necessarily need a bigger ‘pipe’ for your electricity if you use a smarter ‘valve.’ By utilizing load-management tech, you can prove to the city that your car won’t pull power while the oven and dryer are running. This is often the difference between a permit being granted or denied on the spot.
Is this trick just a dangerous shortcut?
It’s natural to be skeptical. I was too. I thought anything that didn’t involve ripping out my walls was somehow ‘cheating’ the system. However, the National Fire Protection Association (NFPA) actually supports this through the National Electrical Code (NEC) Article 702.5, which allows for load management to ensure the system remains within its rated capacity. You aren’t cutting corners; you’re using load shedding devices to avoid a full service upgrade. It’s a sophisticated way to manage your existing 60 or 100-amp service without risking a fire. I’ve seen so many homeowners hit the permit error that stops home charger installs in their tracks simply because they didn’t know these devices existed. Have you ever been told by a contractor that your only choice was a total rewire? If you’re tired of being told your older home is ‘obsolete,’ stick around. I’m going to show you exactly how to document this setup so the inspector signs off without a second glance.
Run the Numbers Before You Buy Anything
To save your panel, you first need to prove it isn’t already drowning. Think of your electrical service like a monthly bank account. If your ‘income’ is 100 amps and your mortgage (AC), groceries (stove), and entertainment (dryer) already cost you 95 amps, you can’t just add a 40-amp car payment. Most people skip the math and head straight to the hardware store, only to discover the hidden cost of skipping a panel load calculation when the inspector rejects their permit application. You need to document every major appliance’s nameplate rating. I remember sitting on my cold laundry room floor with a flashlight, squinting at the tiny metal tag on my dryer to find its wattage. It felt tedious, but those numbers are your currency. If you show the city that your peak load—not your total possible load—is manageable, you’ve won half the battle.
The Automatic Bouncer for Your Circuits
This is where the magic happens. Instead of paying a crew to dig a trench and upgrade your main service, you install a load management device. These units act like a bouncer at a crowded club; if the stove and the AC are both ‘dancing’ at the same time, the bouncer tells the EV charger to wait outside. This is exactly how to add an ev charger without a 200 amp panel upgrade legally. 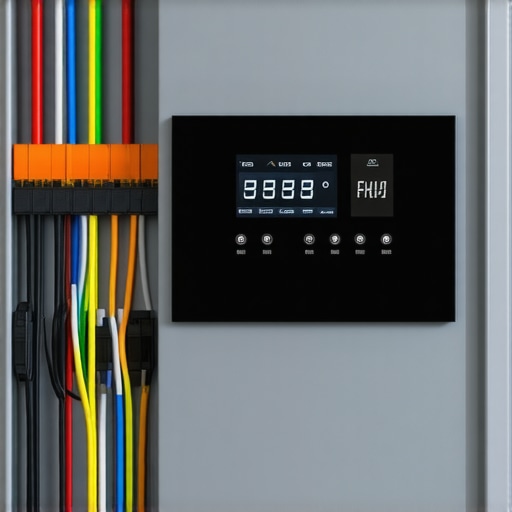
Dynamic Balancing vs Load Shedding
You have two main choices here. A basic load shedder is a binary switch—it simply cuts power to the charger when the total house draw hits 80%. It’s blunt but effective. On the other hand, many modern units now use ‘dynamic balancing.’ This is far more elegant. Instead of just turning the car ‘off,’ the system throttles the charging speed down to a trickle while you’re cooking dinner, then ramps it back up to full speed the moment you flip the oven off. By using how smart chargers use dynamic balancing to prevent blown fuses, you can often keep your car charging all night without ever worrying about a trip to the dark basement to flip a breaker.
Small Details That Kill Your Permit Application
Even with a smart load manager, I almost failed my final inspection over a single screw. I had used a standard screwdriver to tighten the lugs on my new breaker, thinking ‘hand-tight’ was enough. The inspector walked in, pulled out a calibrated torque wrench, and showed me I was off by nearly 15 inch-pounds. He told me that loose connections under the high heat of EV charging are the leading cause of garage fires. This is why your charger needs a specific torque setting to pass inspection. It’s not just red tape; it’s about making sure your house doesn’t burn down while you sleep.
Separate Your Grounds and Neutrals
If your project requires a sub-panel because your main box is physically full, do not make the rookie mistake of bonding the ground and neutral wires together in that second box. I did this once and spent three hours wondering why my GFCI was tripping instantly. In a sub-panel, those wires must be isolated. Always ensure why your subpanel needs a separate ground bar for ev circuits to maintain a clear path for fault current. Once you have the hardware installed and the torque settings verified, you need to create a ‘Permit Pack’ for the inspector. This folder should include your load calculation worksheet, the spec sheet for your load management device, and a clear photo of your panel schedule. Having this ready shows the inspector you aren’t just a DIYer winging it; it proves you know how to prove your electrical panel is code compliant for resale and safety.
The 200-Amp Myth That Costs Homeowners Thousands
Most electricians will walk into your garage, see a 100-amp panel, and immediately quote you $3,500 for a full service upgrade. They’ll tell you it’s a mandatory code requirement or that your house will brown out the moment you plug in. In my experience, that is rarely the whole truth. While a 200-amp service is great, it’s often an expensive luxury rather than a technical necessity for a single EV. According to data from the Electric Power Research Institute (EPRI), the average American home rarely exceeds a 50-amp draw even during peak evening hours. If you are smart about when you charge, you can easily manage panel upgrades for ev chargers by simply prioritizing efficiency over raw capacity. The real secret isn’t more power; it’s better management of what you already have.
Why is your charger suddenly cutting out at noon?
If you’ve successfully installed your unit but find it stops charging during the heat of the day, you might be facing the thermal throttle. This is a sophisticated nuance many beginners miss. If your charger is mounted on an exterior wall that catches the direct afternoon sun, the internal sensors may shut the unit down to protect the sensitive motherboard from overheating. It’s not a hardware failure; it’s a design feature. I’ve seen homeowners waste hours on ev charger troubleshooting only to realize they just needed a small sunshade over the unit to keep it operational.
The Dangerous Trap of Mixing Breaker Brands
Here is the ‘Oops’ factor that almost cost me a new panel: using a compatible breaker. I once bought a brand-X breaker because it fit the slot in my brand-Y panel perfectly. It clicked in, the lights came on, and I thought I was a genius. But after two hours of heavy charging, I noticed the reason your ev charger smells like burnt plastic—the busbar was literally melting. Compatible is not the same as Listed. Every panel is designed for a specific tension and metallurgical match between the breaker and the busbar. Using the wrong brand creates micro-arcs that generate immense heat. I now always tell people to check the specific breaker brands that are known to overheat with evs before they even touch a screwdriver. #IMAGE_PLACE_HOLDER_C#
The Double-GFCI Nuisance Trip
Another advanced headache involves the Ghost in the Machine—intermittent tripping. If you bought a plug-in charger and your local code requires a GFCI breaker in the panel, you now have two brains trying to monitor ground faults: the breaker and the charger itself. These two systems often fight each other, leading to nuisance tripping where the car stops charging for no apparent reason. This is a classic example of why the gfci in your panel keeps nuisance tripping your charger. The pro move? Hardwire your charger. By removing the plug and the outlet, you often eliminate the need for that panel-level GFCI in many jurisdictions, creating a much more stable connection. Before you sign off on your DIY project, make sure to how to verify code compliance for your ev charger installation one last time. Have you ever fallen into this trap? Let me know in the comments.
Get a Thermal Camera Before You Smell Smoke
After months of heavy use, I realized that my electrical panel isn’t a ‘set it and forget it’ appliance. The constant high-amperage draw of an EV creates a thermal cycle that can actually physically move your wires. I started using a FLIR ONE thermal camera attached to my phone once every few months just to peek at the breakers. It sounds like overkill until you see a bright yellow glow coming from a lug that looks perfectly fine to the naked eye. This is often why your main lugs might be loose after a year of charging. Metal expands when it’s hot and contracts when it cools; over hundreds of charging sessions, those screws can back out just enough to create a high-resistance point. According to the National Electrical Testing Association (NETA) MTS-2023 standards, bolted electrical connections should be inspected for high resistance using thermographic imaging or manual torque checks periodically to prevent catastrophic failure. 
How do I maintain my charging setup over time?
Maintaining your system isn’t just about the wires; it’s about the software too. If you have a ‘smart’ unit, you need to know how to update the firmware on your smart charging station. Manufacturers often push patches that improve thermal management or fix bugs that cause the unit to drop offline. Physically, I always check the ‘holster’ for spiders or debris. It sounds silly, but a single spider web inside the J1772 handle can trap moisture and cause the pins to corrode, eventually leading to a costly replacement of the entire cable. I also highly recommend looking into the best breaker lockouts for your home charging circuit if your panel is in a shared space like a carport or an unlocked basement, ensuring no one accidentally flips your car’s life support off while you’re sleeping.
Prepare for the Bi-directional Revolution
Looking ahead, the way we think about panels is shifting. We are moving toward a world where your car doesn’t just take power; it gives it back during a blackout. This is why I tell everyone to look at panel upgrade strategies to meet ev charging code requirements in 2025 now, rather than later. Future standards like ISO 15118-20 are paving the way for ‘Vehicle-to-Home’ (V2H) tech. If you’re already inside your panel adding a circuit, consider adding a whole-house surge protector. Knowing why your main service panel needs a surge protector for your ev is the best insurance policy you can buy against a lightning strike frying your car’s $10,000 onboard charger. Don’t just build for today’s commute; build for the power grid of the next decade. If you haven’t checked your breaker torque settings since installation, go grab a torque wrench this weekend and verify them—it’s the single most important safety check you can perform.
The Expensive Lessons That Saved My Sanity and My House
After wrestling with my old panel for weeks, I realized that the most important part of the job isn’t the heavy lifting; it’s the attention to microscopic details. First, never ignore the hum. If your charger or breaker is making a buzzing sound, you’re likely dealing with a loose connection or a faulty relay. Learning how to diagnose a faulty internal relay in your charging station early on can save you from a complete hardware failure later. Second, always size up on your wire. Even if code says 6 AWG is fine for a short run, going to 4 AWG can significantly reduce heat and energy loss over time. Understanding the specific wire gauge that prevents voltage drop over long runs is the difference between a charger that gets warm and one that stays cool under pressure. Finally, trust the permit process. An inspector isn’t a hurdle; they are the final safety check that ensures your insurance company will actually pay out if something goes wrong.
My Personal Toolkit for a Bulletproof Setup
#IMAGE_PLACEHOLDER_E#
I don’t recommend a lot of specialty gadgets, but these four items changed my workflow. I rely on a calibrated torque screwdriver because hand-tightening is a fire hazard in disguise—precision matters when 40 amps are flowing for eight hours straight. I also keep a copy of the latest NEC guidelines bookmarked to show the inspector I’ve done my homework. For actual maintenance, a thermal camera is non-negotiable; it lets you see high-resistance heat before you smell smoke. Finally, if you ever run into unexpected errors, keep a guide handy for troubleshooting ev chargers common compliance pitfalls and fixes. Having the right tools turns a stressful weekend project into a professional-grade installation you can be proud of.
Claim Your Electrical Independence
Building your own charging infrastructure is more than just a home improvement project; it’s about future-proofing your life. You don’t need to be an electrical engineer to get this right, you just need to be diligent. By respecting the physics of high-voltage systems and following the rules of code compliance, you can enjoy the convenience of home charging without the five thousand dollar standard upgrade fee. Your old house has plenty of life left in it—you just have to know how to unlock its potential safely. Have you encountered any unexpected pushback from your local building department during your install? Let me know in the comments below!