I was standing on a rickety step ladder in my dimly lit garage, wire strippers in hand, when I heard my youngest son’s footsteps pattering toward the main service panel. My heart did a literal somersault. Even though I’d double-checked the circuit was dead, the sheer terror of him “helping” by flipping a switch back on while I was elbow-deep in the wiring was a massive wake-up call. I’d been working on how to install a second ev charger for a multi-car household, and in my excitement, I’d completely neglected a physical barrier to the breaker. That moment of pure panic changed how I view my panel forever. Today, I’m going to walk you through why a simple breaker lockout is the most underrated tool in your EV arsenal and which ones actually fit the breakers we use for high-load charging. We’re going to solve the safety gap between “I think it is off” and “I know it is off,” so you can sleep better at night.
Why You Can Not Just Tape Down Your Breakers Anymore
When I first started tinkering with my home setup, I did what most of us do: I put a piece of blue painter’s tape over the switch and scribbled “DO NOT TOUCH” in Sharpie. It felt like enough. But here’s the cold truth I learned the hard way—tape fails. Heat, humidity, or a curious toddler can peel that tape right off. If you’ve noticed why your breaker gets hot to the touch during charging, you already know that EV circuits handle a lot of stress. I once made the rookie mistake of skipping a panel load calculation before adding more hardware, and the resulting chaos made me realize that managing your panel requires more than just good intentions. According to the Electrical Safety Foundation (ESFI), electrical malfunctions cause over 50,000 home fires annually, and while a lockout won’t stop a fire, it prevents the accidental energization that leads to shocks and short circuits during maintenance. You need a mechanical block that forces a deliberate action to bypass. Have you ever had a close call where someone almost flipped a breaker while you were working? It’s a terrifying feeling, isn’t it?
Do these little plastic clips really make a difference?
I get it. You’re looking at a $10 piece of molded plastic and wondering if it’s just another gimmick pushed by big hardware stores. I used to be a skeptic too. I thought my system of telling everyone in the house to stay away from the garage was foolproof. It wasn’t. A real lockout device ensures that even if you forget to tell the guest staying in your spare room, your circuit remains safe. Plus, when you are dealing with the specific torque settings that prevent panel fires during high load charging, the last thing you want is the circuit live while you’re trying to get those connections perfect. In the next section, we will dive into the specific brands that actually stay put on a Square D or Eaton panel without wiggling loose.
Pick a Lockout That Actually Grips Your Breaker
Finding the right lockout is not like buying a lightbulb; it is more like finding the exact key for a deadbolt. If you have a Square D Homeline panel, a generic ‘universal’ lockout from a big-box store might feel snug, but a sharp tug can often pop it right off the toggle. I learned this the hard way when I was prepping for panel upgrades for ev chargers what you need to know. I bought a cheap plastic kit, clamped it on, and then watched it slide down the breaker face while I was moving some 6-gauge wire. If that toggle had moved just a fraction of an inch, I would have had a live circuit in my hands. You need to match the device to the specific frame size of your breaker. For most 40A or 50A double-pole breakers used in EV circuits, you want a ‘large handle’ lockout that clamps onto the tie-bar between the two poles. This ensures that both sides of the 240V circuit are physically immobilized. Before you buy, check the specific breaker brands that are known to overheat with evs to ensure your panel hardware is even worth locking out or if it is time for a full replacement.
Master the Clamp and Padlock Method
Once you have the right hardware, the installation is a thirty-second insurance policy. First, flip the breaker to the ‘OFF’ position. Never try to install a lockout on a live breaker; the physical pressure of the clamp can sometimes cause internal arcing if the contacts are worn. Place the lockout device over the toggle and tighten the set screw until the device cannot be wiggled. This is where the magic happens: the hole in the lockout device will now align with the frame, allowing you to slide a small padlock through. I keep a dedicated brass padlock in my tool bag just for this. If you are worried about ensuring code compliance when installing ev chargers, remember that OSHA-style lockout/tagout (LOTO) is not just for factories—it is the gold standard for residential safety too. 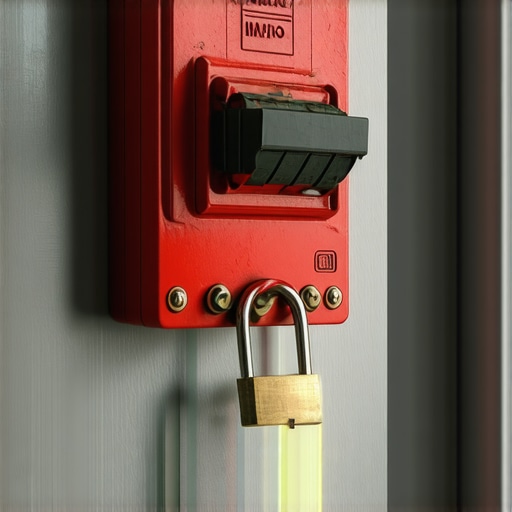
Don’t Skip the Verification Step
The biggest mistake people make is trusting the plastic. After the lock is on, try to flip the breaker with your thumb. If there is any play, you have the wrong size. I once spent twenty minutes fighting with a lockout on an older Eaton panel because the toggle was slightly wider than modern versions. I ended up having to use a ‘pin-out’ style lockout that grips the small indentations on the side of the breaker. This is especially critical when you are dealing with the specific torque settings that prevent panel fires during high load charging. If you are torquing down lugs, you are putting physical stress on the entire busbar; you cannot afford for that breaker to have even a millimeter of movement. If you find your breaker is wobbly or the lockout won’t seat, it might be a sign of deeper issues like why your breaker gets hot to the touch during charging, which often indicates the plastic casing has slightly deformed from heat.
Handling Double-Pole Breakers for 240V Circuits
EV chargers pull a lot of juice, which means we are almost always working with double-pole breakers. These require a specific ‘tie-bar’ lockout. You cannot just lock one side and hope for the best. If one pole is energized while the other is dead, you risk back-feeding through the appliance or charger, which is a recipe for a motherboard-frying disaster. If you are currently troubleshooting ev chargers common compliance pitfalls and fixes, verify that your lockout covers the entire width of the double-pole unit. When I was installing a second charger for a neighbor, we realized his panel was so crowded we couldn’t fit a standard lockout. We had to use a specialized ‘thin-profile’ device designed for space-saver breakers. Always have a few different sizes on hand; it is cheaper than a trip to the ER.I’ve seen it a hundred times on the forums: “I want a Level 2 charger, so I guess I need to spend $4,000 on a service upgrade.” It’s a common belief, but honestly, it’s often wrong. In many cases, you can learn how to add an ev charger without a 200 amp panel upgrade simply by being smarter about your existing capacity. I’ve worked on homes where the math worked out perfectly without a single change to the main service lines, yet the homeowner was being pressured by contractors to rip out everything. Instead of brute-forcing the electrical capacity, look into how to use load shedding devices to avoid a full service upgrade. These clever gadgets monitor your home’s total draw and temporarily throttle the charger if you decide to run the dryer and the oven at the same time. The National Electrical Code (NEC) 2023 even provides specific frameworks for using these “automated load management systems,” proving that the industry is moving away from the “bigger is always better” mentality. 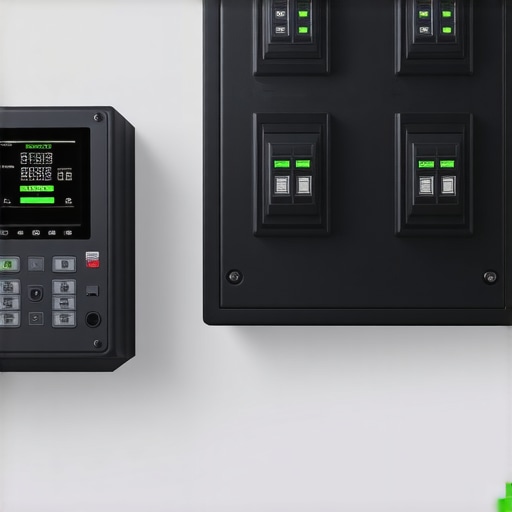
The 200-Amp Myth That Might Be Costing You Thousands
Most people assume their panel is a static bucket of power, but it is much more dynamic than that. I’ve found that homeowners often overestimate their baseline usage. When you actually perform a professional load calculation, you might find that your “maxed out” panel is actually sitting at 40% capacity most of the day. Challenging the status quo of the full service upgrade is about efficiency, not just cutting corners. For example, if you are planning upgrading your panel for better ev charging performance, focus on the busbar quality and the spacing rather than just the amperage on the main breaker. This nuance is what many general electricians miss because they aren’t specializing in high-demand EV installs.
Can Your Existing Panel Handle Two EVs at Once?
This is where we get into the weeds of load calculations and sophisticated management. If you are already pushing the limits, you need to know troubleshooting ev chargers common compliance pitfalls and fixes before the inspector knocks on your door. One of the most frustrating “oops” moments is discovering why the city inspector failed your garage wiring because you didn’t account for the “continuous load” rules—which state that a charger pulling 40A requires a 50A breaker and wire rated for that sustained heat. If you just look at the raw numbers without the 125% safety margin, you’re setting yourself up for a failed inspection and a potentially dangerous situation.
Stop Chasing Nuisance Trips in Your Sleep
Don’t let a “nuisance trip” drive you crazy. If you find why the gfci in your panel keeps nuisance tripping your charger, it’s usually because the charger itself has internal GFCI protection that is “fighting” with the breaker you installed. This double-layering can create a feedback loop that shuts down your charging for no reason at 3 AM. It’s these tiny, technical details—like the specific torque settings that prevent panel fires during high load charging—that separate a DIY job from a professional, code-compliant installation. We also need to be wary of external factors; the mistake that causes ev charger motherboards to fry during storms often comes down to skipping a $50 surge protector while focusing on the bigger, more expensive parts of the job. Have you ever fallen into this trap or been told you need a massive upgrade when you suspected otherwise? Let me know in the comments.The real work begins after the city inspector signs off on your permit and you plug in for that first full charge. I have realized over the years that a ‘set it and forget it’ mentality is the quickest way to end up with a melted terminal block three years down the line. I now keep a small ‘EV survival kit’ in my garage, which includes a few of the essential spare parts to keep for your home charging unit. But the most important item in my bag is not a spare fuse—it is a $30 handheld infrared thermometer. Every six months, while my car is pulling its full 48-amp load, I point that red laser at the breaker and the wire lugs. If I see anything climbing over 140°F, I know I have a loose connection or a failing busbar. It is the most effective way to handle ev charger troubleshooting expert tips for common issues before they become expensive middle-of-the-night emergencies.
How often should I actually open my panel for a checkup?
I generally recommend a visual inspection every change of season, or at least twice a year. If you live in a region with harsh temperature swings, you need to be especially diligent with 3 maintenance tasks that keep your outdoor charger running through winter. Look for ‘blooming’ on the copper—that weird greenish-white oxidation that signals moisture—and check that your how to update the firmware on your smart charging station routine is actually working. Software bugs can sometimes cause the unit to ignore your off-peak schedules, which is why why your ev battery health depends on your home charger settings more than you might think.
The specialized tool that changed my DIY game
If you are serious about maintaining your own equipment, stop guessing. The National Electrical Code (NEC) Section 110.14(D) is very specific: if a manufacturer provides a torque value on the breaker or lug, you are legally required to use a calibrated torque tool for the installation. I use a digital torque screwdriver because it beeps when I hit the exact inch-pounds required. This is the only way to how to verify your electrician actually used copper wire for the install properly and ensure they did not just ‘hand-tighten’ a connection that will eventually vibrate loose under high load. 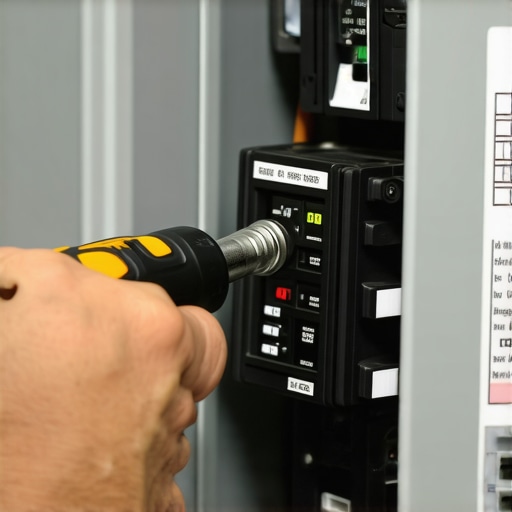 Looking ahead, we are moving toward a world where your car will not just take power; it will give it back. Bidirectional charging is the next frontier, and it is going to require even more robust panel upgrade strategies to meet ev charging code requirements in 2025. If you are not thinking about how your panel will handle V2H (Vehicle-to-Home) technology today, you might find yourself paying for another major upgrade in just a few years. If you are feeling overwhelmed by these technical requirements, my best advice is to learn how to find an electrician who actually understands ev codes so you have a partner who sees the big picture. My challenge to you: grab a cheap IR thermometer this weekend and scan your panel while the car is charging—you might be surprised by the heat signatures you find.
The Lessons I Learned the Hard Way about High-Load Wiring
After years of tinkering, I’ve realized that electrical safety isn’t just about following a manual; it’s about respect for the power moving through your walls. One of my biggest lightbulb moments was realizing that thermal expansion is your worst enemy. Under the heavy load of a Level 2 charger, wires physically move and expand, which is why the specific torque settings that prevent panel fires during high load charging are not suggestions—they are lifesavers. I also learned that you should never assume a breaker is truly ‘off’ just because the lever moved; always verify with a meter.
Another hard lesson was the value of documentation. I spent three hours once trying to figure out which leg of a circuit was failing because I hadn’t labeled my sub-panel properly. If you are upgrading your panel for better ev charging performance, take the extra five minutes to create a clear, permanent map. Finally, don’t ignore the ‘smell test’. If you ever notice the reason your ev charger smells like burnt plastic, shut it down immediately; that scent is the smell of a connection failing under stress.
My Personal Toolkit for a Bulletproof Garage Setup
I’m often asked what I keep in my bag to ensure things stay running smoothly. First and foremost, get a digital torque screwdriver. It’s the only way to satisfy the legal requirements of NEC 110.14(D) and ensure your lugs are perfect. Second, I swear by a non-contact voltage tester; it’s your first line of defense before you touch any metal. I also highly recommend keeping the essential spare parts to keep for your home charging unit, such as extra lockout clips and high-quality wire nuts, so you aren’t stranded if a small component fails.
#IMAGE_PLACEHOLDER_E#
For those who want to dive deeper into the ‘why’ behind the rules, I always keep a copy of the NEC Handbook nearby. It’s dense, but it’s the bible for ensuring code compliance when installing ev chargers. Lastly, a simple infrared thermometer is my favorite diagnostic tool—it’s like having X-ray vision for finding loose connections before they arc.
The Future of Your Home is Just One Upgrade Away
Embarking on a panel upgrade or a new EV install can feel like a massive undertaking, but it’s really about building a foundation for the next decade of your life. Whether you are researching panel upgrade strategies to meet ev charging code requirements in 2025 or just trying to get a single plug to work, remember that every step you take toward safety makes your home more resilient. Don’t be intimidated by the jargon or the complexity. By staying curious and checking your connections, you’re already ahead of 90% of homeowners. You’ve got the tools and the knowledge; now it’s time to make your garage the high-tech charging hub it was meant to be. Have you ever found a loose wire while checking your panel, or are you still working up the courage to open the cover? Let me know in the comments below!