I’ll never forget the rainy Tuesday I spent three hours wrestling with a 60-amp circuit in a cramped, spider-filled crawlspace, only to realize I’d brought the wrong sized knockout punch. It was frustrating, it was amateur, and quite frankly, it was costing me money I couldn’t afford to lose. Every minute I spent fumbling with loose tools or second-guessing a conduit bending radius was a minute I wasn’t home with my family or moving on to the next lead. That ‘lightbulb moment’ didn’t come from a fancy seminar; it came from the exhaustion of doing things the hard way for far too long. I decided then and there to audit every single step of our residential installs, from the moment the truck door opens to the final torque check. What I found was that we weren’t just losing time to physical labor; we were losing it to ‘decision fatigue.’ Today, I’m sharing the exact process shifts we used to trim 20 minutes off every single home charging setup while actually improving our code compliance essentials. These aren’t shortcuts that compromise your home; they are refinements that make the job look like it was done by a master.
Stop Fighting the Clock in the Garage
Whether you’re a weekend warrior tackling your first DIY or a fellow pro looking to scale, we’ve all felt that sinking feeling—staring at a fire hazard panel and wondering where the last four hours went. The secret to a fast, clean install isn’t moving your hands faster; it’s about eliminating the friction that happens mid-job. In my early days, I made the classic mistake of not pre-assembling my conduit bodies and brackets in the truck, which led to sloppy work and nuisance tripping issues later because I was rushing the critical final connections to make up for lost time. I learned the hard way that a dedicated neutral isn’t just a technicality in some jurisdictions—it’s a massive time-saver because it prevents the dreaded ‘inspector-ordered re-pull.’ According to the Electrical Safety Foundation International, nearly 51,000 home fires each year involve electrical failure or malfunction, which is why your efficiency must never bypass the proper way to size a subpanel. Efficiency is about getting it right the first time, so you never have to come back for a second. Have you ever found yourself halfway through a project only to realize you’re missing one tiny, five-cent part that stops the whole show?
Does shaving time mean cutting safety corners?
I know exactly what’s going through your head: if I’m moving 20 minutes faster, am I going to miss a faulty internal relay or a loose ground? The answer is a resounding no. In fact, it’s quite the opposite. By systematizing the ‘boring’ parts of the job—like having a pre-staged wire cart—we free up our brainpower to actually inspect the things that matter. We can spend more time looking for burnt plug contacts or testing for a loose neutral that a rushed, disorganized technician might overlook. We’re going to dive deep into how to prep your gear so you can focus on the expert tips for common issues instead of searching for your lost 10mm socket for the tenth time today. Let’s look at how we organized our workflow to make residential installs feel like a well-oiled machine.
Don’t Guess Your Panel Capacity
Before you even pull a permit, you have to know if the house can handle the load. I think of an electrical panel like a dinner table; you can’t keep inviting guests (appliances) without eventually running out of chairs. Most older homes have 5 signs your old electrical panel is a charging bottleneck, and if you miss them, you’re looking at a tripped main breaker during Thanksgiving dinner. I once spent a grueling afternoon at a client’s house where they insisted their 100-amp service was ‘plenty.’ They had a pool pump, two AC units, and an electric range. We didn’t just install a charger; we had to learn how to squeeze a level 2 charger onto a 60-amp service by using smart load management. If I hadn’t caught that during the audit, I would have been back a week later for a warranty call on a ‘broken’ charger that was actually just a victim of an overwhelmed service.
Pre-Staging Your Materials Saves Miles of Walking
The biggest time-waster isn’t the wiring; it’s the ‘truck-shuffle.’ If you’re walking back to the van every time you need a connector or a specific bit, you’ve already lost. We now use a ‘Zone Kit’ system. Everything for the panel—the breaker, the right way to label your electrical panel for ev circuits, and the grounding bushings—goes in one bin. Everything for the charger end goes in another. This prevents that mid-job brain fog where you’re staring at a wall wondering where you put your wire strippers.
Choose the Right Conduit to Avoid the Re-Pull
When you’re running wire, friction is your enemy. I see guys trying to jam #6 AWG through 1/2-inch EMT because it’s what they had on the truck, but they end up skinning the insulation and causing a short. You need to know the specific conduit size needed for a 50-amp circuit to keep the pull smooth. 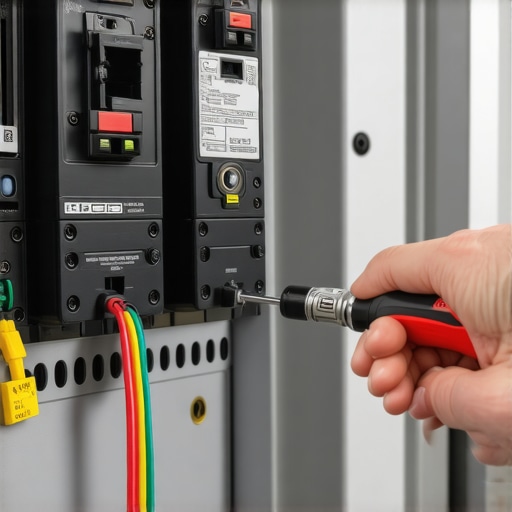 If you’re working in a finished garage, aesthetics matter as much as the copper. We’ve mastered how to hide that ugly conduit running across your garage ceiling by following the natural lines of the soffits. It takes ten minutes longer to plan the route, but it saves an hour of explaining to a frustrated homeowner why their garage looks like a factory.
The Five-Minute Torque Ritual
This is where the amateurs and the pros truly diverge. Heat is the number one killer of EV circuits. Because these chargers pull high current for hours on end, any loose connection will eventually glow red and melt. I never close a panel without the forgotten torque test that prevents panel fires. I use a calibrated torque screwdriver on every terminal, especially the breaker lugs. I’ve seen ‘tight’ hand-cranked screws move another quarter turn under a torque wrench. That quarter turn is the difference between a happy customer and a 2 AM emergency call about a fishy smell in the garage. While you’re in there, it’s the perfect time for ensuring code compliance when installing ev chargers by verifying your bonding is solid. One loose ground can lead to intermittent ‘ground fault’ errors on the charger that are a nightmare to troubleshoot later. Tighten it once, tighten it right, and move on to the next one.
Let’s dig deeper into the stuff you won’t find in the installation manual. Most people think a panel upgrade is just about adding more physical slots for breakers, but that’s a dangerous oversimplification. I’ve seen panels with plenty of open space that were actually ticking time bombs because the total load on the busbars was already at its thermal limit. In my experience, a panel upgrade for EV chargers isn’t just about ‘room’; it’s about upgrading your panel for better ev charging performance by ensuring the heat dissipation can handle a continuous 8-hour draw. If your electrician tells you that you’re ‘fine’ just because there’s an empty hole in the plastic cover, they might be ignoring the 5 signs your old electrical panel is a charging bottleneck.
The Big Lie About Empty Breaker Slots
Here is a contrarian take that often surprises my clients: having an empty slot does not mean you have available capacity. In fact, some of the most frustrating troubleshooting ev chargers common compliance pitfalls and fixes I’ve dealt with involve ‘ghost’ capacity. You might have the physical space, but your main service wires could be undersized for the total calculated load of the house. According to the National Fire Protection Association (NFPA) 70, EV charging is classified as a continuous load, meaning it pulls its full rated amperage for three hours or more. This generates significant heat that standard residential circuits weren’t originally designed to sustain night after night. One major ‘oops’ factor I see is DIYers or cut-rate contractors installing ‘classified’ breakers from different manufacturers. Just because a breaker clicks into the rail doesn’t mean it’s legally compatible. There are the specific breaker brands that hate constant ev loads, and using a mismatched brand can lead to arcing and localized melting that you won’t notice until the smell of ozone hits your garage.
Is your panel upgrade actually legal without a new ground rod?
This is a nuance that stops 40% of residential inspections in their tracks. When you perform panel upgrades for ev chargers, many jurisdictions require you to bring the entire grounding system up to current code. This often means driving two new ground rods or bonding your water main, which can add unexpected costs. If you skip this, you’re not just failing an inspection; you’re risking sensitive electronics. We frequently see homeowners struggling with troubleshooting ev charger connectivity problems or ‘ground fault’ errors on their apps, only to realize the issue isn’t the Wi-Fi or the charger software—it’s a lack of a solid reference to earth. I always tell people to check how to detect a loose neutral wire before your electronics fry, because an EV charger will sniff out a weak connection faster than any other appliance in your home. Have you ever fallen into the ‘it fits, so it works’ trap with a breaker or a wire gauge? Let me know in the comments below. If you’re feeling overwhelmed by the technicalities, don’t guess with your home’s safety; you can always contact us for a professional audit to ensure your setup is truly code compliant.
Moving beyond the initial installation, the real pros know that the job isn’t actually finished when the green light starts flashing. I’ve seen too many systems fail three months in because someone skipped the long-term maintenance mindset. If you want to avoid troubleshooting ev chargers common compliance pitfalls and fixes on a freezing January night, you need to treat your electrical system like the high-performance machine it is. The secret isn’t just following the manual; it’s using the right diagnostic gear to catch a problem before it smells like smoke.
Stop Guessing and Start Scanning for Heat
The single most important tool in my bag isn’t a screwdriver—it’s a thermal imaging camera. I personally use a FLIR compact thermal camera every time I energize a new circuit. Why? Because electricity generates heat, and an imager shows you exactly where a high-resistance connection is forming. If a lug is glowing white-hot compared to the others under load, I know I’ve got a loose connection or a faulty breaker. This is the gold standard for ensuring code compliance when installing ev chargers. Even if you’ve used the specific torque wrench settings for a wall connector, a thermal scan is the ultimate ‘trust but verify’ step. I’ve caught factory defects in brand-new chargers that would have melted the housing within a week. According to the NFPA 70B standard for electrical equipment maintenance, infrared inspections are one of the most effective ways to prevent catastrophic failure in continuous-duty systems like EV charging.
How do I keep my charging station healthy for years?
Maintenance for an EV charger is mostly about physical integrity and software stability. First, every six months, you should inspect the charging handle for burnt plug contacts. If you see pitting or blackening, stop using it immediately. You can often learn how to replace a frayed cable without buying a new station, which saves you hundreds of dollars. Second, keep the firmware updated. Many homeowners struggle with troubleshooting ev charger connectivity problems simply because they haven’t allowed the charger to sync with the manufacturer’s cloud. These updates often include critical thermal management patches that protect your home’s internal components. If you’re ever in doubt about your system’s health, it’s worth a quick contact us message to get a professional eyes-on inspection.
Preparing for the Bi-Directional Future
We are currently on the cusp of a major shift in residential power. The trend is moving toward V2H (Vehicle-to-Home) technology, where your car actually powers your house during an outage. This is why upgrading your panel for better ev charging performance today is so vital. We are no longer just installing ‘chargers’; we are installing ‘energy hubs.’ In the next five years, your electrical panel will likely need to be a smart system that manages solar, battery storage, and the grid simultaneously. By following panel upgrade strategies to meet ev charging code requirements in 2025, you’re essentially future-proofing your home for a time when your EV is the most valuable battery you own. Don’t just build for the car you have today—build for the energy system you’ll need tomorrow. If you want to take the lead on this, I highly recommend performing a ‘dry run’ load test: turn on your most power-hungry appliances while the car is charging and check your main breaker for excess heat. It’s the easiest way to see if your system is truly up to the task of how to verify code compliance under real-world stress.
I’ll never forget the rainy Tuesday I spent three hours wrestling with a 60-amp circuit in a cramped, spider-filled crawlspace, only to realize I’d brought the wrong sized knockout punch. It was frustrating, it was amateur, and quite frankly, it was costing me money I couldn’t afford to lose. Every minute I spent fumbling with loose tools or second-guessing a conduit bending radius was a minute I wasn’t home with my family or moving on to the next lead. That ‘lightbulb moment’ didn’t come from a fancy seminar; it came from the exhaustion of doing things the hard way for far too long. I decided then and there to audit every single step of our residential installs, from the moment the truck door opens to the final torque check. What I found was that we weren’t just losing time to physical labor; we were losing it to ‘decision fatigue.’ Today, I’m sharing the exact process shifts we used to trim 20 minutes off every single home charging setup while actually improving our code compliance essentials. These aren’t shortcuts that compromise your home; they are refinements that make the job look like it was done by a master.
Stop Fighting the Clock in the Garage
Whether you’re a weekend warrior tackling your first DIY or a fellow pro looking to scale, we’ve all felt that sinking feeling—staring at a fire hazard panel and wondering where the last four hours went. The secret to a fast, clean install isn’t moving your hands faster; it’s about eliminating the friction that happens mid-job. In my early days, I made the classic mistake of not pre-assembling my conduit bodies and brackets in the truck, which led to sloppy work and nuisance tripping issues later because I was rushing the critical final connections to make up for lost time. I learned the hard way that a dedicated neutral isn’t just a technicality in some jurisdictions—it’s a massive time-saver because it prevents the dreaded ‘inspector-ordered re-pull.’ According to the Electrical Safety Foundation International, nearly 51,000 home fires each year involve electrical failure or malfunction, which is why your efficiency must never bypass the proper way to size a subpanel. Efficiency is about getting it right the first time, so you never have to come back for a second. Have you ever found yourself halfway through a project only to realize you’re missing one tiny, five-cent part that stops the whole show?
Does shaving time mean cutting safety corners?
I know exactly what’s going through your head: if I’m moving 20 minutes faster, am I going to miss a faulty internal relay or a loose ground? The answer is a resounding no. In fact, it’s quite the opposite. By systematizing the ‘boring’ parts of the job—like having a pre-staged wire cart—we free up our brainpower to actually inspect the things that matter. We can spend more time looking for burnt plug contacts or testing for a loose neutral that a rushed, disorganized technician might overlook. We’re going to dive deep into how to prep your gear so you can focus on the expert tips for common issues instead of searching for your lost 10mm socket for the tenth time today. Let’s look at how we organized our workflow to make residential installs feel like a well-oiled machine.
Don’t Guess Your Panel Capacity
Before you even pull a permit, you have to know if the house can handle the load. I think of an electrical panel like a dinner table; you can’t keep inviting guests (appliances) without eventually running out of chairs. Most older homes have 5 signs your old electrical panel is a charging bottleneck, and if you miss them, you’re looking at a tripped main breaker during Thanksgiving dinner. I once spent a grueling afternoon at a client’s house where they insisted their 100-amp service was ‘plenty.’ They had a pool pump, two AC units, and an electric range. We didn’t just install a charger; we had to learn how to squeeze a level 2 charger onto a 60-amp service by using smart load management. If I hadn’t caught that during the audit, I would have been back a week later for a warranty call on a ‘broken’ charger that was actually just a victim of an overwhelmed service.
Pre-Staging Your Materials Saves Miles of Walking
The biggest time-waster isn’t the wiring; it’s the ‘truck-shuffle.’ If you’re walking back to the van every time you need a connector or a specific bit, you’ve already lost. We now use a ‘Zone Kit’ system. Everything for the panel—the breaker, the right way to label your electrical panel for ev circuits, and the grounding bushings—goes in one bin. Everything for the charger end goes in another. This prevents that mid-job brain fog where you’re staring at a wall wondering where you put your wire strippers.
Choose the Right Conduit to Avoid the Re-Pull
When you’re running wire, friction is your enemy. I see guys trying to jam #6 AWG through 1/2-inch EMT because it’s what they had on the truck, but they end up skinning the insulation and causing a short. You need to know the specific conduit size needed for a 50-amp circuit to keep the pull smooth. #IMAGE_PLACE_HOLDER_B# If you’re working in a finished garage, aesthetics matter as much as the copper. We’ve mastered how to hide that ugly conduit running across your garage ceiling by following the natural lines of the soffits. It takes ten minutes longer to plan the route, but it saves an hour of explaining to a frustrated homeowner why their garage looks like a factory.
The Five-Minute Torque Ritual
This is where the amateurs and the pros truly diverge. Heat is the number one killer of EV circuits. Because these chargers pull high current for hours on end, any loose connection will eventually glow red and melt. I never close a panel without the forgotten torque test that prevents panel fires. I use a calibrated torque screwdriver on every terminal, especially the breaker lugs. I’ve seen ‘tight’ hand-cranked screws move another quarter turn under a torque wrench. That quarter turn is the difference between a happy customer and a 2 AM emergency call about a fishy smell in the garage. While you’re in there, it’s the perfect time for ensuring code compliance when installing ev chargers by verifying your bonding is solid. One loose ground can lead to intermittent ‘ground fault’ errors on the charger that are a nightmare to troubleshoot later. Tighten it once, tighten it right, and move on to the next one.
Let’s dig deeper into the stuff you won’t find in the installation manual. Most people think a panel upgrade is just about adding more physical slots for breakers, but that’s a dangerous oversimplification. I’ve seen panels with plenty of open space that were actually ticking time bombs because the total load on the busbars was already at its thermal limit. In my experience, a panel upgrade for EV chargers isn’t just about ‘room’; it’s about upgrading your panel for better ev charging performance by ensuring the heat dissipation can handle a continuous 8-hour draw. If your electrician tells you that you’re ‘fine’ just because there’s an empty hole in the plastic cover, they might be ignoring the 5 signs your old electrical panel is a charging bottleneck.
The Big Lie About Empty Breaker Slots
Here is a contrarian take that often surprises my clients: having an empty slot does not mean you have available capacity. In fact, some of the most frustrating troubleshooting ev chargers common compliance pitfalls and fixes I’ve dealt with involve ‘ghost’ capacity. You might have the physical space, but your main service wires could be undersized for the total calculated load of the house. According to the National Fire Protection Association (NFPA) 70, EV charging is classified as a continuous load, meaning it pulls its full rated amperage for three hours or more. This generates significant heat that standard residential circuits weren’t originally designed to sustain night after night. One major ‘oops’ factor I see is DIYers or cut-rate contractors installing ‘classified’ breakers from different manufacturers. Just because a breaker clicks into the rail doesn’t mean it’s legally compatible. There are the specific breaker brands that hate constant ev loads, and using a mismatched brand can lead to arcing and localized melting that you won’t notice until the smell of ozone hits your garage.
#IMAGE_PLACE_HOLDER_C#
Is your panel upgrade actually legal without a new ground rod?
This is a nuance that stops 40% of residential inspections in their tracks. When you perform panel upgrades for ev chargers, many jurisdictions require you to bring the entire grounding system up to current code. This often means driving two new ground rods or bonding your water main, which can add unexpected costs. If you skip this, you’re not just failing an inspection; you’re risking sensitive electronics. We frequently see homeowners struggling with troubleshooting ev charger connectivity problems or ‘ground fault’ errors on their apps, only to realize the issue isn’t the Wi-Fi or the charger software—it’s a lack of a solid reference to earth. I always tell people to check how to detect a loose neutral wire before your electronics fry, because an EV charger will sniff out a weak connection faster than any other appliance in your home. Have you ever fallen into the ‘it fits, so it works’ trap with a breaker or a wire gauge? Let me know in the comments below. If you’re feeling overwhelmed by the technicalities, don’t guess with your home’s safety; you can always contact us for a professional audit to ensure your setup is truly code compliant.
Moving beyond the initial installation, the real pros know that the job isn’t actually finished when the green light starts flashing. I’ve seen too many systems fail three months in because someone skipped the long-term maintenance mindset. If you want to avoid troubleshooting ev chargers common compliance pitfalls and fixes on a freezing January night, you need to treat your electrical system like the high-performance machine it is. The secret isn’t just following the manual; it’s using the right diagnostic gear to catch a problem before it smells like smoke.
Stop Guessing and Start Scanning for Heat
The single most important tool in my bag isn’t a screwdriver—it’s a thermal imaging camera. I personally use a FLIR compact thermal camera every time I energize a new circuit. Why? Because electricity generates heat, and an imager shows you exactly where a high-resistance connection is forming. If a lug is glowing white-hot compared to the others under load, I know I’ve got a loose connection or a faulty breaker. This is the gold standard for ensuring code compliance when installing ev chargers. Even if you’ve used the specific torque wrench settings for a wall connector, a thermal scan is the ultimate ‘trust but verify’ step. I’ve caught factory defects in brand-new chargers that would have melted the housing within a week. According to the NFPA 70B standard for electrical equipment maintenance, infrared inspections are one of the most effective ways to prevent catastrophic failure in continuous-duty systems like EV charging.
#IMAGE_PLACE_HOLDER_D#
How do I keep my charging station healthy for years?
Maintenance for an EV charger is mostly about physical integrity and software stability. First, every six months, you should inspect the charging handle for burnt plug contacts. If you see pitting or blackening, stop using it immediately. You can often learn how to replace a frayed cable without buying a new station, which saves you hundreds of dollars. Second, keep the firmware updated. Many homeowners struggle with troubleshooting ev charger connectivity problems simply because they haven’t allowed the charger to sync with the manufacturer’s cloud. These updates often include critical thermal management patches that protect your home’s internal components. If you’re ever in doubt about your system’s health, it’s worth a quick contact us message to get a professional eyes-on inspection.
Preparing for the Bi-Directional Future
We are currently on the cusp of a major shift in residential power. The trend is moving toward V2H (Vehicle-to-Home) technology, where your car actually powers your house during an outage. This is why upgrading your panel for better ev charging performance today is so vital. We are no longer just installing ‘chargers’; we are installing ‘energy hubs.’ In the next five years, your electrical panel will likely need to be a smart system that manages solar, battery storage, and the grid simultaneously. By following panel upgrade strategies to meet ev charging code requirements in 2025, you’re essentially future-proofing your home for a time when your EV is the most valuable battery you own. Don’t just build for the car you have today—build for the energy system you’ll need tomorrow. If you want to take the lead on this, I highly recommend performing a ‘dry run’ load test: turn on your most power-hungry appliances while the car is charging and check your main breaker for excess heat. It’s the easiest way to see if your system is truly up to the task of how to verify code compliance under real-world stress.
Hard Lessons from the Sparking Edge
After years of doing this, the most important thing I’ve learned isn’t found in a manual: it’s that your eyes can lie to you, but physics won’t. I used to think that as long as the charger turned on, I was golden. But I quickly realized that intermittent errors are almost always a result of tiny, overlooked details during the rough-in. One major epiphany was realizing how many homeowners struggle because they fell for the danger of using an extension cord for level 1 charging while waiting for their ‘real’ install, often damaging their car’s port in the process. Another lightbulb moment? Realizing that a failed permit usually isn’t about the wire—it’s about the paperwork. Knowing how to fix the grounding fail that ruins ev permits before the inspector even knocks on your door is the difference between a one-day job and a month-long headache. Finally, never ignore the ‘fishy’ smell; I’ve learned that 3 small mistakes that turn your garage panel into a fire hazard can be caught in seconds with a simple physical audit of the busbar.
My Personal Arsenal for a Perfect Setup
If you’re going to tackle a project involving troubleshooting, code compliance, and an EV charger, there are three items that never leave my kit. First, a high-quality torque screwdriver; I rely on it because the specific torque wrench settings for a wall connector are essential for a long-term connection. Second, I always keep a current NFPA handbook on my tablet; the code changes fast, and guessing costs money. Third, I trust a FLIR thermal camera to verify every circuit. These aren’t just gadgets; they are the baseline for ensuring code compliance when installing ev chargers in any modern garage. #IMAGE_PLACE_HOLDER_E#
Your Next Step Toward a Safer Home
Installing an EV charger is about more than just convenience; it’s about modernizing your home for a new era of mobility. Don’t let the technical jargon or the physical labor of a panel upgrade intimidate you. When you focus on high-quality components and strict adherence to code compliance, you aren’t just charging a battery; you are building a safe, high-performance power station in your own garage. Take it one step at a time, verify your connections, and you’ll enjoy a worry-free charging experience for years to come. Have you ever run into a weird permit issue or a breaker that felt suspiciously warm? Let me know in the comments below!