I remember the smell of ozone and the sudden, heavy silence when my entire garage went dark. I was in the middle of a delicate cut on my table saw while my Tesla was drawing its full 48 amps. It was a terrifying reminder that ‘making it work’ isn’t the same as doing it right. I had fallen for the trap of thinking I could just tap into an existing circuit, a move that is one of the 3 hidden costs of DIY EV charger wiring that nobody tells you about. My mistake cost me a spoiled project, a dead power tool, and a very expensive emergency call to an electrician to fix my scorched bus bar. Today, I want to make sure you never have to stand in that same darkness. We are going to walk through the math and the logic of sizing a subpanel so your workshop stays bright and your car stays charged, no matter how many tools you are running at once.
Why Your Main Panel Can’t Handle the Workshop Heat
When I first started out, I thought my 200-amp main service was an infinite well of power. It is not. Between the AC, the dryer, and the oven, there isn’t much ‘room’ left when you add a high-draw Level 2 charger to the mix. This is usually why your electrician recommends a 60-amp circuit for a 48-amp charger; it is about that 80% continuous load rule that the National Electrical Code (NEC) obsesses over. According to the National Fire Protection Association, electrical failure or malfunction is a leading cause of home fires, and overloading a garage circuit is a prime candidate for that statistic. If you try to run a workshop off the same lines as your car, you are asking for heat buildup that your insulation simply wasn’t designed to handle.
Is a dedicated workshop subpanel actually worth the hype?
You might be thinking, ‘Can’t I just be careful and not run the saw while the car is charging?’ Trust me, you will eventually forget. Or your spouse will plug in a vacuum to clean the car. Or the car will start a scheduled charge while you’re finishing a project late at night. A subpanel isn’t just about ‘more power’; it is about isolation and safety. It allows you to manage your loads without affecting the rest of your house. It gives you a localized kill-switch for your workshop tools without plunging your kitchen into darkness. Plus, if you ever plan on upgrading your panel for better EV charging performance, having that infrastructure already in place will save you thousands in future labor. I learned the hard way that cutting corners on the front end just leads to a mid-project disaster. Have you ever felt your breaker panel and noticed it was warm to the touch after a long charging session? If so, you’re already pushing your limits. Let’s look at how we can fix that by focusing on the subpanel approach and getting your garage up to code.
Stop Guessing and Start Counting Your Amps
I once tried to estimate my garage load by just adding up the big tools in my head, but I completely ignored the ‘ghost draws’ like the air compressor, the shop vac, and the overhead LED arrays. This is exactly why your ev permit application requires a load calculation worksheet. Think of your electrical panel like a highway; if you try to shove five lanes of traffic into a two-lane exit, you are going to get heat, congestion, and eventually a crash. For a modern workshop that includes an EV charger, I almost always recommend a 100-amp subpanel. It sounds like overkill until you realize that a 48-amp charger alone requires 60 amps of breaker space to meet the 125% continuous load requirement. If you drop in a 60-amp subpanel and then try to run a dust collector and a table saw while the car is charging, you’ll be walking back to the main house in the dark to reset a breaker every single night. 
Thicker Copper Saves More Than Just Your Sanity
Once you know the load, the physical link between your main panel and the subpanel becomes the most critical point of failure. Using the specific wire gauge that prevents voltage drop over long runs is a safety fundamental. If your subpanel is more than 50 feet from the main service, you have to account for resistance. I once helped a neighbor troubleshoot a charger that kept erroring out; it turned out he had used undersized wire that caused the voltage to sag every time the car requested full power. For a 100-amp subpanel, 2 AWG aluminum or 4 AWG copper is usually your baseline, but always check your local amendments because why your ev circuit needs a dedicated neutral in some jurisdictions can change how you pull your wire through the conduit.
The Torque Test That Prevents Garage Fires
I used to think ‘hand-tight’ was a legitimate electrical unit of measurement. I was wrong. The forgotten torque test that prevents panel fires is the difference between a pro install and a DIY disaster. Last year, I went back to a subpanel I had installed six months prior and used a calibrated torque wrench on the lugs. I was horrified to find that two of them had loosened slightly due to the thermal expansion and contraction caused by the heavy EV charging cycles. You must follow the specific torque wrench settings for a wall connector and your subpanel breakers. If a connection is even slightly loose, it creates resistance; resistance creates heat, and heat eventually melts your plastic breaker housing. Do not trust your ‘feel’ when it comes to 60 amps of continuous current; trust the wrench.
I’ve seen plenty of DIYers brag about passing their final inspection as if it’s a gold medal for engineering. Here is the contrarian truth: the National Electrical Code is a floor, not a ceiling. It is the absolute minimum required to keep your house from burning down, but it isn’t a guide for high-performance longevity. When it comes to ensuring code compliance when installing ev chargers, simply meeting the requirement is often the first mistake. If you build exactly to code, you are operating at the edge of your equipment’s thermal capacity for eight hours every night. I prefer to build for the ‘90% rule’ rather than the 80% limit, giving myself extra breathing room so the components aren’t constantly stressed by the heat soak of a Level 2 charge.
Why Passing Inspection Doesn’t Mean Your Setup is Perfect
One common trap is focusing so much on the permit that you ignore the physical reality of how your workshop functions. You might have the right wire gauge, but if you didn’t account for why your charger needs a specific torque setting to pass inspection, you are still at risk. The inspector isn’t going to put a torque wrench on every lug; they are looking for the big-picture safety markers. I’ve seen ‘passed’ installations that were ticking time bombs because the installer used a budget breaker that met the spec but lacked the thermal dissipation properties of a premium unit. According to a study by the Institute of Electrical and Electronics Engineers (IEEE), residential-grade circuit breakers can experience significant mechanical degradation when subjected to the repetitive, high-heat duty cycles of modern EV charging. This is why I always look for industrial-grade options even in a residential garage.
Can a loose neutral wire actually fry your car’s onboard computer?
The short answer is yes, and it’s a nightmare I’ve seen play out in person. When people dive into troubleshooting ev chargers common compliance pitfalls and fixes, they usually look at the hot wires first. But a loose neutral in your subpanel can cause ‘voltage floating.’ This means your 240V circuit can suddenly send lopsided voltage into your sensitive electronics. One side might drop to 90V while the other spikes to 150V. If your car’s onboard charger isn’t equipped with a robust surge protector, that spike can cook the motherboard. Learning how to detect a loose neutral wire before your electronics fry is the single most important ‘advanced’ skill you can have. I recommend checking your neutral bus bar every time you do a seasonal shop cleaning. If you see even a hint of discoloration on the white insulation, shut it down immediately.
The Hidden Danger of Breaker Heat Soak
Everyone talks about wire gauge, but nobody talks about the ‘stacking effect.’ If you put your EV charger breaker right next to your main workshop feed breaker, you are concentrating heat in one corner of the panel. I’ve found that the specific breaker brands that hate constant ev loads are often the ones with the thinnest plastic casings. They tend to warp over time, leading to internal arcing. To avoid this, I always suggest spacing out your high-load breakers with a ‘blank’ space in between if your panel allows it. It’s a small trick that significantly improves airflow and keeps the internal temperature of the subpanel within a safe range. Have you ever fallen into the trap of thinking ‘it passed inspection, so it’s perfect’? Let me know in the comments. We all learn more when we share those ‘almost’ disaster stories.
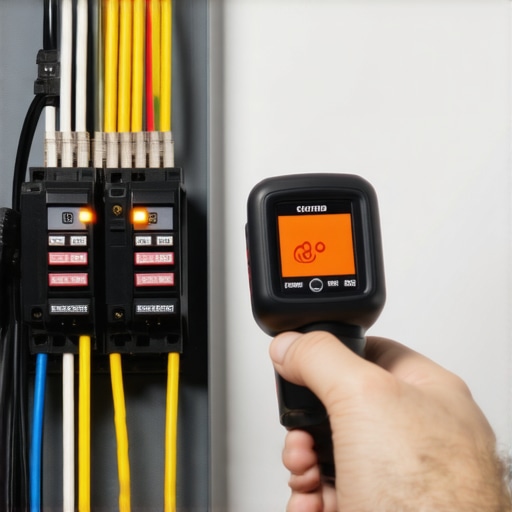
If you really want to stay ahead of the curve, you need to stop thinking like a weekend warrior and start thinking like a facilities manager. My most-used tool isn’t a screwdriver—it’s a compact thermal camera. I use it once a month to scan my subpanel while the car is pulling its maximum load. According to FLIR Systems technical documentation on preventive maintenance, identifying ‘hot spots’ in a panel before they become visible char marks is the most effective way to prevent catastrophic failure. This isn’t just about ensuring code compliance when installing ev chargers; it’s about absolute peace of mind. If I see a lug that’s 20 degrees hotter than its neighbors, I know exactly where my next maintenance hour needs to go.
How do I maintain my workshop’s electrical health over time?
It is not a ‘set it and forget it’ situation. Every six months, I perform a ‘shake and tighten’ routine. I shut down the main breaker and check that all my connections are still seated. You would be surprised at how much why your main lugs might be loose after a year of charging becomes an issue due to vibration from shop tools and thermal cycling. I also keep a kit of the essential spare parts to keep for your home charging unit, like a spare 60-amp breaker and high-temp electrical tape. It sounds paranoid until your charger fails on a Sunday night when the hardware stores are closed and you have a 100-mile commute the next morning.
Why the Future of Your Garage is Two-Way
Looking forward, the ‘static’ garage is dying. We are moving toward dynamic ecosystems where your car doesn’t just suck power; it manages it. I am already seeing more DIYers look into how smart chargers use dynamic balancing to prevent blown fuses. This technology is the future because it allows you to install a high-power charger without needing a full service upgrade. Your workshop and your car will eventually negotiate who gets the juice in real-time. If you want to be ready for that, make sure your subpanel has the data-ready conduit space now. My advanced tip for you today: buy a calibrated digital torque screwdriver and re-verify your charger’s internal terminals tonight. It might just save your car’s motherboard from a slow, heat-induced death.
Hard Truths About Running a High-Load Shop
I used to think that as long as the breaker didn’t trip, everything was fine. But after years of tinkering, I’ve realized that electrical systems don’t always fail loudly—sometimes they fail slowly, through heat and oxidation. One of the biggest shifts in my thinking was realizing that a 100-amp subpanel isn’t ‘extra’ space; it is ‘safety’ space. If you’re constantly troubleshooting ev chargers common compliance pitfalls and fixes, you might be treating symptoms rather than the cause, which is often an undersized distribution point. Another lesson? Don’t skimp on the label maker. While the right way to label your electrical panel for ev circuits seems like a minor detail, in an emergency, knowing exactly which breaker kills the car vs. the table saw is a literal life-saver. Finally, always plan for the ‘N+1’ rule. If you have one EV now, you’ll likely have two in five years. Knowing why your garage needs a subpanel for that second ev now saves you from tearing out your drywall twice.
The Gear I Actually Use in My Garage
Building a high-performance electrical setup requires more than just a standard screwdriver set. Here are the items I keep on my workbench to ensure everything stays within spec: Digital Torque Screwdriver: I use a Wera Kraftform. It ensures I hit those exact manufacturer specs every time I tighten a terminal. Compact Thermal Camera: A FLIR One for my smartphone. It’s the easiest way to see how to tell if your panel is actually a fire hazard by spotting heat signatures before they smoke. NFPA 70 Handbook: It’s heavy, but it’s the bible of electrical safety. Having a copy helps when you need to double-check an inspector’s claim or verify a complex load calculation.
Your Journey to a Professional Grade Workshop
Taking the leap from ‘just getting it done’ to ‘doing it right’ is what separates a hobbyist from a master. By prioritizing safety and ensuring code compliance when installing ev chargers, you aren’t just following rules—you are protecting your home, your expensive tools, and your family. Your garage should be a place of creation, not a source of electrical anxiety. Take it one wire at a time, check your torque settings, and never stop learning. Have you ever found a loose wire or a scorched breaker that gave you a real scare during a project? Let me know in the comments below!