The temperature hit twelve degrees last Tuesday, and my morning routine turned into a slapstick comedy routine—except I wasn’t laughing. I walked out to my car, coffee in one hand and keys in the other, ready for a smooth commute. I grabbed my charging handle, gave it the usual tug, and nothing moved. The cable was literally welded to the pavement by a thick sheet of black ice. I spent ten minutes chipping away at it with a plastic spatula, feeling like a total amateur. It’s a classic winter gotcha that no one warns you about when you first transition to electric. If you’ve ever stood in the dark, wondering if you’re about to rip the port right out of your car, you know exactly what I’m talking about. Today, I’m going to share the tricks that actually work to keep your cable mobile, because learning why your charging cable is stiff in the winter is only half the battle; the other half is making sure it doesn’t become a permanent part of your landscaping. Have you ever had to defrost your charger just to get to work?
The Morning I Almost Ripped My Charging Port Off
My first winter with an EV was a bit of a disaster. I made the ultimate rookie mistake: I thought if the cable was stuck, a little enthusiastic pulling would do the trick. I ended up straining the internal wiring and worrying that why your ev plug contacts look burnt might become my next urgent search due to mechanical stress on the connection. I even tried pouring lukewarm water on the ice once—please, don’t do that. It just creates a fresh layer of ice five minutes later and makes the driveway a skating rink. The reality is that EV cables, especially the heavy-duty ones we use for Level 2 charging, are excellent at trapping moisture underneath them. When that moisture freezes, it forms a bond stronger than some industrial glues. According to the National Fire Protection Association, maintaining the physical integrity of your charging equipment is vital, as damaged insulation or strained connectors can lead to significant electrical hazards in wet conditions.
Will a little ice actually break my expensive charger?
You might think it is just water and it will melt eventually, or that the cable is rugged enough to handle a bit of ice. While the cable jacket is tough, the constant freeze-thaw cycle combined with you yanking on it can cause micro-tears. Even worse, if the ice gets into the handle mechanism, it can prevent a proper seal. I’ve learned the hard way that ev charger troubleshooting starts with simple prevention. If you aren’t careful, you might find yourself needing to replace a frayed cable much sooner than you ever planned. The goal is to create a physical barrier or a lifting strategy so that the ice-anchor never has a chance to grab hold in the first place. It isn’t just about convenience; it’s about protecting an investment that likely cost you a pretty penny to install. Let’s look at how we can outsmart Mother Nature without resorting to blowtorches or hair dryers.
Lift the Line Before the Ice Sets
To keep your cable from becoming a permanent fixture of your driveway, you need to think vertically. Gravity is your best friend when it comes to moisture; if the cable is on the ground, it sits in a puddle that eventually turns into a concrete-like bond. I learned this the hard way during a particularly nasty sleet storm. I ended up using an old garden hose reel I had lying in the garage to keep the excess slack off the pavement. It wasn’t pretty, but it worked. Properly managing the slack is similar to how to stop your kids from tripping over your charging cable, as both require keeping the cord off the main walking and driving surfaces. If you don’t have a reel, a simple heavy-duty J-hook mounted to a post or your siding does the job just as well. The goal is to ensure the only part of the equipment touching the ground is the car’s tires. This is often why some ev chargers work better with cold weather than others; the units designed for northern climates often ship with superior cable management systems or more flexible thermal jackets that don’t crack when you try to coil them at sub-zero temperatures. 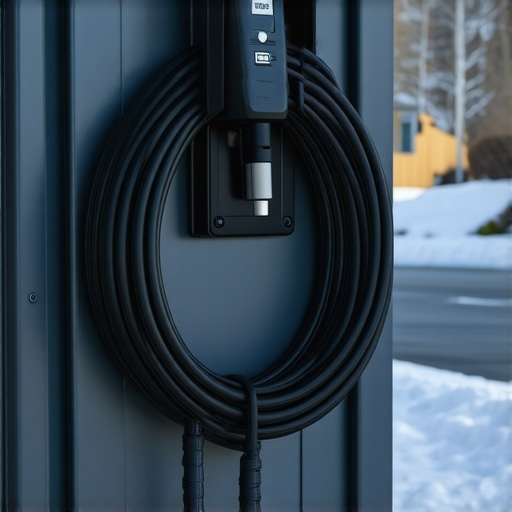
Protect the Handle Like Your Wallet Depends on It
The connector handle is the ‘brain’ of the operation, and it is far more delicate than the thick rubber cable. When moisture gets inside the trigger mechanism or the latch, it can freeze solid, preventing you from clicking it into the port or, worse, preventing it from releasing once the car is finished. I remember one morning when my thumb actually got stuck to the frozen metal release button—not my finest moment. If you can’t park inside, use a ‘charging port cover’ or even a simple magnetic fabric hood. If moisture gets into the pins and freezes, you might see why your charging port light stays red no matter what because the car cannot establish a clean handshake with the charger. Furthermore, if you’ve noticed why your charger handle feels sticky after a rainstorm, that’s usually a sign of residue or seal degradation that will only get worse when the temperature drops.
How Your Service Panel Fights the Freeze
Cold weather doesn’t just affect the rubber; it changes the electrical resistance and puts a unique strain on your home’s infrastructure. When it’s freezing, your car’s battery heater often kicks in simultaneously with the charger, pulling a steady, high-amperage load for hours on end. This constant high-demand state is why I always tell people that panel upgrades for ev chargers what you need to know isn’t just a summer conversation. If your panel is already near capacity, the added stress of a winter charging session—where the car is fighting to stay warm while drinking juice—can lead to nuisance trips. You want a system that provides upgrading your panel for better ev charging performance, ensuring that the breakers stay cool even when the world outside is freezing. Think of your electrical panel like a heart; in the winter, it has to pump harder to keep everything running, and you don’t want it to have a ‘heart attack’ when you need your car ready for a morning commute.Everyone tells you that upgrading to a 200-amp service is the only way to safely charge at home, but I’ve found that’s often an expensive myth. You can frequently save a fortune by learning how to add an ev charger without a 200 amp panel upgrade through smart load-shedding devices. These systems monitor your home’s total draw and temporarily throttle the car if you turn on the dryer or oven. It’s a sophisticated way to stay within code while keeping your bank account intact. However, the real ‘trap’ I see isn’t just capacity; it’s the physical connection. Most homeowners skip the math, but the hidden cost of skipping a panel load calculation usually shows up six months later in the form of a melted breaker or an expensive service call. According to the Electrical Safety Foundation International (ESFI), nearly half of all home electrical fires are caused by faulty wiring or overloaded circuits, and an EV is the single largest continuous load your house will ever face.
Why Does the Breaker Trip Only When it’s Freezing Outside?
It seems counterintuitive—shouldn’t the wires stay cooler in the snow? The reality is that cold weather causes metals to contract, which can slightly loosen terminal screws that weren’t torqued perfectly during installation. This creates high-resistance points. If you’ve ever wondered why your main lugs might be loose after a year of charging, it’s this exact thermal cycling. This is also why your electrician recommends a 60 amp circuit for a 48 amp charger; that 20% buffer isn’t just a suggestion, it’s a safety requirement for continuous loads. 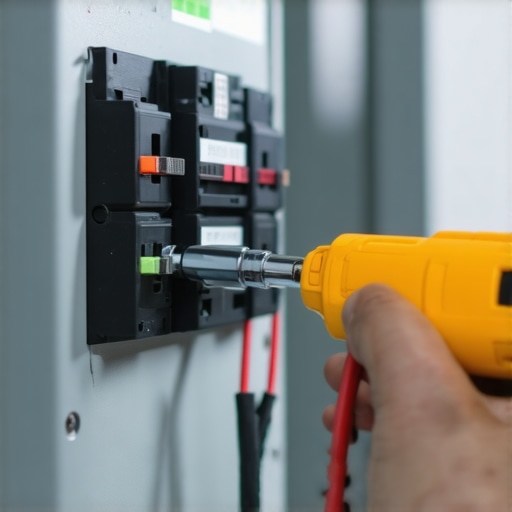 When those connections loosen, you start seeing physical damage. I’ve walked into garages where the smell of ozone was thick because of troubleshooting ev chargers common compliance pitfalls and fixes that were ignored for too long. If you ignore the signs, you’ll eventually find why your ev plug contacts look burnt and what to do next at the top of your search history. Beyond the heat, there’s the issue of ‘nuisance trips’ caused by specific equipment choices. I’ve noticed the specific breaker brands that are known to overheat with evs often fail because they weren’t designed for the 10-hour, high-amperage marathons an EV demands. Ensuring code compliance when installing ev chargers isn’t just about passing an inspection; it’s about making sure your house doesn’t become a cautionary tale. Have you ever fallen into the trap of ignoring a buzzing breaker or a warm charging handle? Let me know in the comments.That buzzing sound from your electrical panel is usually the sound of money leaving your pocket and safety leaving your house. To keep my setup humming—silently—I’ve moved beyond the basic ‘plug and play’ mindset and started treating my charger like a high-performance machine that needs a 10,000-mile service. One specific tool changed everything for me: a precision torque wrench. Most people do not realize that why your charger needs a specific torque setting to pass inspection is not just about bureaucracy. If those internal connections are not tightened to the exact inch-pound specified by the manufacturer, they will vibrate under load, heat up, and eventually fail. I personally use a Wiha insulated torque screwdriver because it provides a definitive ‘click’ the moment you hit the target, preventing stripped lugs or loose wires. The National Electrical Code (NEC) Section 110.14(D) actually mandates that torqueing be done with a tool that provides a numerical reading, so guessing is no longer a legal option. Before you close up your unit, checking the specific torque wrench settings for a wall connector can save you from a melted terminal block three years down the line.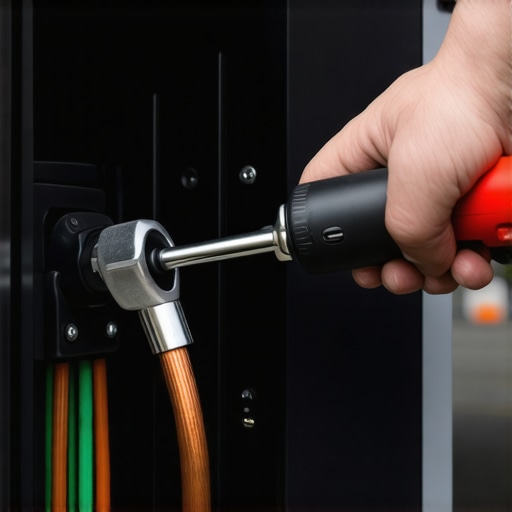
How do I keep my home setup running for the next decade?
It comes down to a simple quarterly checklist. I check the cable for nicks, I wipe down the pins with a specialized electrical contact cleaner, and I verify that my Wi-Fi signal has not degraded. If your app stops responding, you might need to dive into troubleshooting ev charger connectivity problems before a critical firmware update fails. I also keep a small kit of the essential spare parts to keep for your home charging unit, specifically an extra holster and a replacement terminal block.
Prepare Your Panel for the 2025 Standards
As we look toward the future, the trend is moving toward bidirectional charging—where your car can actually power your house. This means your equipment will be working twice as hard. We are already seeing new panel upgrade strategies to meet ev charging code requirements in 2025 that emphasize smart load management. Don’t just install for the car you have today; install for the energy ecosystem you will have tomorrow. My best advice for any EV owner is to perform a ‘thermal check’ every six months: feel the charger handle and the breaker after an hour of charging. If they are more than slightly warm, you have a resistance issue that needs fixing immediately. Go grab your manual right now, find those torque specs, and verify your connections—it is the cheapest insurance policy you will ever own.
The Hard Lessons I Learned While Chipping Ice Off My Cord
After three winters in the trenches of EV ownership, I’ve realized that the small details often lead to the biggest headaches. One ‘lightbulb moment’ for me was discovering that even a slightly loose connection in the panel can cause enough heat to melt the plastic housing before the breaker even trips. This is why I advocate for a yearly thermal check. I also learned that how to verify code compliance for your ev charger installation isn’t just about satisfying an inspector; it is about knowing your house can handle the 40-amp surge while you’re asleep. Another realization? A professional installation isn’t just a cost—it’s an investment in your property. I finally understood the real reason your home value increases with a pro ev setup when my neighbor struggled to sell his house because of a DIY electrical nightmare in the garage.
The Gear That Saved My Winter Commute
To keep everything running smoothly, I rely on a few specific tools that move beyond the basics. First, I highly recommend a Wiha Torque Screwdriver to ensure every terminal is set to factory specs. Second, I never charge without a high-quality surge protector integrated into the main panel; learning why your main service panel needs a surge protector for your ev changed how I view grid stability during snowstorms. Finally, keep a can of specialized electrical contact cleaner on hand. It prevents the ‘burnt contact’ look by removing road salt and grime that inevitably hit the handle during the slushy months.
#IMAGE_PLACE_HOLDER_E#
Take Control of Your Winter Charging Routine
Don’t wait for the first blizzard to realize your setup isn’t up to the task. Moving toward code compliance essentials for ev charger installations in 2025 means building a system that is resilient, smart, and safe. By taking these small preventative steps today—lifting your cables, torqueing your lugs, and monitoring your panel—you ensure that your EV remains a source of freedom rather than a morning frustration. Have you ever had a charging cable freeze solid to the ground, or did you find a clever way to keep yours dry? Let me know in the comments below!