It was a frantic Tuesday evening, the kind where you are juggling grocery bags and trying to usher two hyperactive kids into the house, when I heard the dreaded thud. My youngest had caught his sneaker on the heavy-duty cord snaking across the garage floor, sent a bag of apples flying, and nearly yanked the connector straight out of my car’s port. It was a mess, a bruise, and a wake-up call all rolled into one. If you have been treating your garage floor like a giant spool for your EV charger, you are living on borrowed time. I learned the hard way that a loose cable isn’t just an eyesore; it is a safety hazard for the people you love most. Today, I am going to share exactly how I reclaimed my garage floor and why properly managing your cable is the best weekend project you will ever tackle.
Why Your Garage Floor is a Hazard Waiting to Happen
Most of us focus so much on the car and the charger that we forget about the six feet of heavy copper cord in between. When I first installed my unit, I just let the cable dangle. I thought I was being efficient, but really, I was creating a tripwire that even an Olympic hurdler would struggle to clear. Beyond the physical trips, leaving a cable on the floor exposes it to moisture, dirt, and the weight of your tires if you aren’t careful. I actually made the rookie mistake of mounting my unit at a height that felt right for me but left way too much slack on the ground. To avoid my blunder, you should look into the best height for a wall-mounted charger to avoid cord strain. Have you ever walked into your garage at night and had your heart skip a beat because you almost ate the concrete thanks to your charger?
Is a cord management system actually worth the hype?
You might think a fancy holster or a retractable reel is just a way for companies to squeeze more money out of you, but the peace of mind is priceless. According to the Electrical Safety Foundation International (ESFI), thousands of home accidents are caused by improper cord usage and trip hazards every year. A dedicated management system ensures you aren’t putting unnecessary stress on your car’s charging port or the internal wiring of your home. If you are worried about the aesthetics, there are plenty of ways to how to hide ev charger wires for a clean garage look without compromising on accessibility.
Keep the Inspector and the Kids Happy
When I finally decided to fix my setup, I realized that cable management isn’t just about safety—it is often about staying on the right side of local regulations. I once had a friend who had to redo half his setup because the city inspector failed his garage wiring due to poor support and lack of protection for the conductors. Proper cable holsters and retractors aren’t just for show; they keep the weight of the cable from pulling on the electrical box, which can lead to loose connections or even heat buildup over time. In the next section, I will walk you through the specific tools I used to finally get my garage floor clear and my kids safe.
Give Your Connector a Dedicated Home
The very first thing I did was stop treating my charger like a discarded vacuum cleaner hose. You need a wall-mounted holster. Think of it like a dock for your phone, but for something that carries enough current to power your entire kitchen. When the connector is just dangling, the weight of the cable pulls on the internal pins. Over time, this creates ‘micro-gaps’ that lead to heat. I learned that using the right materials is half the battle; for example, knowing the difference between copper and aluminum for ev wiring is crucial because copper handles the physical stress of constant movement much better. I actually spent twenty minutes one Saturday morning checking my own setup to how to verify your electrician actually used copper wire for the install, and it gave me immense peace of mind knowing I had the right foundation.
Mount the Unit at the Correct Height
Most people just eyeball the mounting height, but there is actually a ‘sweet spot’ that prevents the cable from dragging while keeping it accessible. If it is too high, you are fighting gravity every time you plug in; too low, and you are back to the trip-hazard problem. You should aim for the exact distance your charger must be from the garage floor to ensure the cable loops naturally without touching the concrete. I once tried to mount mine on a whim during a renovation and nearly ripped the bracket off because I didn’t hit a stud. If you are working with a finished space, learn how to mount a charger on drywall without it ripping out before you pick up the drill. 
Stop the Tangle with a Mechanical Retractor
If you have a long driveway or a multi-car garage, a simple hook won’t cut it. I eventually invested in a spring-loaded retractor. It works exactly like those retractable badge reels people wear at offices, just beefier. I remember trying to save a few bucks by using a plastic garden hose reel I found in the shed. Within three days, the weight of the heavy-gauge wire—specifically the exact wire gauge you need for a 50-amp ev circuit—snapped the plastic spindle like a toothpick. A real retractor keeps the cable suspended mid-air, so it never even touches the floor. This doesn’t just prevent trips; it keeps the cable clean. No more dragging road salt or mud into your hands every morning when you go to unplug.
Don’t Skip the Panel Load Math
As you are organizing the physical cable, you have to ensure the ‘invisible’ part of the system is just as tidy. When I added a second charger for my wife’s car, I almost caused a localized blackout in my own house because I didn’t account for the total draw. Many homeowners ignore the hidden cost of skipping a panel load calculation until they smell something funny or the lights start flickering. If your breaker feels warm, pay attention. There are very specific reasons why your breaker gets hot to the touch during charging, and usually, it’s because the circuit is working right at its limit without enough ‘breathing room’ or proper ventilation. Efficient cable management makes the garage safer, but proper load management keeps the house standing.Now that the cable is off the floor, we need to talk about the logic behind the wall—the part where most DIYers (and quite a few pros) get into trouble. You have probably heard that the only way to support a fast charger is to shell out thousands for a massive service upgrade. Honestly? I think that is often a complete waste of money. Everyone tells you a 200-amp panel is the gold standard for modern homes, but I have found that you can often bypass the headache by learning how to add an ev charger without a 200-amp panel upgrade through smart load management. It is about being surgical with your power, not just throwing more copper at the problem.
Stop Overpaying for a Massive Service Upgrade
In my experience, the biggest mistake people make is assuming they have to upgrade their entire electrical service to handle dual EVs. Instead of a $4,000 panel swap, looking into upgrading your panel for better ev charging performance via a sub-panel or a load-shedding device is usually more efficient. This nuance is something many contractors won’t tell you because it’s easier to quote a full upgrade. However, if you are applying for permits, you need to be careful. I’ve seen many projects stall because why your ev permit application requires a load calculation worksheet is often ignored until the city inspector is already at your door.
Is your panel actually fighting your charger?
One of the most frustrating advanced issues is ‘nuisance tripping.’ You buy a high-end charger with built-in ground fault protection, and your electrician installs a GFCI breaker because they think they are being extra safe. But here is the catch: those two systems often conflict. According to the National Fire Protection Association (NFPA), the ‘double-stacking’ of GFCI protection can lead to unexpected outages because the charger and the breaker are essentially competing to detect the same leak. This is exactly why the gfci in your panel keeps nuisance tripping your charger. If you are constantly resetting your breaker in the middle of the night, you aren’t dealing with a broken charger; you’re dealing with a code-compliance paradox.
The Torque Trap Most DIYers Miss
If you decide to handle the install yourself, there is one ‘oops’ factor that causes more fires than almost anything else: improper torque. Most people just tighten the screws on the outlet until they feel ‘snug.’ That is a recipe for disaster. High-amperage draws cause wires to heat up and expand; if those connections aren’t tightened to specific inch-pounds using a torque screwdriver, you will eventually notice the reason your ev charger smells like burnt plastic is a loose lug. This is why you must how to pick a nema 14-50 outlet that wont melt under pressure and ensure it is torqued to the manufacturer’s exact specifications. 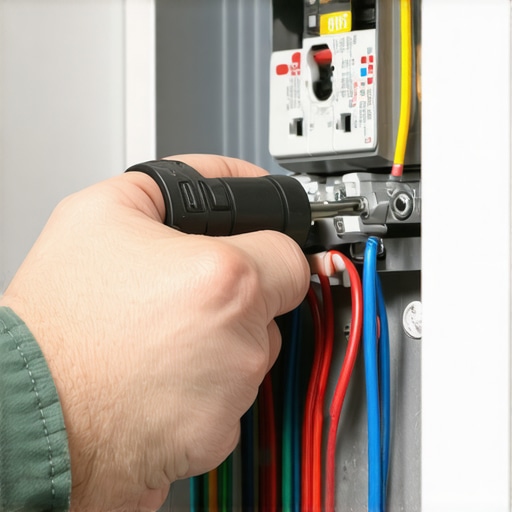
Stay Ahead of the Inspector
Finally, do not overlook the 2025 updates to the NEC. Many older garages don’t meet the current code compliance essentials for ev charger installations in 2025, which now require very specific disconnect locations and labeling. If you are struggling with a unit that won’t start, don’t just keep hitting the reset button. Start by ev charger troubleshooting expert tips for common issues like checking your ground continuity. Have you ever fallen into the trap of a ‘mystery trip’ or a melting outlet? Let me know in the comments below, because sharing these mistakes is how we all stay safe.
Stop Your Main Lugs From Backing Out
Most people assume that once the charger is on the wall, the job is done forever. But electricity at high amperage is a physical force. Every time your car draws 40 or 48 amps, the copper wires heat up and expand, then contract when the session ends. This ‘thermal cycling’ can actually loosen the screws in your panel over time. I make it a habit to safely shut off the breaker once a year and check the tightness of the connections. You would be shocked at why your main lugs might be loose after a year of charging even if they were perfect on day one. If you aren’t comfortable opening the panel, hire a pro for a five-minute ‘tune-up’—it is cheaper than a house fire and provides immense peace of mind for those of us with chargers running through the night.
How do I maintain my charging system over time?
Maintenance is less about the car and more about the infrastructure. Aside from checking lugs, you should inspect the handle pins for any signs of pitting or discoloration. If you notice the plastic starting to warp, you are likely dealing with high resistance. Keeping a small kit of the essential spare parts to keep for your home charging unit, like a spare holster or a high-quality NEMA 14-50 receptacle, can save you from being stranded on a Monday morning. According to the NFPA 70 (NEC) Handbook, electrical equipment subject to continuous heavy use requires periodic inspection to ensure the integrity of the grounding path hasn’t been compromised by vibration or heat. I have found that simply wiping down the connector pins with an electronics-safe cleaner every few months prevents the micro-arcing that eventually leads to a ‘Check Charger’ light.
Invest in a Thermal Camera Before You Smell Smoke
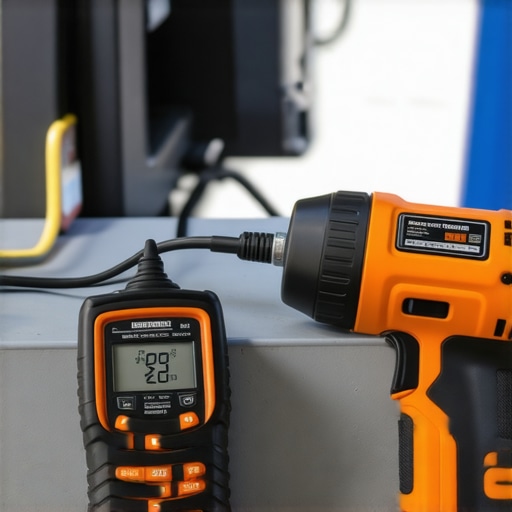
If you want to feel like a real pro, buy a cheap thermal imaging attachment for your smartphone. I use mine once a month during a peak charging session. I just point it at the breaker and the outlet. If I see a ‘hot spot’ that looks like a glowing sun compared to the rest of the panel, I know I have a loose connection or a failing breaker. It is the ultimate way to catch ev charger troubleshooting expert tips for common issues before they become emergencies. This tool is how I caught a faulty breaker from one of the specific breaker brands that are known to overheat with evs before it actually melted. It feels like having X-ray vision for your home’s safety, and for under a hundred dollars, it is the best insurance policy you can buy for your garage.
Expect Your Car to Power Your House Next
We are moving toward a world of bidirectional charging. In the next few years, your garage setup won’t just be about taking power; it will be about giving it back during peak hours. To prepare for this, you should focus on smart infrastructure now. I have started using how to use load shedding devices to avoid a full service upgrade which allows my charger to communicate with my heavy appliances like the AC and dryer. Also, don’t ignore the digital side of your hardware. I regularly check how to update the firmware on your smart charging station because manufacturers often release patches that improve thermal management or fix communication bugs with new car models. My advanced tip for you this week: download your charger’s specific app, check for a firmware update, and verify your torque settings—it is the easiest performance boost you will ever get.
Three Hardest Lessons My Garage Taught Me
Looking back at that Tuesday evening disaster, I realize that the best safety features aren’t built into the car—they are built into your habits. First, I learned that a ‘snug’ connection is just a loose connection waiting to fail. I now prioritize ev charger troubleshooting by performing a physical check of the terminals twice a year. Second, I realized that code compliance is not just red tape; it is a blueprint for keeping your family safe. I spent hours learning how to verify code compliance for your ev charger installation because I never wanted to wonder if my garage was a fire risk. Finally, I discovered that you don’t always need to spend thousands on a panel upgrade if you are smart about your layout and load management.
Tools That Actually Make a Difference
If you are serious about maintaining your setup, you need more than just a standard screwdriver. I personally swear by a calibrated torque driver to ensure every lug is set to the manufacturer’s spec. I also suggest keeping the essential spare parts to keep for your home charging unit in a small bin nearby; having a spare holster or a high-quality outlet on hand can save you from a charging emergency. If you are worried about the city coming by, checking out tips on how to pass an ev inspection when your garage is overcrowded can give you the confidence to show off your work. These aren’t just gadgets; they are the foundation of a reliable home fueling station.
#IMAGE_PLACEHOLDER_E#
Secure Your Garage for the Long Haul
The transition to electric driving is supposed to make your life easier, not more stressful. By taking the time to manage your cables, verify your torque settings, and keep an eye on your thermal health, you are turning your garage into a professional-grade charging hub. Don’t let the technical jargon of ev charger troubleshooting or panel upgrade requirements intimidate you. You have the tools and the knowledge to do this right. Your garage is now safer, cleaner, and ready for whatever the future of transportation throws your way. Have you ever noticed your charger getting unusually warm during a summer heatwave, or have you struggled with a specific code requirement? Let me know in the comments below!