It was 7:00 AM on a Tuesday, and I was staring at a pile of mangled EMT conduit that looked more like a pretzel than an electrical run. I’d spent the whole previous evening trying to ‘finesse’ a tight corner in my garage to avoid a bulky junction box for my new car. When the inspector walked in, he didn’t even need his tape measure. He just pointed at my hand-bent 90-degree turn and said, ‘That’s going to skin your wire alive.’ I felt like a total amateur. I thought I was being clever and space-efficient, but I was actually committing one of the 3 hidden costs of DIY EV charger wiring: ignoring the physics of wire friction. We all want our garages to look clean, but there is a very real, very dangerous reason why the ‘bend radius’ is a hill your local inspector will die on.
Protecting Your Wires from the Friction Trap
Today, I’m going to pull back the curtain on why those curves matter so much for your code compliance essentials for EV charger installations in 2025. We’re going to talk about ‘jam ratio,’ wire stress, and why a bend that’s too tight can turn your expensive EV cable into a heater inside your wall. If you’ve been struggling with EV charger troubleshooting only to find out the issue is buried in your conduit, this is for you. According to the National Electrical Code (NEC), specifically Chapter 9, the radius of the bend is calculated to prevent the ‘outer’ side of the wire insulation from stretching too thin and the ‘inner’ side from bunching up. Have you ever had an inspector fail your work for a bend that looked ‘close enough’ to you?
Is this just a rule made to sell more conduit?
It’s easy to get cynical and think these rules are just bureaucratic fluff. But trust me, after seeing a ‘fried’ wire that was pulled through a too-tight elbow, I’m a believer. When you force a heavy gauge wire—like the specific conduit size needed for a 50-amp circuit—around a sharp corner, the pressure on the insulation is immense. Over time, heat expansion and contraction can cause that thinned-out insulation to fail, leading to a direct short. It’s not about making things difficult; it’s about ensuring code compliance when installing EV chargers so you don’t wake up to a smoke-filled garage. My mistake early on was thinking that if the wire moved, it was fine. The truth is much more technical, and getting it right the first time saves you from the nightmare of re-pulling 50 feet of expensive copper.
The Secret 6x Rule for Smooth Wire Pulls
To get this right, you need to understand the “Radius Rule.” For most residential EV setups using THHN wire in EMT conduit, the NEC mandates that the radius of the curve be at least six times the internal diameter of the conduit. If you are working with the specific conduit size needed for a 50-amp circuit, like a 1-inch pipe, your bend needs to be a sweeping 6-inch curve, not a sharp elbow. I think of it like a highway off-ramp: if it’s too sharp, the “traffic” (your heavy-gauge wire) is going to crash into the walls, causing heat-generating friction. When planning panel upgrade strategies to meet EV charging code requirements in 2025, this physical path is just as critical as the breaker size.
Put Down the Trailer Hitch and Buy a Real Bender
I remember a job where a DIYer tried to bend a 3/4-inch EMT over a trailer hitch because he didn’t want to buy a $40 bender. The result was a kinked mess that looked like a crimped soda straw. When we tried to pull the wire, it got stuck halfway, and we ended up having to perform a full round of troubleshooting of the EV charger path just to find the blockage. Use a dedicated conduit bender with a foot pedal. Mark your take-up distances accurately. If you’re already handling panel upgrades for EV chargers, don’t undercut the quality at the very last mile.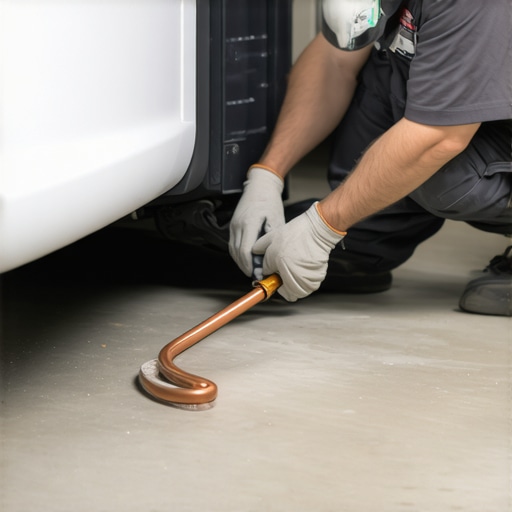
Don’t Let Friction Ruin Your Expensive Copper
Even if your bends look pretty, the “pull” itself is where the damage happens. Use wire pulling lubricant—it’s cheap insurance. If you don’t, you risk the “burn-through” effect where the wire’s jacket melts against the conduit during the pull. This is a common culprit in EV charger troubleshooting when a brand-new install keeps tripping the GFCI. While you’re at it, make sure you’ve addressed how to fix the grounding fail that ruins ev permits, as a nicked ground wire is just as dangerous as a nicked hot lead.
Why Your Wrist is Not a Calibrated Torque Wrench
Once the wire is through, the mechanical work isn’t over. One of the most overlooked code compliance essentials for EV charger installations in 2025 is the use of a torque screwdriver. You might think you have a “feel” for how tight a lug should be, but the inspector will want to see that you’ve followed why your charger needs a specific torque setting to pass inspection. A loose connection under a heavy 40-amp continuous load will eventually arc and melt the terminal block. I’ve seen $1,000 chargers turned into plastic puddles because someone guessed at the tightness rather than using a calibrated tool. Whether you are focused on ensuring code compliance when installing EV chargers or just trying to get your car to charge safely overnight, these mechanical details are what separate a professional job from a fire hazard.
But even if your torque settings are perfect, there’s a bigger myth I see all the time: the absolute necessity of a 200-amp service. Everyone tells you that you cannot install a Level 2 charger unless you drop five grand on a full service upgrade. In my experience, that is simply not true. You can often skip the massive bill by using intelligent load-shedding devices. I’ve seen homeowners save thousands by looking for the secret to getting faster charging without a new panel. The Electric Power Research Institute (EPRI) has published findings suggesting that smart load management can effectively mitigate the need for infrastructure upgrades in over 60% of residential scenarios. By prioritizing panel upgrade strategies to meet EV charging code requirements in 2025 that focus on software rather than just bigger copper bars, you stay compliant without tearing your hair out over the cost. Check your local utility programs too; sometimes they actually reward this approach.
Can you really charge two cars on one breaker?
This is where the DIYers and even some pros get tripped up. Most people think one charger equals one dedicated circuit, period. However, the NEC does allow for “automatic load management systems” (ALMS). If you have two EVs but a limited panel, you can use how to share a single circuit between two EVs safely through power-sharing chargers. The trap here is the ‘neutral wire’ oversight. Many installers forget that while the chargers might balance the load, an imbalanced neutral in the subpanel can still cause issues. Knowing how to detect a loose neutral wire before your electronics fry is an advanced skill that separates the weekend warriors from the experts. 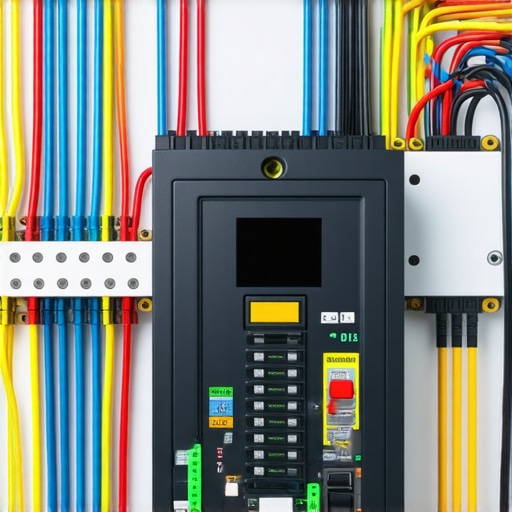
The hidden humidity trap that ruins your morning
Another nuance that gets missed involves the specific type of GFCI protection you use for outdoor units. I recently worked with a client who had his charger trip every single time it rained, even though the unit was waterproof. We discovered it was nuisance tripping caused by capacitive leakage in the cable—basically, the moisture was trickling just enough ‘ghost’ current to the ground to flip the breaker. Implementing 6 ways to stop nuisance tripping during high humidity charging is vital for anyone living in coastal or swampy climates. It usually comes down to the fact that why your outdoor charger needs a specific type of gfci (specifically a Class A GFCI) to distinguish between a real life-threatening short and a bit of morning dew. Don’t let a rainy Tuesday leave you with an empty battery. Have you ever fallen into the trap of over-upgrading your panel when a smarter solution was available? If you’re stuck in the middle of a confusing install, feel free to contact us and let’s talk through it. Let me know your biggest ‘oops’ moment in the comments below!
Spot Invisible Heat Before It Melts Your Breaker
Once you’ve successfully navigated the permit hurdles and the wires are in the wall, it’s tempting to never think about your electrical panel again. But if you’re pushing 40 or 50 amps through a circuit for six hours every night, you’re subjecting your infrastructure to more stress than a typical HVAC system. I’ve started carrying a compact thermal imaging camera—the FLIR One is my personal favorite—for every follow-up visit. By scanning the panel while the car is charging, you can see ‘hot spots’ that a visual inspection would miss entirely. If a terminal is glowing bright white on the screen, that’s a loose connection waiting to fail. This is the gold standard for how to tell if your panel is actually a fire hazard before the smell of ozone fills your garage.
I recommend doing a ‘thermal audit’ every six months. It takes two minutes. If you see temperatures exceeding 60-70°C at the breaker, you’re looking at a potential failure. Regular monitoring is the key to upgrading your panel for better ev charging performance without constantly replacing expensive components. When you stay ahead of the heat, you’re effectively ensuring code compliance when installing EV chargers for the long haul, rather than just passing the initial inspection.
How can I keep my charging system running for the next decade?
Maintenance isn’t just about the panel; the ‘business end’ of the charger takes a beating from the elements. If you have an outdoor unit, you need to know how to spot corrosion inside your outdoor charging pedestal. Salt air or even high humidity can oxidize the contacts, increasing resistance and slowing down your charge. I use a non-conductive contact cleaner once a year to keep the J1772 or NACS pins bright and shiny. This prevents the nightmare scenario where why your ev plug contacts look burnt and what to do next becomes your primary search query. Also, don’t forget the forgotten torque test that prevents panel fires. Thermal cycling—the expanding and contracting of copper as it heats up and cools down—can actually loosen screws over time. Re-checking those torque settings annually is a pro-level move that DIYers almost always skip.
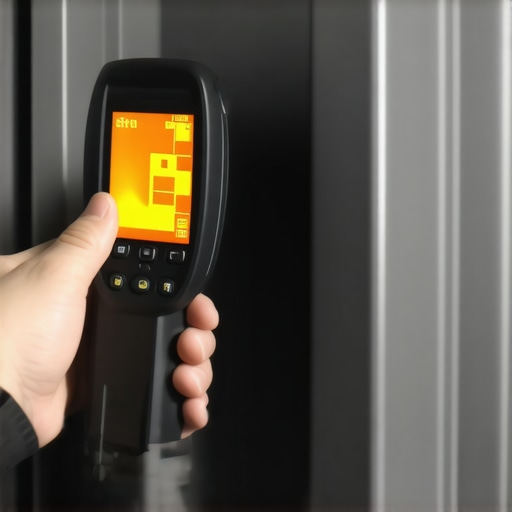
Looking forward, the way we maintain these systems is shifting toward software. We are moving toward the IEEE 1547-2018 standard, which governs how distributed energy resources (like your EV battery) interact with the grid. In the next few years, your maintenance routine might include firmware updates to enable Vehicle-to-Home (V2H) capabilities. If you’re already troubleshooting of the EV charger path, start looking at units that support ISO 15118 for ‘Plug & Charge’ and bi-directional power. This is where the industry is headed—your car won’t just take power; it will provide it during an outage. If your current setup feels like it’s at its limit, consider how to properly size a subpanel for your ev workshop now, so you have the physical space for these future ‘smart’ components. My best advice? Buy a cheap infrared thermometer today and scan your breaker while your car is at 80% charge. If it’s too hot to touch, stop charging and contact us immediately to tighten things up before a small arc becomes a big problem.
Hard Truths From My First Melted Breaker
Looking back at my early days, the biggest ‘lightbulb moment’ wasn’t about the math—it was about the physical mechanics of the installation. I realized that a 50-amp circuit isn’t just a bigger version of a light switch; it’s a high-pressure system that punishes any shortcut you take. If you don’t focus on ensuring code compliance when installing EV chargers, you’re not just risking a failed inspection; you’re risking a house fire. I learned the hard way that ‘hand-tight’ is a recipe for disaster under a continuous 8-hour load. Another reality check? Most DIYers underestimate the physical space needed for proper conduit bends, which leads to the exact friction and insulation damage issues we discussed earlier.
The Gear I Use to Sleep Better at Night
To keep my installs safe and efficient, I rely on a few non-negotiable tools that I trust personally. First, a calibrated torque screwdriver is essential because knowing why your charger needs a specific torque setting to pass inspection is only half the battle; you actually have to hit those numbers to prevent arcing. I also keep a thermal imaging camera in my bag to spot heat signatures during a live charge before they ever become smoke. Finally, I always have the NEC Handbook accessible on my tablet—it’s the ultimate authority for how to verify code compliance for your ev charger installation. These aren’t just gadgets; they are the barrier between a professional-grade setup and a dangerous amateur job.
Build a Power Setup You Can Actually Trust
Taking the time to do things right is an investment in your home’s future value and your own peace of mind. By focusing on upgrading your panel for better ev charging performance and following the strict physical rules of conduit pathing and terminal torque, you’re creating a system that will handle the next decade of EV technology with ease. Don’t be intimidated by the code—be empowered by it. It’s the roadmap to a garage that charges your car efficiently without keeping you awake at night. If you hit a wall or just want a professional second opinion on your wiring path, don’t hesitate to contact us for expert guidance. Have you ever found a loose connection or a surprisingly hot breaker while troubleshooting your own setup? Let me know your story in the comments below!