I’ll never forget the sound of my expensive investment clattering onto the driveway. It wasn’t just a bump; it was the sickening thud of a heavy Level 2 charging station detaching itself from my home’s exterior. I had made the classic rookie move: I assumed that a standard drill bit and those little yellow plastic anchors from my junk drawer could handle the constant tugging and weight of a 25-foot cable. Spoiler alert: they couldn’t. Brick looks tough, but it’s actually a porous, fickle material that will spit out a poorly installed fastener the moment you look away.
Don’t Let Gravity Win Against Your Brick Wall
If you’re tired of seeing your charger sag or, heaven forbid, you’re staring at a pile of dust where your mounting plate used to be, you are in the right place. Today, I’m going to walk you through exactly how to anchor that station so it stays put through summer heat waves and winter freezes. We aren’t just looking for ‘good enough’—we are looking for a rock-solid mount that satisfies code compliance essentials.
Can a few screws really handle a twenty-pound cable?
It’s a fair question. When you’re constantly coiling and uncoiling that thick cord, you’re applying dynamic load, not just static weight. This is where most DIYers fail. I once used the wrong gauge of screw and ended up with a mounting plate that rattled every time I plugged in the car. It’s not just about the charger falling; it’s about preventing moisture from seeping into the holes and cracking your brick over time. According to the Brick Industry Association, choosing the wrong fastener can lead to significant masonry damage because of ‘spalling’—where the face of the brick literally pops off under stress.
The Secret to a Permanent Masonry Mount
The reality is that brick requires a bit of finesse. You need to know when to hit the mortar and when to aim for the solid clay. If you hit the mortar with the wrong hardware, it’ll crumble faster than a stale cookie. This is why outdoor weatherproofing isn’t just about the electronics; it’s about the structural integrity of the mount itself. I’ve seen chargers fail because the owner didn’t account for the expansion and contraction of the brick. Have you ever walked out to your garage and noticed your charger looks just a little bit ‘crooked’ compared to yesterday? If so, you’re already in the danger zone. We’re going to fix that today before you end up needing a troubleshooting guide for connectivity because your unit hit the deck and snapped its internal antenna. It’s time to stop crossing your fingers and start using the right sleeve anchors.
Choose Your Drill Site Wisely
Identifying the right spot on your masonry is the difference between a lifetime mount and a weekend failure. Most people assume the mortar—the soft stuff between bricks—is the best place to drill because it’s easier. That is a massive mistake. Mortar is designed to be sacrificial; it’s there to take the brunt of moisture and movement so the bricks don’t crack. If you hang a heavy Level 2 station on a few mortar joints, the vibration from the charging cable will eventually turn that mortar into powder. I remember trying to mount a heavy station on my old 1920s bungalow. I thought I was being clever by drilling into the mortar to save the brick. Five minutes later, I had a hole the size of a golf ball and a mounting plate that shook like a leaf in a storm. I had to patch the masonry and start over, aiming for the center of the brick face this time. It was a messy, dusty lesson, but it taught me that structural integrity lives in the clay, not the lime. Always aim for the center of the brick to ensure you have enough ‘meat’ around the hole to prevent the brick from splitting under the expansion of a sleeve anchor.
Why Solid Brick Beats Mortar Every Time
When you tighten a masonry anchor, it expands against the walls of the hole. Brick provides a rigid, compressed environment for that expansion to bite into. Mortar, being porous, simply compresses further, creating a loose fit that will eventually fail. This is also why you must how to verify code compliance for your ev charger installation before you start, as many local codes require specific mounting depths for heavy outdoor appliances.
The Right Tools Prevent Costly Masonry Damage
You wouldn’t use a butter knife to saw through a log, so don’t use a standard cordless drill for brick. You need a hammer drill. A standard drill relies on pressure and friction, which generates enough heat to dull a masonry bit in seconds. A hammer drill uses a rapid pulsing action—like a miniature jackhammer—to pulverize the brick while the bit rotates. 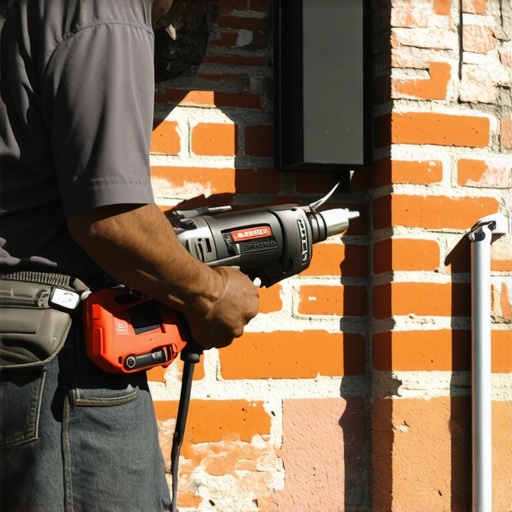
Why a Standard Drill Just Won’t Cut It
If you try to force a regular drill through hard-fired brick, you risk ‘spalling’—where the back of the brick blows out, leaving you with a massive, unfixable hole. Use a high-quality carbide-tipped bit. I always keep a can of compressed air nearby to blow the dust out of the hole every half-inch. If you leave the dust in there, it acts like a lubricant, preventing your anchor from getting the grip it needs. This attention to detail is vital because the specific screws you should never use for an electrical box often include the cheap zinc-plated ones that come in the charger box. Swap those out for stainless steel sleeve anchors or high-grade Tapcons immediately.
Select Fasteners That Actually Grip
For a heavy charger, I swear by 1/4-inch diameter stainless steel sleeve anchors. Unlike plastic plugs that can become brittle and snap in freezing temperatures, sleeve anchors are mechanical. They use a metal cone that pulls into a sleeve, locking it into the brick with hundreds of pounds of force. This is a critical part of why outdoor chargers need a specific kind of weatherproofing; if the mount is loose, water will eventually find its way behind the unit.
Seal the Deal Against Moisture
Once your holes are drilled and your anchors are ready, don’t just bolt the unit on and walk away. Brick is thirsty. If water gets into those newly drilled holes and freezes, it will expand and crack your wall. I always squirt a bit of high-grade outdoor silicone into the hole before tapping the anchor in. This creates a gasket that keeps the interior of the brick dry. If you are running exposed wiring, make sure you know how to use a liquid tight conduit for outdoor charger exposed runs to ensure the entire system is sealed. Finally, don’t forget the proper way to seal conduit openings against spiders and dust, because a solid mount is useless if a nest of spiders shorts out your motherboard from the inside.Once you have conquered the brick, you might feel like the hard part is over. But here is the contrarian truth: most DIY failures happen inside the electrical panel, not on the wall. We often assume that if the charger turns on and the car starts drawing power, we have won. In reality, a Level 2 charger is one of the most taxing appliances a home can handle. It is a continuous load, meaning it runs at full tilt for hours. This constant heat is why upgrading your panel for better ev charging performance is often a necessity, not a luxury. Most people think their old 100-amp service is fine because they do not use the dryer and the oven at the same time, but the math rarely supports that gamble. One of the biggest ‘oops’ factors I see involves the choice of circuit breaker. Not all breakers are created equal, and some brands are notoriously prone to heat-related failures when pushed to their limits. If you are using the specific breaker brands that are known to overheat with evs, you are essentially installing a component that is waiting to fail under stress. I have seen panels where the plastic around the breaker warped because the homeowner did not use a high-quality unit rated for continuous duty.
Why does your 48-amp charger need a 60-amp circuit?
This is the most common point of confusion for advanced DIYers. They buy a 48-amp charger and think a 50-amp breaker is close enough. According to the National Electrical Code (NEC) Article 625, EV charging is defined as a continuous load. This means the circuit must be rated for 125% of the charger’s output. A 48-amp draw requires a 60-amp circuit. Ignoring this is not just a minor technicality; it is a recipe for nuisance tripping. This is where the hidden cost of skipping a panel load calculation really bites you—you might think you are saving money, but you are actually degrading your electrical infrastructure every night.  Another nuance that separates the pros from the amateurs is the torque setting. Most people just hand-tighten the lugs until they feel snug. Professional electricians use a torque screwdriver. Why? Because thermal expansion from high-current draw will cause loose connections to wiggle just enough to create an arc. If you have ever wondered why the gfci in your panel keeps nuisance tripping your charger, it is often due to these micro-arcs or induction issues that your mount did not fully prevent. Have you ever fallen into the ‘it is probably fine’ trap with your home wiring? Let me know in the comments. I have been there, and I can tell you that a $50 torque wrench is a lot cheaper than a new service panel. Before you flip that breaker for the first time, make sure you know how to verify code compliance for your ev charger installation so you can sleep as soundly as your car charges.
Keep Your Connections Tight and Your Mind Easy
Once you’ve successfully mounted that station to the brick and verified your panel can handle the load, you might think the job is finished. It isn’t. High-amperage electrical systems are living things. They expand when they get hot and contract when they cool down. This constant thermal cycling is why maintenance is non-negotiable. I make it a habit to check my mounting bolts every six months. Just a quick tug to ensure the brick hasn’t shifted and the sleeve anchors are still biting hard. If you ignore this, you’ll eventually find yourself asking why your main lugs might be loose after a year of charging, which is a precursor to a much more expensive repair.
Why I Trust a Thermal Camera Over My Own Eyes
If you want to move from DIY enthusiast to a pro-level maintainer, buy a thermal imaging camera. I use a FLIR attachment for my smartphone to scan my electrical panel while the car is pulling 48 amps. According to the InterNational Electrical Testing Association (NETA), infrared inspections are the gold standard for identifying high-resistance connections before they turn into fires. If I see a bright purple or white spot on a breaker lug, I know I have a loose wire. This proactive approach is the best way to avoid ev charger troubleshooting expert tips for common issues by stopping the problem before the charger even faults out. 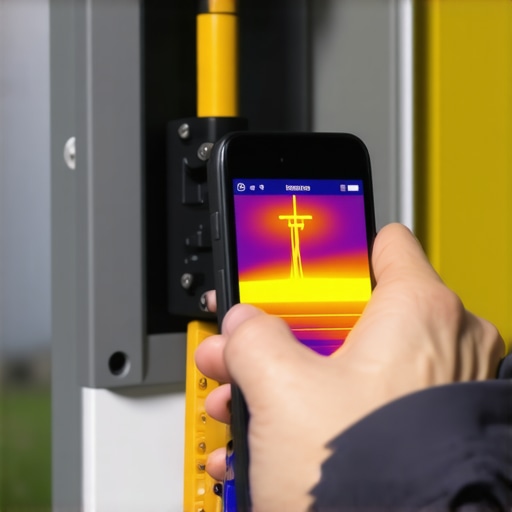
How do I maintain my home charging ecosystem over time?
Maintenance isn’t just about screws and wires; it’s about software too. Most modern Level 2 units are essentially computers in a weather-resistant box. You need to know how to update the firmware on your smart charging station to ensure you’re getting the latest safety patches and efficiency algorithms. I also suggest a monthly inspection of the J1772 or NACS plug. Look for any signs of pitting or discoloration on the pins. If you see dark marks, stop charging immediately and learn why your ev plug contacts look burnt and what to do next. Catching a worn-out cable early allows you to learn how to replace a frayed cable without buying a new station, saving you hundreds of dollars.
Prepare for the Bi-Directional Future
We are moving toward a world where your car isn’t just a consumer of energy, but a backup battery for your entire home. Bi-directional charging (V2H) is the next frontier. If you’re already looking at upgrading your panel for better ev charging performance, consider the space for a transfer switch or a smart gateway now. Even if you don’t have a V2H-capable car yet, the infrastructure trend is clear: your garage is becoming a mini-power plant. Don’t forget to periodically check your outdoor equipment for environmental damage; knowing how to spot corrosion inside your outdoor charging pedestal will be even more critical when that pedestal is helping power your refrigerator during a blackout. My challenge for you today: Go to your panel, safely open the door, and check if you can feel any radiant heat near the EV breaker. If it’s hot to the touch, it’s time to break out the torque screwdriver.
The Brickwork Realities I Didn’t Expect
After years of tinkering, I’ve realized that a successful EV charger installation isn’t a ‘set it and forget it’ project. First, I learned that thermal cycling is the silent killer of electrical stability; you need to understand why your main lugs might be loose after a year of charging to prevent heat damage. Second, mother nature doesn’t play fair. Even a small gap in your masonry mount can lead to internal moisture, which is the mistake that causes ev charger motherboards to fry during storms. Finally, remember that your local authority is your friend; knowing why the city inspector failed your garage wiring can save you from a costly ‘do-over’ later.
The Tools That Saved My Installation
I don’t go into any masonry job without a few specific items that ensure a pro-grade finish. My top recommendation is a digital torque screwdriver. Using one is the only way to be sure you are following the manufacturer’s specs and explains why your charger needs a specific torque setting to pass inspection. I also highly recommend keeping your digital interface sharp by learning how to update the firmware on your smart charging station regularly. Lastly, for peace of mind, I always install a whole-house surge device because I’ve seen firsthand why your main service panel needs a surge protector for your ev. These small investments prevent massive headaches.
#IMAGE_PLACEHOLDER_E#
Build a Setup That Lasts for Years
You’ve taken the time to drill the right holes, pick the right anchors, and verify your electrical load. This level of care separates a dangerous DIY hack from a professional-grade home infrastructure. By focusing on the structural integrity of your brick mount and the precision of your electrical connections, you are protecting one of your most valuable assets. Don’t be afraid to double-check your work or call in a pro if the troubleshooting ev charger connectivity problems becomes more than you can handle. Your electric vehicle is the future of transport, and your garage is now the heart of that journey.
Have you ever run into a surprise when drilling into your home’s exterior masonry? Let me know in the comments below!