I’ll never forget the rainy Tuesday morning I nearly threw my back out just trying to plug in my car. I’d spent thousands on the tech but zero minutes thinking about where it actually sat on my wall. I’d mounted it at knee-height because I wanted it to look “discreet” in my garage. What a joke. Every single day, I was crouching down like a catcher in the bottom of the ninth, wrestling with a cable that was stiff from the morning chill. It was clumsy, it was annoying, and it was entirely avoidable. I learned the hard way that when it comes to EV ownership, ergonomics aren’t just a luxury—they are the difference between a seamless morning and a literal pain in the neck.
Stop Crouching and Start Charging the Right Way
If you’re about to drill holes in your garage wall, I’m here to tell you to put the drill down for a second. We’re going to talk about the “Goldilocks zone”—that perfect height where you don’t have to stoop, but the cable isn’t dangling in your face. Getting this right is about more than just comfort; it’s about safety, cable longevity, and even ensuring code compliance when installing ev chargers. I’m going to share the exact measurements that worked for me and the major mistakes I made so you don’t have to repeat them. Have you ever found yourself tripping over your own charging cable because it was just pooling on the floor? Let me know, because that was my life for six months before I finally wised up. It’s a common frustration that most people don’t think about until they’re disentangling their feet while carrying groceries.
Does a few inches actually matter for daily use?
You might think I’m being picky, but ergonomics are the unsung hero of the EV lifestyle. When I first installed mine, I didn’t realize that the exact distance your charger must be from the garage floor is actually regulated in many areas for safety. For example, the National Electrical Code (NEC) generally requires a minimum height of 18 inches for indoor installations to keep the electrical connections away from any potential fumes or water accumulation. I initially ignored this and went for a “hidden” look, only to realize I was making common compliance pitfalls that could have voided my insurance or failed a home inspection. Beyond the rules, if you mount it too low, you are constantly fighting gravity. According to the ADA (Americans with Disabilities Act) standards for reachable ranges, keeping controls between 15 and 48 inches is standard, but for a heavy EV cable, the higher end of that spectrum is your best friend.
Why Most People Get the Mounting Height Wrong
Most of us just eye-ball it. We hold the unit against the wall, say “that looks about right,” and start drilling. But we forget that the cable has significant weight. If you mount it too high, the tension on the plug can actually damage your car’s charging port over time. If you mount it too low, you’re constantly cleaning dirt and spider webs off the connector. I once had a buddy who mounted his so high on a brick wall that he had to stand on his tiptoes to reach the holster. We eventually had to look up the right way to mount a charger on brick just to fix his mistake without turning his garage into Swiss cheese. Beyond just my back, I had to think about the kids. If the charger is too low, the cable becomes a literal tripwire. I had to learn how to stop your kids from tripping over your charging cable the hard way—after my youngest took a header into the recycling bins because I left the cord coiled like a snake at ankle height. We’re going to make sure your setup is rock solid, perfectly placed for your reach, and safe for everyone walking through the garage.
Target the Forty-Eight-Inch Sweet Spot
If you want to save your back and protect your car’s charging port, aim for 48 inches from the floor to the base of the unit. This height is the literal “Goldilocks zone” for the average adult. It allows you to plug in without bending your knees and keeps the cable far enough off the ground to avoid the dirt. I remember my second attempt at mounting a charger in my old house. I was so focused on hitting a heavy stud that I ignored the height entirely. I ended up with a charger so high I had to reach like I was grabbing a jar off the top shelf of a pantry. It looked ridiculous and, worse, it put constant tension on the cable connector because the weight wasn’t properly supported. 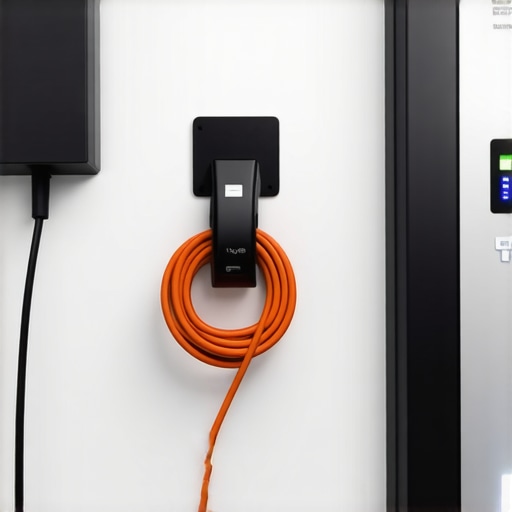 Mounting at 48 inches ensures that the cable naturally loops down and back up to the car, providing the slack needed to prevent strain.
Check Your Panel Capacity Before You Drill
Before you even think about driving the first screw, you need to know if your house can actually handle the extra juice. Most homeowners assume a 200-amp panel is a “get out of jail free” card, but that’s not always the case. You need to look into panel upgrade strategies to meet ev charging code requirements in 2025. I once tried to add a second charger for my wife’s car without doing the math. Halfway through the first simultaneous charge, the whole house went dark because the main breaker tripped. I hadn’t bothered with a load calculation, and the summer AC load pushed it over the edge. If you are adding multiple units or have an older service, learning how to calculate the exact circuit load for a dual head charger is a non-negotiable first step.
Stop the Cable Spaghetti with a Proper Holster
The charger unit is only half the battle; the cable is the part you actually interact with every single morning. If you leave it hanging, it’s going to get stepped on, driven over, or tangled in your lawnmower. I used to just drape mine over the top of the unit, but in January, why your charging cable is stiff in the winter and what to do became a very real problem for me. The cord became so rigid it was like wrestling a frozen python just to get it back on the hook. A dedicated holster mounted at the same 48-inch height makes the daily “plug and play” routine effortless and keeps the cable off the cold concrete where it loses its flexibility.
Use the Right Materials to Avoid Melted Components
Electrical noise and heat are the silent killers of a good charging session. Many people get frustrated when their charger stops for no reason or throws a red light. Often, it’s because of internal hardware conflicts. You might find why the gfci in your panel keeps nuisance tripping your charger is the culprit, especially if you have a “double GFCI” situation where both the breaker and the charger are trying to sense the same ground faults. To keep things running cool, always use the specific wire gauge that prevents voltage drop over long runs. If the wire is too thin for the distance, it heats up like a toaster element, and your car will automatically throttle the charging speed to keep from melting the wires. I’ve seen DIY jobs where people used cheap breakers that couldn’t handle the continuous load; checking the specific breaker brands that are known to overheat with evs can save you from a potential fire hazard down the road.Let’s dig deeper into a nuance that almost nobody talks about: the hidden danger of the high-end NEMA 14-50 outlet. Most homeowners think a plug-in model is superior because it feels modular, but the real difference between hardwired and plug-in charging stations often comes down to long-term safety. When you’re pulling 40 or 50 amps for six hours straight, a plug is a point of failure. I’ve seen industrial-grade outlets literally char because the installer didn’t use a torque screwdriver. It sounds like overkill, but why your charger needs a specific torque setting to pass inspection is rooted in physics—loose connections create resistance, and resistance creates fire. Have you ever noticed your plug feeling hot to the touch after a session? That’s a massive red flag you shouldn’t ignore. Have you ever fallen into this trap? Let me know in the comments.
Stop Obsessing Over Panel Amps and Start Calculating Load
Everyone tells you that a 200-amp service is the holy grail, but that’s a dangerous oversimplification. You can have a 200-amp panel and still fail a local inspection if your house has an electric range, a hot tub, and two AC units. This is why your ev permit application requires a load calculation worksheet. It’s not just a bureaucratic hoop; it’s the only way to prove you won’t melt your main lugs. In my experience, people skip this step and then wonder why your charging speed drops when the sun hits the unit or when the dryer kicks on. According to a 2023 study by the Electrical Safety Foundation International (ESFI), nearly 15% of residential electrical fires in modernized homes involve high-draw circuits that weren’t properly balanced against the total home load.
The Critical Neutral Wire Mistake Most DIYers Make
Here is a specific “oops” factor that catches even smart people off guard. Many 240V appliances don’t require a neutral wire—just two hots and a ground. However, many modern smart chargers use that neutral to power their internal Wi-Fi boards and sensors. I’ve seen people pull three wires to save money, only to realize why your new charger requires a neutral wire even for 240v the hard way when the screen won’t even turn on. It’s a frustrating mistake that requires ripping out conduit and re-pulling wire. If you’re looking for ev charger troubleshooting expert tips for common issues, start by checking if your installer took a shortcut on the wiring.
Does my charger really need its own sub-panel?
If you are planning for the future, the answer is almost always yes. People think they are saving money by cramming one more breaker into a crowded main panel, but how to verify code compliance for your ev charger installation becomes much simpler with a dedicated sub-panel. This isolates the high-heat, high-draw EV circuit from your sensitive home electronics. Beyond just passing inspection, upgrading your panel for better ev charging performance ensures that you have room for a second car later without having to redo the entire job. It’s about building a system that’s robust enough to handle the 2025 standards, not just barely scraping by today’s minimums.
Don’t Let Your Investment Melt Under the Radar
Once the drywall is patched and the permit is signed, most homeowners assume the job is done forever. I made that mistake with my first installation and ended up with a scorched terminal block six months later. High-draw electrical systems are dynamic; they expand and contract with every heat cycle. If you aren’t checking in on your hardware, you are essentially waiting for a failure. I’ve found that why your main lugs might be loose after a year of charging isn’t just a theory—it’s a physical reality of metallurgy. Every few months, I take ten minutes to physically inspect my setup, and it has saved me from at least one potential garage fire when I noticed a slight discoloration on a wire casing that indicated a loose connection.
Why I Carry an Infrared Thermometer in My Garage
You don’t need a degree in electrical engineering to maintain your setup, but you do need the right diagnostic tools. My go-to is a simple handheld infrared thermometer. About twenty minutes into a heavy charging session, I point it at the breaker in my panel and the plug at the wall. If I see temperatures climbing above 140°F, I know I have a resistance issue. This is far more effective than just waiting for a smell or a trip. According to the National Fire Protection Association (NFPA) 70B, regular thermal inspections are a cornerstone of preventing electrical equipment failure. I also highly recommend keeping the essential spare parts to keep for your home charging unit, like a high-quality replacement holster or an extra J1772 adapter, so a minor hardware fatigue doesn’t leave you stranded on a Monday morning.
How do I keep my charging setup running for a decade?
The secret to longevity isn’t just in the hardware; it’s in the software and the surge protection. I eventually realized that why your main service panel needs a surge protector for your ev was the best hundred bucks I ever spent. A single lightning strike or utility spike can fry a $700 smart charger in a heartbeat. Beyond physical protection, you have to stay on top of the digital side. I used to ignore the notification pings on my phone, but learning how to update the firmware on your smart charging station is critical for fixing bugs that can cause troubleshooting ev charger connectivity problems or even thermal management issues. If your charger is ‘smart,’ treat it like a computer—it needs patches to stay safe.
The Future is Talking Back to the Grid
Looking ahead to 2025 and beyond, your charger won’t just be a passive pipe for electricity. We are moving toward a world of bidirectional charging (V2H), where your car can power your house during a blackout. This makes upgrading your panel for better ev charging performance today an investment in your home’s future resilience. If you’re already seeing issues, don’t wait for a total blackout; check out ev charger troubleshooting expert tips for common issues to nip them in the bud. My best advice? Buy a torque screwdriver today and double-check your terminal connections to the manufacturer’s spec—it is the single most effective way to ensure your house stays standing while your car gets its juice.
The Hard Lessons That Saved My Garage from a Melted Mess
Looking back at my first DIY attempts, I realize how much I didn’t know about the physics of electricity. Here are the lightbulb moments that finally made my setup reliable: Torque is not a suggestion. I used to think ‘hand-tight’ was enough, but I learned that why your charger needs a specific torque setting to pass inspection is about preventing the tiny micro-arcs that eventually lead to charred plastic. Another big one? Always pull a neutral wire. Even if your current unit doesn’t ask for it, you will likely need it for the next generation of smart tech, and why your new charger requires a neutral wire even for 240v is a lesson you don’t want to learn while re-opening your walls. Finally, remember that heat is a cumulative enemy; a circuit that stays cool for twenty minutes might be blistering after four hours.
My Go-To Kit for a Stress-Free Charging Life
I don’t go into my garage without a few specific items that ensure everything is running at peak performance. First, a handheld infrared thermometer is my best friend for spotting resistance issues before they trip a breaker. I also highly recommend keeping the essential spare parts to keep for your home charging unit, such as a high-quality holster and a spare J1772 adapter, so you’re never stranded. For the technical side, I always keep a copy of my ev permit application load calculation worksheet in a folder near the panel. It’s the easiest way to verify code compliance for your ev charger installation if a home inspector or insurance adjuster ever asks questions.
Future-Proof Your Drive and Sleep Better at Night
Setting up your home for an EV is more than just a home improvement project; it is an investment in a new way of living. By taking the time to focus on ergonomics and upgrading your panel for better ev charging performance, you are building a system that will serve you for a decade, not just a few months. If you ever feel overwhelmed, don’t hesitate to look back at ev charger troubleshooting expert tips for common issues to get back on track. You’ve done the hard work of switching to electric—now make sure the charging part of your day is the easiest thing you do. Have you ever struggled with a stiff cable in the winter or a mounting height that just felt ‘off’? Let me know your experience in the comments below!