I stood there, coffee in hand, staring at the salt spray misting over my driveway. It was beautiful, sure, but my car wasn’t charging. I’d spent a small fortune on a high-end Level 2 unit only eighteen months prior, convinced it was ‘weatherproof.’ When I finally pried open the casing, I didn’t see high-tech circuitry; I saw a crusty, green mess of oxidized copper and pitted aluminum. Living by the coast means fighting a constant battle against the atmosphere, and if you think your charger is immune just because the box said ‘NEMA 4,’ I’ve got some expensive news for you. Today, we are going to look at exactly how many years you can realistically get out of a coastal installation and the specific steps I took to stop my second unit from meeting the same watery grave.
Salt Air is Eating Your Charger From the Inside Out
[image1] Most manufacturers will tell you their units are built for the outdoors, but they often aren’t talking about the aggressive, moisture-heavy salt air found within five miles of the coast. I made the classic mistake of thinking a standard mounting job was enough. I didn’t bother to use a liquid-tight conduit for my exposed runs, and salt-laden moisture literally wicked its way through the wires into the motherboard. It was a $700 lesson in humility. You really have to understand why outdoor chargers need specific weatherproofing that goes beyond a simple plastic shell. According to research by the Association for Materials Protection and Performance (AMPP), atmospheric corrosion in coastal regions can be significantly more aggressive than in arid climates, often reducing the service life of unprotected metal components by over 50%.
Have you ever noticed that strange white, chalky residue on your outdoor outlets or gate hinges? That’s the first sign of trouble. I ignored it on my charging handle, and within weeks, the pins were so pitted they wouldn’t make a solid connection. If you aren’t proactive, you’ll be forced to spot corrosion inside your pedestal before the whole thing sparks and dies. Have you looked closely at your charger’s contact pins lately?
Will My Charger Really Rust Away in Three Years?
It sounds like a scare tactic, but without the right intervention, it’s a very real possibility. While a typical Level 2 charger might last 10 years in a garage in the Midwest, that same unit might only give you 3 to 5 years if it’s bolted to a post near the Atlantic or Pacific. The salt doesn’t just sit on the surface; it penetrates seals and creates conductive paths where there shouldn’t be any. This leads to those annoying intermittent faults or, worse, a fried motherboard. I’ve seen neighbors lose their units even faster because they didn’t know the proper way to seal conduit openings, effectively creating a direct straw for salt air to reach the sensitive electronics. This early degradation is exactly why you need a plan before the sea air claims another victim.I learned the hard way that a NEMA rating only refers to the enclosure, not the internal connections once you start poking holes for wires.
Coat Your Terminals Before They Turn Green
The first thing I did on my second unit was apply dielectric grease to every single metal-on-metal connection. Think of it as a waterproof raincoat for your electricity. When I installed my first unit, I didn’t think twice about the bare copper. After six months, the salt air had turned those bright orange strands into a brittle, turquoise mess that couldn’t carry a current. Now, I use a generous amount of non-conductive grease to seal out oxygen. You should also verify that your electrician didn’t skip the forgotten torque test. If a connection is even slightly loose, that tiny gap allows salt air to penetrate the core of the wire, leading to heat buildup and eventually a fire. I remember opening the casing of my failed unit and seeing that one loose lug had basically become a saltwater battery terminal.
Seal Every Single Entry Point
Don’t trust the rubber gaskets that come in the box. I used a high-grade silicone sealant around the mounting screws and the conduit entry points. If you are mounting on a porous surface, you need to know the right way to mount a charger on brick to prevent moisture from seeping behind the unit. I also found that the proper way to seal conduit openings involves more than just a bit of putty; it requires a complete barrier to stop the ‘chimney effect’ where salt air is pulled into the charger by temperature changes. This effect literally sucks the damp ocean breeze into your electronics every time the unit cools down after a charging session. 
Check Your Grounding and GFCI Needs
Coastal moisture increases the risk of ground faults. Because salt water is highly conductive, your safety systems will be working overtime. This is why your outdoor charger needs a specific type of GFCI that won’t give you nuisance trips every time a fog bank rolls in. I remember one morning where I couldn’t get the car to charge because the humidity was so high the internal sensor thought there was a short. I had to run through several expert tips for common issues before I realized the salt buildup on the plug handle itself was the culprit.
The Five-Minute Rinse Rule
It sounds counterintuitive to spray water on an electrical device, but a gentle rinse of the closed charging handle and the exterior casing once a month removes the salt crust before it can migrate inside. I keep a microfiber cloth handy to dry the contact pins if they ever look damp. If you notice your charging speed is fluctuating, it might be time to check why your ev plug contacts look burnt. Usually, it’s not a fire—it’s just heavy oxidation from the ocean spray causing a poor connection and generating heat. I’ve made it a habit to check the handle every Sunday; it takes thirty seconds but has kept my second charger running perfectly for three years now. Don’t wait for the ‘click’ to stop working; a little preventative cleaning goes a long way.Most people believe that if their main breaker is 100 amps, they simply don’t have room for a Level 2 charger. I’m here to tell you that’s not necessarily true. Instead of a $3,000 service upgrade, you can often squeeze a level 2 charger onto a 60 amp service by using smart load management. This is the hidden nuance that keeps your wallet fat while your car stays charged. However, the ‘oops’ factor I see most often isn’t the capacity—it’s the heat. Because EV charging is a ‘continuous load,’ meaning it runs at full tilt for hours, it puts a unique strain on your hardware. I’ve seen specific breaker brands that hate constant ev loads, literally melting the plastic casing before they ever trip. This is why you must verify code compliance with a focus on temperature ratings, not just amp numbers. According to the National Fire Protection Association (NFPA), failure to account for this 125% continuous load rule is one of the leading causes of electrical fires in new EV retrofits. You also need to ensure you aren’t falling for 3 ways to spot a fake ul listing on a cheap charger, which might look fine on the outside but lack internal thermal shut-offs. 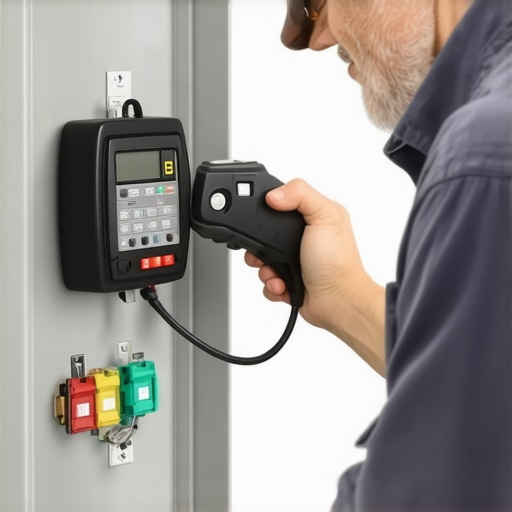
Can You Really Avoid a Full Panel Upgrade?
Yes, but you have to be smart about it. If you’re tight on space, how smart chargers use dynamic balancing to monitor your home’s total draw and dial back the car’s power when the dryer or AC kicks on. It’s a sophisticated way to stay within code without tearing out your walls. But even with the best tech, don’t ignore the forgotten torque test. If your electrician didn’t use a calibrated torque wrench, those vibrating electrons will eventually wiggle the connection loose, especially in coastal areas where thermal expansion is frequent. Dealing with these troubleshooting ev chargers common compliance pitfalls and fixes early is the difference between a set-it-and-forget-it installation and a 2 AM call to the fire department. Have you ever fallen into the ‘more amps is better’ trap, or did you find a clever way to stay within your existing panel’s limits? Let me know in the comments.
Get yourself a thermal camera and stop worrying
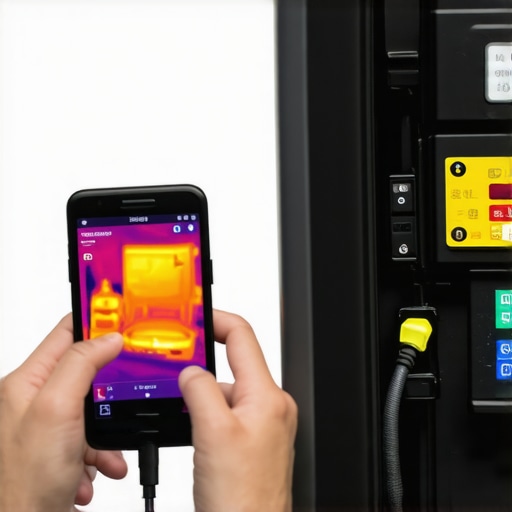
For the longest time, I felt like I was just waiting for something to smell like burning plastic. That changed when I bought a compact thermal imager that plugs right into my phone. Every six months, I run a full-load charging session for about an hour, then I pop the cover of my subpanel and the charger itself. What I am looking for are ‘hot spots’—terminals that are significantly warmer than the wires they are connected to. This is the ultimate way to verify code compliance in a real-world scenario. If a lug is glowing purple on the screen while the wire is blue, I know that connection is failing. This proactive approach is a cornerstone of the NFPA 70B Standard for Electrical Equipment Maintenance, which emphasizes that preventive thermography can catch up to 95% of electrical failures before they occur. It is much cheaper than a $2,000 emergency repair.
Beyond the heat, I’ve found that many of my ‘hardware’ issues were actually software gremlins. If you find yourself troubleshooting ev charger connectivity problems, don’t immediately blame your router. I once spent three hours moving a mesh node only to realize the charger’s internal WiFi antenna was shielded by my own metal tool cabinet. You should follow the steps to fix an ev charger that wont connect to your home wi-fi by checking for physical interference first. It’s often the simplest things, like a misplaced bag of salt or a metal ladder, that cause the most headaches.
How do I keep my charging hardware alive for a decade?
Consistency is more important than intensity when it comes to maintenance. Once a year, I use a calibrated torque wrench to ensure nothing has vibrated loose. This is especially vital if you went through upgrading your panel for better ev charging performance recently, as new breakers can sometimes ‘settle’ after a few thermal cycles. I also keep a close eye on the cable itself. If you see any nicks or if the handle starts to feel loose, don’t wait; ensuring code compliance means maintaining the physical integrity of the equipment, not just the wires behind the wall. I always tell my neighbors that a well-maintained 40-amp charger will outlast a neglected 80-amp monster every single time.
Your home will eventually run on your car’s battery
Looking ahead, we are moving toward a world of bidirectional charging. I’ve already started looking at panel upgrade strategies to meet ev charging code requirements in 2025 because the next generation of chargers won’t just take power; they will give it back to your house during a blackout. This shift makes your current wiring choices even more critical. If you cheap out on wire gauge now, you’ll be ripping it all out in five years when you want to use your Ford F-150 Lightning to power your AC during a summer storm. My advice? Go one size larger on the conduit than you think you need today. It’s a $50 difference now that saves $500 later. I strongly encourage you to grab a thermal leak detector or a basic infrared thermometer this weekend and check your charger’s plug while it’s active. If it feels more than ‘warm’ to the touch, you’ve got work to do.
The $700 Mistakes I Will Never Make Again
Reflecting on my first failed installation, the biggest lesson I learned was that ‘weatherproof’ is a relative term. On the coast, it doesn’t just mean rain; it means microscopic salt particles that find their way into every unsealed crevice. First, never assume a NEMA 4 enclosure is a fortress. If you don’t use dielectric grease on every terminal, you are essentially inviting green oxidation to eat your investment. Second, I realized that verifying code compliance isn’t just about passing an inspection; it’s about making sure your hardware survives the unique atmospheric pressure of the shoreline. Finally, I found that the ‘chimney effect’ in conduits is real—if you don’t seal the ends, your charger will literally breathe in the salt air every time it heats and cools.
My Essential Coastal Charging Arsenal
To keep my second unit alive, I rely on a few specific tools that aren’t in a standard electrician’s belt. I highly recommend a FLIR thermal camera attachment for your smartphone; it allows you to see high-resistance connections before they melt. I also swear by high-grade silicone sealant and a calibrated torque wrench to prevent the vibration-induced gaps that let moisture in. For the technical side, I keep the NFPA 70B guidelines bookmarked to stay ahead of preventative maintenance. If you are worried about the digital side of things, troubleshooting ev charger connectivity problems often comes down to salt buildup on the WiFi antenna housing, so keep a can of electronics cleaner handy.
Take Back Control from the Salt Air
You don’t have to let the ocean air win. By being proactive and ensuring code compliance through regular thermal checks and physical cleaning, you can double the lifespan of your equipment. It might feel like extra work now, but it beats a $1,000 replacement bill next summer. As you look toward the future, start thinking about panel upgrade strategies to meet ev charging code requirements in 2025, especially if you plan on adding bidirectional charging to your coastal home. A little bit of grease and a lot of vigilance will keep your EV ready for the road for years to come. Have you noticed any green oxidation or white chalky residue on your charger’s terminals yet? Let me know in the comments below!