I stood there, hands on hips, staring at the red ‘failed’ tag dangling from my new Level 2 charging station. I’d spent three weekends mapping out the run, pulling heavy-gauge wire, and sweating through my shirt, only to have the city inspector shake his head before he even opened his clipboard. The culprit? A grounding configuration that I thought was ‘fine’ but was actually a direct violation of the National Electrical Code. It was a gut-punch moment that taught me a lot about the difference between a circuit that works and a circuit that is safe and compliant. If you are struggling with a rejected permit or a charger that won’t stop throwing ground fault errors, I have been exactly where you are. Today, we are going to fix the grounding mess so you can finally get that permit signed off and get back to charging. [image placeholder]
Why Your Inspector Just Failed Your Grounding Setup
The biggest mistake I made early on—and it is one I see neighbors making constantly—is treated the ground wire as an afterthought. I once assumed that as long as the green wire was connected to *something* metal, I was golden. But EV chargers are incredibly sensitive to electrical noise. When I didn’t properly separate my grounds and neutrals in my garage subpanel, I didn’t just risk a permit failure; I created a path for circulating currents that could have fried my car’s onboard charger. You see, why your subpanel needs a separate ground bar for ev circuits is not just a suggestion; it is a hard requirement for a reason. If you have bonded your neutral and ground at a subpanel, you have created a parallel path for current, which is exactly the permit error that stops home charger installs in their tracks. The inspector isn’t being a jerk—they are keeping your house from becoming a giant antenna for electrical interference. Have you ever had an inspector point out a mistake that you were 100% sure was correct? I’d love to hear your story in the comments.
Does a tiny grounding wire really matter that much?
It absolutely does, especially when you consider that a poor ground is the primary cause of those annoying ‘Check Charger’ lights on your dashboard. According to the National Fire Protection Association (NFPA 70), a solid grounding path is essential for clearing faults quickly enough to prevent fire or electrocution. If your ground is weak, the GFCI protection built into your charger can’t do its job, leading to what we call nuisance tripping. This is why ensuring code compliance when installing ev chargers starts with the very first wire you land in the panel. We aren’t just trying to pass a test; we are trying to ensure that when a surge hits, it has a safe way to exit your home without passing through your $50,000 vehicle. Knowing the grounding trick that fixes intermittent charging errors can save you weeks of frustration and several hundred dollars in re-inspection fees. Let’s look at how to verify your ground rod and bonding before the city comes back for a second look.
Stop Letting Your Subpanel Neutral and Ground Touch
I remember my first subpanel install; I left the bonding jumper in because I figured more grounding was better. Big mistake. In a main panel, they are one and the same, but the second you move to a subpanel in the garage, they must be isolated. If they aren’t, the neutral current—which is supposed to return to the utility—finds a path through your metal conduit and the car’s chassis. To fix this, you need to physically remove the green bonding screw or the metal strap connecting the neutral bar to the panel case. Then, you install a dedicated ground bar that is bolted directly to the metal housing. This is one of the most critical panel upgrade strategies to meet ev charging code requirements in 2025 because it ensures your car isn’t part of the return path for every light bulb in your house. When current starts flowing where it shouldn’t, your charger’s sensors pick up the imbalance and shut everything down to prevent a shock hazard. 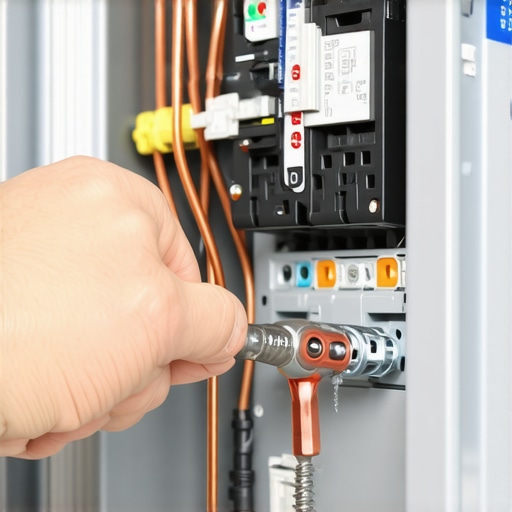
Why Your Screwdriver Isn’t Accurate Enough
After I separated the bars on my second attempt, I thought I was in the clear, but the inspector pointed at my terminal lugs and asked, “What is the torque on those?” I blanked. Most DIYers don’t realize that why your charger needs a specific torque setting to pass inspection is written right on the side of the breaker or in the charger’s installation manual. If the connection is too loose, heat builds up as current jumps the gap; if it’s too tight, you crush the wire strands and weaken the metal. Both scenarios lead to high resistance that can melt your lugs. I had to buy a calibrated torque screwdriver just to prove those connections were set to exactly the manufacturer’s spec, usually around 20 to 50 inch-pounds depending on the terminal. It felt like overkill until I saw how much the wire settled after that final, precise click of the tool.
Identify a Weak Ground Before the Car Does
A “connected” wire isn’t always a “functional” wire. I once spent three hours wondering why a Wall Connector kept pulsing red until I realized the ground rod outside was basically sitting in a pocket of dry air because the soil was so sandy and loose. You can use a multimeter to check the voltage between neutral and ground at the charger—it should be nearly zero volts. If you see a reading of 2V or higher, you likely have a “dirty” ground or a loose connection further up the line. Learning how to detect a loose neutral wire before your electronics fry is a lifesaver here because it helps you distinguish between a charger fault and a house-wide wiring issue. If the ground is weak, the car’s safety computer will refuse the handshake, and you’ll be stuck staring at a dashboard error. Getting this right is the only way how to fix a check charger warning on your cars dashboard without throwing parts at a problem that is actually just a bad piece of copper in the dirt. Focus on the physical continuity from the rod to the terminal, and never trust a connection just because it feels tight to the touch.
One common piece of advice you will hear in every forum is that you absolutely need a 200-amp service upgrade to run a Level 2 charger safely. In my experience, that is often an expensive myth. While a panel upgrade for ev chargers is sometimes unavoidable, many homeowners can actually avoid the massive bill by using dynamic load management. This is where you use a smart charger that monitors your home total usage and throttles the car intake when the dryer or AC kicks on. It is a sophisticated way how to add an ev charger without a 200 amp panel upgrade, yet many traditional electricians will push for the full service swap because they are not familiar with these newer digital solutions. If you skip the why your ev permit application requires a load calculation worksheet, you are flying blind, but doing the math often reveals you have more headroom than you think.
Skip the Expensive Service Swap with Smart Load Management
Everyone says you have to upgrade your main lugs, but I have found that optimizing your current capacity is often more efficient. Smart chargers use what we call dynamic balancing to ensure your main breaker never sees an overload. This technology essentially makes your car the most polite appliance in your house; it waits for its turn to draw power. It is one of the best panel upgrade strategies to meet ev charging code requirements in 2025 because it prioritizes safety without tearing your wall apart. Have you ever been told you needed a full panel upgrade when you were sure you didn’t? I would love to hear about those quotes in the comments.
Why do some new cars refuse to charge on older Level 2 units?
It is not always a hardware failure; often, it is a communication handshake issue. Modern EVs, especially those built after 2022, have extremely tight tolerances for what they consider a clean signal on the pilot wire. According to a technical bulletin from the Society of Automotive Engineers (SAE), even minor electromagnetic interference (EMI) from a nearby variable-speed pool pump can disrupt the J1772 signaling. This is why some new cars refuse to charge on older level 2 units—the car computer detects noise on the ground and aborts the session as a safety precaution. This is not a broken charger; it is a compatibility gap that often requires a shielded pilot wire or a simple firmware update. 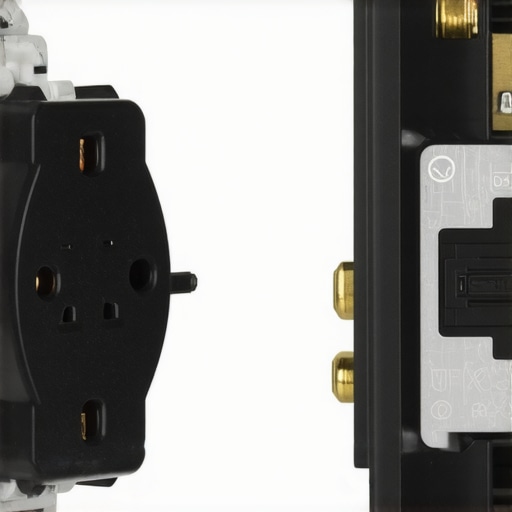
The Double-GFCI Trap That Baffles DIYers
One trap I see constantly—the oops factor that fails inspections—is the double-GFCI nightmare. If you choose a plug-in charger, the NEC 2020 code requires a GFCI breaker for that 240V outlet in garages. However, almost every Level 2 charger has its own internal GFCI protection. When you have two GFCI brains watching the same circuit, they often fight each other, leading to why the gfci in your panel keeps nuisance tripping your charger. This is why I always advocate for hardwiring whenever possible. It is the real difference between hardwired and plug-in charging stations that most people do not appreciate until they are resetting their breaker every morning. Hardwiring removes the need for that sensitive external GFCI breaker, resulting in a much more stable connection. You also have to be careful about the physical components you choose. If you are not hardwiring, you need to pick a nema 14-50 outlet that wont melt under pressure—look for industrial grade markings rather than the $10 residential versions meant for stoves. Finally, upgrading your panel for better ev charging performance is not just about capacity; it is about ensuring your busbars can handle a continuous 40-amp draw for eight hours straight without heat fatigue.
I used to think that once the inspector signed the card, I was done for a decade. But after a year of heavy charging, I noticed a faint smell of ozone in the garage. I pulled out my FLIR C5 thermal camera—a tool I now consider non-negotiable for any serious EV owner—and saw a bright orange hotspot on my 60-amp breaker. The constant heating and cooling of the wire under heavy load had actually caused the metal to expand and contract, slightly loosening the terminal lug over time. This is precisely why your main lugs might be loose after a year of charging. If I hadn’t caught it, that heat would have eventually melted the breaker casing. According to the NFPA 70B Standard for Electrical Equipment Maintenance, periodic infrared inspections are recommended for high-load systems to prevent catastrophic failure, and I’ve started applying that same industrial logic to my home setup.
How do I maintain my home charging setup over time?
Maintenance isn’t just about tightening screws; it’s about software and hardware hygiene. I keep a kit of the essential spare parts to keep for your home charging unit, including a spare holster, a high-quality contact cleaner, and a microfiber cloth for the plug pins. Dust and spiderwebs in a garage can lead to poor contact, which increases resistance. I also make it a habit to check for app notifications once a month. You’d be surprised how often a ‘Check Charger’ light is actually just a software bug waiting for a patch. Knowing how to update the firmware on your smart charging station can solve 90% of connectivity drops before they even happen. If you notice your cord is getting difficult to manage in January, understanding why your charging cable is stiff in the winter and what to do will save you from accidental trips and cable strain. 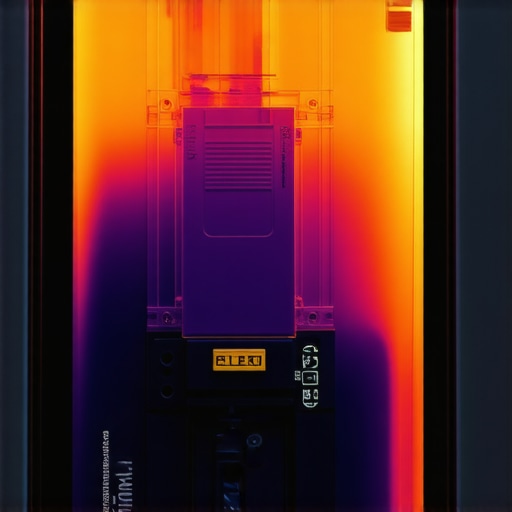
Your Garage is the New Power Plant
Looking ahead, I see the role of the home charger shifting from a simple ‘gas pump’ to a two-way energy hub. With the rise of V2H (Vehicle-to-Home) technology, your charger will soon be feeding power back into your panel during peak hours or outages. This makes upgrading your panel for better ev charging performance even more vital today, as the busbars will eventually be handling bi-directional traffic. We are moving away from passive charging to active load management where your car, solar, and battery work as one. If you haven’t yet, go grab a torque wrench and verify your breaker settings to the manufacturer’s spec this weekend; it’s the single best way to ensure your DIY work survives the next five years of daily use. Being proactive about ensuring code compliance when installing ev chargers doesn’t stop at the initial permit—it’s a continuous process of making sure your connections stay as tight as the day they were first torqued down. Don’t wait for a red light on your dashboard to tell you something is wrong.
The Hardest Lesson I Learned About Grounding My Charger
I learned the hard way that a ground wire isn’t just a safety backup; it is a critical communication path for your car. One of the most significant lightbulb moments for me was realizing that a small amount of electrical noise on a poorly bonded ground bar could trick a high-tech car into thinking there was a fatal short. If you find yourself troubleshooting ev charger connectivity problems, look at your grounding first. I’ve seen cases where a single loose screw on a subpanel caused a vehicle to drop its charge rate by half. Another lesson? Don’t assume the factory connections inside the charger are tight; vibrations during shipping can loosen them just enough to cause high-resistance heat. Finally, remember that ensuring code compliance when installing ev chargers is actually a favor to your future self, as it prevents the most common fire hazards before they ever start.
The Three Tools That Saved My Permit
If you want to move from a DIY amateur to a pro-level installer, you need more than just a pair of pliers. I swear by my calibrated torque screwdriver, which ensures every lug meets the exact inch-pound specification required by the NEC. Next, I never close a panel without running a thermal imaging check; it is the only way to see a loose connection before it starts to smell like burnt plastic. Lastly, I always keep a digital copy of the inspection checklist for a used home ev charging station on my phone. Even if your equipment is new, that checklist highlights exactly what an inspector is going to look for, from conduit support distances to proper labeling. Using these tools transformed my garage from a ‘hopefully safe’ zone into a fully compliant power hub. [image placeholder]
Take the Reins of Your Home Energy Future
Building a reliable charging setup is about more than just getting through the night; it is about preparing your home for the next twenty years of transportation. By focusing on the details like proper bonding and upgrading your panel for better ev charging performance, you are turning your garage into a high-efficiency power plant. Don’t be intimidated by the code book—it is just a roadmap for a system that won’t let you down in the middle of a winter storm. You have the knowledge now to go out there, grab your torque wrench, and finish the job with total confidence. Have you ever had a surprise failure during an electrical inspection? Let me know what the inspector caught in the comments below.