I was standing in my garage, staring at a four-prong NEMA 14-50 plug on the end of my brand-new Level 2 charger, and then looking back at the three lonely wires poking out of my wall. I felt that familiar itch of frustration. It is 240 volts, I told myself. You have two hots and a ground. Why on earth did the manufacturer insist on this extra white neutral wire? I remember thinking I could just outsmart the manual—maybe I could just cap it off or bond it to the ground. That bit of arrogance almost cost me a $700 piece of equipment. I eventually learned the hard way that these modern chargers aren’t just dumb pipes for electricity like an old-school welder; they are sophisticated computers that happen to move a lot of power. Today, I am going to walk you through exactly why your charger is being so picky and how to avoid the expensive mistake of ignoring that neutral connection. We will cover the technical logic and how to ensure you are ensuring code compliance when installing ev chargers in your own home.
Your Charger Brain Runs on More Than Just Raw Power
Most of us grew up thinking 240V was simple: two hot legs working together to provide the muscle. But your new smart charger is a different beast entirely. It has Wi-Fi chips, LED displays, and complex logic boards that manage the communication between your house and your car’s battery. These internal electronics rarely run on 240V; they typically require 120V. That is where the neutral wire comes in. It provides the return path for those 120V components. When I first started messing with these, I figured the ground could handle any minor return current. I was wrong. Using the ground wire as a current-carrying conductor is not just a safety hazard; it is a recipe for internal interference. According to the NFPA 70 National Electrical Code (NEC), using a ground in place of a neutral is a violation that can lead to hazardous voltages on the metal chassis of your appliances. If you find yourself staring at an old three-wire setup, you might be looking at a necessary panel upgrade for your ev charger to bring that fourth wire into the mix. I once tried to bypass this for a neighbor, and we spent three days troubleshooting ev charger connectivity problems because the logic board was getting ‘dirty’ power. It was a humbling lesson that proved the manual actually knows what it’s talking about.
Wait, Do I Really Need to Tear Up My Walls for One Extra Wire?
I know what you are thinking because I thought it too: Is this just a scheme by copper companies to sell more wire or for electricians to pad their bills? It feels like overkill for a car charger. But the reality is that skipping this wire is the mistake that causes ev charger motherboards to fry during storms or even simple power surges. Without a dedicated neutral, the voltage for those sensitive electronics can fluctuate wildly if the load becomes unbalanced. Have you ever opened your electrical panel and felt like you were looking at a puzzle with missing pieces? If you have faced this ‘missing wire’ dilemma, I would love to hear how you handled it in the comments. We are going to fix this the right way so your car stays charged and your house stays safe. Let’s look at the actual steps to verify your wiring before you plug that expensive vehicle in.
Look Inside the Panel Before You Buy Anything
You cannot just assume your existing garage wiring is ready for a Level 2 charger. The first thing I do when I walk into a garage is pop the cover off the electrical panel to see what we are working with. You are looking for two things: physical space for a double-pole breaker and the presence of four wires if you are using a NEMA 14-50 plug. I remember a client who thought his old 10-gauge dryer wire could handle a modern 40-amp continuous load. It did not end well; the heat literally cooked the insulation until it was brittle as a potato chip. To avoid a fire, you must ensure you have the exact wire gauge you need for a 50-amp ev circuit, which is typically 6 AWG copper for most residential runs. While you are in there, take a close look at the material of the wire. If you see silver-colored strands, you might be dealing with aluminum, and you will need to know how to verify your electrician actually used copper wire for the install to ensure long-term safety.
Fix the Three-Wire Dilemma the Right Way
If you only see three wires (two hots and a ground) coming from your panel to the garage, you have a choice to make: pull a new wire or hardwire the charger. Many people try to ‘cheat’ by jumpering the neutral to the ground at the outlet. Do not do this. It creates a parallel path for return current and is a major code violation. If your charger requires a neutral, the safest path is often upgrading your panel for better ev charging performance by running a proper 4-wire set. This ensures that the sensitive Wi-Fi and logic boards in your unit get the clean 120V they need without ‘polluting’ the ground wire. 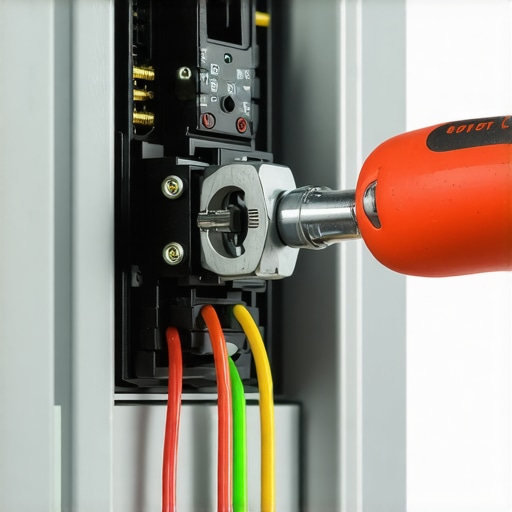
Don’t Skip the Torque Wrench
This is the step that most DIYers and even some ‘pro’ electricians miss. Every terminal on your breaker and your outlet has a specific torque rating, usually printed right on the side of the device. High-amperage charging creates a lot of heat, which causes the metal to expand and contract. If your connections are not tightened to the specific torque settings that prevent panel fires during high load charging, the wires will eventually wiggle loose. I once skipped the torque wrench on a personal project and used a standard screwdriver; two months later, the smell of burnt plastic in the garage was overwhelming. The loose connection had created an arc that was slowly melting the outlet housing.
Keep Your Subpanel Grounds Separate
If you are installing a subpanel in your garage to handle the EV load, you must be careful about how you bond your wires. In a main panel, the neutral and ground are often connected to the same bus bar. However, in a subpanel, they must remain isolated. If you mix them up, you are going to find yourself troubleshooting ev chargers common compliance pitfalls and fixes for hours because the charger will likely detect a ground fault and refuse to start. Ensure why your subpanel needs a separate ground bar for ev circuits is a concept you fully grasp before you start landing wires.
Stop the Ghost Tripping Before It Starts
One of the most annoying issues with new installs is the GFCI ‘handshake’ problem. Most building codes now require a GFCI breaker for garage outlets. However, many EV chargers have their own internal GFCI protection. When you put a GFCI charger on a GFCI breaker, they can ‘fight’ each other, leading to nuisance trips. If you are wondering why your ev charger trips the gfci even when not in use, it is often this conflict between the two safety systems. To fix this while staying legal, many people opt to hardwire the charger directly, which often removes the requirement for that expensive GFCI breaker in the panel.Common wisdom says that if your breaker is tripping, you just need a bigger one. I see this all the time on DIY forums. People think a 60-amp breaker is a ‘safety buffer’ for a 40-amp charger. But here is the reality: your breaker is not just a switch; it is a calibrated safety device designed to protect the weakest link in the chain—usually the wire insulation. If you upsize the breaker without upsizing the wire, you are essentially turning your wall into a giant toaster element. One of the biggest traps is the ‘continuous load’ rule. Most people do not realize that an EV charger is one of the only things in your house that draws max power for hours on end. According to the National Electrical Code (NEC) Article 625, EV charging is defined as a continuous load, meaning the circuit must be rated for 125% of the charger’s output. If you miss this calculation, you will find out the hard way why the real reason your circuit breaker trips at 90 percent charge is not a faulty car, but a thermal physics problem in your panel.
Why Does My Brand New Breaker Feel Like a Pizza Oven?
If you have ever touched your panel during a charging session and pulled your hand back in a hurry, you are seeing the ‘Oops factor’ in action. A common mistake is using a cheap, standard breaker for a high-intensity application. Not all breakers are created equal. In my experience, a ‘residential grade’ breaker often struggles with the 8-hour heat soak of an EV. You might need to look into ev charger troubleshooting expert tips for common issues to see if your breaker is simply the wrong tool for the job.  I have seen dozens of DIY installs fail because of ‘double tapping’—where someone tries to squeeze two wires into one breaker terminal to save space. It is a shortcut that leads to arcing and heat damage. You need to know how to verify code compliance for your ev charger installation by checking for dedicated circuits. If your panel is full, do not cheat. Look at panel upgrade strategies to meet ev charging code requirements in 2025 instead of risking a house fire. Even professional electricians sometimes miss the nuance of ‘terminal temperature ratings.’ If your wire is rated for 90°C but your breaker terminal is only rated for 75°C, you have to size your wire based on that lower 75°C rating. It is a technicality that often results in the city inspector failing the job. Have you ever fallen into this trap or had an inspector point out a tiny detail you missed? Let me know in the comments. Ensuring code compliance essentials for ev charger installations in 2025 is about more than just passing a test; it is about sleeping soundly while your car draws 10,000 watts ten feet from your bedroom.I treat my EV charger like a high-performance computer because, frankly, that is exactly what it is. One of the most overlooked aspects of ownership is the digital side of things. If your charger is ‘smart,’ it is running on firmware that likely needs periodic patches to handle new car communication protocols or security fixes. I make it a habit to check for updates every few months because I have seen units refuse to talk to a car simply because the software was out of date. Knowing how to update the firmware on your smart charging station is the difference between a seamless morning and being stranded with a dead battery because of a software glitch.
The One Tool That Saves My Sanity and My House
If you want to move beyond the DIY basics and really protect your investment, you need a handheld infrared (IR) thermometer. I use mine religiously during the first few weeks of a new install. After the car has been charging for about an hour, I point that red laser at the breaker and the outlet. If I see temperatures climbing above 140°F (60°C), I know I have a loose connection or a failing component. This simple $20 tool allows you how to spot a dying breaker before it shuts down your charging session or, worse, starts a fire. Physical maintenance is just as vital, especially for those with chargers mounted in the elements. Performing 3 maintenance tasks that keep your outdoor charger running through winter, like checking the gaskets and cleaning the port pins, ensures that moisture doesn’t create high-resistance paths that melt your expensive equipment.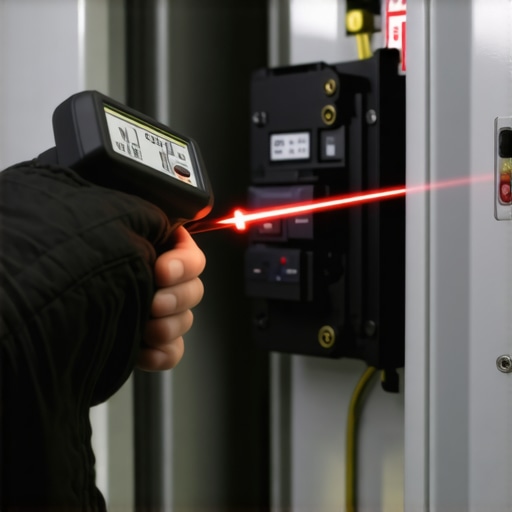
How do I keep this system from failing three years from now?
The key to long-term reliability is resisting the urge to ‘set it and forget it.’ Every year, I recommend doing a quick ‘torque check’ on the main terminals in your panel (with the main breaker off, of course). Copper and aluminum expand and contract with the heat of every charging cycle. Over time, this thermal cycling can back out even the most well-tightened screw. According to the Tesla North American Charging Standard (NACS) technical specification v1.0, ensuring consistent electrical contact is paramount for safety at high-current loads. If you are not comfortable doing this yourself, make sure how to find an electrician who actually understands ev codes so they can perform a quick annual safety audit. This is the gold standard for preventing the ‘melted outlet’ syndrome that plagues so many older installs.
Get Ready for the Two-EV Household
The trend is clear: most families who buy one EV eventually buy a second. If you are already at your panel’s limit, you need to think about scaling. Before you jump into a $4,000 service upgrade, you should learn how to load test your house before adding a second charger. Many modern chargers now offer ‘load sharing,’ where two units communicate and split a single 50-amp circuit. It is a brilliant way to scale without tearing your walls apart. As you plan for this future, don’t forget to look into how to claim the federal alternative fuel infrastructure tax credit, which can significantly offset the costs of adding that second port. My advanced tip for today? Buy a charger that supports Open Charge Point Protocol (OCPP). This ensures you aren’t locked into one manufacturer’s ecosystem when the technology inevitably changes in five years.
Lessons from the Smoldering Outlet
Looking back at my first few attempts at home electrical work, I realize that the biggest mistake wasn’t a lack of effort, it was a lack of respect for the continuous load. An EV charger is the only appliance that tests every weak point in your system for eight hours straight. If you notice the reason your ev charger smells like burnt plastic, it is usually a sign that a connection you thought was ‘tight enough’ actually wasn’t. My biggest lightbulb moment came when I realized that saving $100 on a DIY hack could cost me $50,000 in home repairs. Always trust the four-wire requirement; it is there to protect the logic board that makes your charger ‘smart’ in the first place.
The Gear That Saves My Sanity
I never step into a garage without my diagnostic toolkit. First, a high-quality infrared thermometer is non-negotiable for monitoring heat levels at the breaker. Second, I highly recommend a dedicated torque screwdriver to ensure every lug is set to the manufacturer’s specifications. Third, always check for 7 utility rebates that pay for your charger installation costs before you buy, as many local providers offer massive incentives for high-efficiency units. Finally, keep a copy of the NEC handbook nearby—it is the ultimate guide for anyone serious about the federal tax credits available for rural charging stations and proper safety protocols.
Future Proof Your Driveway Today
The transition to electric driving is more than just a car purchase; it is an infrastructure upgrade for your life. Taking the time to do things right today—like pulling that extra neutral wire or upgrading your grounding system—ensures you won’t have to redo the work when your family adds a second vehicle. When you learn how to prep your homes electrical for a future ev purchase, you are investing in peace of mind. Don’t be afraid to ask for help from a specialist who lives and breathes these codes. Have you ever found a ‘surprise’ in your electrical panel that changed your installation plans? Let me know in the comments below!