I remember standing in my garage three years ago, the smell of fresh drywall still hanging in the air, feeling way too confident about my DIY prowess. I’d spent two full weekends wrestling with conduit and pulling wire for my new Level 2 EV charger. When the local inspector finally pulled into my driveway, I expected a pat on the back and a shiny green sticker. Instead, he didn’t even get three feet past the door before he sighed. That single, heavy sigh cost me two weeks of waiting, another $150 in reinspection fees, and a bruised ego that took much longer to heal. It wasn’t that I was being lazy; I just didn’t know the specific nuances of verifying code compliance for modern high-draw appliances. Today, I’m going to share the hard-won secrets that will help you avoid my mistakes and get your project signed off without a second visit.
The Heart-Sinking Moment the Inspector Pulls Out the Red Pen
Passing an inspection isn’t just about things working; it’s about them working safely under the most extreme conditions. My first big blunder was simple but devastating: I used the wrong size wire for the breaker I’d chosen. It’s a classic wire gauge mistake that fails 40 percent of inspections, yet it’s so easy to overlook when you’re staring at a wall of options at the hardware store. The inspector pointed out that while my charger might work today, that wire would eventually turn into a toaster element under a continuous 40-amp load. Have you ever felt that stomach-drop moment when a pro spots a flaw in your hard work before they’ve even opened their clipboard? Tell me about your closest call in the comments below.
Does the Inspector Actually Want to Make Your Life Miserable?
It’s easy to view the electrical inspector as the villain in your home improvement story, but they’re actually your last line of defense against a house fire. According to data from the National Fire Protection Association (NFPA), electrical distribution or lighting equipment is a leading cause of home fires, accounting for nearly 45,000 incidents annually. They aren’t looking for reasons to fail you; they’re looking for peace of mind. Often, the permit error that stops residential charging installs isn’t even the wiring itself, but the lack of proper documentation or a load calculation that proves your house can actually handle the extra juice.
Don’t Let These Simple Mistakes Stall Your Project
If there’s one thing I’ve learned from my neighborly chats with the guys at the permit office, it’s that consistency matters more than speed. Most people rush the finish line and forget about the forgotten torque test. If your terminals aren’t tightened to the exact inch-pound specification required by the manufacturer, you’re looking at a loose connection, heat buildup, and an instant failure. We’re going to dive into the exact checklist you need to follow so that when that inspector walks in, you can hand him a cold water and watch him sign your permit with a smile.
The Math Every DIYer Tries to Skip
Before you even touch a screwdriver, you need to prove your house won’t dim the streetlights when you plug in. Most homeowners think if they have an empty slot in their panel, they’re good to go. I learned the hard way that a physical space doesn’t equal electrical capacity. You need to perform a formal load calculation. If you’ve ever looked at a document full of numbers and felt your eyes glaze over, you aren’t alone, but learning how to read the load calculation your electrician sent you is the difference between a project that starts and one that gets red-flagged immediately. This document is essentially a budget for your electricity; if you spend more than you have, the “bank” (your main breaker) shuts you down.
How to Squeeze a Charger onto a Tight Service
If your calculation shows you’re red-lining, don’t panic. You don’t always need a $3,000 service upgrade. I once worked on an older 60-amp panel where we thought a Level 2 was impossible. By using a smart load-management device, we figured out how to squeeze a level 2 charger onto a 60 amp service safely. It’s like a traffic cop for your appliances, pausing the car charge if the dryer kicks on. This is a game-changer for historic homes.
The Physical Layout the Inspector Will Scrutinize
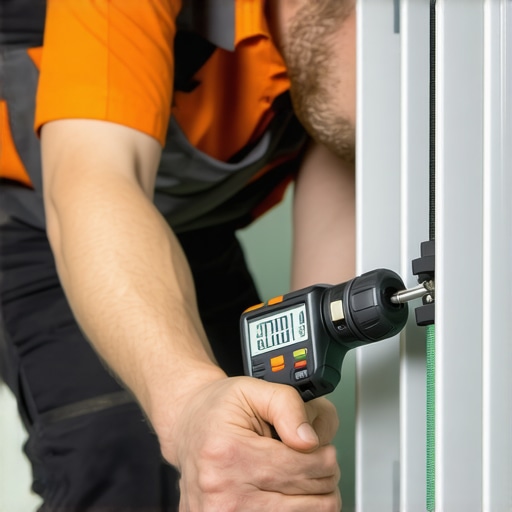
Once your math is solid, the inspector will look at the “bones” of the install. This is where most DIYers get sloppy. I remember my second install—I thought I was being clever by tucking the conduit tight into a corner, but I ignored the minimum bending radius. The inspector didn’t care about my aesthetic; he cared that I was stressing the wire insulation. This is also why why your local inspector cares about conduit bending radius; a kinked wire is a hot wire. Use a proper bender and keep your runs accessible.
Keep Your Outdoor Trench Up to Code
If you’re running wire to a detached garage or a pedestal, the shovel is your most important tool. A shallow trench is a death sentence for your permit. On a job last summer, the homeowner insisted 12 inches was “deep enough” because the dirt was hard. I had to show him the code book—if that conduit isn’t at the right level, it’s a hazard for future gardening or landscaping. Knowing the exact conduit depth required for outdoor chargers saves you from digging the same hole twice. Dig deep, or don’t dig at all.
The Grounding Mistake That Ruins Everything
Grounding isn’t just a suggestion; it’s the safety net for your car’s sensitive electronics. I’ve seen people try to “cheat” the ground by bonding to a nearby water pipe, which is a massive no-no in the EV world. If you get this wrong, you’ll see a red light on your charger and a “fail” on your inspection sheet. Learning how to fix the grounding fail that ruins ev permits usually involves driving a dedicated rod or ensuring a continuous copper path back to the main service. It’s extra work, but it’s what keeps you from frying your car’s motherboard during a surge.
Watch Out for Picky Breaker Brands
Finally, check your hardware. Not all breakers are created equal, even if they fit the slot. Some brands are notorious for nuisance tripping when they deal with the constant, high-heat load of a car. I’ve had to swap out dozens of units because the specific breaker brands that hate constant ev loads will simply pop every time the car hits 80% charge. Stick to high-quality, manufacturer-recommended components to avoid a midnight trip to the garage to reset a switch.
Why Over-Protecting Your Circuit Actually Causes Failure
Common wisdom suggests that two layers of safety are always better than one. In the world of EV charging, however, this logic often leads to the “Dueling GFCI” nightmare. If you are installing a plug-in Level 2 unit, the National Electrical Code (NEC) frequently requires a GFCI breaker in the panel for garage outlets. But here is the kicker: your charger already has a sophisticated Charging Circuit Interrupting Device (CCID) built into its motherboard. According to the UL 2231-2 standard, these systems are designed to detect minute ground faults with extreme precision. When you have two of these systems on the same line, they can “nuisance trip” each other during standard self-test cycles. This is why understanding the critical difference between hardwired and plug-in chargers is vital; hardwiring often removes the need for that external GFCI breaker, resulting in a much more stable connection. Have you ever fallen into this trap where your charger trips even though nothing is actually wrong? Let me know in the comments.
Can Your 100-Amp Panel Actually Support a Fast Charger?
I get asked this constantly by homeowners in older neighborhoods. The standard advice is usually a flat “no,” but the reality is far more nuanced. You do not necessarily need a full service replacement if you utilize panel upgrade strategies to meet ev charging code requirements in 2025, such as smart load-shedding controllers. The real trap for an older panel isn’t just the total amp capacity; it’s the physical thermal health of the existing busbar. If your panel is twenty years old, running a 40-amp continuous load for eight hours is like running a marathon in a winter coat—things are going to get hot. I have seen 3 small mistakes that turn your garage panel into a fire hazard, and nearly all of them involve heat buildup at the point where the breaker clips onto the busbar. If you see even a tiny bit of discoloration on that metal, no amount of math will make that install code-compliant.
The Thermal Trap Most DIYers Ignore
Most people assume that if the lights stay on, the job is a success. But an EV is a “continuous load,” meaning the current flows at a high rate for more than three hours. This is why the specific breaker brands that hate constant ev loads are such a headache for professional electricians. Lower-quality breakers are designed for intermittent use like a microwave or a vacuum. When you subject them to the relentless pull of a modern EV, the internal components can fatigue. This leads to “ghost trips” that only happen at 3:00 AM when the charger reaches peak temperature. Furthermore, if you are mounting equipment outside, why your outdoor charger needs a specific type of gfci becomes a major factor; standard GFCIs often cannot handle the specific harmonic distortion created by the car’s power inverter, leading to premature failure.
The Hidden Sign Your Panel is Screaming for Help
Before you consider your project finished, you need to check your main lugs. Your individual circuit might be wired perfectly, but the massive draw of a car acts like a magnifying glass for existing weaknesses in your home’s infrastructure. I have identified 3 signs your main lug is loose and causing power flickers that many homeowners mistake for utility grid issues. If your kitchen lights dim the moment your car starts charging, it is rarely a problem with the utility company; it is almost always a high-resistance connection in your panel that is generating dangerous levels of heat. Addressing these advanced nuances is what ensures your home stays safe long after the inspector leaves the driveway.
The Tools I Actually Trust for the Long Haul
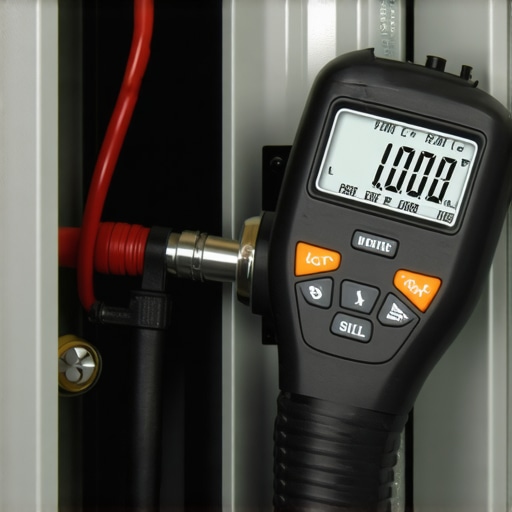
I’ve spent thousands of hours in garages, and if there is one thing I’ve learned, it’s that your eyes can lie to you, but a calibrated tool won’t. When I’m finishing an install, I don’t just ‘feel’ if a screw is tight. I use a high-precision digital torque wrench because missing the specific torque wrench settings for a wall connector by even 5 inch-pounds can lead to resistance-born heat. I also carry a non-contact infrared thermometer. If I’ve been charging my car for two hours, I’ll point that laser right at the breaker. If it’s reading more than 50°C (122°F) above the ambient garage temperature, I know I’ve got a loose connection or a failing component. This is the level of ev charger troubleshooting expert tips for common issues that separates a one-weekend project from a permanent home improvement.
How do I keep my charging setup running for a decade?
It is a ‘set it and forget it’ appliance until it isn’t. Every six months, I do a walk-around. I look for why your charger handle feels sticky after a rainstorm, which is often a sign of environmental contaminants or UV degradation of the plastic. I also take a can of electronic contact cleaner to the pins—learning how to clean your charger ports without damaging them prevents the micro-arcing that eventually ‘welds’ a plug into your car. According to the 2023 NEC Section 625.42(B), if you use a charger with restricted access or software-based amperage settings, that documentation must be onsite for the inspector. I keep a physical folder with my load calculations and manual next to the panel; it’s a pro move that makes you look like an expert during resale. Beyond the hardware, I always check for software updates on my smart charger to ensure it hasn’t lost its handshake with the utility provider.
Plan for the Second Car Before You Buy It
The biggest mistake I see now is people ‘filling’ their electrical capacity with one charger and leaving no room for the spouse’s future EV. If you’re already running conduit, think about why your garage needs a subpanel for that second ev now. It is much cheaper to run one large feeder line today than two separate lines over the next three years. This also allows you to how to properly size a subpanel for your ev workshop if you ever want to add power tools or a heater later. We are quickly approaching a world where your car isn’t just a consumer of power, but a source. I’m already looking at how to use your ev as a backup home battery safely, which will turn our garages into mini-power plants. Within the next five years, ISO 15118-20 standards will make ‘Plug & Charge’ the norm, where your car communicates directly with your home grid to optimize for the lowest utility rates. Scaling your home infrastructure isn’t just about adding more wires; it’s about building a digital-ready electrical system. CTA: Take five minutes tonight to touch your charger’s breaker cover (carefully!) after it has been running for an hour. If it feels significantly hot rather than just mildly warm, it is time to double-check those torque settings and connections.
Hard-Won Secrets from My Most Stressful Panel Swap
Looking back at my first few installs, there are details that didn’t click until I saw them fail in real-time. First, never underestimate the power of labeling. It’s not just about passing the test; it’s about ensuring that five years from now, when you’re dealing with troubleshooting ev chargers common compliance pitfalls and fixes, you aren’t guessing which wire goes where. Second, I’ve learned that a ‘tight’ screw isn’t always enough—expansion and contraction from thermal cycles will loosen anything that isn’t torqued to spec. Lastly, remember that your permit is your best friend during a home sale; knowing how to prove your electrical panel is code compliant for resale can add thousands in perceived value to your property.
#IMAGE_PLACEHOLDER_E#
The Tool Bag Essentials That Saved My Sanity
If you’re going to do this right, stop relying on cheap hardware store testers. I personally swear by a calibrated digital torque wrench because getting the specific torque wrench settings for a wall connector exactly right is the only way to sleep soundly at night. I also recommend keeping a physical copy of the 2023 NEC Handbook on your workbench—digital is fine, but flipping to Article 625 while your hands are dusty is a rite of passage. Finally, invest in a high-quality thermal camera or a non-contact thermometer; being able to see a hot spot before it smells like fish is the ultimate pro move.
Your Garage is the Gateway to the Future
Taking on an EV charger project is more than just adding a plug; it’s about modernizing your home’s infrastructure for a new era of energy. Whether you are navigating code compliance essentials for ev charger installations in 2025 or planning a future-proof panel upgrade, you are building a system that will power your life for decades. Don’t be intimidated by the red tape or the technical math. Every expert started exactly where you are—staring at a panel and wondering if they have enough room. You’ve got the knowledge now, so go out there and build something safe.
What’s the biggest hurdle you’ve faced while trying to get your home ready for an EV? Let me know below.