I was standing in my garage, sweat dripping off my nose, staring at a $200 roll of thick copper wire that was suddenly, frustratingly useless. I’d spent three hours wrestling that stiff cable through a tight conduit bend, feeling proud of my DIY spirit. Then my neighbor, a retired master electrician, walked over, peeked at the label, and just shook his head. ‘It’s too thin for a continuous load, kid,’ he said. I felt the blood drain from my face. I had sized my wire based on a standard appliance circuit, totally ignoring the fact that an EV charger is basically a high-powered furnace that runs for eight hours straight. It turns out I wasn’t alone in my ignorance; this exact oversight is the leading reason for the permit error that stops 40% of residential charging installs across the country. Today, I’m going to share the hard lessons I learned so you don’t end up with a pile of scrap copper and a failed inspection. We are going to fix your wiring plan before you pull a single inch of cable. Have you ever felt that sinking feeling when you realize your ‘simple’ project is actually a code-compliance nightmare?
Stop Sizing Your Wire Like It is a Common Toaster
Most homeowners—and even some general electricians—think wire sizing is a suggestion. It is not. When you are ensuring code compliance when installing EV chargers, you have to account for the ‘continuous load’ rule. According to the National Fire Protection Association (NFPA 70/NEC), any load that runs for three hours or more must be restricted to 80% of the circuit’s capacity. This means if you want to charge at 40 amps, you cannot just use a 40-amp wire; you need a circuit (and wire) rated for 50 amps. If you get this wrong, you will notice the 4 signs your electrician used the wrong gauge wire, including heat damage and nuisance tripping.
Is obsessing over wire thickness really worth the extra cost?
Many people ask if jumping from #8 to #6 AWG copper is just a way for wire manufacturers to take more of your money. The reality is that why thinner wire is costing you miles every night comes down to voltage drop and heat. Thinner wire has more resistance. More resistance means more heat. More heat means your charger might throttle its speed or, worse, melt the insulation inside your walls. I learned the hard way that saving $50 on a smaller wire gauge resulted in me paying triple that in labor and replacement materials later. Setting up your charging station the right way starts with understanding that your car is the most demanding thing your house has ever had to power.
Run the Numbers Before You Buy the Parts
Before you even touch a screwdriver, you have to treat your home’s electrical panel like a finite budget. Think of your electricity as a bank account; you cannot spend more than you have without facing a ‘penalty’ in the form of a tripped main breaker. Most people skip the math and just jam a new breaker in, but you need to sit down and learn how to read the load calculation your electrician sent you. I once helped a buddy who was convinced his 100-amp panel could handle a new Level 2 charger along with his electric range and AC. We did the math and realized he was already pulling 85 amps during dinner time. If we had added that charger, he would have seen the 5 signs your main breaker is overwhelmed by a new level 2 charger, likely plunging his house into darkness the first time the car started charging while he was using the toaster. If your panel is full or aged, look into upgrading your panel for better ev charging performance before moving forward.
Grab a Torque Wrench to Prevent a Fire
The single most common mistake I see in DIY installs—and even some pro jobs—is ‘hand-tightening’ the lugs. When you are dealing with 40 or 50 amps of continuous current, a loose connection acts like a tiny heater. I remember a service call where the homeowner complained about a strange scent in the garage. It turned out to be one of the 5 reasons your electrical panel smells like fish: a loose lug was arching and melting the breaker casing. You must use a torque wrench. Using the specific torque wrench settings for a wall connector ensures the wire stays seated perfectly as it expands and contracts with the heat. This is the forgotten torque test that prevents panel fires. 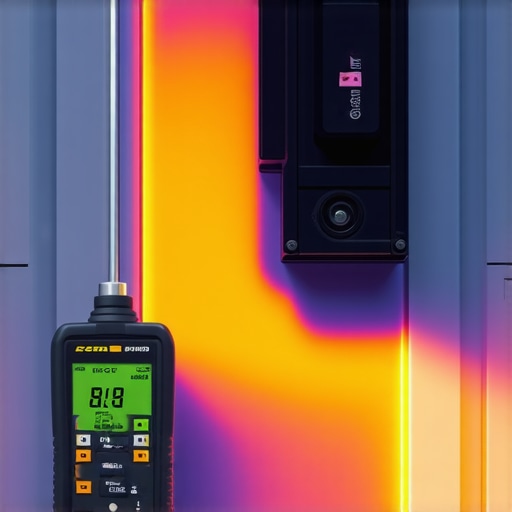
Select the Right Pipe for the Job
Routing the wire is where the physical labor kicks in, and you cannot just let raw cable hang off the wall. You need to understand the specific conduit size needed for a 50-amp circuit to ensure the wires have enough ‘breathing room’ to dissipate heat. If you cram thick wires into a pipe that is too small, they will cook each other. For outdoor runs, I always recommend using how to use a liquid tight conduit for outdoor charger exposed runs to keep moisture out. Moisture is the enemy of high-voltage electronics and can lead to you troubleshooting ev charger connectivity problems or ground faults later.
Identify the Right Breaker for Your Brand
Not all breakers are created equal. Some panels are notorious for ‘nuisance tripping’ when they hit the 80% load mark for hours on end. I have spent countless hours helping clients figure out the specific breaker brand that keeps tripping during fast charging. If you use a cheap, off-brand breaker in a high-demand application, it will fail prematurely. Always match the breaker brand to your panel’s manufacturer to ensure a seated, safe connection. This small detail is a huge part of ensuring code compliance when installing EV chargers. Getting the hardware right today prevents you from having to perform ev charger troubleshooting expert tips for common issues next month when the system stops working in the middle of the night.
Most people think that if a product is for sale on a major website, it must be safe. I see this common sense approach backfire constantly. The industry is currently flooded with uncertified hardware that carries counterfeit safety marks. While everyone tells you to look for the UL logo, I have found that 3 ways to spot a fake UL listing on a cheap charger is a skill every EV owner needs. According to a recent alert from Underwriters Laboratories, counterfeit marks on electrical equipment have surged, and these devices often skip critical safety components like thermal sensors. Buying a bargain-bin unit is one of the 3 hidden costs of cheap internet bought chargers because when an internal relay welds shut, there is nothing stopping the flow of electricity from overheating your car’s battery.
The Grounding Error That Voids Your Warranty
Here is a trap that even seasoned DIYers fall into: the extra grounding rod. You might think more grounding is better, but creating a second path to earth can actually create a ground loop that sends stray current through your vehicle’s sensitive electronics. This is the grounding rod mistake that voids your EV warranty and is a major red flag for any inspector. When you are focusing on code compliance essentials for EV charger installations in 2025, you have to ensure your charger shares the same grounding electrode system as your main house panel. If you get this wrong, you are not just risking a permit fail; you are risking a fried motherboard in a $60,000 vehicle.
Can you avoid a $3,000 panel upgrade with smart load management?
The standard advice is that if your panel is full, you need a heavy-up. I disagree. For many homes, the secret to getting faster charging without a new panel lies in digital load shedding. Modern systems can monitor your home’s total intake and throttle the car charger only when the HVAC or dryer kicks in. This is a far more elegant solution than a massive construction project. However, you must understand panel upgrades for EV chargers: what you need to know before deciding, because some older bus bars simply cannot handle the sustained heat of a 48-amp draw, regardless of the software management in place.
Why Your Inspector Cares About the Small Stuff
I have seen permits denied because a conduit bend was too sharp. It sounds petty, but why your local inspector cares about conduit bending radius is about physics: if you pull heavy gauge wire through a 90-degree kink, you are likely scraping the insulation, creating a hidden arc-fault risk. Staying on top of how to verify code compliance for your EV charger installation is what separates a weekend hobbyist from a homeowner with a safe, long-lasting setup. Have you ever fallen into this trap or had a simple install turn into a multi-day ordeal? Let me know in the comments.
Once you survive the scrutiny of an inspector and the physical exhaustion of the install, you might think you are done. I thought so too, until about six months in when I noticed my charging handle felt a little warmer than usual. It turns out, even a perfect installation needs an eyes-on-it approach to stay healthy. I started keeping a specific toolkit just for my garage setup, and it has saved me from ev charger troubleshooting expert tips for common issues more than once. The most important tool I own isn’t a screwdriver; it’s a non-contact infrared thermometer. Once a month, while the car is pulling its full 48 amps, I point that red laser at my main breaker and the charger’s internal terminals. If I see temperatures creeping above the manufacturer’s rating—usually around 60°C to 75°C for the wire insulation—I know a connection is loosening before it ever has the chance to start troubleshooting ev charger connectivity problems or causing a smell.
The One Tool That Saves Your Panel from Melting
I cannot stress enough how much a simple thermal check can reveal. Professional testers often use high-end FLIR cameras, but for us homeowners, a basic thermal gun is plenty. According to the International Association of Electrical Inspectors (IAEI), thermal anomalies are the primary precursors to catastrophic failure in continuous-load systems. If you notice a hot spot, it is time to break out the torque wrench again and verify the specific torque wrench settings for a wall connector. Copper is soft; it cold-flows and expands under heat, which naturally loosens screws over time. By catching this early, you are ensuring code compliance when installing EV chargers even years after the permit was signed off. I have seen chargers that were ‘perfectly installed’ fail in year three simply because the owner never checked for terminal creep.
How do I maintain my home charging station over time?
Maintenance isn’t just about the wires inside the wall; it’s about the hardware you touch every single day. I make it a habit to check the pins on the charging handle for any signs of black carbon buildup or pitting. If they look dull, I follow the steps for how to clean your charger ports without damaging them using electronic contact cleaner—never water or abrasive pads. Externally, if your unit is outside, check the seals on your conduit. UV rays are brutal on plastic, and if your liquid-tight fittings start to crack, you will soon be upgrading your panel for better ev charging performance because of a short circuit caused by rainwater. Also, keep an eye on your app; if you find why your smart charger lost its wi-fi-connection again, it might be a sign that the internal logic board is overheating or the antenna is corroding.
The Future of Your Garage is a Two-Way Street
Looking ahead, the trend is moving toward ‘V2H’ or Vehicle-to-Home technology. Soon, your charger won’t just be a drain on your panel; it will be a backup generator. This is why I always tell people to over-build their infrastructure now. If you are already doing the work, consider how to use your ev as a backup home battery safely by ensuring your transfer switch or gateway is compatible with bidirectional flow. We are moving toward a world where the car stabilizes the grid, and your 2025-compliant install is the foundation for that. My prediction? In five years, we won’t even call them chargers; they will be ‘energy hubs.’ For now, grab that thermal gun and do a quick sweep of your breakers tonight—it is the easiest way to sleep soundly while your car gulps down electricity.
Lessons Learned from a Blown Breaker and a Frustrated Inspector
After years of tinkering in my own garage and helping neighbors avoid disaster, I realized that the hardest lesson isn’t about the wire gauge—it’s about the ego. Most of the 3 hidden costs of diy ev charger wiring come from assuming you don’t need a second look at your work. I once spent an entire Saturday morning re-pulling 6-gauge wire because I thought I could eyeball a conduit bend radius. I couldn’t, and the inspector noticed the stress on the insulation immediately. One thing I’ve learned is that copper is a soft metal that expands and contracts; checking your lugs every six months isn’t overkill, it’s basic preventative maintenance. Also, always double-check your math; a 100-amp service feels huge until you turn on the electric oven and the car at the same time. Remember, the inspector is actually your best friend because they catch the small mistakes that could lead to a catastrophic failure.
The Essential Toolkit for Keeping Your Connection Clean
I trust a high-quality torque wrench more than my own grip strength. Every lug has a specific setting, and hitting that mark is the difference between a cold connection and a fire hazard. I also recommend keeping a can of specialized electronic cleaner on hand so you can learn how to clean your charger ports without damaging them safely. Dust and moisture are the silent killers of fast charging speeds. Finally, always have the contact info for a pro ready; if you are ever in doubt about your panel’s health, don’t hesitate to contact us for a professional walkthrough of your system. #IMAGE_PLACE_HOLDER_E#
Start Your Home Charging Journey the Right Way
Mastering your home energy setup is incredibly rewarding. By following these ev charger troubleshooting expert tips for common issues, you are taking the first step toward a future of sustainable, self-reliant transportation. You’ve got the knowledge and the tools; now go make your garage the smartest and safest room in the house. Have you ever found a loose wire or a hot spot during a routine check of your electrical panel? Let me know in the comments below.