I was sitting on my couch, halfway through a bowl of popcorn, when the floor lamp beside me started doing this weird, rhythmic dance. It wasn’t a full blackout, just a stutter, like the house was blinking. I figured the wind was kicking up outside, but the trees through the window were dead still. Then it hit me: my Rivian had just kicked over to its scheduled charging session in the garage. I ignored it for weeks, telling myself it was just ‘old house charm.’ That was my first big mistake, and it nearly cost me my entire main service panel.
Why My Living Room Turned Into a 1970s Disco
The truth is, I’m a bit of a DIY enthusiast, but even I didn’t realize how much raw stress a Level 2 charger puts on a home’s electrical backbone. When you’re pulling 48 amps for eight hours straight, things get hot. When things get hot, they expand; when they cool, they contract. Do that every night for a year, and those beefy main lugs—the heavy-duty screws holding the primary cables from the street—can actually start to wiggle. I’ve learned the hard way that why your main lugs might be loose after a year of charging often comes down to this relentless thermal cycling. If you’ve noticed your lights flickering specifically when the dryer or the car is running, you aren’t seeing ghosts. You’re seeing a high-resistance connection. According to the National Fire Protection Association (NFPA), electrical failures are a leading cause of home fires, often stemming from these exact types of hidden loose connections. I felt like an absolute idiot when my electrician showed me the charred insulation on my main feeder wires. If I had just known how to tell if your panel is actually a fire hazard sooner, I could have saved a lot of sleep and several thousand dollars in emergency repairs.
Wait, Can a Simple Loose Wire Really Torch My House?
You might be thinking, ‘It’s just a screw, how bad can it really be?’ I used to think the same thing. I assumed the breakers would trip if anything was actually wrong. But here’s the kicker: a loose lug doesn’t always trip a breaker. It just sits there, arcing and sparking at a microscopic level, generating enough heat to melt plastic and copper alike. It’s a silent killer for your expensive electronics. Before you go upgrading your panel for better ev charging performance, you need to know if the foundation you already have is literally falling apart. Have you ever smelled something slightly ‘fishy’ or like burning plastic near your breaker box while the car was plugged in? If so, please don’t wait—I’ve been exactly where you are, and it’s a dangerous game to play. Today, we’re going to walk through the three red flags that mean your home is crying out for a torque wrench before things get smoky. We’ll also look at how this differs from other common gremlins, like how to detect a loose neutral wire before your electronics fry, so you can talk to an electrician with confidence.
Spot the Warnings Before the Smoke Starts
To keep your house from becoming a cautionary tale, you need to treat your electrical panel like a high-performance engine. When you’re pushing a constant load, every connection is a potential point of failure. Start by looking for ‘pitting’ or small black marks on the metal lugs. This is basically electrical scarring. If you see discoloration on the wire insulation—turning from white or black to a crispy brown—that’s a sign that the heat has already reached dangerous levels. Last summer, I decided to do a ‘sniff test’ after a long charging session. I didn’t smell ozone, but I did catch a whiff of what smelled like burning fish. It turned out my main lugs had backed off just enough to create an arc. This is where ev charger troubleshooting expert tips for common issues become vital, as identifying these early signs saves your entire service entry.
The Simple Way to Monitor Your Panel Temperature
You don’t need to be a certified pro to use a non-contact infrared thermometer. Think of it like checking a child’s fever. While your car is charging at its full 48-amp rate, point that laser at the main breakers and the lugs. If you see temperatures climbing above 140°F (60°C), you have a problem. Most residential hardware isn’t rated for much more than 75°C at the terminals. I once saw a DIY install where the homeowner used a standard residential breaker for a continuous 10-hour charge; the breaker didn’t trip, it just slowly deformed until it fused to the bus bar. Knowing the specific breaker brands that hate constant ev loads can help you avoid this exact scenario. 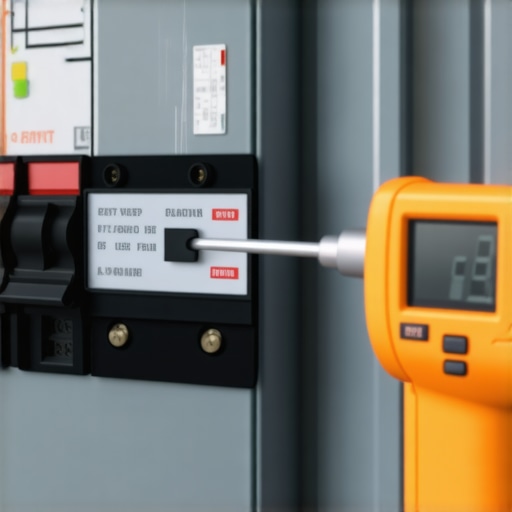
Why Your Torque Wrench is More Important Than Your Drill
Most people think ‘tight is tight,’ but in the world of high-voltage EV charging, ‘tight’ has a very specific number. If you over-tighten, you crush the wire strands, reducing the surface area and actually increasing resistance. If you under-tighten, the thermal expansion we talked about will eventually wiggle the wire loose. This is exactly why your charger needs a specific torque setting to pass inspection. I learned this the hard way when I tried to ‘eye-ball’ the tightness on a new sub-panel. Three months later, the lights started flickering again. When I finally bought a proper inch-pound torque wrench and checked the specific torque wrench settings for a wall connector, I realized I was nearly 15 inch-pounds under the manufacturer’s spec.
Fixing the Grounding Failures Most DIYers Ignore
It’s not just about the hot wires; your ground connection is your safety net. If your ground wire is loose or improperly bonded, a surge or a fault has nowhere to go but through your car’s expensive onboard charger. You need to know how to fix the grounding fail that ruins ev permits before the inspector knocks on your door. When I helped my neighbor with his Tesla Wall Connector, we found his grounding rod was barely three feet in the dirt. It worked for a toaster, but it wasn’t enough to satisfy the car’s internal safety checks. We had to drive a new eight-foot rod just to get the green light on the charger’s faceplate.Most people assume that if their breaker isn’t tripping, their system is healthy. In my experience, that is a dangerous myth. I’ve seen panels where the breaker remained closed while the plastic housing literally melted onto the bus bar. This happens because of ‘thermal creep’—a slow, cumulative damage that standard breakers aren’t designed to detect. You see, everyone focuses on the total amperage, but they forget the 80% rule for continuous loads. This is why your electrician recommends a 60-amp circuit for a 48-amp charger. If you try to run a 50-amp load on a 50-amp breaker for hours, you aren’t just pushing the limit; you are actively degrading the internal springs of the breaker, making it less likely to trip when a real emergency occurs.
The Fatal Flaw in Plug-in Level 2 Stations
Here is a contrarian take: stop using the NEMA 14-50 ‘dryer’ plugs for daily EV charging. I know they are popular and marketed as ‘portable,’ but the industrial-grade sockets required for 40-amp continuous draws are rarely found at big-box hardware stores. Most consumer-grade outlets are designed for a dryer that runs for 45 minutes, not a Rivian that pulls power for 10 hours. I’ve discovered that the real difference between hardwired and plug-in charging stations often comes down to the point of failure at the outlet. Hardwiring eliminates two contact points where heat can build up. According to the Electrical Safety Foundation International (ESFI), high-current connections are the primary failure point in residential EVSE setups. If you insist on a plug, you must use a Hubbell or Bryant industrial-grade receptacle, or you are asking for a fire.
Is Your Voltage Dropping Because of the Wrong Wire Gauge?
Many DIYers think they can save a few bucks by using the minimum allowed wire size for a short run. But when you factor in the heat inside a garage, that wire becomes a bottleneck. If your car is complaining about ‘reduced charging speed,’ it might not be the car at all. You need to check the specific wire gauge that prevents voltage drop over long runs. A 2% drop in voltage might not seem like much, but at 48 amps, that’s energy being turned into heat inside your walls instead of miles in your battery. 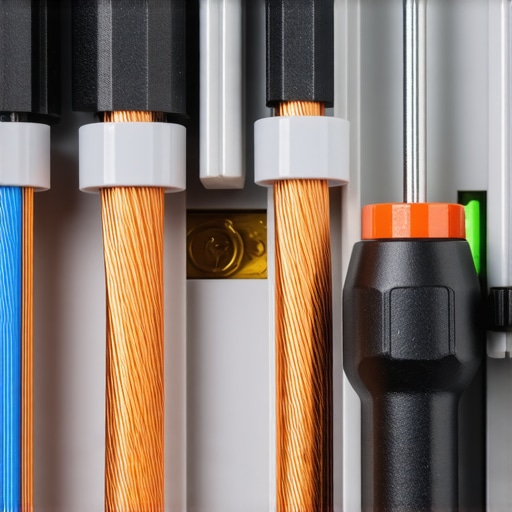
Don’t Double Up on the GFCI
Here is the ‘oops’ factor that almost every advanced DIYer hits: nuisance tripping. Modern Level 2 chargers have built-in GFCI protection. If you install a GFCI breaker in your panel to feed that charger, the two systems will often ‘fight’ each other, leading to random shutdowns at 3:00 AM. This is one of the most common troubleshooting ev chargers common compliance pitfalls and fixes I deal with. The code in some areas requires the breaker to be GFCI if it’s a plug-in unit, which is yet another reason to go with a hardwired installation to bypass that headache. Ensuring code compliance when installing ev chargers isn’t just about passing an inspection; it’s about understanding how these safety systems interact. Have you ever fallen into this trap and found your car empty in the morning? Let me know in the comments.
The truth is, even with a perfect installation, things change. After living with my Rivian for eighteen months, I realized that the ‘set it and forget it’ mentality is exactly what leads to those midnight melt-downs I was so afraid of. I’ve shifted my approach to treat my home charging station more like a piece of high-precision industrial equipment. If you aren’t periodically checking your connections, you’re essentially gambling with your home’s electrical foundation. This is where ev charger troubleshooting expert tips for common issues become less of a luxury and more of a seasonal chore.
The Secret Weapon for Electrical Peace of Mind
I eventually bit the bullet and bought a dedicated CDI torque screwdriver. It cost more than a standard set, but it’s the only way to be 100% sure you are hitting the specific torque wrench settings for a wall connector. According to the National Electrical Code (NEC) Section 110.14(D), if a torque value is provided by the manufacturer, you are legally required to use a calibrated tool to meet it. If you’re just ‘cranking it down’ with a regular screwdriver, you’re likely over-stressing the terminal or leaving it loose enough to arc. I also keep a small ‘emergency kit’ on a shelf right above the charger. Knowing the essential spare parts to keep for your home charging unit, like a spare high-quality breaker and a few feet of 6-gauge THHN wire, has saved me from a Sunday night panic more than once.
How do I keep my charging setup running for the long haul?
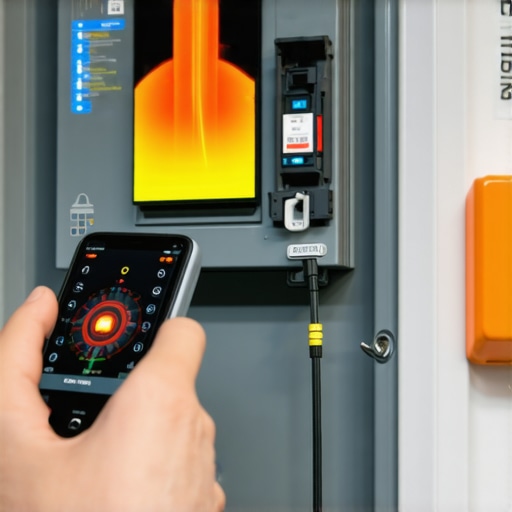
Maintenance isn’t just about tightening screws; it’s about environmental awareness. Every six months, I do a ‘cold-start’ inspection. I shut off the breaker, pull the cover off the charger, and look for any signs of ‘creep’—where the wire starts to pull out of the terminal due to thermal cycling. I also use a FLIR ONE thermal camera. It’s a tiny thermal imaging device that plugs into your smartphone. While the car is pulling its full 48 amps, I scan the panel and the charger. If I see a ‘bright’ spot that’s 20 degrees hotter than the rest of the bus bar, I know I have a high-resistance connection that needs immediate attention. This proactive approach is way cheaper than panel upgrades for ev chargers what you need to know after a fire has already started.
The Smart Way to Scale for Your Second EV
If you think one charger is a stress test, wait until your spouse gets an EV. I’ve seen so many people try to daisy-chain chargers or run two heavy loads on a single main panel that’s already at its limit. This is why your garage needs a sub-panel for multiple chargers. It simplifies the wiring, keeps the heat out of your main house panel, and makes troubleshooting a breeze. Looking ahead, the next big trend is definitely Vehicle-to-Home (V2H) technology. Your car won’t just be a consumer; it will be a backup battery for your entire house. This makes upgrading your panel for better ev charging performance even more critical because the flow of electricity will eventually go in both directions. If your lugs are loose now, they certainly won’t handle the bidirectional stress of the future. I strongly recommend grabbing a thermal camera this weekend and doing a ‘fever check’ on your panel while your car is at a 50% state of charge—you might be surprised by what you find.
Hard-Earned Truths from the Back of My Breaker Box
After a year of tinkering and a few close calls, I’ve realized that the biggest threat to your home isn’t a catastrophic surge; it’s the slow, quiet degradation of a connection you haven’t looked at in months. First, I learned that ‘tight’ is a moving target. Because copper and aluminum expand at different rates, a connection that passed inspection in January might be dangerous by July. Second, the 80% rule for continuous loads isn’t just about preventing a trip; it’s about preserving the physical integrity of the breaker’s internal springs. If you push a circuit to its absolute limit every night, those springs lose their tension, and that’s when the heat starts to build. Finally, I discovered that ensuring code compliance when installing ev chargers is the only way to sleep soundly. Code isn’t red tape—it’s a set of rules written in the ashes of houses that didn’t follow them.
The Gear That Keeps My Garage from Melting
I don’t go into my electrical panel without a few specific tools that I now consider non-negotiable. First and foremost is a calibrated torque screwdriver. You cannot feel the difference between 30 and 45 inch-pounds with a standard grip, but your terminal lugs certainly can. I also swear by the FLIR ONE thermal camera; it’s the fastest way to see a loose connection before it starts to smell. I highly recommend spending time reading how to verify code compliance for your ev charger installation to understand the ‘why’ behind the tools. Lastly, I always keep a kit of the essential spare parts to keep for your home charging unit, including a spare industrial-grade breaker and 6-gauge wire scraps, just in case I spot discoloration during a routine check.
Building a Foundation for Your Electric Future
Taking ownership of your home’s electrical health can feel intimidating, but you don’t have to be a master electrician to be a smart homeowner. By simply being observant and checking your equipment once a season, you’re already doing more than 99% of people to protect your investment. The transition to electric transport is an exciting shift, but it requires us to treat our homes with a new level of respect. When you master the basics of ev charger troubleshooting, you aren’t just fixing a car charger; you’re future-proofing your entire lifestyle. Don’t wait for a flicker or a fishy smell to take action—grab a thermometer this weekend and see what your panel is trying to tell you. Have you ever noticed your lights flickering specifically when your EV starts its charging cycle? Let me know what you found in the comments below!