It was a Tuesday morning, 6:00 AM, and the coffee had not even finished brewing yet. I walked out to the garage, expecting to see that comforting green glow on my charger. Instead? Total darkness. Not a flicker. Not a beep. I figured a breaker had just tripped during the midnight thunderstorm, but when I flipped the switch back and forth, nothing happened. That is when the smell hit me—that unmistakable, metallic burnt electronics scent that usually means a very expensive weekend. I realized then that my 600 dollar Level 2 station had become a very high-tech paperweight because I had skipped a crucial step in my setup.
How a Single Storm Turned My Charger Into a Paperweight
We often think of power surges as these massive, rare events like a direct lightning strike on our roof. But the truth is, smaller surges happen all the time. My big mistake was assuming the internal circuitry of my charger was smart enough to handle a spike from the local grid. It was not. Because I did not have a surge protector for my EV at the main panel, that voltage spike went straight for the heart of the machine: the motherboard. If you are standing in your garage right now, staring at a blank screen or a flashing red light, you are likely wondering if you are looking at a simple fix or a total replacement. Most EV charger troubleshooting starts with the basics, but if the motherboard is toast, the symptoms are pretty specific. I have been through this nightmare, and I want to help you figure out if your unit is salvageable or if it is time to call it.
Is a whole-home surge protector really worth the hype?
I used to think these were just upsells from electricians looking to pad the bill. I was wrong. According to the National Electrical Manufacturers Association (NEMA), up to 80 percent of surges are actually generated inside the home by other appliances cycling on and off. When you combine those daily micro-shocks with a nasty storm, your charger motherboard eventually gives up the ghost. Have you ever noticed your lights flicker when the AC kicks on? That is a surge, and your charger feels every bit of it. Have you ever had a piece of equipment just quit on you after a rainy night?
The Tell-Tale Signs of a Fried Controller Board
The most obvious sign, and the one that broke my heart, was the No Sign of Life syndrome. If you have checked your breaker and confirmed there is power at the outlet, but the unit stays dead, the logic board is likely scorched. Sometimes, you might see a Ground Fault error that will not clear, even after you have used the grounding trick that usually fixes minor glitches. Another weird one I encountered was Zombie Mode. The lights were on, but the car would not handshake with the charger. They just sat there staring at each other. This often happens when a surge fries the communication chip but leaves the power LEDs intact. It is incredibly frustrating. Before you go out and buy a new one, you need to be sure. A fried board can look a lot like a loose neutral wire, which is a much cheaper fix. But if you have had a recent storm or a utility outage, the motherboard is the prime suspect.
Check the Power Path Before Blaming the Board
The first thing you need to do is verify that power is actually reaching the unit. It sounds simple, but you would be surprised how often a breaker looks like it is “on” but has actually tripped internally. Push it all the way to the “off” position and then firmly back to “on.” If it instantly trips again, you aren’t dealing with a fried board yet; you are dealing with a short circuit. This is where EV charger troubleshooting becomes a process of elimination. If the breaker stays on but the charger remains dark, it is time to look at the wiring. I remember a neighbor who almost threw away a 700 dollar unit because he didn’t realize a wire had vibrated loose in his subpanel. You should check how to detect a loose neutral wire before your electronics fry as this can mimic a dead motherboard by providing inconsistent voltage that prevents the logic board from booting up.
Open the Case and Look for Physical Damage
If you are comfortable working around high voltage—and please, turn the breaker off first—you can open the housing to look for the magic smoke marks. A fried motherboard usually leaves a calling card: a small black scorch mark, a swollen capacitor that looks like a tiny bloated soda can, or a smell like burnt plastic. #IMAGE_PLACE_PLACEHOLDER_B# This logic board is the brain of your operation; it handles the handshake with your car. If the car and charger aren’t talking, check out troubleshooting EV charger connectivity problems to see if it is a software glitch or a hardware failure. If you see physical charring on the board, the debate is over. You cannot patch a scorched microprocessor.
Test the Internal Fuses and Relays
Some high-end chargers have internal glass fuses or ceramic fuses. If you get lucky, the surge stopped there. Use a multimeter set to continuity mode—the setting that beeps—and touch the ends of the fuse. No beep means the fuse died so the motherboard could live. However, if the fuse is fine but the unit still won’t click when you plug it into the car, you might need to diagnose a faulty internal relay in your charging station. Relays are the mechanical switches that move the high-amperage electricity to your car, and they are often the first thing to fail after the logic board during a voltage spike.
Prepare Your Panel for the Replacement
If the board is truly toast, you have to ask why it happened. Installing a new charger on the same dirty circuit is just lighting money on fire. This is the moment to look at panel upgrades for EV chargers. If your panel is an older model or maxed out, it might be creating the very surges that killed your unit. Ensure you are following code compliance essentials for EV charger installations in 2025, which now heavily emphasize whole-home surge protection. I learned the hard way that a 200 dollar surge protector at the panel is much cheaper than a new charger every time a summer storm rolls through. Check why your main service panel needs a surge protector for your EV to make sure your next unit survives the next grid spike.
Everyone will tell you that a Level 2 charger is a simple ‘plug and play’ appliance. In my experience, that mindset is exactly what leads to scorched boards and melted sockets. The biggest myth in the EV world is that a NEMA 14-50 outlet is just as good as a hardwired connection. It isn’t. When you are pulling 40 or 48 amps for six hours straight, that outlet becomes a significant point of failure. I have seen more ‘fried’ motherboards that were actually victims of heat creep from a poor plug connection than from actual lightning. If you want to do it right, you should look into the real difference between hardwired and plug-in charging stations before committing to a setup that might fail in two years.
Why doesn’t my torque wrench matter for a simple home install?
If you think ‘hand-tight’ is good enough for your charger’s terminal blocks, you are walking into a trap. This is the ‘Oops’ factor that kills professional-looking installs. According to the National Fire Protection Association (NFPA 70, Section 110.14(D)), if a manufacturer provides a torque value, you are legally and safety-bound to use a calibrated torque wrench to meet it. Most DIYers ignore this, but loose connections create resistance, and resistance creates heat. Over time, this heat travels up the wire and cooks the logic board from the inside out. You can learn exactly why your charger needs a specific torque setting to pass inspection and save your hardware. I have seen lugs back out nearly half a turn after just one season of heavy use due to thermal expansion. If you haven’t checked your panel lately, you might be surprised to find why your main lugs might be loose after a year of charging.
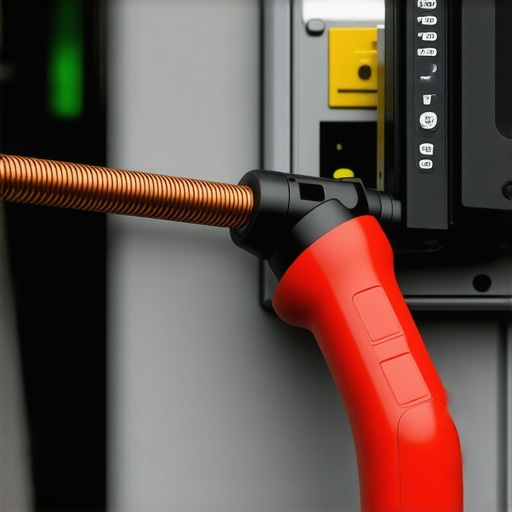
Another nuance people miss is the continuous load calculation. An EV charger is one of the only things in your house that runs at full tilt for hours. This isn’t like a toaster or a vacuum. If your panel is already hovering near its limit, that constant draw causes a slight voltage drop that makes the motherboard components work twice as hard to maintain a stable ‘handshake’ with the car. This is why panel upgrades for EV chargers are often a technical necessity rather than a luxury. You are essentially asking an old marathon runner to sprint for eight miles; eventually, something is going to snap. Don’t let a 50-year-old bus bar be the reason your 800-dollar charger dies. Ensure you are looking at panel upgrade strategies to meet EV charging code requirements in 2025 to stay ahead of the curve. Have you ever fallen into this trap of assuming your old panel was ‘fine’ just because the lights stayed on? Let me know in the comments. If you’re currently staring at a dead unit and need a professional eye, you can always contact us for a diagnostic before you buy a replacement.
After my first motherboard fried, I stopped guessing and invested in a forty-dollar infrared thermometer. It is now my most important tool for long-term safety. Every few months, while the car is pulling its full load, I scan the breaker and the charger housing. If I see a localized temperature spike at one terminal, I know I have a loose connection before it becomes a fire hazard. This is the most effective way to manage how to detect a loose neutral wire before your electronics fry. Beyond thermal imaging, I always keep the essential spare parts to keep for your home charging unit in a dedicated toolbox, specifically extra ceramic fuses and a spare charging cable, as these are the components most likely to wear down from daily use.
How do I maintain my home charger over time?
Maintaining your setup is more than just checking digital error codes; it is about the physical integrity of the contacts. I make it a habit to inspect the handle contacts for any sign of pitting or dark oxidation marks. If you notice discoloration, you need to understand why your ev plug contacts look burnt and what to do next before the resistance causes a thermal shutdown. Dust and moisture are the silent killers of motherboards, so I use a can of compressed air to clear out the housing vents twice a year. According to the National Electrical Code (NEC) 2023 Section 625.42(B), equipment must be clearly labeled with its maximum current rating, but I go a step further and re-verify my lug tightness every twelve months. Always reference the specific torque wrench settings for a wall connector or your specific manufacturer guide to ensure your connections haven’t loosened from thermal expansion cycles. #IMAGE_PLACE_PLACEHOLDER_D# I predict that by 2026, we will see a major shift toward AI-integrated chargers that perform their own internal health diagnostics and predict grid surges before they reach the motherboard. Until then, if you are planning to add a second electric vehicle, stop trying to squeeze more load onto your current panel. Building out the right infrastructure by learning why your garage needs a sub-panel for multiple chargers is the only way to scale safely. While many modern units are marketed for how smart chargers use dynamic balancing to prevent blown fuses, nothing beats a robust, hardwired subpanel for reliability. My advanced tip for today? Buy an infrared thermometer and scan your panel ten minutes into your next charging session. If any connection is over sixty degrees Celsius, you have a maintenance issue that needs an electrician immediately.It was a Tuesday morning, 6:00 AM, and the coffee had not even finished brewing yet. I walked out to the garage, expecting to see that comforting green glow on my charger. Instead? Total darkness. Not a flicker. Not a beep. I figured a breaker had just tripped during the midnight thunderstorm, but when I flipped the switch back and forth, nothing happened. That is when the smell hit me—that unmistakable, metallic burnt electronics scent that usually means a very expensive weekend. I realized then that my 600 dollar Level 2 station had become a very high-tech paperweight because I had skipped a crucial step in my setup.
How a Single Storm Turned My Charger Into a Paperweight
We often think of power surges as these massive, rare events like a direct lightning strike on our roof. But the truth is, smaller surges happen all the time. My big mistake was assuming the internal circuitry of my charger was smart enough to handle a spike from the local grid. It was not. Because I did not have a surge protector for my EV at the main panel, that voltage spike went straight for the heart of the machine: the motherboard. If you are standing in your garage right now, staring at a blank screen or a flashing red light, you are likely wondering if you are looking at a simple fix or a total replacement. Most EV charger troubleshooting starts with the basics, but if the motherboard is toast, the symptoms are pretty specific. I have been through this nightmare, and I want to help you figure out if your unit is salvageable or if it is time to call it.
Is a whole-home surge protector really worth the hype?
I used to think these were just upsells from electricians looking to pad the bill. I was wrong. According to the National Electrical Manufacturers Association (NEMA), up to 80 percent of surges are actually generated inside the home by other appliances cycling on and off. When you combine those daily micro-shocks with a nasty storm, your charger motherboard eventually gives up the ghost. Have you ever noticed your lights flicker when the AC kicks on? That is a surge, and your charger feels every bit of it. Have you ever had a piece of equipment just quit on you after a rainy night?
The Tell-Tale Signs of a Fried Controller Board
The most obvious sign, and the one that broke my heart, was the No Sign of Life syndrome. If you have checked your breaker and confirmed there is power at the outlet, but the unit stays dead, the logic board is likely scorched. Sometimes, you might see a Ground Fault error that will not clear, even after you have used the grounding trick that usually fixes minor glitches. Another weird one I encountered was Zombie Mode. The lights were on, but the car would not handshake with the charger. They just sat there staring at each other. This often happens when a surge fries the communication chip but leaves the power LEDs intact. It is incredibly frustrating. Before you go out and buy a new one, you need to be sure. A fried board can look a lot like a loose neutral wire, which is a much cheaper fix. But if you have had a recent storm or a utility outage, the motherboard is the prime suspect.
Check the Power Path Before Blaming the Board
The first thing you need to do is verify that power is actually reaching the unit. It sounds simple, but you would be surprised how often a breaker looks like it is “on” but has actually tripped internally. Push it all the way to the “off” position and then firmly back to “on.” If it instantly trips again, you aren’t dealing with a fried board yet; you are dealing with a short circuit. This is where EV charger troubleshooting becomes a process of elimination. If the breaker stays on but the charger remains dark, it is time to look at the wiring. I remember a neighbor who almost threw away a 700 dollar unit because he didn’t realize a wire had vibrated loose in his subpanel. You should check how to detect a loose neutral wire before your electronics fry as this can mimic a dead motherboard by providing inconsistent voltage that prevents the logic board from booting up.
Open the Case and Look for Physical Damage
If you are comfortable working around high voltage—and please, turn the breaker off first—you can open the housing to look for the magic smoke marks. A fried motherboard usually leaves a calling card: a small black scorch mark, a swollen capacitor that looks like a tiny bloated soda can, or a smell like burnt plastic. #IMAGE_PLACE_PLACEHOLDER_B# This logic board is the brain of your operation; it handles the handshake with your car. If the car and charger aren’t talking, check out troubleshooting EV charger connectivity problems to see if it is a software glitch or a hardware failure. If you see physical charring on the board, the debate is over. You cannot patch a scorched microprocessor.
Test the Internal Fuses and Relays
Some high-end chargers have internal glass fuses or ceramic fuses. If you get lucky, the surge stopped there. Use a multimeter set to continuity mode—the setting that beeps—and touch the ends of the fuse. No beep means the fuse died so the motherboard could live. However, if the fuse is fine but the unit still won’t click when you plug it into the car, you might need to diagnose a faulty internal relay in your charging station. Relays are the mechanical switches that move the high-amperage electricity to your car, and they are often the first thing to fail after the logic board during a voltage spike.
Prepare Your Panel for the Replacement
If the board is truly toast, you have to ask why it happened. Installing a new charger on the same dirty circuit is just lighting money on fire. This is the moment to look at panel upgrades for EV chargers. If your panel is an older model or maxed out, it might be creating the very surges that killed your unit. Ensure you are following code compliance essentials for EV charger installations in 2025, which now heavily emphasize whole-home surge protection. I learned the hard way that a 200 dollar surge protector at the panel is much cheaper than a new charger every time a summer storm rolls through. Check why your main service panel needs a surge protector for your EV to make sure your next unit survives the next grid spike.
Everyone will tell you that a Level 2 charger is a simple ‘plug and play’ appliance. In my experience, that mindset is exactly what leads to scorched boards and melted sockets. The biggest myth in the EV world is that a NEMA 14-50 outlet is just as good as a hardwired connection. It isn’t. When you are pulling 40 or 48 amps for six hours straight, that outlet becomes a significant point of failure. I have seen more ‘fried’ motherboards that were actually victims of heat creep from a poor plug connection than from actual lightning. If you want to do it right, you should look into the real difference between hardwired and plug-in charging stations before committing to a setup that might fail in two years.
Why doesn’t my torque wrench matter for a simple home install?
If you think ‘hand-tight’ is good enough for your charger’s terminal blocks, you are walking into a trap. This is the ‘Oops’ factor that kills professional-looking installs. According to the National Fire Protection Association (NFPA 70, Section 110.14(D)), if a manufacturer provides a torque value, you are legally and safety-bound to use a calibrated torque wrench to meet it. Most DIYers ignore this, but loose connections create resistance, and resistance creates heat. Over time, this heat travels up the wire and cooks the logic board from the inside out. You can learn exactly why your charger needs a specific torque setting to pass inspection and save your hardware. I have seen lugs back out nearly half a turn after just one season of heavy use due to thermal expansion. If you haven’t checked your panel lately, you might be surprised to find why your main lugs might be loose after a year of charging.
Another nuance people miss is the continuous load calculation. An EV charger is one of the only things in your house that runs at full tilt for hours. This isn’t like a toaster or a vacuum. If your panel is already hovering near its limit, that constant draw causes a slight voltage drop that makes the motherboard components work twice as hard to maintain a stable ‘handshake’ with the car. This is why panel upgrades for EV chargers are often a technical necessity rather than a luxury. You are essentially asking an old marathon runner to sprint for eight miles; eventually, something is going to snap. Don’t let a 50-year-old bus bar be the reason your 800-dollar charger dies. Ensure you are looking at panel upgrade strategies to meet EV charging code requirements in 2025 to stay ahead of the curve. Have you ever fallen into this trap of assuming your old panel was ‘fine’ just because the lights stayed on? Let me know in the comments. If you’re currently staring at a dead unit and need a professional eye, you can always contact us for a diagnostic before you buy a replacement.
After my first motherboard fried, I stopped guessing and invested in a forty-dollar infrared thermometer. It is now my most important tool for long-term safety. Every few months, while the car is pulling its full load, I scan the breaker and the charger housing. If I see a localized temperature spike at one terminal, I know I have a loose connection before it becomes a fire hazard. This is the most effective way to manage how to detect a loose neutral wire before your electronics fry. Beyond thermal imaging, I always keep the essential spare parts to keep for your home charging unit in a dedicated toolbox, specifically extra ceramic fuses and a spare charging cable, as these are the components most likely to wear down from daily use.
How do I maintain my home charger over time?
Maintaining your setup is more than just checking digital error codes; it is about the physical integrity of the contacts. I make it a habit to inspect the handle contacts for any sign of pitting or dark oxidation marks. If you notice discoloration, you need to understand why your ev plug contacts look burnt and what to do next before the resistance causes a thermal shutdown. Dust and moisture are the silent killers of motherboards, so I use a can of compressed air to clear out the housing vents twice a year. According to the National Electrical Code (NEC) 2023 Section 625.42(B), equipment must be clearly labeled with its maximum current rating, but I go a step further and re-verify my lug tightness every twelve months. Always reference the specific torque wrench settings for a wall connector or your specific manufacturer guide to ensure your connections haven’t loosened from thermal expansion cycles. #IMAGE_PLACE_PLACEHOLDER_D# I predict that by 2026, we will see a major shift toward AI-integrated chargers that perform their own internal health diagnostics and predict grid surges before they reach the motherboard. Until then, if you are planning to add a second electric vehicle, stop trying to squeeze more load onto your current panel. Building out the right infrastructure by learning why your garage needs a sub-panel for multiple chargers is the only way to scale safely. While many modern units are marketed for how smart chargers use dynamic balancing to prevent blown fuses, nothing beats a robust, hardwired subpanel for reliability. My advanced tip for today? Buy an infrared thermometer and scan your panel ten minutes into your next charging session. If any connection is over sixty degrees Celsius, you have a maintenance issue that needs an electrician immediately.
Why My 600 Dollar Mistake Was My Best Teacher
Reflecting on that dark Tuesday morning, I realized that protecting a logic board isn’t just about the charger itself—it’s about respecting the sheer volume of energy moving through your home. The biggest lesson was moving away from temporary solutions. I now understand that the real difference between hardwired and plug-in charging stations is the reduction of heat-related stress on the internal motherboard. I also learned that small vibrations in the house can loosen terminal screws over time, which is why your charger needs a specific torque setting to pass inspection and regular re-checks. Treating your EV setup as a critical utility rather than a simple gadget is the key to longevity.
The Toolkit That Keeps My Garage Safe
If you want to move from reactive repairs to proactive protection, you need a few core items in your arsenal. First, a dedicated Type 2 surge protector at your main panel is non-negotiable; check out why your main service panel needs a surge protector for your EV to understand the science behind it. Second, an infrared thermometer allows you to see heat before you smell smoke. Finally, I recommend keeping the essential spare parts to keep for your home charging unit—specifically the internal fuses—so you aren’t left stranded while waiting for a manufacturer shipment. These simple tools have saved me thousands in potential replacement costs.
Building a Setup That Outlasts Your Car
At the end of the day, your home charging station should be the most reliable part of your morning routine. By staying ahead of grid instability and prioritizing panel upgrade strategies to meet EV charging code requirements in 2025, you ensure your hardware remains safe for years to come. Don’t wait for a storm to tell you your protection is inadequate. Professional EV charger troubleshooting is helpful, but preventing the damage in the first place is always the better path. If you are worried your current panel isn’t up to the task, you can contact us to secure your infrastructure. Have you ever noticed your charger acting strange after a power flicker? Let me know in the comments below.