I still remember the smell—a sharp, acrid scent of burning plastic that cut through the usual damp-earth aroma of my garage. It was 2:00 AM, and I was standing over my brand-new “bargain” EV charger, watching a tiny wisp of smoke curl out of the handle. I’d spent weeks hunting for the best deal, eventually landing on a generic unit from a third-party marketplace for half the price of the big names. I felt like a savvy shopper until I realized I was one bad connection away from a house fire. That “savings” vanished the moment I had to call an emergency electrician. We’ve all been tempted by the lower price tag, but after years of tinkering and a few too many close calls, I’ve learned that the sticker price is just the tip of the iceberg. Today, I’m going to break down the three hidden costs of these cheap internet-bought chargers so you don’t have to learn the hard way.
Your Home Electrical Infrastructure Takes the Hit
When you plug a high-draw device like an EV into your home, you aren’t just using an appliance; you’re stressing your entire system. Cheap chargers often lack the sophisticated thermal management found in reputable units. My first big mistake was ignoring how hot the plug got during a summer afternoon. I didn’t realize that learning how to spot a cheap knockoff charging cable before it melts was actually a survival skill for my garage. These units often use thinner copper or inferior alloys that create excessive resistance. Over time, that heat migrates back to your wall, leading to dangerous degradation. I eventually found that understanding why your ev plug contacts look burnt and what to do next is usually the final warning before a “cheap” charger destroys your expensive 14-50 outlet entirely.
Is that bargain safety sticker actually a forgery?
It is a terrifying thought, but it happens more than you’d think. Many budget-bin chargers carry logos that look like safety certifications but are actually meaningless or outright fakes. According to a report by Underwriters Laboratories (UL), counterfeit marks on electrical equipment are a massive risk, as these devices often fail to meet even basic safety standards. If your charger isn’t truly certified, you aren’t just risking a broken device; you’re potentially voiding your homeowner’s insurance if things go south.
Stormy Weather and Fried Motherboards
Another cost people forget is the lack of robust surge protection. A quality station acts as a gatekeeper for your car’s delicate electronics. A cheap one is a wide-open door for voltage spikes. I once lost a $500 control board because I skipped the advice on why your main service panel needs a surge protector for your ev while relying on a bargain-basement charger. These generic units often skip the expensive protection components that guard against minor grid fluctuations. You save a few hundred bucks today, but you risk a massive repair bill for your car’s onboard inverter tomorrow. Have you ever noticed your charger acting glitchy or throwing errors after a local power flicker? That’s often the first sign that your unit is failing to protect itself. It’s exactly the mistake that causes ev charger motherboards to fry during storms and it is entirely avoidable with the right gear.
Stop Guessing and Start Calculating Your Real Capacity
Think of your electrical panel like a Thanksgiving dinner table. If you keep piling on side dishes without clearing off the empty plates, eventually, something is going to slide off the edge. Most homeowners assume that if there is a blank space for a new breaker, their house can handle the load. I once sat in a client’s garage while their main breaker hummed like a beehive because they’d added a Level 2 charger to a 100-amp service already strained by an electric oven and a dryer. This is exactly why your ev permit application requires a load calculation worksheet. It isn’t just bureaucracy; it’s a mathematical guardrail for your home’s safety.
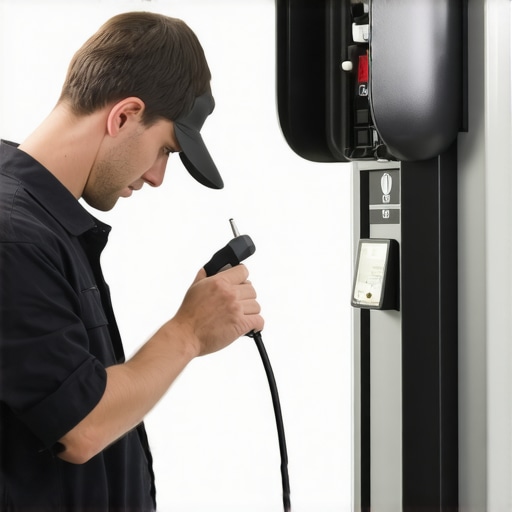
If you find that your panel is pushing its limits, don’t panic. You don’t always need a massive, expensive overhaul. There are clever ways how to add an ev charger without a 200 amp panel upgrade, such as using load-shedding devices or smart energy managers that prioritize your home’s essentials over the car during peak hours. By utilizing a load management system, you can effectively trick the car into waiting its turn. This is a brilliant strategy for panel upgrade strategies to meet ev charging code requirements in 2025 without the five-figure price tag of a full service replacement. This ensures you’re ensuring code compliance when installing ev chargers while keeping your infrastructure stable.
Tighten Lugs to Spec or Risk a Meltdown
One of the most dangerous myths in electrical work is that ‘hand-tight’ is sufficient for high-amperage continuous loads. When your EV pulls 40 or 48 amps for six hours straight, the copper wires expand and contract. Over time, a connection that felt snug can wiggle loose, creating a high-resistance bridge that generates localized heat. I remember helping a friend troubleshoot a ‘dead’ charger only to find the terminal block had melted into a charred mess. He’d used a standard flathead screwdriver and his ‘best guess’ at the pressure. This is why your charger needs a specific torque setting to pass inspection.
Precision Tools Over Guesswork
To avoid a fire hazard, you must use a calibrated torque wrench. You need to look up the the specific torque wrench settings for a wall connector or whatever brand you are installing. Usually, it’s measured in inch-pounds, and being off by just a few can be the difference between a cool connection and a glowing one. It’s a core part of how to verify code compliance for your ev charger installation and the only way to ensure your setup doesn’t cost you a new garage later.
Matching Your Wire to the Real-World Demand
Heat isn’t just a problem at the connection points; it’s a problem along the entire length of the run. If you use a wire gauge that is technically ‘at the limit’ but run it through a hot attic, you’re asking for trouble. When current flows through an undersized or overheated wire, the voltage drops and the heat builds up inside the conduit. If you’ve ever wondered why your charger handle feels sticky after a rainstorm, it’s often due to chemical breakdown from repeated overheating. Always over-spec your wire for long runs to keep the resistance low and your car’s electronics safe. This is also how to tell if your panel is actually a fire hazard—look for discoloration around the breakers where that chronic heat has started to cook the plastic casing.
Most homeowners believe that buying a ‘smart’ charger automatically solves their infrastructure problems. In my experience, the opposite is often true. While the app on your phone might look sleek, software cannot fix a hardware bottleneck, and sometimes, those high-tech features actually introduce more failure points. One of the most frustrating ‘Oops’ factors I see involves the double-GFCI trap. If you install a plug-in charger into an outlet protected by a GFCI breaker, you’ve created a system where two safety monitors are constantly ‘talking’ over each other. This is exactly why the gfci in your panel keeps nuisance tripping your charger. The internal protection of the car and the charger often conflicts with the breaker, leading to a dead battery in the morning for no apparent reason.
That missing neutral wire will haunt your installation
A common contrarian view I hold is that ‘simple is safer’ when it comes to the actual wiring. Many DIYers assume that because a Level 2 charger is 240V, they only need two ‘hot’ wires and a ground. However, many modern units specifically require a dedicated neutral for their logic boards or integrated 120V outlets. Skipping this is a recipe for internal damage. I’ve had to explain why your new charger requires a neutral wire even for 240v to more people than I can count. Without that neutral, you risk unstable voltages that can fry the car’s communication module. Have you ever fallen into this trap? Let me know in the comments.
Why is your charger clicking but refusing to start?
If you hear a rhythmic ‘click-clack’ coming from your wall unit, you aren’t hearing a software glitch; you’re likely hearing a physical component failing. Inside every station is a high-power relay or contactor. Over time, the contacts inside can pit or weld themselves shut due to the high-amperage arcing. Learning how to diagnose a faulty internal relay in your charging station can save you from replacing the entire unit when a $40 part is the actual culprit. This is a level of ev charger troubleshooting expert tips for common issues that most standard manuals simply won’t cover. 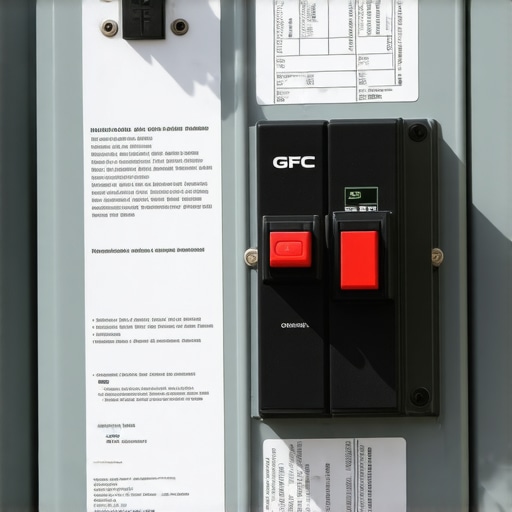
Infrastructure efficiency over raw power
People obsess over getting the fastest charge possible, but chasing 48 amps on a 100-amp service is a fool’s errand. The National Fire Protection Association (NFPA) notes that electrical distribution equipment is a leading cause of home fires, and adding a continuous 11.5kW load to an old panel is a massive risk. Instead of a full service replacement, I often recommend upgrading your panel for better ev charging performance by focusing on heat dissipation and circuit organization rather than just raw amperage. If you are dealing with constant drops in speed, you might actually be looking at troubleshooting ev charger connectivity problems or thermal throttling rather than a panel capacity issue. Always look for the nuance before you reach for your wallet.
I’ve realized over the years that installing the charger is only the halfway point. The real challenge is keeping that system running at peak efficiency while the rest of your home’s electrical load evolves. If you treat your charging station like a ‘set it and forget it’ appliance, you’re essentially ignoring a high-performance machine that works harder than your AC unit and water heater combined. To stay ahead of potential failures, I’ve started carrying a handheld thermal camera during my annual home inspections. It sounds overkill until you see a glowing orange ‘hot spot’ on a breaker that looks perfectly fine to the naked eye. This is how I’ve been able to identify how to detect a loose neutral wire before your electronics fry your car’s sensitive onboard computer.
Don’t Let Your Investment Slow-Cook Over Time
Heat is the silent enemy of every electrical connection. When you’re pushing 48 amps through a circuit for eight hours a night, even the slightest imperfection in a terminal can lead to thermal runaway. I personally swear by the FLIR TG165-X or any entry-level thermal imager. Once a year, while the car is actively charging, I pop the cover off my subpanel (carefully!) and scan the lugs. If one wire is 20 degrees hotter than the others, I know exactly why your main lugs might be loose after a year of charging. The cyclic heating and cooling of the copper causes physical movement—a phenomenon called ‘creep’—that can back out even the best-installed screws.
Beyond heat, you have to deal with the physical environment of your garage. I’ve seen more chargers killed by spiders and dust than by actual electrical surges. Creepy-crawlies love the warmth of a transformer, and their webs can create conductive paths that cause internal shorts. This is why I always emphasize the proper way to seal conduit openings against spiders and dust. A simple bit of duct seal or a specialized grommet can save you from how to diagnose a faulty internal relay in your charging station down the road when a nest causes the mechanical components to jam.
How do I keep my charger healthy for the next decade?
Maintenance isn’t just about cleaning; it’s about verification. According to the National Electrical Code (NEC) 2023 Section 625.42, EV charging loads must be considered continuous, meaning the equipment and the wiring must be rated for 125% of the load. Over time, insulation can degrade if it was poorly selected. I always recommend keeping the essential spare parts to keep for your home charging unit, such as a replacement holster or a spare T25 security bit. Furthermore, if you start noticing weird behavior, don’t just reboot the app. Use the physical signs to guide you; it’s a core part of ev charger troubleshooting expert tips for common issues.
The Shift Toward Bidirectional Charging
Looking ahead, the next big trend isn’t just faster charging—it’s bidirectional power. We are moving toward a world where your car powers your house during a blackout. This shift will require even stricter ensuring code compliance when installing ev chargers because the current will flow both ways. If your current wiring is ‘just okay,’ it won’t survive the demands of a V2H (Vehicle-to-Home) system. I suggest you start upgrading your panel for better ev charging performance now to prepare for this hardware. If you’re already seeing issues, don’t wait—check out my guide on troubleshooting ev charger connectivity problems to see if your hardware is struggling to keep up with the modern grid. Take 10 minutes this weekend to just look at your charger’s plug; if it’s discolored, you need to act immediately.
Hard-Earned Truths from the Garage Trenches
Looking back at that night with the smoking charger, I realized that modern electrical work is 10% wiring and 90% heat management. My biggest lightbulb moment was discovering that compliance isn’t a finish line—it’s a baseline. If you aren’t ensuring code compliance when installing ev chargers, you’re not just risking a fine; you’re building a system with a built-in expiration date. Another hard lesson? Software cannot fix poor physics. A ‘smart’ app won’t stop a loose wire from arcing, but a calibrated torque wrench will.
Lastly, I learned to respect the ‘continuous load.’ Your car pulls more power than your dishwasher, dryer, and oven combined—and it does it for hours. This isn’t an appliance; it’s a dedicated infrastructure project. Treating it with that level of respect is the only way to avoid the ev charger troubleshooting expert tips for common issues that plague so many DIY installs.
The Survival Kit for Your High-Voltage Hardware
I don’t go near a charger without these four things. First, the FLIR TG165-X. It lets me see the heat before the smell starts, which is how I’ve saved countless outlets from melting. Second, a Tekton 1/4-inch Drive Click Torque Wrench. Precision is safety; if you don’t know how to verify code compliance for your ev charger installation via proper torque, you’re just guessing. Third, I always keep the essential spare parts to keep for your home charging unit in a dedicated bin, specifically extra mounting screws and weatherproofing gaskets. Finally, I rely on the NFPA 70 (NEC) handbook—it’s the only source of truth that matters when an inspector walks into your garage.
#IMAGE_PLACEHOLDER_E#
Build a Charging Setup That Outlasts Your Car
At the end of the day, the peace of mind that comes from a professional-grade installation far outweighs the $300 saved on a generic marketplace unit. You’ve invested thousands into an electric vehicle; don’t let the last ten feet of wire be the reason it sits dead in the driveway. By focusing on quality components and rigorous safety standards, you’re not just powering a car—you’re future-proofing your home. Take the extra time to do it right, and your EV charger will be the most reliable part of your daily routine. Have you ever discovered a hidden electrical issue in your garage that surprised you? Let me know in the comments below!