I sat at my kitchen table with a cold cup of coffee, staring at a rejection letter from my utility company. It felt like a punch in the gut. I had done everything right—or so I thought. I bought a top-tier charger, hired a licensed pro, and was diligent about ensuring code compliance when installing ev chargers. But because I forgot to attach one specific, itemized receipt showing the labor and materials separately, $500 vanished into thin air. It is a common story. Most homeowners think the hard part is the wiring, but the real boss battle is the paperwork. I am here to make sure you do not repeat my failure. Today, we are going to walk through the exact filing process that ensures your utility company cuts you a check instead of sending a form letter.
My $500 Lesson in Red Tape
You would not believe how picky these rebate programs are. According to data from the Clean Energy Finance Center, nearly 25% of energy-related rebate applications are initially rejected due to simple clerical errors or missing documentation. That is a quarter of people leaving money on the table! When I first tried to figure out how to claim the federal tax credit for your home installation, I realized that the government and utility companies speak a different language than we do. They do not just want to see that you spent money; they want to see the specific UL-listing of the device and a signed-off permit. If you are weighing the difference between a 500 and 1500 charger install, that $500 rebate might be the only thing keeping your project under budget.
Is chasing these rebates actually worth the headache?
I get it. You are busy, and the idea of digging through how to properly size a subpanel for your ev workshop notes just to find a serial number feels like a chore. But look at it this way: for thirty minutes of focused work, you are effectively earning a $500 tax-free bonus. That is a pretty good hourly rate. Early on, I assumed the electrician would handle all the filing. I was wrong. They handle the wires; you handle the wealth. Have you ever started a rebate application only to close the tab in frustration halfway through?
Why Your Receipt is Your Biggest Enemy
The biggest mistake I made was accepting a lump sum invoice. My electrician wrote EV Charger Installation – $1,200 and called it a day. The utility company? They hated it. They needed to see the cost of the charger and the cost of the permit fees broken out. Without that, they could not verify if I met the threshold for the why your electric utility might give you a free smart charger incentive program. [image_placeholder]
Get Your Documentation in Order Before the Auditor Knocks
Think of your utility company’s rebate department like a high-end restaurant critic. They don’t just want to know you were served a meal; they want to see the specific ingredients, the chef’s signature, and the exact time the plate hit the table. To get your money back, you need to transition from a casual homeowner to a meticulous record-keeper. The first thing you must do is demand a granular, line-item invoice from your electrician. I learned this the hard way after my first attempt. I handed over a general receipt, and the auditor treated it like a blank piece of paper. You need labor, materials, permit fees, and the charger unit itself listed as separate entries. This is especially critical if you are trying to figure out how to get your utility to pay for your panel upgrade, as those costs are often capped or calculated differently than the charger install itself.
Demand an Itemized Breakdown or Pay the Price
When my electrician, Dave, first handed me the bill, it just said ‘Installation of Level 2 Station.’ I had to practically beg him to go back and list the wire gauge, the breaker brand, and the conduit length. Why? Because some utility programs only cover specific hardware. If your invoice doesn’t explicitly state the model number, they assume you bought a cheap, non-qualified unit. 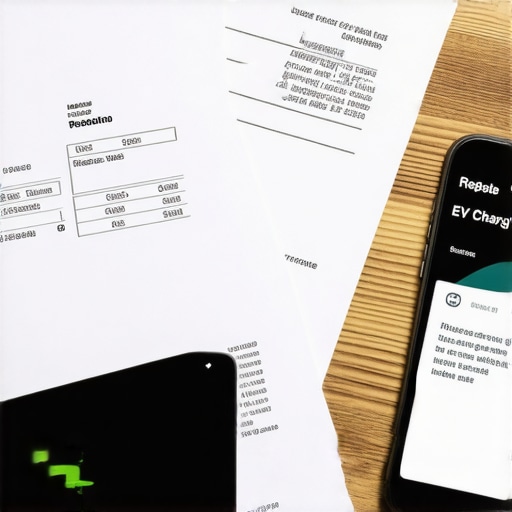 Beyond the bill, you need the ‘Golden Ticket’—your closed permit number. In the world of rebates, an unpermitted install is an invisible install. Avoiding the permit error that stops 40 of residential charging installs is the difference between a check in your mailbox and a ‘denied’ status in your inbox. Check that your permit is not just issued, but officially ‘Finaled’ or ‘Closed’ in the city database before you hit the submit button on your application.
Capture Every Detail During the Install
While the walls are open or the conduit is being bent, grab your phone and start taking photos. I once helped a neighbor who was being grilled by his utility company because they didn’t believe his charger was hardwired. One photo of the internal connections saved him $400. You want to document the wiring before the faceplate goes on. This is also the time to ensure your pro is following the specs. For instance, knowing why your charger needs a specific torque setting to pass inspection can prevent a failed city visit that would delay your rebate by weeks. Inspectors and utility auditors love seeing that a torque wrench was used; it signals that the job was done by someone who respects the code.
Fix Your Connectivity Before You Hit Send
Many modern ‘Smart Charger’ rebates require you to prove the device is connected to the grid so the utility can manage load during peak hours. This is where most people trip at the finish line. If your Wi-Fi signal in the garage is weak, your application will fail because the utility can’t ‘ping’ the device. If you find that your smart charger refuses to sync with the local utility app, address it immediately with a Wi-Fi extender. I spent three hours on the phone with tech support just to realize my garage door was acting as a giant lead shield for my signal. Don’t submit your rebate until that app shows a steady, green connection. Finally, if your project was more complex, double-check your panel upgrades for ev chargers what you need to know notes to ensure the total amperage listed matches what the utility has on file for your home service.
You might think that because your charger is ‘UL-listed’ and your electrician has a pulse, you are automatically in the clear. I used to believe that too, until I realized that code compliance is less about safety and more about precision. One of the most common myths in the EV world is that a 50-amp breaker always equals a 50-amp charge. In reality, the National Electrical Code (NEC) requires a 125% overcurrent protection for continuous loads. If you are not careful with how to verify code compliance for your ev charger installation, you might find your breaker tripping every time the car hits a peak draw because the thermal dissipation in your panel simply cannot keep up.
Bigger Breakers Won’t Save a Weak Panel
Many homeowners assume they just need to swap a 20-amp breaker for a 50-amp one and call it a day. That is a fast track to a ‘fish smell’ in your garage. Before you even touch a screwdriver, you need to understand upgrading your panel for better ev charging performance. A panel that is already near its capacity will experience a significant voltage drop. According to a study by the Electrical Safety Foundation International (ESFI), electrical malfunctions are a leading cause of home fires, and adding a high-amperage continuous load like an EV charger to an aging panel is a recipe for disaster. If you ignore the the forgotten torque test that prevents panel fires, you are literally playing with fire. Loose connections create resistance, and resistance creates heat.
Can You Really Squeeze a Level 2 Charger onto a 60-Amp Main Service?
It sounds impossible, right? Most pros will tell you that you need at least a 100-amp or 200-amp service to safely charge an EV. However, there is a nuance: load shedding. By using a smart energy management system, you can actually learn how to squeeze a level 2 charger onto a 60-amp service without upgrading your entire utility feed. This involves the charger ‘talking’ to your panel and slowing down the car’s intake when the oven or AC kicks on. It is a sophisticated dance that requires a deep dive into troubleshooting ev chargers common compliance pitfalls and fixes. If your electrician doesn’t mention load management, they might be trying to upsell you on a $3,000 service upgrade you don’t actually need.
The Invisible Reason Inspectors Fail DIY Installs
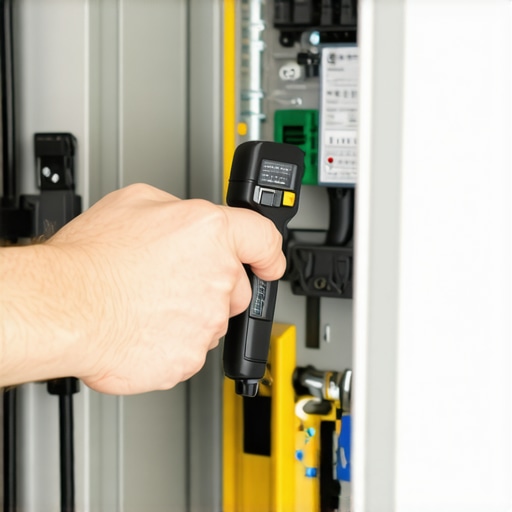
The ‘Oops’ factor that catches almost everyone is the torque specification. In 2017, the NEC started requiring that all field-terminated connections be torqued to specific inch-pounds using a calibrated tool. Most DIYers just ‘hand tighten’ until it feels snug. That is the quickest way to fail an inspection. I have seen countless homeowners lose their rebate because they couldn’t produce a photo of the torque wrench in action. Knowing why your charger needs a specific torque setting to pass inspection is the hallmark of a pro. It ensures that the copper doesn’t expand and contract enough to loosen the lug over time. Have you ever fallen into this trap? Let me know in the comments. I want to hear your horror stories about inspectors who went over your panel with a magnifying glass.
I’ll be honest: once the inspector leaves and that green sticker is slapped on the panel, most people never look at their charger again. That’s a massive mistake. Since I’m obsessed with ensuring code compliance when installing ev chargers, I’ve adopted a preventative maintenance mindset borrowed from industrial electricians. If you want to avoid a $2,000 repair bill three years from now, you need two things in your garage: a quality torque wrench and a basic thermal imaging camera. I personally use a FLIR mobile attachment because it lets me see heat signatures that the human eye misses. If I see a glowing orange spot on my breaker while the car is pulling 40 amps, I know a lug is loosening before I ever get to the point of wondering about the 5 reasons your electrical panel smells like fish.
Why a $200 Thermal Camera is My Best Investment
I don’t just use it for the cool factor. High-resistance connections are the silent killers of home EV infrastructure. The NFPA 70B standard for electrical equipment maintenance—which recently shifted from a recommendation to a mandatory requirement in many commercial settings—emphasizes that regular thermal inspections can prevent nearly 75% of electrical failures. By scanning my panel once every six months during a heavy charge cycle, I can catch a hot spot long before it turns into a charred motherboard. If you do spot something, you’ll need to revisit the forgotten torque test that prevents panel fires. Don’t just crank it down until it feels tight; use the specific inch-pound settings for your brand of breaker to stay within safety margins.
How do I keep my charger running like day one?
Maintenance isn’t just about the wires; it’s about the physical wear and tear of daily use. I make it a habit to wipe down my charging handle and check the pins for any signs of arcing or pitting every time I clean the garage. In the winter, I’ve had to learn how to keep your charging cable from freezing to the driveway because a stiff, frozen cable puts immense strain on the internal relay of the wall unit. If you feel resistance when plugging in or hear a strange clicking, don’t force it. You might be looking at how to diagnose a faulty internal relay in your charging station if you aren’t proactive about cable care. #IMAGE_PLACE_HOLDER_D#
Connectivity is the Next Maintenance Frontier
Looking ahead, I predict we are moving toward a world of ‘Vehicle-to-Everything’ (V2X) where your car powers your home during outages. This means your charger won’t just be a dumb pipe; it will be a two-way communication hub. In this future, your home network becomes as vital as your fuel system. If your app starts lagging, don’t ignore it. I’ve found that troubleshooting ev charger connectivity problems usually comes down to firmware updates that got interrupted or a router that needs a simple reboot. A ‘dead’ charger is often just a ‘confused’ one. If you’re struggling with a unit that won’t start, check out these ev charger troubleshooting expert tips for common issues before you call an electrician. My best advice? Go to your garage tonight, plug in your car, and just listen. A soft hum is normal; a sizzle or a snap is a crisis. If you can, use a handheld infrared thermometer to make sure your terminals aren’t exceeding 70 degrees Celsius during a peak charge.
I’ll be honest: once the inspector leaves and that green sticker is slapped on the panel, most people never look at their charger again. That’s a massive mistake. Since I’m obsessed with ensuring code compliance when installing ev chargers, I’ve adopted a preventative maintenance mindset borrowed from industrial electricians. If you want to avoid a $2,000 repair bill three years from now, you need two things in your garage: a quality torque wrench and a basic thermal imaging camera. I personally use a FLIR mobile attachment because it lets me see heat signatures that the human eye misses. If I see a glowing orange spot on my breaker while the car is pulling 40 amps, I know a lug is loosening before I ever get to the point of wondering about the 5 reasons your electrical panel smells like fish.
Why a $200 Thermal Camera is My Best Investment
I don’t just use it for the cool factor. High-resistance connections are the silent killers of home EV infrastructure. The NFPA 70B standard for electrical equipment maintenance—which recently shifted from a recommendation to a mandatory requirement in many commercial settings—emphasizes that regular thermal inspections can prevent nearly 75% of electrical failures. By scanning my panel once every six months during a heavy charge cycle, I can catch a hot spot long before it turns into a charred motherboard. If you do spot something, you’ll need to revisit the forgotten torque test that prevents panel fires. Don’t just crank it down until it feels tight; use the specific inch-pound settings for your brand of breaker to stay within safety margins.
How do I keep my charger running like day one?
Maintenance isn’t just about the wires; it’s about the physical wear and tear of daily use. I make it a habit to wipe down my charging handle and check the pins for any signs of arcing or pitting every time I clean the garage. In the winter, I’ve had to learn how to keep your charging cable from freezing to the driveway because a stiff, frozen cable puts immense strain on the internal relay of the wall unit. If you feel resistance when plugging in or hear a strange clicking, don’t force it. You might be looking at how to diagnose a faulty internal relay in your charging station if you aren’t proactive about cable care.
Connectivity is the Next Maintenance Frontier
Looking ahead, I predict we are moving toward a world of ‘Vehicle-to-Everything’ (V2X) where your car powers your home during outages. This means your charger won’t just be a dumb pipe; it will be a two-way communication hub. In this future, your home network becomes as vital as your fuel system. If your app starts lagging, don’t ignore it. I’ve found that troubleshooting ev charger connectivity problems usually comes down to firmware updates that got interrupted or a router that needs a simple reboot. A ‘dead’ charger is often just a ‘confused’ one. If you’re struggling with a unit that won’t start, check out these ev charger troubleshooting expert tips for common issues before you call an electrician. My best advice? Go to your garage tonight, plug in your car, and just listen. A soft hum is normal; a sizzle or a snap is a crisis. If you can, use a handheld infrared thermometer to make sure your terminals aren’t exceeding 70 degrees Celsius during a peak charge.
Lessons I Learned the Hard Way About My Panel and Permits
Reflecting on my first install, I realized that the smallest details often lead to the biggest headaches. Here are a few lightbulb moments from my journey:
- The Label Trap: Most people just write ‘EV’ on the breaker. I learned that using the right way to label your electrical panel for ev circuits—including the amperage and destination—prevents inspectors from getting grumpy during their five-minute walkthrough.
- The Wire Gauge Regret: I once tried to save a few dollars by using the bare minimum thickness allowed. I quickly learned why thinner wire is costing you miles every night due to heat-induced resistance. Spend the extra $40 on the thicker copper.
- Resale Readiness: Keeping a digital folder of your permit and inspection report is vital. Knowing how to prove your electrical panel is code compliant for resale will be a massive selling point when it is time to move.
My Personal Gear for a Worry-Free Garage
To keep my system in top shape, I rely on a few specific tools that help me stay ahead of potential failures. I trust a FLIR thermal camera attachment because it identifies loose lugs instantly. I also keep a calibrated torque wrench nearby for those the specific torque wrench settings for a wall connector, as vibration over time can actually loosen connections. Finally, I always recommend installing a whole-home surge protector; understanding why your main service panel needs a surge protector for your ev is the best way to safeguard the expensive computer inside your charging station.
Taking the First Step Toward Your Smart Home Energy Future
Transitioning to an electric vehicle is one of the most exciting upgrades you can make to your home life. While the paperwork and technical jargon might feel like a mountain to climb, the peace of mind that comes from ensuring code compliance when installing ev chargers is priceless. You are not just building a gas station in your garage; you are modernizing your home’s infrastructure for the next generation of technology. Take it one step at a time, keep your receipts organized, and don’t be afraid to double-check your pro’s work. Have you ever had a utility rebate rejected for a tiny clerical error? Share your story below so we can all learn!