I’ll never forget the cold sweat I felt staring at my breaker box three years ago. I’d just brought home my first EV, and the excitement was palpable—until I opened that grey metal door and saw a chaotic jumble of switches with absolutely no empty slots. I felt like I was staring at a Tetris game that had already reached the top of the screen. I almost called an electrician to gut the whole thing right then and there, a mistake that would have cost me thousands of dollars unnecessarily. You see, I fell for the classic trap: assuming that a full-looking panel means a full-load capacity. It took me a few hours of research and one very embarrassing phone call to a retired buddy of mine to realize I was looking at the problem all wrong.
The Real Reason Your Panel Capacity Matters Right Now
We are in the middle of a massive shift in how we power our lives, and your garage is the new gas station. But here is the kicker: most homes built before 2010 weren’t designed with a 50-amp “fuel pump” in mind. If you get this wrong, you aren’t just looking at a tripped breaker; you’re looking at 3 small mistakes that turn your garage panel into a fire hazard. Determining if you have room isn’t just about counting the physical switches. It’s about the math behind the scenes. According to the National Fire Protection Association (NFPA), electrical failures or malfunctions are a leading cause of home fires, and overloading an old system with a continuous high-draw load like an EV is a recipe for disaster. That is why 5 signs your old electrical panel is a charging bottleneck are so vital to recognize before you even buy the charging station. Today, I’m going to show you how to peel back the curtain on your home’s electrical capacity so you can plan your install with confidence. [image_placeholder]
Is a total panel upgrade actually mandatory?
This is the fear that keeps most new EV owners up at night. You’ve already dropped forty or fifty grand on a car, and the last thing you want is a surprise $3,000 bill for a new service entrance. The truth is, you might have more wiggle room than you think. Early in my journey, I made the boneheaded mistake of ignoring how to read the load calculation your electrician sent you, assuming it was just “technical fluff.” I was wrong. Understanding your actual “demand load” versus your “connected load” can be the secret to getting faster charging without a new panel. We’re going to walk through how to check your main breaker’s amperage and how to spot those sneaky “tandem” breakers that can save your skin. Have you ever opened your panel and felt completely overwhelmed by the mess of wires? Drop a comment or reach out—I’ve been there, and I promise it’s simpler than it looks once you know what to look for.
Find Your Real Power Limit
Think of your electrical panel as a water pipe. You can only shove so much through it before something bursts. Before you buy a single foot of wire, you need to know the size of your main service. Most modern homes have a 200-amp service, which is usually plenty, but many older houses are stuck with 100 or even 60 amps. When I first looked at my setup, I saw a 100-amp main breaker and panicked. I was convinced I needed a $4,000 service upgrade until I realized the secret to getting faster charging without a new panel often lies in smart load management rather than raw amperage.
Look for the Number on the Big Switch
Open your panel door and look for the largest breaker, usually located at the very top or bottom. It will have a number stamped on the handle—100, 125, 150, or 200. This is your hard ceiling. If you see 5 signs your main breaker is overwhelmed by a new level 2 charger, such as flickering lights when the car starts charging, you might be pushing that limit too hard. 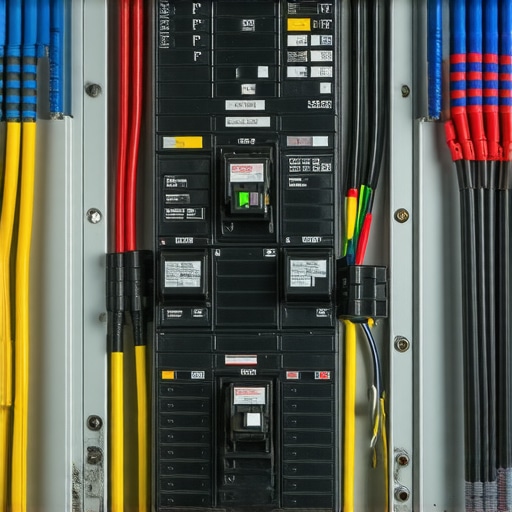
Can Tandem Breakers Save Your Wallet?
If your panel looks physically full, don’t lose hope. Many panels support ‘tandem’ or ‘wafer’ breakers, which allow you to fit two circuits into the slot of one. I remember a specific install for a neighbor where we thought he was maxed out. He had a 200-amp service but zero physical space. By swapping four standard breakers for tandems, we cleared enough room for a dedicated 50-amp EV circuit in twenty minutes. Just be careful; the specific breaker brands that hate constant ev loads can sometimes overheat if you use the wrong type of thin breaker for a continuous high-draw device.
The Math That Keeps Your House Standing
A physical slot is not a guarantee of safety. You have to perform a load calculation to see what is actually happening when your oven, dryer, and AC are all humming at once. This is where most DIYers fail. I once ignored this and tried to run a charging session while my wife was baking and the dryer was on high heat; the main breaker tripped, plunging the whole house into darkness. That was my wake-up call to finally learn how to read the load calculation your electrician sent you.
Why the Inspector Will Check Your Conduit
Once you know the panel can handle the juice, you have to get the power to the car. This involves conduit, and it is a major sticking point for permits. You must ensure you are using the specific conduit size needed for a 50-amp circuit to avoid overheating. If your wires are too cramped, they can’t dissipate heat, leading to insulation failure. It’s a common reason for the wire gauge mistake that fails 40 percent of inspections.
Don’t Skip the Torque Wrench
One of the most overlooked steps is the final connection. When you land those thick copper wires into the breaker lugs, you cannot just ‘hand tighten’ them until they feel snug. Loose connections under high continuous load create heat, which leads to arcing. I always use a calibrated torque driver now because the forgotten torque test that prevents panel fires is the difference between a safe garage and a disaster. Taking the time to do this correctly ensures you can how to pass your garage electrical inspection on the first try without the inspector rolling their eyes at your handiwork.I used to think a 200-amp service was the ‘end game’ for home electrical. Everyone tells you that once you reach that magic number, you are golden. But here is the contrarian truth that most DIY forums miss: a 200-amp rating does not mean your panel can handle 200 amps of continuous, heavy-duty draw across all its components. In my experience, I have seen newer 200-amp panels from budget brands struggle more than a well-maintained 125-amp Square D unit from the 90s. The nuance lies in the busbar material and how heat dissipates when you are pulling 40 amps for eight hours straight. Have you ever fallen into the trap of thinking raw numbers were enough? Let me know in the comments.
Why does my breaker trip even when I am under the total limit?
This is the advanced question that separates the pros from the hobbyists. The answer usually comes down to ambient temperature and the ’80 percent rule’ defined by the National Electrical Code (NEC). According to NEC Article 625, EV charging is classified as a continuous load, meaning it can run for three hours or more. This generates incredible internal heat. If your garage is already 100 degrees in July, that thermal-magnetic breaker is going to trip way before it hits its face-value rating. It is a common cause of 6-ways-to-stop-nuisance-tripping-during-high-humidity-charging. Most people blame the car or the charger, but the culprit is usually the physics of heat inside that grey box. [image_placeholder] The ‘oops’ factor I see most often involves brand compatibility. Many homeowners assume that if a breaker physically fits into the slot, it is safe to use. This is a dangerous myth. Using a Westinghouse breaker in a modern Eaton panel might ‘work’ for a lightbulb, but under the stress of an EV load, the tension on the busbar connection is slightly off. This creates high-resistance points. I’ve seen this lead to the specific breaker brands that hate constant ev loads literally melting into the plastic housing. Beyond the hardware, you have to worry about ensuring code compliance when installing ev chargers to protect your home’s resale value. If an inspector sees ‘mismatched’ brands, it is an automatic fail. If you are struggling with a setup that keeps shutting down, it might be time for ev charger troubleshooting expert tips for common issues before you replace the whole panel. Remember, upgrading your panel for better ev charging performance is not just about adding more power; it is about managing the heat that comes with it.
Don’t Let Your New Service Turn Into a Paperweight
After you have navigated the nightmare of the initial install, it is easy to assume the work is done. But I have seen dozens of homeowners spend thousands on upgrading your panel for better ev charging performance only to ignore the system until something starts smoking. High-amperage continuous loads like an EV charger are not ‘set it and forget it’ appliances. They are more like performance engines that require periodic tuning. If you ignore the signs of wear, you are essentially waiting for a failure to happen at 2:00 AM while you are asleep. I personally perform a ‘sniff test’ every few months because 5 reasons your electrical panel smells like fish usually point toward melting wire insulation that has not yet caught fire.
How do I maintain my electrical panel for long-term EV charging?
Maintenance starts with a physical and thermal inspection. You should look for any discoloration on the breaker casing or the busbar. I also recommend a quick check of the charging port itself; knowing how to clean your charger ports without damaging them can prevent high-resistance connections that slow down your charging speeds. If you ever decide to add a second vehicle, you need to revisit your load math. Many people assume they can just ‘tap in’ again, but why your garage needs a subpanel for that second ev becomes clear when you realize the main panel cannot handle two simultaneous 40-amp draws without a sophisticated management system.
The One Tool I Use to Catch Fires Before They Start
If you want to move beyond guesswork, you need an infrared thermometer or a thermal imaging camera. I use a FLIR attachment for my smartphone to scan my panel while the car is at its peak charging cycle. According to the NFPA 70B Standard for Electrical Equipment Maintenance, thermographic inspections are the gold standard for identifying loose connections and overloaded circuits before they reach the point of failure. If you see a breaker glowing bright purple on the screen compared to the others, you have a problem. This is a crucial part of ev charger troubleshooting expert tips for common issues. 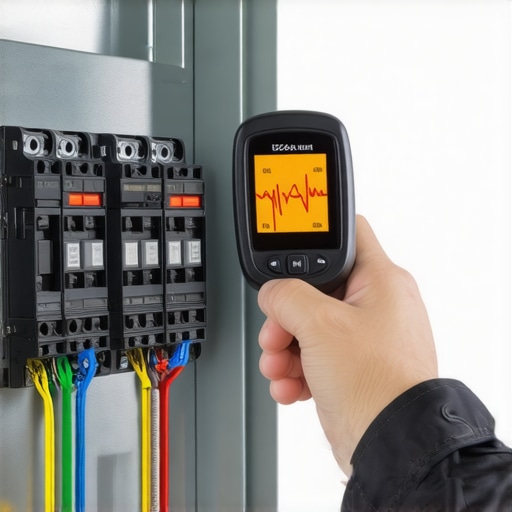
Looking Ahead to the Grid of 2030
The trend is moving toward ‘Smart Panels’ that don’t just sit there but actively manage your home’s energy. In the next five years, we will see more homes adopting integrated systems that prioritize the EV during low-rate hours while shedding loads like the water heater. If you are a business owner, you are likely already seeing why your commercial garage needs load management software to avoid massive peak-demand charges. For the residential DIYer, the best thing you can do right now is keep your records. Knowing how to verify code compliance for your ev charger installation and keeping those permits on file is vital. This is especially true for future proofing; you must be able how to prove your electrical panel is code compliant for resale when it comes time to move. I strongly suggest you grab a torque screwdriver and verify the specific torque wrench settings for a wall connector today—that simple five-minute check could save your entire house from an arc-fault disaster.
What I Learned When My Breaker Started Smoking
Three years of tinkering and one near-miss taught me that the biggest danger isn’t a full panel—it’s an ignored one. First, always respect the 80% rule for continuous loads; pushing a 40-amp charger on a 40-amp breaker is a fire hazard, not a ‘tight fit.’ Second, check your connections every six months. Vibration and thermal expansion are real, and a loose lug is the fastest way to fry your equipment. Third, don’t let a 100-amp service scare you. With the secret to getting faster charging without a new panel, you can often make it work without the $3,000 upgrade. Finally, if you hear a hum, don’t ignore it—the noise your breaker makes before it fails is your only warning before the lights go out.
The Gear That Keeps My Charging Station Safe
I’ve spent a lot of money on gadgets, but three things have actually paid for themselves. I never touch a panel without my calibrated torque screwdriver. It’s the only way to ensure the specific torque wrench settings for a wall connector are met, preventing arc faults. I also swear by infrared thermal cameras for spotting ‘hot spots’ during a heavy charge. Lastly, I keep a digital copy of the National Electrical Code (NEC) on my phone. It’s dense, but it’s the ultimate authority when you need to be ensuring code compliance when installing ev chargers for your peace of mind and home insurance.
Your Path to a Worry-Free Home Power Station
Stepping into the world of high-voltage DIY or even just managing your own contractors can feel like learning a second language. But remember, every expert started with a ‘full’ panel and a lot of questions. By focusing on heat management and how to verify code compliance for your ev charger installation, you aren’t just charging a car; you’re future-proofing your home for the next decade. You’ve got the knowledge now to make upgrading your panel for better ev charging performance a success instead of a stress-test for your wallet. Have you run into a ‘mystery trip’ during a midnight charging session that drove you crazy? Drop a comment below and let’s figure it out together.