I stood there with my hands in my pockets, looking from my brand-new Tesla to the old wooden garage forty feet away at the back of the lot. The first electrician I called didn’t even get out of his truck before saying, “You’ve got to dig, pal. Twenty-four inches deep, all the way across the yard.” I looked at my prize-winning hydrangeas and the custom stone walkway I’d spent three weekends building. There had to be another way. I wasn’t about to turn my backyard into a construction zone just to get 240 volts to my car. I almost gave up and settled for a lifetime of slow overnight trickles, but then I started obsessing over the National Electrical Code. I realized that the ‘standard’ way isn’t the only way.
Stop Killing Your Grass for a Faster Charge
Most homeowners believe that adding a Level 2 station to a detached space requires a massive excavation project. It’s the biggest hurdle that keeps people stuck on slow, painful Level 1 charging for months. I made the early mistake of thinking I could just run a heavy-duty extension cord across the grass—don’t ever do that. It’s a massive fire risk, and the safety reason why you should never use an extension cord for your ev is something your insurance company won’t ignore. Today, I’m going to show you how to bypass the shovel entirely. We’re talking about utilizing existing overhead structures, running exposed conduit along fence lines, or even re-evaluating your current garage power. Before you start, you need to look at your service capacity; often, panel upgrades for ev chargers are the real secret to making these remote setups work without a hitch. We are going to get your car charging at full speed without ruining your landscaping or your budget. Have you ever looked at a multi-thousand-dollar trenching quote and considered just selling the EV? I want to hear about it in the comments.
Is a no-dig installation actually safe for my home?
You’re probably skeptical. I was too. My first attempt at a ‘shortcut’ actually failed a preliminary check because I didn’t understand the conduit depth rule that fails more garage inspections than anything else. However, the reality is that the NEC provides several legal pathways for detached buildings that don’t involve a backhoe. According to the Electrical Safety Foundation International (ESFI), nearly half of all home electrical fires stem from improper wiring or overloaded circuits, which is why how to pass your electrical inspection on the first visit should be your top priority. By using Rigid Metal Conduit (RMC) or Intermediate Metal Conduit (IMC), you can often run power above ground or at very shallow depths that don’t require deep trenching, provided you follow the specific mounting rules. We aren’t cutting corners here; we’re just being smarter about the route the power takes from your main panel to your garage.
Make Sure Your Panel Can Actually Handle the Heat
Before you even touch a piece of conduit, you have to look at the heart of your home. Most people assume they need a full service upgrade the moment they buy a Tesla, but that is not always the case. I remember helping my neighbor, Dave, who was convinced he needed a $3,000 panel swap. We sat down with a calculator and realized that by using a few smart tricks, we could make it work. You first need to determine how to calculate if your 100-amp service can handle a daily commute. If you find your panel is nearly at capacity, do not panic. You can often learn how to load balance your home electrical system without a full panel swap, which keeps your dryer and your charger from fighting for dominance at 2:00 AM. Trust me, finding out your main breaker is running hot because you skipped the math is a terrifying way to spend a Tuesday night.
Skip the Shovel with Rigid Metal Conduit
This is the part that saves your hydrangeas. The National Electrical Code (NEC) normally demands a 24-inch burial for standard PVC conduit. However, if you switch to Rigid Metal Conduit (RMC), that requirement drops significantly—sometimes as shallow as 6 inches, or even above ground if properly supported. I used RMC to hug the base of my stone wall. It is heavy, it is more expensive than plastic, and it requires a pipe bender, but it is practically bulletproof. When you choose this path, you must be meticulous about code compliance essentials for ev charger installations in 2025 to ensure your inspector doesn’t flag the exposed run. If you are mounting along a fence or an existing structure, you avoid the backbreaking labor and the mess of a mud-filled yard. 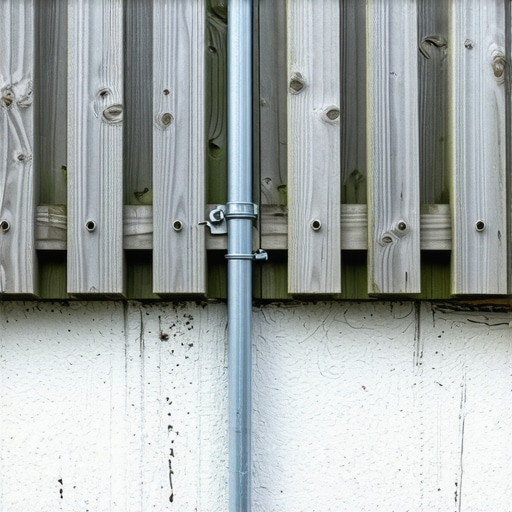
Why Copper is Your Only Friend for Remote Runs
When you are running power forty or fifty feet away to a detached garage, the ‘voltage drop’ becomes your biggest enemy. I have seen DIYers try to save fifty bucks by using aluminum, but for high-load EV charging, it is a recipe for a headache. You should prioritize how to verify your electrician actually used copper wire for the install because copper handles the heat and resistance over distance much better. If the wire is too thin or the material is subpar, you will experience the common wire sizing error that causes voltage drops during charging, which means your car might take ten hours to charge instead of five. Dave’s charger kept throwing a ‘red ring’ error because his voltage was sagging like a wet clothesline until we swapped him over to the correct gauge of copper.
Nail the Safety Checks Before You Flip the Breaker
The final step is the most overlooked: the ground. A detached building is a different beast than an attached garage. You can’t just rely on the wire coming from the house. In many jurisdictions, you need a dedicated grounding rod at the garage itself. Understanding how to ground your ev charger according to the latest standards is what separates a safe installation from a dangerous one. If you skip this, your car’s sensitive electronics might detect a ‘ground fault’ and refuse to take a single kilowatt. It’s also the time to double-check your connections. I always use a torque screwdriver because the specific torque settings that prevent panel fires during high-load charging are non-negotiable. A loose wire under a 40-amp load will vibrate, heat up, and eventually melt your expensive new charger.Most electricians will walk into your basement, see a 100-amp sticker on the door, and immediately hand you a $4,000 quote for a full service upgrade. I am here to tell you that in many cases, they are trying to sell you a solution for a problem that has not been properly diagnosed. The common belief that you absolutely need 200 amps for a Level 2 charger is one of the most expensive myths in the industry. While panel upgrades for ev chargers are sometimes necessary, you can often bypass this by looking at your actual load demand. According to the National Fire Protection Association (NFPA) 70, Section 220, we can use specific demand factors to prove that your existing service is more capable than it looks on paper. Instead of a massive hardware swap, you can learn how to load balance your home electrical system without a full panel swap. This allows your charger to ‘talk’ to the rest of the house, dialing back the power only when high-draw appliances like the oven and AC are running simultaneously. 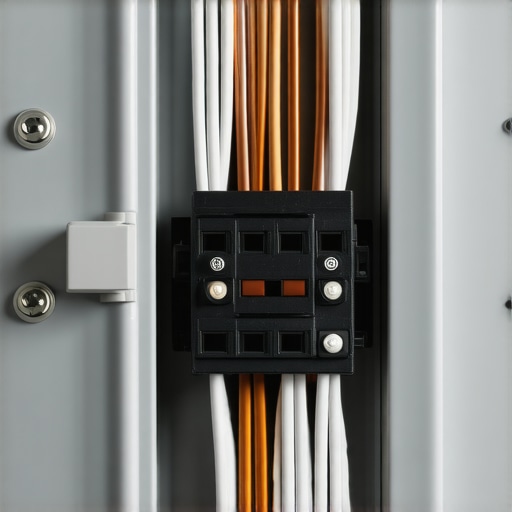
Watch Out for the Hidden Neutral Trap
Even if the math works, there is an ‘oops’ factor that kills more chargers than anything else: the loose neutral. I once spent four hours troubleshooting a friend’s setup where the car would charge for ten minutes and then error out with a cryptic red light. We checked the voltage, the breaker, and the car’s software, but nothing seemed wrong. Finally, I opened the main panel and found a neutral wire that was barely hanging on by a thread. This is the hidden danger of loose neutral wires in your electrical panel. If that connection isn’t rock solid, you will see erratic voltage swings that can fry the delicate communication boards in your charger. You also need to keep an eye on temperature; why your breaker gets hot to the touch during charging usually boils down to poor physical contact or an aged spring clip in the busbar, not necessarily a total circuit overload.
How do I know if my old panel is actually safe for high-draw charging?
It is a question that keeps a lot of new EV owners up at night. The key isn’t just the age of the panel, but the maintenance history and the specific hardware. If you see brands like ‘Zinsco’ or ‘Federal Pacific’ on the cover, stop immediately; those are documented fire hazards regardless of whether you have an EV or not. For everyone else, how to verify code compliance for your ev charger installation means looking for signs of oxidation or ‘double-tapping,’ where two wires are crammed into a single terminal. If you find yourself constantly hitting a wall with capacity, it might be time to look into upgrading your panel for better ev charging performance, but only after you have exhausted the smart-load management options. Have you ever fallen into this trap where a contractor tried to sell you a 200-amp upgrade without doing a load calculation? Let me know in the comments. If things still aren’t working right after you’ve checked the basics, consult some ev charger troubleshooting expert tips for common issues before you call for expensive backup.
Keep the Grime Away from Your Charging Pins
Maintenance isn’t just for the car; it’s for the hardware that fuels it. I noticed my charge times creeping up last summer, only to find a thin layer of oxidation on the handle pins. You need to know how to clean the pins on your charging handle safely without using abrasive chemicals that strip the metal plating. While you’re at it, check the software. Most modern units are essentially small computers, and learning how to update your charger software without calling a technician can fix those annoying handshake errors that happen when your car gets a firmware update but your charger doesn’t. If the app starts acting up, you are likely dealing with the reason your smart charger app keeps losing connection, which is often a signal strength issue rather than a hardware failure.
Invest in a Torque Screwdriver and Peace of Mind
If you take one piece of advice from my trial-and-error journey, buy a calibrated torque screwdriver. I can’t stress enough how many mystery electrical smells are just loose wires expanding and contracting. Following the specific torque settings that prevent panel fires during high-load charging is the difference between a system that lasts twenty years and one that melts in three. I also recommend a whole-house surge protector. Since these chargers are connected directly to your car’s expensive battery management system, why your ev charger needs a surge protector in the panel becomes obvious the first time a summer storm rolls through.#IMAGE_PLACE_HOLDER_D#
How do I keep my setup running through a brutal winter?
Cold weather is the ultimate stress test for electrical systems. If your charger is outside, you need to stay on top of 3 maintenance tasks that keep your outdoor charger running through winter, specifically checking for ice buildup in the holster and ensuring the cable hasn’t become brittle. I’ve seen cheap plastic covers crack in sub-zero temps, exposing the electronics to road salt and slush.
Plan for the Second EV Before It Arrives
The trend is clear: most households don’t stay a one-EV family for long. If you’re currently running a single line to a garage, think about how to upgrade your garage sub-panel for dual charging stations now. It is much cheaper to run a larger wire today than to dig everything up again in two years. You can even learn how to install a second ev charger for a multi-car household using a load-sharing setup where two chargers split a single 60-amp circuit. This prevents you from needing a massive service upgrade while still keeping both cars topped off by morning. Looking ahead, the industry is moving toward bidirectional charging. According to the ISO 15118-20 ‘Road vehicles — V2G communication interface’ technical documentation, your car will soon act as a backup battery for your house. This makes code compliance essentials for ev charger installations in 2025 even more critical, as your wiring will need to handle power flowing in both directions. My final advanced tip? Take five minutes this weekend to check your panel labels. If they are faded or vague, grab a label maker. Clear, accurate labeling is one of the specific circuit labels required by the electrical inspector and it saves your life during an emergency. Go do it today—it’s the easiest safety win you’ll ever get.
The Hardest Lesson My Stone Walkway Taught Me
#IMAGE_PLACEHOLDER_E#
Looking back at that initial four-thousand-dollar quote, I realize how close I came to wasting money on a backhoe I didn’t need. The first big takeaway is that your local inspector is actually an ally, not an enemy. When I showed him my plan for Rigid Metal Conduit (RMC) along the fence line, he pointed out a minor grounding flaw that could have ruined my car’s onboard charger. Secondly, never skip the math. If I hadn’t learned how to calculate if your 100-amp service can handle a daily commute, I would have spent a fortune on a panel upgrade I didn’t need yet. Finally, remember that heat is the silent killer of electrical components. A circuit might hold for twenty minutes, but EV charging is a marathon, not a sprint. Staying alert for 3 signs your main breaker is running dangerously hot during overnight charging is a habit every new owner should develop.
The Gear That Saved My Weekend
You don’t need a truckload of specialized machinery, but a few specific items are non-negotiable for a professional-grade finish. I highly recommend picking up a copy of the National Electrical Code (NEC) handbook; it is the ultimate guide to ensuring code compliance when installing ev chargers. Beyond the book, invest in a high-quality pipe bender if you are using RMC; it makes those corners around your flower beds look clean rather than sloppy. I also can’t emphasize enough the importance of a calibrated torque tool. Using the specific torque settings that prevent panel fires during high-load charging is the only way to sleep soundly while your car pulls heavy current in the garage. Lastly, consider a whole-house protector to guard against grid spikes, as why your ev charger needs a surge protector in the panel becomes very clear after your first major summer lightning storm.
Own Your Power Without Breaking Ground
You bought an electric vehicle to move into the future, not to turn your backyard into a permanent construction site. By choosing the right conduit and being smart about your existing service, you can have the fast Level 2 speeds you deserve without the headache of a massive excavation project. Whether you are dealing with ev charger troubleshooting expert tips for common issues or just planning your first run of wire, remember that the standard way is rarely the only way. Take your time, verify your load with a professional, and enjoy the convenience of a full battery every single morning. Have you ever been told you absolutely had to dig a deep trench for your charger? Let me know in the comments how you handled it!