It was a Tuesday night, about 11:30 PM. I’d just plugged in my car, expecting a full charge by morning. As I walked back into the kitchen, a faint, acrid smell followed me—the unmistakable scent of melting insulation. I ran back to the garage, heart pounding, and put my hand near the electrical panel. It felt like an oven. That was the night I learned that “hand-tight” is a recipe for disaster. I’d spent thousands on the car and hundreds on a fancy wall connector, but I’d neglected a simple five-second check on the terminal lugs. If I hadn’t caught it, my house would have been a headline the next morning.
Your Screwdriver Might Be Your Worst Enemy
I used to think I had a ‘feel’ for how tight a screw should be. I’ve been a DIY guy for twenty years, and I’ve never had a problem—until I started dealing with the sustained, high-amperage draw of an electric vehicle. Unlike a toaster or a vacuum, an EV charger pulls max power for hours on end. This creates heat, and heat causes metal to expand and contract. If your connections aren’t set to the manufacturer’s exact specifications, you end up with small mistakes that turn your garage panel into a fire hazard. I made the mistake of thinking my wrist was as accurate as a calibrated tool. It wasn’t. Today, I want to show you why the forgotten torque test that prevents panel fires is the single most important step in your installation process. We aren’t just making things ‘snug’; we are preventing electrical resistance from turning your wiring into a heating element. Have you ever noticed your lights flickering or smelled something odd when your car starts charging?
Is a special torque wrench actually worth the hassle?
You might be skeptical. I certainly was. I thought torque wrenches were for engine blocks, not electrical panels. But the data says otherwise. According to the NFPA 70 (National Electrical Code) section 110.14(D), if a tightening torque is indicated on the equipment, a calibrated torque tool must be used. This isn’t just a suggestion from a cautious engineer; it’s a safety mandate because loose connections are the leading cause of electrical fires in residential settings. When I finally used a real torque driver on my breaker, I was shocked to find I was nearly 10 inch-pounds under the requirement. If you’ve ever wondered why your main electrical panel feels hot when the car is plugged in, it’s often because those lugs are just a fraction too loose. Before you even think about how to tell if your panel has space for an EV circuit, you need to commit to doing the final connection the right way. It’s the difference between a fast charge and a fire department visit.
Stop Guessing with Your Home’s Safety
To do this right, you need a torque screwdriver or a small torque wrench that reads in inch-pounds (lb-in), not foot-pounds. Using an automotive wrench meant for lug nuts is like trying to perform surgery with a sledgehammer; you’ll strip the threads before you ever get an accurate reading. When I first started, I tried to skip this and just “crank it down,” but how to pass your garage electrical inspection on the first try often comes down to the inspector seeing that you own—and know how to use—the right tools.
Find the Hidden Numbers on Your Breaker
Before you even strip the wire, look at the side of your breaker or the label inside the panel door. You’ll see a specification, something like “25 lb-in” or “45 lb-in.” This isn’t a suggestion. It’s the sweet spot where the terminal exerts enough pressure to keep electrical resistance low without crushing the wire strands. I’ve seen people ignore this and end up needing ev charger troubleshooting expert tips for common issues because their car keeps throwing “input voltage” errors. Those errors are often just heat building up at a loose lug. Following code compliance essentials for ev charger installations in 2025 means respecting these tiny numbers as much as the big ones.
Why the Wire Gauge Changes Everything
EV chargers typically require heavy 6-gauge or 8-gauge wire. This stuff is about as flexible as a frozen garden hose. I remember trying to wrestle a 6-gauge line into a 60-amp breaker. The wire was so stiff it kept trying to lever the breaker right off the metal busbar. I thought I had it tight, but when I finally applied the torque wrench, the screw turned another full rotation. The stiffness of the wire had fooled my hand into thinking it was tight. If you don’t seat that wire deep into the lug, you’re looking at 4 signs your electrician used the wrong gauge wire, even if the gauge is actually correct on paper.
The Right Way to Tighten a Lug
The secret is the “tighten-wiggle-tighten” method. First, tighten the screw until the torque wrench clicks. Then, firmly grab the insulated part of the wire and give it a good wiggle to help the strands settle. You’ll almost always find that the screw can turn a bit more afterward. 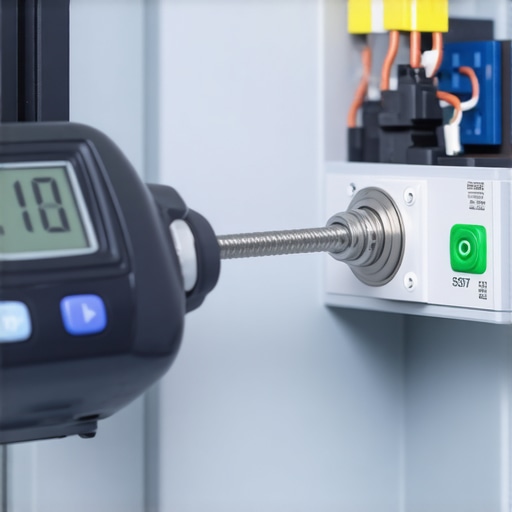 This process ensures the connection is solid through and through. If you skip this, the vibration from the 60Hz hum of the electricity can eventually loosen the connection. This is why the wire gauge mistake that fails 40 percent of inspections is so common—it’s not just about the size, but how that size interacts with the terminal.
Prevent the Mechanical Creep Before It Starts
Metal expands when it gets hot and contracts when it cools. Because an EV pulls power for 8 hours straight, your wiring undergoes significant “thermal cycling.” This can lead to mechanical creep, where the wire literally moves out from under the screw over time. By using the correct torque, you’re providing enough spring-like tension to keep the connection tight even as things expand. If you’re worried about existing setups, knowing how to spot arc faults before they kill your charging session is vital, but preventing them with a calibrated tool is better. Sometimes, upgrading your panel for better ev charging performance is less about more power and more about starting with fresh, clean, properly torqued connections.
I used to think that a 200-amp service was the ultimate insurance policy. If I had that big main breaker, I figured I could plug in two EVs, a hot tub, and a kiln without a second thought. But I was wrong. Let’s dig deeper into why simply having ‘enough space’ in your panel doesn’t actually mean you’re safe. The most common myth I hear is that a panel upgrade is just about adding capacity. In reality, it’s about thermal management. A 200-amp panel can still suffer from localized overheating if the load isn’t balanced correctly across the busbars. When you’re pulling 48 amps for ten hours straight, you aren’t just testing your capacity; you’re testing the structural integrity of your electrical infrastructure. Before you sign off on a project, make sure you know panel upgrades for ev chargers what you need to know goes beyond just a bigger number on the main switch.
Your ‘Compatible’ Breaker Might Be a Fire Hazard
Here is a trap that almost caught me: the ‘universal’ breaker. You go to the hardware store, find a breaker that fits the slot, and think you’re good to go. However, the Electrical Safety Foundation International (ESFI) warns that using breakers not specifically UL-listed for your exact panel model can lead to poor contact tension. Even if it snaps into place, a microscopic gap between the breaker and the busbar creates an arc. This isn’t just a theory; it’s how you end up with the specific breaker brand that keeps tripping during fast charging. I’ve seen ‘compatible’ breakers literally weld themselves to the panel because they couldn’t handle the heat of a continuous EV load. If you don’t see your panel’s brand stamped on that breaker, don’t put it in. 
Why does the charger keep tripping when the house is quiet?
It’s the middle of the night, no lights are on, and yet—*click*—the breaker trips. Most people assume the charger is broken, but the nuance is often found in the grounding system. A common advanced mistake is failing to separate the neutral and ground wires in a subpanel. This creates ‘objectionable current,’ where electricity travels back through the ground wire instead of the neutral. This can cause nuisance tripping and, in extreme cases, lead to the neutral wire error that fries car motherboards. If you are troubleshooting ev chargers common compliance pitfalls and fixes, start by checking your bonding. According to NEC Article 250, the only place your neutral and ground should meet is at your main service entrance. Doing it anywhere else is a recipe for ‘ghost’ errors that drive even experienced electricians crazy.
The Hidden Cost of Skipping a Load Calculation
I’ve met DIYers who are proud they ‘saved money’ by skipping the permit. What they actually did was skip the load calculation. Your panel has a ‘diversity factor’—the assumption that you won’t run every appliance at once. An EV charger ruins that math because it is a continuous load. If your electrician didn’t ask for your square footage and a list of major appliances, they didn’t do the job right. You need to understand how to read the load calculation your electrician sent you to ensure you aren’t redlining your transformer. Skipping this step is why some homeowners find ensuring code compliance when installing ev chargers is so difficult after the fact. Have you ever noticed your lights dimming specifically when the car starts its session? That’s a huge red flag that your system is struggling with the demand. Have you ever fallen into this trap? Let me know in the comments.
I’ve realized that most people treat an EV charger like a refrigerator—you plug it in and expect it to work for fifteen years without a second thought. But this is a high-performance electrical device, and it requires a different mindset. To stay ahead of the game, I personally swear by the Wiha iTorque digital screwdriver. It isn’t just a luxury; it’s the only way I can sleep at night knowing my connections meet the precise specifications required by law. According to technical bulletins from Eaton, specifically their guides on terminal connection maintenance, even a 10% deviation from the recommended torque can lead to a 50% increase in contact resistance. That resistance is what generates the heat that melts panels. 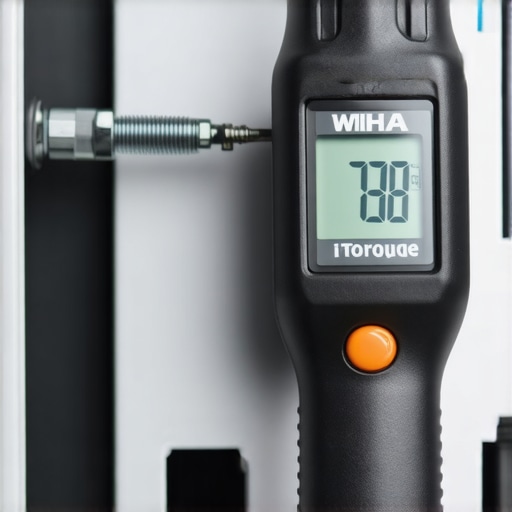
Thermal Cameras Are Your New Best Friend
If you really want to level up your maintenance game, grab a smartphone-compatible thermal camera like a FLIR One. Once a month, I open my panel while the car is pulling its full 48 amps and scan the breakers. If I see a bright white spot on a lug, I know I have a problem before the smell of smoke even starts. This kind of proactive monitoring is the secret to upgrading your panel for better ev charging performance because you’re addressing wear and tear in real-time. If you notice things getting a bit too toasty, it might be time to look into panel upgrade strategies to meet ev charging code requirements in 2025 before a small heat issue becomes a permanent failure.
How do I maintain my home charging station over time?
Maintenance isn’t just about the wires inside the wall; it’s about the hardware you touch every day. I make it a habit to check the charging handle pins for any signs of pitting or black carbon buildup. If the pins look dull, I use a quick blast of specialized electronic contact cleaner—never WD-40—to keep things conductive. Learning how to clean your charger ports without damaging them is a five-minute task that can prevent thousands of dollars in repair costs to your car’s onboard charger. Additionally, don’t ignore the software. If your charger starts acting flaky, troubleshooting ev charger connectivity problems is often just a matter of a firmware update or a router reboot. A ‘dumb’ charger that won’t connect can’t participate in utility rebate programs that save you money.
The Future is Bi-Directional
We are rapidly moving toward a world where your car doesn’t just take power from your house—it runs it. Within the next three to five years, Vehicle-to-Home (V2H) technology will be standard. This means your installation today needs to be robust enough to handle current flowing in both directions. If you want to get ahead of the curve and learn how to use your ev as a backup home battery safely, you need to ensure your grounding and bonding are perfect right now. This isn’t just a trend; it’s the next evolution of the American power grid. If you are feeling overwhelmed by the technicality of these upgrades, don’t hesitate to reach out through our contact us page for a professional assessment. Before your next long-range trip, I challenge you to grab a torque driver and double-check those panel lugs. It takes five minutes and provides the ultimate peace of mind.
The Midnight Call That Changed Everything I Knew
Looking back at my first installation, I realize that the biggest mistake wasn’t a lack of effort—it was a lack of precision. I used to think EV charger troubleshooting was just about resetting a breaker, but it is really about thermal stability and long-term connection integrity. Here are the three truths I live by now:
- Code is just the starting point: Following code compliance essentials for ev charger installations in 2025 is mandatory, but your goal should be over-engineering for safety, not just barely passing.
- Heat is a slow killer: Metal fatigue from thermal cycling takes months to show up. If you don’t use a calibrated torque driver, you are essentially setting a timer for a future failure that could have been avoided.
- Trust your data over your gut: If your lights flicker, do not ignore it. Check 3 signs your main lug is loose and causing power flickers immediately to avoid a complete system meltdown.
The Gear That Keeps My Garage Safe and My Car Charging
I do not recommend products unless I have used them to save my own skin. For a professional-grade finish, I always keep these three things in my bag. First, a high-quality digital torque screwdriver is non-negotiable for anyone serious about panel upgrades for ev chargers what you need to know. It takes the guesswork out of terminal pressure and ensures every connection is exact. Second, a smartphone-compatible thermal camera is the ultimate diagnostic tool for ev charger troubleshooting expert tips for common issues. Seeing the heat before you smell it is a total game changer for home safety. Finally, keep a current copy of the National Electrical Code handy; it is the definitive guide for code compliance and will help you understand how to verify code compliance for your ev charger installation without feeling lost in technical jargon.
Charge Ahead with Total Confidence
Setting up your own high-speed charging station is a massive milestone in your journey toward a sustainable future. By focusing on the small details like torque specs and load balance, you are protecting your home and your investment. If you ever feel like you are in over your head, remember that upgrading your panel for better ev charging performance is a process, not a race. You have done the research, you have the right mindset, and now you have the tools to do it right. Have you ever noticed your electrical panel getting warm to the touch, or did you find a surprisingly loose lug during your last check? Let me know in the comments below!