I stood there, sweat dripping off my chin, trying to shove a rusty lawnmower and three bins of tangled Christmas lights behind a wobbly workbench. The inspector was due in exactly twenty minutes. My shiny new Level 2 charger was mounted perfectly, but honestly, you could barely see the thing behind my ‘wall of hobbies.’ I figured as long as the wires were tucked away correctly, the mess wouldn’t matter. I was wrong. Dead wrong. That hubris led to a big red ‘FAILED’ sticker that haunted my dreams for a week. Dealing with a city official when your garage looks like a storage unit explosion is stressful, but it is a hurdle you can clear without renting a dumpster or offending the local authorities. Today, I’m going to show you how to carve out the ‘compliance zone’ you need to get that permit signed off on the very first try.
Why the Inspector Doesn’t Care About Your Organization System
When the city official walks into your garage, they aren’t looking at your vintage tool collection or judging your lack of shelving. They are looking for ‘working space.’ I learned this the hard way when I got flagged because my charger was way too close to a stack of flammable paint cans. According to the National Electrical Code (NEC), you generally need a clear working space that is 30 inches wide and 36 inches deep in front of electrical equipment. If you can’t stand there comfortably with both arms out, you’re probably going to fail. This isn’t just about being tidy; it’s about making sure a technician—or you—can reach the shut-off if something starts smoking. I thought the exact distance your charger must be from the garage floor was the only number I had to memorize, but the ‘depth’ of the mess in front of it is what actually tripped me up.
Is a little bit of clutter really going to fail me?
In a word? Yes. Inspectors are human, but they are humans with a very specific, legally binding checklist. If they have to parkour over a mountain of mulch bags just to verify code compliance for your EV charger installation, they are already in a bad mood. I made the classic rookie mistake of thinking that as long as the internal components were solid, the environment was secondary. It turns out, accessibility is king. Have you ever had an inspector roll their eyes the moment they stepped into your workspace? Tell me your horror stories—I promise mine is probably more embarrassing. Before you start sweating, know that you don’t need a pristine, showroom-style garage. You just need a strategic path and a clear understanding of why the city inspector failed your garage wiring in the first place.
Establish the Safety Perimeter Early
To pass an inspection, you have to treat your charger like a VIP at a crowded event; it needs its own personal space. This starts with the footprint. If you have a workbench, a lawnmower, or a stack of tires anywhere near the installation site, move them. Think of the electrical panel and the charger as high-traffic zones that need 36 inches of unobstructed depth. I once tried to ‘cheat’ by leaving my kids’ mountain bikes leaning against the wall just three feet away, thinking it was ‘close enough.’ The inspector didn’t even pull out his clipboard; he just pointed at the handlebars and said he’d come back when the floor was clear. To avoid this, literally tape off a 30-by-36-inch box on your floor before the official arrives.
Respect the Hula Hoop Rule
Think of the charger as being inside a hula hoop that extends from the floor to at least six feet high. Nothing—no shelves, no pegboards, no hanging rakes—should invade that cylinder. This ensures that if there is a problem, a technician has the elbow room to work safely. While you are at it, double-check that you have considered how to verify code compliance for your EV charger installation by ensuring no flammable materials are stored in this zone. 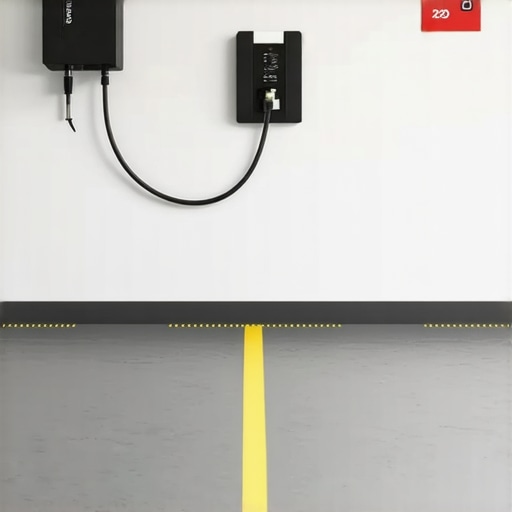
Lock Down Your Hardware Mounts
The inspector will physically tug on your charger. If it wiggles even a fraction of an inch, you are in trouble. I learned that standard plastic wall anchors are the enemy of a Level 2 install. These units are heavy, and the constant plugging and unplugging creates a leverage effect that can pull them right out of the wall.
Avoid the Drywall Rip-Out
You need to hit a stud, or use heavy-duty toggle bolts if a stud isn’t perfectly placed. Knowing how to mount a charger on drywall without it ripping out is the difference between a professional-looking job and a dangerous mess. If your conduit is visible, make sure it is strapped to the wall every few feet. Loose conduit suggests a lazy install, and an inspector who sees laziness will start looking for bigger mistakes. If you want a cleaner aesthetic, you can research how to hide ev charger wires for a clean garage look, but ensure any hidden runs still meet accessibility codes.
The Guts of the Panel Must Match the Label
The most technical part of the ‘how-to’ involves the electrical panel itself. Your breaker must be dedicated; you cannot share this circuit with your garage door opener or a freezer. Using a dedicated line is non-negotiable because why your charging station needs a dedicated circuit breaker comes down to preventing heat buildup over hours of continuous use.
Verify Your Wire Gauge
Think of your wiring like a highway; if you try to squeeze four lanes of traffic into a bike path, things are going to overheat. You must ensure you are using the exact wire gauge you need for a 50-amp EV circuit. I once saw a DIYer try to use 10-gauge wire for a 40-amp charger because it was cheaper, only to have the insulation melt during the first charge. Finally, don’t forget that many modern units have specific wiring quirks, such as why your new charger requires a neutral wire even for 240v, which can catch you off guard if you are used to older appliances. Before the inspector arrives, have your load calculation ready to prove you aren’t overloading your service, as the hidden cost of skipping a panel load calculation often results in a full panel rejection.Most people assume that code compliance is just a checklist of ‘dos and don’ts’ found in a standard manual, but in reality, it is about managing extreme heat over long periods. Everyone says a 50-amp circuit is a 50-amp circuit, but in my experience, the specific hardware you choose to facilitate that power is where the real risk lies. Take NEMA 14-50 outlets, for example. If you bought yours for fifteen dollars at a big-box store, you likely purchased a ‘range’ outlet designed for a kitchen stove that cycles on and off. EV charging is a continuous load, often pulling maximum current for eight hours straight. I have seen those cheap outlets literally char and melt because they lacked the internal contact tension required for that level of endurance. Learning how to pick a NEMA 14-50 outlet that wont melt under pressure is the single most important ‘hardware’ nuance I can share; industrial-grade components are non-negotiable for safety. 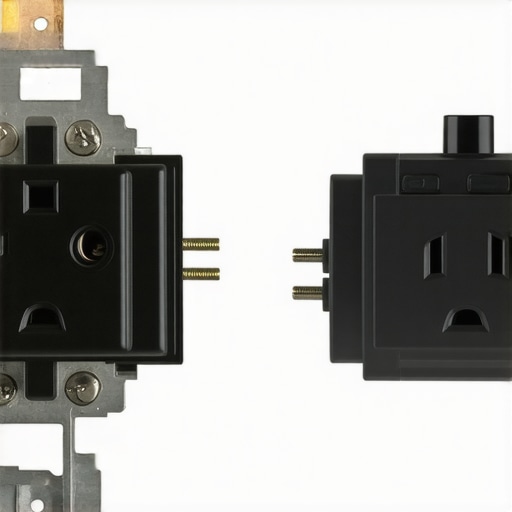
The Nuisance Tripping Trap
Another sophisticated headache involves the Ground Fault Circuit Interrupter (GFCI). Since recent National Electrical Code updates, many jurisdictions require a GFCI breaker for any outlet installed in a garage. However, almost every Level 2 charger already features sophisticated internal GFCI protection. When you place a GFCI-protected charger on a GFCI-protected breaker, they often ‘fight’ each other, leading to random shutdowns in the middle of the night. This is a classic example of why the gfci in your panel keeps nuisance tripping your charger. To stay compliant while keeping your vehicle charging, you might need to hardwire the unit directly to the panel, which frequently bypasses the requirement for that secondary GFCI breaker in many local codes.
Why Does My Breaker Trip When Everything Looks Perfect?
If your installation looks pristine but the breaker keeps popping, you are likely dealing with a ‘continuous load’ miscalculation or thermal fatigue. According to the Electrical Safety Foundation International (ESFI), electrical components must be rated for 125% of the continuous load they carry to prevent overheating. If you are pulling 40 amps, you absolutely need a 50-amp breaker and properly sized wire. Even if the numbers match on paper, you should review ev charger troubleshooting expert tips for common issues because the heat generated at the breaker terminals can cause the metal to expand and loosen the connection over time.
Subpanels and the Grounding Oversight
If you are installing your charger in a detached garage or using an existing subpanel, there is a nuance that fails more DIYers than anything else: the separation of grounds and neutrals. In a main service panel, these are bonded together, but in a subpanel, they must remain strictly isolated. If they are not, you are creating a parallel path for current that can unintentionally electrify the metal casing of your charger. This is precisely why your subpanel needs a separate ground bar for ev circuits. I have seen enthusiasts spend days ensuring code compliance when installing ev chargers only to fail because of one tiny green bonding screw left in the wrong place.
Smart Strategies for Crowded Panels
If your electrical panel is already at capacity, do not just assume you must spend thousands on a full service upgrade. There are modern panel upgrade strategies to meet ev charging code requirements in 2025 that involve smart load management or ‘circuit sharing’ devices instead of replacing the entire transformer. Additionally, be wary of the brand of your equipment; there are the specific breaker brands that are known to overheat with evs due to older spring tension designs. Have you ever fallen into this trap or had an inspector find a ‘nuance’ you completely missed? Let me know in the comments below—I am curious if I am the only one who had to learn the hard way about troubleshooting ev chargers common compliance pitfalls and fixes.
Grab a Torque Wrench Before Your Breaker Melts
If you think your job is done once the lights turn green, you are setting yourself up for a potential service call in eighteen months. I personally treat my electrical panel like a high-performance engine that needs a periodic check-up. The most critical tool in my kit isn’t a fancy multimeter; it is a calibrated torque wrench. According to the National Electrical Code (NEC) 110.14(D), you must use a calibrated torque tool for any terminal where a torque value is specified. This is because copper expands and contracts as it heats up during those long overnight sessions. If your connections are even slightly loose, you create high resistance, which is exactly why your breaker gets hot to the touch during charging. Every six months, I pop the cover (carefully!) to ensure everything is still seated to the manufacturer’s spec. You should also take a second to verify your electrician actually used copper wire for the install, as aluminum requires even more frequent monitoring to prevent oxidation at the terminals. 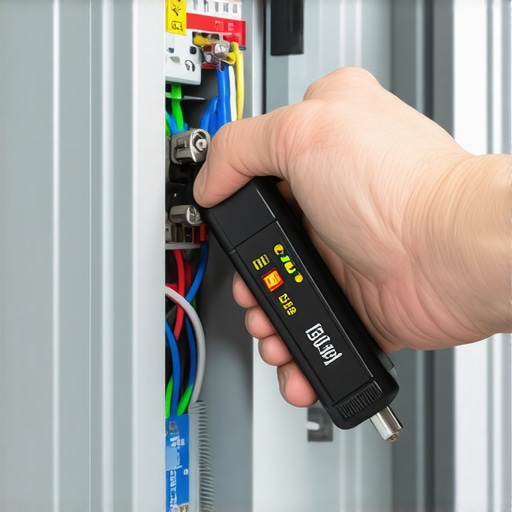
Don’t Ignore the Firmware Update Notification
We live in an era where your ‘gas pump’ has an operating system, and that comes with its own set of bugs. I’ve seen chargers refuse to communicate with the vehicle because of a handshake error that was patched six months ago. If you are struggling with troubleshooting ev charger connectivity problems, the first thing you should do is check the manufacturer’s portal. Knowing how to update the firmware on your smart charging station is as important as knowing how to change a tire. These updates often include better thermal management algorithms that can prevent your unit from throttling down when the garage gets hot.
How Do I Maintain My EV Charger Over Time?
Maintenance for a Level 2 unit is mostly about physical inspection and keeping things clean. Check the J1772 or NACS handle for any signs of arcing—look for small black pits on the metal pins. I recommend keeping a kit of the essential spare parts to keep for your home charging unit, such as a replacement holster and extra cable hangers, to prevent the cord from being stepped on. If you notice the handle is getting harder to engage, look into how to stop your charger handle from sticking in the port before you snap a plastic locking pin.
Plan for the Second EV Now
The biggest trend I see coming is the ‘two-EV household’ becoming the standard rather than the exception. If you are already at the limit of your 200-amp service, you need to look at panel upgrade strategies to meet ev charging code requirements in 2025. Before you commit to another dedicated line, I suggest you how to load test your house before adding a second charger. In the near future, we will see bi-directional charging (V2G) become common, where your car powers your house during a blackout, but that requires a very specific type of code-compliant gateway. For now, focus on ev charger troubleshooting expert tips for common issues to keep your current setup running. My advice? Go buy a torque wrench today and check your breaker lugs—it’s the best twenty minutes of preventative maintenance you’ll ever do.
The Three Lies I Told Myself Before Failing My Permit
I used to think that electrical work was just about making things function, but I learned that code compliance is actually about making things survive the worst-case scenario. Here are the lightbulb moments that changed my perspective:
- The ‘Looks Good’ Trap: I thought a tidy wire run meant a pass. In reality, an inspector will overlook a slightly crooked conduit if your wire gauge is correct and your terminals are torqued, but they will never overlook a pretty install that uses the wrong breaker.
- The ‘It’s Just a Plug’ Myth: I assumed a NEMA 14-50 was just like a dryer outlet. It isn’t. The continuous thermal load of an EV is a different beast entirely. You aren’t just plugging in an appliance; you are installing a high-power fuel station in your home.
- The Inspector Is the Enemy: I used to be nervous when the city official arrived. Now, I see them as a free second set of expert eyes. If they find a mistake, they might be saving my house from a thermal event six months down the road.
Where I Go When the Wiring Gets Complicated
If you are still feeling a bit overwhelmed, don’t worry—the learning curve is steep but manageable. When you’re ready to take the next step, knowing how to find an electrician who actually understands ev codes can save you from repeating my expensive mistakes. I also keep a close eye on code compliance essentials for ev charger installations in 2025 because the rules for smart chargers and load management are evolving faster than ever. If your current system feels sluggish or you’re seeing flickering lights, upgrading your panel for better ev charging performance is usually the most reliable fix. Finally, I highly recommend checking for 3 signs you need a whole house surge protector for your ev to ensure a local lightning strike doesn’t turn your expensive charger into a brick. #IMAGE_PLACEHOLDER_E#
The Peace of Mind That Comes With Doing It Right
There is a specific kind of satisfaction that comes from plugging in your car at night and knowing, with 100% certainty, that every connection is tight, every wire is the right size, and your home is perfectly safe. EV ownership is supposed to be about convenience and the future, not about worrying if your garage is getting too hot. By focusing on code compliance and regular maintenance, you turn your garage into a high-tech fueling hub that adds value to your home. Take it one step at a time, use the right tools, and never be afraid to ask for a professional opinion when the math gets tricky. Have you ever had a surprise ‘fail’ during a home inspection, or did you pass on the very first try? Let me know in the comments below!