I’ll never forget the sound of crunching metal. It was a Tuesday morning, just three days after I’d finished what I thought was a perfect pedestal installation for a small medical office. I was proud of that job; I had even triple-checked the specific torque settings that prevent fires, thinking I’d covered every base. But as I pulled into the lot for a follow-up, my heart sank. The beautiful, sleek charging station was folded over at a forty-five-degree angle. A delivery truck driver had cut the corner too tight, and since there was nothing to stop him, he drove right over the unit. That was my ‘lightbulb’ moment—realizing that electrical safety is useless if the hardware itself is physically vulnerable. I’d skipped the bollard to save the client a few bucks and preserve the ‘clean look’ of the landscaping. That mistake cost me thousands in equipment and a lot of professional pride. Today, I’m going to show you exactly why a bollard isn’t just an accessory—it’s a necessity for any pedestal-mounted charger. We’re going to solve the problem of physical vulnerability before a distracted driver does it for you.
Stop Physical Damage Before It Happens
When we talk about ensuring code compliance, we usually get lost in the weeds of electrical theory. But if you’ve decided to install a charger on a pedestal, you’ve essentially placed a high-voltage target in a high-traffic zone. Cars are heavy, drivers are distracted, and winter ice turns every parking lot into a slow-motion demolition derby. According to data from the National Safety Council, millions of parking lot accidents occur annually, and an exposed charger is often the first thing to get hit. I’ve seen everything from snowplows to grandmas in SUVs take out these pedestals because they simply didn’t see them. If you don’t have a steel-reinforced barrier, you’re not just hoping for the best—you’re gambling with an expensive piece of technology. Have you ever had a moment where a car came uncomfortably close to your charger? I’d love to hear if you’re as paranoid as I am now in the comments.
Is a Metal Pipe Really Going to Save Your Wallet?
You might be skeptical and think that a bollard is overkill, especially for a private driveway. You might even worry it will make your home look like a gas station. But here is the reality: commercial charger pedestals often fail not because the electronics are bad, but because physical trauma compromises the weather-tight seal of the casing. Once that metal or plastic shell is cracked by a fender bender, moisture finds its way inside. Next thing you know, you’re dealing with a check charger warning on your dashboard and a repair bill that makes a steel bollard look like a bargain. It is significantly cheaper to paint a piece of pipe than it is to replace a motherboard fried by rainwater. Trust me, after seeing a bumper shear a mounting bolt like it was a toothpick, I never skip the protection. We’re building for the long haul, and that means preparing for the worst-case driver. [image]
Don’t Just Bolt It Down
Installing a bollard isn’t about decoration; it’s about physics. Most DIYers and even some pros make the mistake of using a thin-walled decorative pipe. If a 5,000-pound SUV taps it, that pipe is going to fold like a soda can. I always recommend 4-inch Schedule 40 steel. It’s the industry standard for a reason. When I worked on a municipal fleet project last year, the specs called for 6-inch bollards. I thought it was overkill until I saw a maintenance truck back into one. The truck had a massive dent and a ruined bumper, but the charger didn’t even wiggle. That’s the level of protection you’re aiming for.
Sink Your Barrier Deep Enough to Matter
The biggest failure point for physical protection isn’t the steel; it’s the footing. If you just tap-con a bollard to a 4-inch sidewalk, the first impact will simply rip the concrete out of the ground. For a pedestal installation, you need a dedicated footing. I typically dig 36 inches deep—similar to the specific depth requirements for underground EV wiring. This ensures the bollard is anchored below the frost line and has enough leverage to resist a moving vehicle without becoming a projectile itself. If you’re in a region with heavy clay, you might even need to go wider with your pour to prevent the whole assembly from leaning over time.
#IMAGE_PLACE_HOLDER_B#
Protect the Conduit Pathway
One of the trickiest parts of ensuring code compliance when installing EV chargers is how the conduit enters the pedestal. If your bollard is too close, you can’t get your sweep (the curved pipe) into the unit easily. If it’s too far, a car can still squeeze through and clip the corner of the charger. I aim for 12 to 18 inches of clearance between the bollard and the pedestal face. While you’re at it, make sure you’re using the exact wire gauge you need for a 50-amp EV circuit to prevent overheating within the confined space of a pedestal. Heat dissipation is much harder in a metal post than it is in a wide-open garage wall.
Handle the Electrical Infrastructure Properly
Physical protection is half the battle, but you can’t forget what’s happening inside the pipes. When you transition from underground to the pedestal, ground movement is your enemy. I once saw a pedestal get pulled downward because the soil settled, and because the electrician hadn’t left an expansion joint or enough slack in the wire, it literally pulled the lugs right off the circuit breaker. This is why how to ground your EV charger according to the latest standards involves more than just a wire; it’s about the integrity of the whole physical and electrical system working together.
Verify Your Power Supply Before Finalizing
Before you pour that concrete and lock your pedestal in place, you better be sure your home can handle the load. I’ve had clients spend three grand on a beautiful pedestal setup only to realize their 100-amp service was already maxed out by their heat pump and dryer. Always look into upgrading your panel for better EV charging performance before you commit to a permanent outdoor fixture. If you ignore the expert tips for common issues, you’ll be digging that concrete back up in six months when the inspector flags your service capacity or you start tripping your main breaker every time you plug in at night.
The Double-GFCI Trap That Most Electricians Miss
Everyone tells you that outdoor electrical equipment needs GFCI protection—and they aren’t wrong. However, there is a nuance here that drives homeowners and novice installers absolutely crazy. Most modern Level 2 chargers already have sensitive GFCI protection built directly into their motherboards. If you install that charger on a circuit protected by a GFCI breaker in your main panel, these two systems will often ‘fight’ each other. This is exactly why the GFCI in your panel keeps nuisance tripping your charger, even when there isn’t a real ground fault. I’ve seen people replace perfectly good chargers three times before realizing the ‘code-compliant’ breaker was actually the culprit. In many jurisdictions, if the unit is hardwired, that redundant panel-side GFCI isn’t just unnecessary; it’s a flaw in the system design.
How Much Voltage Are You Losing Across Your Yard?
When you move a charger away from the garage wall and onto a pedestal, you are likely increasing the length of the wire run significantly. Most people just look up a basic chart and see that #6 copper is rated for 50 or 60 amps and think they are done. But those charts don’t account for ‘voltage drop’ over long distances. According to the Electric Power Research Institute (EPRI), continuous high-current loads are uniquely sensitive to voltage fluctuations. If your pedestal is 100 feet from the house, that #6 wire might result in a voltage drop that causes your charger to throttle its speed or, worse, causes the terminal lugs to overheat. This is often why your breaker gets hot to the touch during charging. If you’re going a long distance, always upsize your wire gauge to keep the resistance low and the charging speeds high. Have you ever fallen into this trap where your ‘fast’ charger felt surprisingly slow? Let me know in the comments.
The Load Calculation Is Not Just a Suggestion
One of the biggest ‘oops’ factors I see in the field is a homeowner assuming a 200-amp panel means they have 200 amps of ‘free’ space. It doesn’t work that way. An inspector doesn’t care what your main breaker says; they care about the calculated load of your existing appliances. Skipping this step is the hidden cost of skipping a panel load calculation. If you add a 48-amp continuous load to a panel that is already running an electric range, a dryer, and a central AC unit, you are asking for a localized brownout or a main breaker failure. Before you go through the hassle of upgrading your panel for better EV charging performance, you should look into smart energy management. You might be able to save thousands by learning how to use load shedding devices to avoid a full service upgrade, which allows the charger to automatically pause if the dryer and oven are on at the same time.
Verify Your Grounding Beyond the Basics
Finally, don’t assume that just because your charger powers on, it is properly grounded. Pedestal units are vulnerable to soil conditions and moisture. If your ground rod isn’t bonded correctly or if you’ve relied on the conduit itself as a ground path (a big no-no in my book for EVs), you’re risking sensitive electronics. It’s vital to how to verify code compliance for your EV charger installation by performing a proper continuity test. A weak ground is often the phantom cause behind mysterious communication errors between the car and the unit. Building it right the first time means looking past the surface and respecting the physics of high-voltage delivery. Your car, your house, and your wallet will thank you for the extra attention to detail.
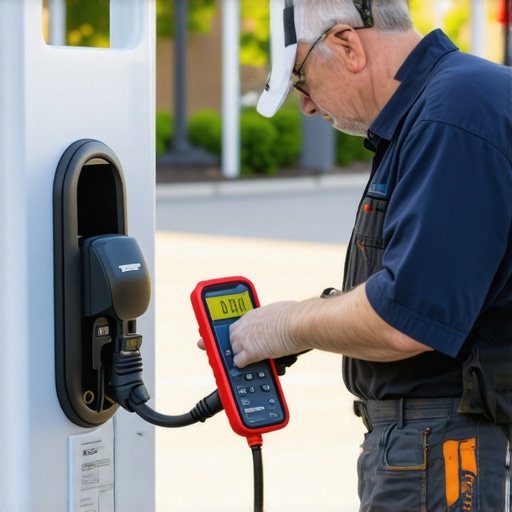
Most homeowners think the job ends when the inspector signs the permit, but for me, that is just day one. If you want your investment to last, you need to think like a maintenance tech, not just an installer. The biggest threat to your outdoor setup isn’t just the weather; it’s the invisible degradation of connections under heavy load. I’ve seen brand-new installs fail within six months because of thermal cycling—where the wires heat up during charging and cool down afterward, eventually loosening the terminals. This is why I always emphasize the specific torque settings that prevent panel fires during high load charging. If those lugs aren’t tightened to the exact inch-pound spec using a calibrated torque wrench, you’re just waiting for a meltdown.
The Secret Weapon in My Diagnostic Kit
I never consider a job finished until I’ve viewed the system under load through a thermal imaging camera. While you don’t need to buy a $5,000 FLIR unit, even a basic smartphone attachment can show you if a breaker is running dangerously hot. According to the NFPA 70B: Standard for Electrical Equipment Maintenance, infrared thermography is one of the most effective ways to identify loose connections before they lead to equipment failure. When I scan a pedestal, I’m looking for “hot spots” at the wire terminations. If one wire is 20 degrees hotter than the others, I know I’ve got a resistance problem that needs immediate attention. It’s the difference between a quick adjustment and a panel upgrade for better EV charging performance because a busbar got scorched.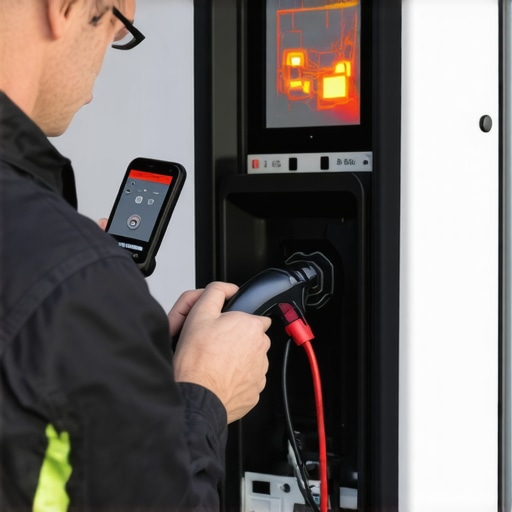
How do I keep my pedestal charger in top shape for years?
Maintaining an outdoor unit requires a bit more elbow grease than a garage-mounted one. I recommend performing 3 maintenance tasks that keep your outdoor charger running through winter: first, check the seals. Gaskets dry out and crack, and once moisture gets in, your electronics are toast. Second, keep the connector holster clean. I’ve seen spiders build nests inside the J1772 handle, which prevents a solid connection and leads to troubleshooting EV charger connectivity problems that drive people crazy. Finally, make sure you know how to protect your outdoor charger from heavy rain and snow by ensuring the pedestal drainage holes are clear. If water pools at the base, it can wick up into the conduit and cause a short.
Future-Proof Your Setup for Bi-Directional Charging
The trend I’m seeing is a shift toward bi-directional charging—where your car can actually power your house during a blackout. If you are already thinking about how to prep your homes electrical for a future EV purchase, consider running a larger conduit than you currently need. A 1.25-inch or 1.5-inch pipe doesn’t cost much more than a 1-inch one, but it gives you the “room to grow” when we move to V2H (Vehicle-to-Home) systems that require more conductors. And don’t forget the software; always check how to update the firmware on your smart charging station. Manufacturers often release patches that improve charging efficiency or fix bugs that cause nuisance tripping. My advice? Grab a torque wrench this weekend and double-check your breaker connections—you might be surprised at what a quarter-turn can do for your peace of mind.
The Hardest Lessons I Learned in the Parking Lot
Looking back at that crumpled pedestal from my early days, I realize that technical skill means nothing without foresight. One ‘lightbulb moment’ for me was discovering that even a perfectly wired unit can fail due to vibration from nearby traffic. If you don’t use expansion couplings, the ground’s natural movement will eventually yank your wires loose. Another hard truth: your weatherproofing is only as good as your last inspection. I’ve seen ants move into a pedestal and short out a motherboard because a grommet wasn’t seated right. Finally, don’t ignore expert tips for common issues just because you think your situation is unique. Physics doesn’t care about your zip code.
The Essential Toolkit for Any Serious Installer
I’m often asked what I carry to every job site. First, a high-quality, calibrated torque wrench is non-negotiable to ensure the specific torque settings that prevent panel fires are met. Second, I swear by the Fluke 117 Multimeter; it’s rugged and accurate for testing ground continuity. For resources, I always keep a digital copy of the latest NEC (National Electrical Code) on my phone. If you’re feeling overwhelmed, I recommend reaching out to a pro through our contact page to get a second pair of eyes on your plan. It is better to ask a ‘dumb’ question now than to pay for a smart mistake later.
#IMAGE_PLACE_HOLDER_E#
Your Next Step Toward a Bulletproof Charging Setup
Building an outdoor charging station is an investment in your home’s future value and your own daily convenience. By focusing on physical barriers, electrical integrity, and upgrading your panel for better EV charging performance, you are setting yourself up for years of trouble-free miles. Don’t let the complexity scare you—take it one trench, one wire, and one bollard at a time. Have you ever encountered an unexpected obstacle while trying to mount a charger outside? Let me know in the comments below!