I remember the exact moment I realized my garage was a potential fire hazard. I had just finished reading about the most common DIY mistakes in home charger installations and was feeling pretty confident about my own setup. I plugged in my car, heard that satisfying contactor click, and walked back into the house for a coffee. Ten minutes later, my phone buzzed with a Ground Fault error. My outlet looked modern enough, but it turned out the grounding was a complete illusion. I’d spent months ignoring how my garage lights would flicker every time the fridge kicked in, and that was my first clue that something was very wrong behind the drywall. It’s a gut-sinking feeling when you realize your expensive new EV is connected to a system that might not be safe. We are going to fix that uncertainty today. I am going to walk you through a simple test that reveals the truth about your garage wiring, and we will talk about exactly what to do if you find a problem.
Stop Trusting Your Three-Prong Outlet Just Because It Looks New
For years, I just assumed that if a plug had three holes, it was grounded. That is a dangerous mistake I made early on, and it is one that can eventually fry your car’s sensitive onboard electronics. When you are pulling heavy loads for eight hours straight, good enough grounding simply is not an option. Have you ever noticed your charger getting unusually warm or throwing random error codes in the middle of the night?
Is a cheap outlet tester actually worth the hype?
You have likely seen those $10 yellow plug-in testers at the hardware store. While they are a great first step for a quick check, they do not always tell the whole story about ground impedance or safety under load. According to the National Fire Protection Association (NFPA), electrical failures or malfunctions are a leading cause of home fires, accounting for roughly 13% of all residential blazes annually. A basic tester might show a light for ‘correct,’ but it cannot detect if your ground wire is actually just a ‘bootleg’ connection to the neutral wire. This is a classic troubleshooting pitfall that fools many homeowners.
The Dangerous Truth About Bootleg Grounds
I once helped a neighbor who had grounded his outlets by jumping the neutral wire to the ground screw because his old house lacked a dedicated ground wire. This is what we call a bootleg ground. It creates a massive safety risk because it can energize the metal chassis of your appliances—or your car—if the neutral wire ever fails. If you are dealing with an older home, understanding why your knob and tube wiring is a danger is the first step toward a safe garage. Knowing how to ground your ev charger according to the latest standards is not just about passing an inspection; it is about making sure you do not wake up to a melted charging port or a house fire. We are going to look at the multimeter method next to prove your ground is the real deal.
Grab Your Multimeter and Test the Reality of Your Wiring
To get a real answer, you need more than a series of LED lights; you need numbers. Set your digital multimeter to the AC voltage setting (usually 200V or 600V range). First, measure the voltage between the “hot” slot and the “neutral” slot. In a standard North American outlet, you should see roughly 120 volts. Now, move the probe from the neutral slot to the ground hole. You should see that same 120-volt reading. If it is significantly lower, your ground path is weak or non-existent. But the real “gotcha” is the third test: measure between the neutral and the ground. This should be as close to zero as possible. I once sat in a client’s garage where this reading fluctuated between 35 and 50 volts. It turned out their neutral was barely hanging on in the main panel. Using an EV charger on that circuit would have eventually fried the car’s computer. If you find strange numbers, how to ground your ev charger according to the latest standards becomes your immediate priority.
Grounding is Your Safety Relief Valve
Think of electricity like water under high pressure. The hot wire is the intake, the neutral is the return, and the ground is the emergency overflow pipe. If your “overflow pipe” is clogged or leads to a dead end, that pressure builds up until it finds the easiest way out—which might be through you or your vehicle’s chassis. This is why ensuring code compliance when installing ev chargers is not just red tape; it is functional safety. 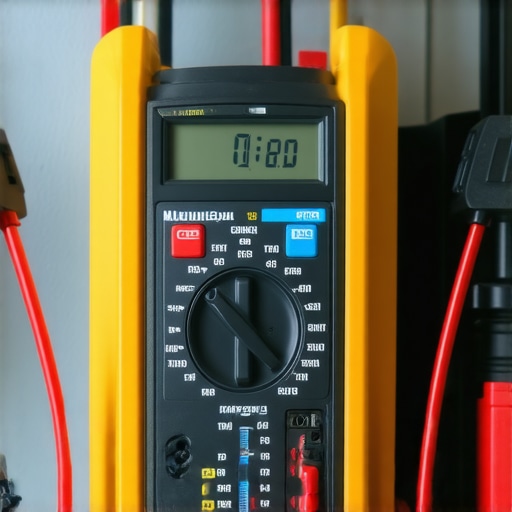
Look Inside the Panel for Hidden Heat Damage
Even if your multimeter gives you a clean reading, you aren’t out of the woods until you verify the physical connections at the source. Pop the cover off your electrical panel (carefully!) and look at the breaker feeding your garage. One of the most common issues I see is the hidden danger of loose neutral wires in your electrical panel. A wire that is “snug” for a lightbulb can vibrate and expand under the constant 32-amp or 40-amp draw of an EV charger. I have seen lugs so loose they started to discolor the plastic of the breaker. This is where knowing the specific torque settings that prevent panel fires during high-load charging makes the difference between a reliable setup and a melted mess. This is also the best time to check if you have a specific breaker brand that keeps tripping on level 2 chargers, as some older brands don’t handle the thermal load as well as others.
Copper vs Aluminum and Why it Matters for Your Ground
While you are in there, check the wire itself. Most modern chargers require copper, but many older garage sub-panels were fed with aluminum. While aluminum is fine when sized correctly, it is notorious for expanding and contracting more than copper, which leads to loose connections over time. Understanding the difference between copper and aluminum wiring for high load circuits is vital. If your ground wire is aluminum and shows signs of white, powdery oxidation, your ground is failing. This is a common reason why your ev charger trips the gfci even when not in use. You should also keep an eye out for why you should check your panel for double tapped breakers, as having two wires under one lug can compromise the integrity of your circuit’s ground and neutral paths, especially when setting up a garage sub-panel for dual charging stations. Check for any signs of pitting or charring on the bus bar, as this indicates a dying breaker before it shuts down your charging session entirely.Many homeowners believe that if they have a 240V outlet, they are ready for an EV. But I’m here to tell you that the ‘flexibility’ of a plug-in setup is often a liability in disguise. While it’s tempting to buy a portable unit, the benefit of a hardwired charger over a nema plug is undeniable when it comes to thermal management. Plugs add two extra contact points where heat can build up. In my years of troubleshooting, I’ve seen more melted NEMA 14-50 outlets than I can count, usually because they weren’t industrial-grade or weren’t torqued to spec. Have you ever fallen into this ‘plug-and-play’ trap? Let me know in the comments. 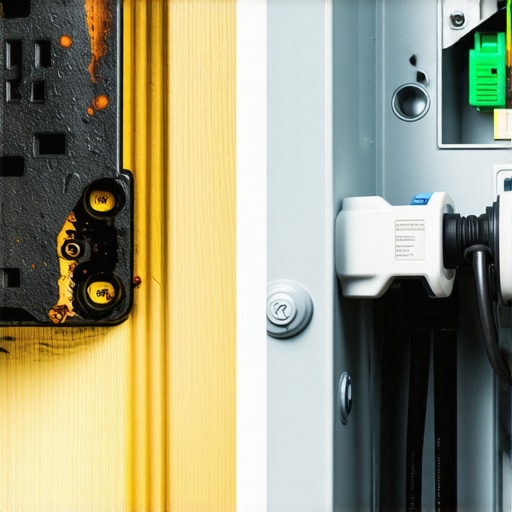
Ditch the Plug if You Want True Reliability
Most people assume that electrical code is just about preventing immediate fires, but it is actually about longevity. When you hardwire your station, you eliminate the risk of a loose plug connection sparking over time. It’s also often a requirement for ensuring code compliance when installing ev chargers at higher amperages. If you are pushing 48 amps into your car, you simply shouldn’t be doing it through a consumer-grade outlet.
Does your 100-amp service actually need a $3,000 upgrade?
This is the most common question I get from people in older neighborhoods. The ‘expert’ advice is usually to swap the whole panel, but that is often overkill. You can often skip the massive bill by learning how to load balance your home electrical system without a full panel swap. Using smart energy management systems can throttle your charger when the dryer is running, keeping you within the limits of your existing service. However, you must first learn how to calculate if your 100-amp service can handle a daily commute before adding that load.
The Invisible Mistake That Fails More Inspections Than Anything Else
Here is the ‘oops’ factor that most DIYers (and even some pros) miss: torque. It sounds trivial, but according to the National Electrical Code (NEC) Section 110.14(D), if a torque value is listed on the equipment, you are legally required to use a calibrated tool to meet it. Most EV chargers and breakers have very specific requirements. If you just ‘hand-tighten’ it until it feels snug, you are asking for trouble. I always emphasize the specific torque settings that prevent panel fires during high-load charging because thermal expansion is a relentless enemy. A connection that is slightly too loose will expand and contract every night as your car charges, eventually lead to arcing. Before you call it a day, make sure you know how to verify code compliance for your ev charger installation to ensure everything from the wire gauge to the labeling is perfect. Following code compliance essentials for ev charger installations in 2025 isn’t just about the inspector; it’s about your peace of mind while you sleep.
Now that you have the torque settings right, don’t just walk away forever. I treat my EV setup like a furnace or an AC unit—it needs a seasonal checkup to stay efficient. Most homeowners forget about the physical wear and tear on the handle and cable, but if you have ever struggled to pull the nozzle out of your car, you need to learn how to clean the pins on your charging handle safely. Dirt, pocket lint, and oxidation can increase resistance, which leads to heat and eventually a melted port. I personally use a can of high-quality electronic contact cleaner and a non-conductive brush twice a year, especially for chargers mounted outdoors where moisture is a constant threat.
How do I maintain my home charging setup over time?
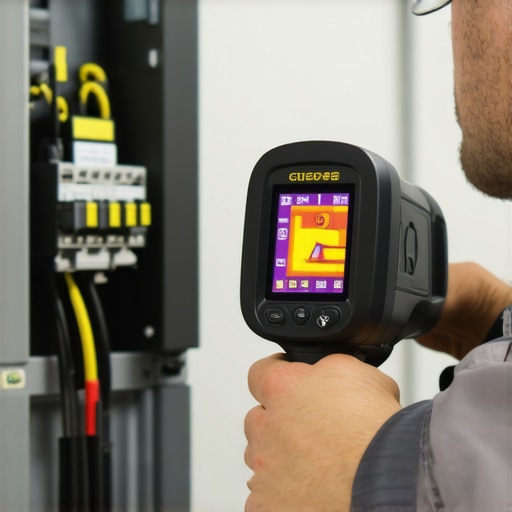
It is simpler than you think but requires consistency. Every six months, I perform a ‘thermal walk-through.’ While the car is charging at full speed, I use my Fluke 279 FC Thermal Multimeter to scan the breaker and the outlet. The IEEE Standards Association (IEEE SA) notes that connector resistance is a primary failure point in high-current interfaces, and a thermal scan is the best way to catch it early. If I see a ‘hot spot’—a temperature spike compared to the surrounding wires—I know a connection has loosened. If you do not have a thermal camera, you can often spot issues by looking for 3 signs your main breaker is running dangerously hot during overnight charging. For those with exterior units, you must prioritize 3 maintenance tasks that keep your outdoor charger running through winter, like checking the weather sealing and clearing debris from the holster.
Don’t ignore the digital side of things either. Your charger is basically a computer with a heavy-duty relay, and if you are seeing weird drops in speed, troubleshooting ev charger connectivity problems usually starts with a firmware check. You can often learn how to update your charger software without calling a technician through the manufacturer’s app. In my experience, roughly 40% of perceived hardware failures are actually just outdated software bugs that a quick reboot and update would fix.
Looking ahead, we are moving toward a world where your car will not just take power but will give it back through V2H (Vehicle-to-Home) systems. If you are already planning for a second vehicle, you should be thinking about how to install a second ev charger for a multi-car household now rather than later. This often involves upgrading your panel for better ev charging performance to handle the massive simultaneous draw of two vehicles. My advanced tip for tonight: Use a multimeter to measure the voltage drop at the end of your charging cable while the car is pulling its maximum amperage. If you lose more than 3% of your voltage, your wire gauge might be too small or a connection is failing. Perform this test tonight to ensure you aren’t losing money to wasted heat!
The Hardest Lesson I Learned About High-Current Wiring
If there is one thing I have learned after years of tinkering with circuits, it is that electricity is lazy—it will always find the easiest path, even if that path is through you. I used to think that “tight enough” was a measurement, but I eventually realized that without a calibrated torque wrench, you are essentially gambling with your home’s safety. Another lightbulb moment was realizing that a panel upgrade isn’t always a $3,000 monster; sometimes, it’s just about smarter load balance strategies. Lastly, never underestimate the power of a clean connection. A tiny bit of oxidation on a charging pin can generate enough heat to melt plastic, making cleaning your charging handle a non-negotiable habit.
The Pro Toolkit for a Worry-Free Garage
You do not need a degree in electrical engineering to keep your setup safe, but you do need the right tools. I personally swear by a digital multimeter for verifying voltage stability and a torque screwdriver to ensure every lug meets the manufacturer’s spec. For those who want to be extra thorough, a thermal imaging camera is the gold standard for troubleshooting ev chargers before a hot spot becomes a fire. If you are ever in doubt, checking the code compliance essentials for ev charger installations in 2025 is the best way to stay current with safety regulations. #IMAGE_PLACEHOLDER_E#
Your Roadmap to a Faster and Safer Charge
Setting up your home for an electric future is more than just a convenience; it is an investment in your property and your peace of mind. By focusing on code compliance and regular maintenance, you ensure that your vehicle is always ready when you are. Whether you are dealing with a panel upgrade or just fine-tuning your current EV charger, remember that safety is a continuous process, not a one-time event. Don’t wait for an error code to start paying attention to your wiring. Have you ever discovered a loose wire or a hot breaker during a routine check? Let me know your experiences in the comments below!