I’ll never forget the sinking feeling I had when my shiny new Level 2 charger arrived in its pristine packaging. I was so focused on the tech and the app features that I completely ignored the state of the ground it would be standing over. My garage floor was a disaster zone of old oil spots, hairline cracks, and that fine concrete dust that seems to multiply overnight. I thought, ‘It’s just a floor, right?’ Wrong. I spent a fortune on the car and the hardware, only to realize that a dusty, uneven floor was going to make every morning plug-in a gritty, messy experience. Plus, I almost made a huge mistake by not considering how the floor surface affects safety and moisture migration near my high-voltage components.
Get Your Groundwork Right Before the Electrician Shows Up
When you’re looking at the real difference between hardwired and plug-in charging stations, you’re usually thinking about wire gauges and breakers. But listen to me: the environment matters just as much as the electrical specs. I once tried to slap a cheap DIY floor kit down after my charger was already mounted, and let me tell you, trying to paint around a conduit run is a nightmare you don’t want to live through. You want a clean, sealed surface that won’t track silica dust into your car’s interior or, worse, create a slipping hazard when you’re handling heavy cables in a rainstorm. According to the Portland Cement Association, unsealed concrete can actually ‘dust’ significantly due to the carbonation of the surface, which creates a fine powder that can interfere with the cooling fans of some high-end charging units.
Is a fancy floor coating actually worth the trouble?
I get it. You’ve already spent thousands on the car and probably need to budget for why your electrician recommends a 60-amp circuit for a 48-amp charger. You might be wondering if you can just leave the bare concrete. In my experience, skipping the floor prep is a decision you’ll regret the first time you drop a heavy charging handle on a brittle, oil-soaked slab. A good polyaspartic or epoxy coating doesn’t just look ‘cool’—it protects the concrete from the increased weight of an EV, which can be significantly heavier than a traditional internal combustion vehicle. That’s a lot of localized pressure on your garage slab every single night. Before you lock in the best height to mount your charger for daily use, take a long, hard look at what’s under your boots. Have you ever dealt with a crumbling garage floor that made you second-guess your home upgrades? Because I’ve been there, and fixing it later is twice as expensive.
Scrub the Slab to Save Your Sanity
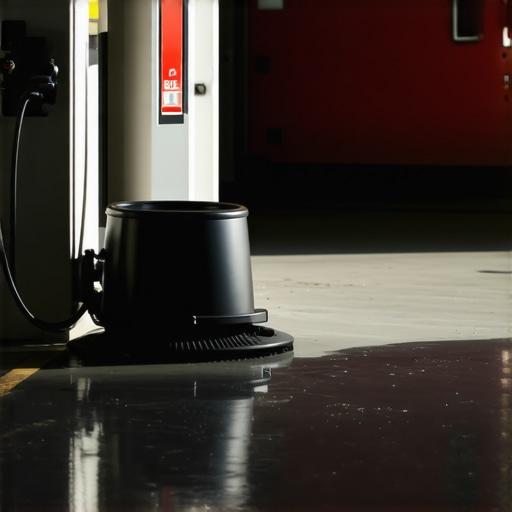
Before you even think about the wiring, you need to handle the literal foundation of your charging station. Bare concrete is a sponge for automotive fluids, and if you mount a charger over an oil-slicked floor, you’re asking for a slip-and-fall accident while lugging around a heavy cable. I learned this the hard way: I once decided to deep-clean my garage with a high-pressure hose to ‘prep’ the area, only to realize I’d accidentally sprayed water directly into the open electrical backbox where the unit was supposed to be mounted. I had to spend three days with a hairdryer and a shop vac making sure every terminal was bone-dry before my electrician would even look at it. To avoid my mistake, use a heavy-duty degreaser and a stiff brush on the floor at least 48 hours before your installation date. This creates a dust-free environment that protects the sensitive internal relays of your charger from silica buildup.
Don’t Guess Your Home’s Electrical Limits
Think of your electrical panel like a monthly budget. Every appliance—your AC, your oven, your dryer—is a recurring bill. Adding a Level 2 charger is like adding a massive new car payment to that budget. You need to know exactly how much ‘cash’ (amps) you have left. Before the electrician arrives, you should how to tell if your utility meter can handle the extra load. If you’re living in an older home with a 100-amp service, you’re likely going to hit a wall. You might need to research panel upgrades for ev chargers: what you need to know before you can safely draw the 40 or 48 amps required for fast home charging. Many homeowners assume they can just swap a breaker, but without a proper load calculation, you risk a house fire or, at the very least, a nuisance trip in the middle of the night that leaves you with a dead battery in the morning. This is precisely why your electrician recommends a 60-amp circuit for a 48-amp charger; it provides the necessary 20% safety margin for continuous loads.
Seal the Gaps to Keep Out the Creepy-Crawlies
Once the wiring is pulled through the conduit, you aren’t done. One of the most overlooked steps in a DIY-adjacent or even some pro installs is finishing the entry points. Spiders, earwigs, and fine grit love to crawl through conduit pipes and nest inside the warm, buzzing interior of a charging station. I’ve seen chargers fail because a spider web across a circuit board became damp and caused a short. You need to understand the proper way to seal conduit openings against spiders and dust using duct seal or silicone. While you are at it, check the hardware. You must ensure why your charger needs a specific torque setting to pass inspection. Hand-tightening those terminal lugs isn’t enough; thermal expansion and contraction over months of high-heat charging can loosen those wires, leading to arcing. Finally, always how to verify code compliance for your ev charger installation to ensure that your grounding and clearances meet the 2025 standards, protecting your home’s resale value and your family’s safety.
Stop Chasing Amps and Start Checking Your Busbar
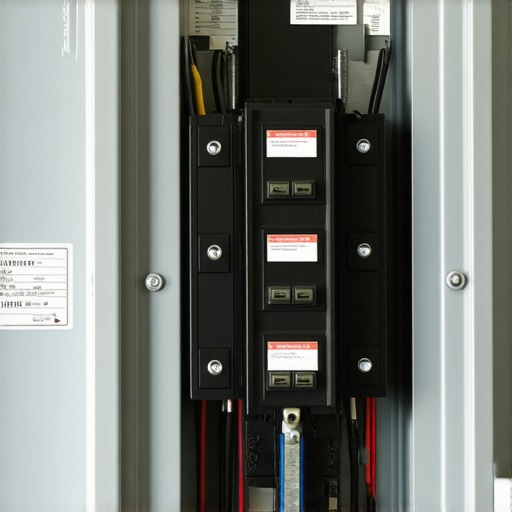
Most homeowners believe that if they have a 200-amp service, they are automatically ‘golden’ for an EV charger. In my experience, that is a dangerous assumption. Total amperage is only half the story; the physical health and configuration of your panel’s busbar matter just as much. I’ve seen 200-amp panels that were so crowded with ‘twin’ or ‘tandem’ breakers that the heat buildup was already at critical levels before the EV charger was even unboxed. When you add a continuous load like a car—which according to the National Electrical Code (NEC) Article 625 must be calculated at 125% of its rated power—you are stressing the equipment in a way a toaster or a vacuum never could. Before you commit to a purchase, you need to look at panel upgrades for ev chargers: what you need to know to ensure your hardware can actually breathe.
Why does your breaker keep tripping even if the load looks right?
This is the most common ‘ghost in the machine’ for new EV owners. You’ve done the math, the electrician installed a 50-amp breaker for your 40-amp charger, yet it trips every Tuesday night. Often, the culprit isn’t an overload but a conflict between the GFCI protection in your panel and the GFCI protection built into the charger itself. This ‘nuisance tripping’ is a headache that many pros don’t warn you about. If you are struggling with this, you should read up on why the gfci in your panel keeps nuisance tripping your charger. Modern chargers have very sensitive internal ground-monitoring circuits, and when two different GFCI systems ‘fight’ over the same line, the result is a dead battery and a frustrated owner. Have you ever fallen into this trap? Let me know in the comments.
The Heat Trap That Most DIYers Ignore
Here is a nuance that even some general contractors miss: the brand and age of your breakers. Not all breakers are created equal. Some ‘value’ brands are notorious for having a lower thermal tolerance when subjected to six hours of continuous high-amperage draw. I always recommend checking the specific breaker brands that are known to overheat with evs. If your breaker feels hot to the touch—not just warm, but ‘I don’t want to keep my finger there’ hot—you have a high-resistance connection or a failing component. This is also why I’m a stickler for maintenance. You would be shocked to learn why your main lugs might be loose after a year of charging. The constant heating and cooling cycles can actually cause the metal to expand and contract enough to loosen the physical screws holding your house’s main power lines. This leads to arcing, which is a leading cause of electrical fires.
Don’t Let Your Smart Charger Be Outsmarted
Finally, let’s talk about the ‘Oops’ factor of software. We love our smart features, but they add a layer of complexity that can lead to ev charger troubleshooting: expert tips for common issues. I once spent four hours trying to figure out why a car wouldn’t charge, only to find out the homeowner’s utility-managed ‘smart charging’ program had throttled the unit to zero during a peak demand event without notifying their app. Beyond the software, you must ensure your physical installation remains legal and safe. Always know how to verify code compliance for your ev charger installation. If you skip the permit or the load calculation, you aren’t just risking a fine; you’re risking your homeowner’s insurance coverage if anything ever goes wrong. It’s always better to handle ensuring code compliance when installing ev chargers on day one than to have an inspector force you to rip out finished drywall a year later.
I used to think that once the status light turned green and my car started humming, my job was finished. But after twelve months of pulling 48 amps for six hours every night, I realized that an EV circuit isn’t a ‘set it and forget it’ appliance like a microwave. High-amperage continuous loads put a unique kind of stress on your home’s electrical infrastructure. If you aren’t performing basic maintenance, you’re essentially running a marathon in flip-flops—eventually, something is going to snap. I’ve started making a habit of doing a ‘thermal walk-through’ once a quarter, and honestly, it’s saved me from at least one potential melt-down.
How often should I inspect my home charging setup?
At a minimum, I recommend a deep dive every six months. I don’t just mean looking at the app; I mean a physical inspection of the hardware. According to the NFPA 70B (Recommended Practice for Electrical Equipment Maintenance), electrical connections should be periodically inspected because thermal cycling—the process of wires heating up during use and cooling down after—can gradually loosen even the tightest connections. I personally check for any signs of ‘pitting’ or discoloration on the plug blades and use a non-contact infrared thermometer to check the breaker temperature while the car is charging. If you see anything unusual, it’s time to dive into ev charger troubleshooting: expert tips for common issues before a small spark becomes a big problem.
The One Tool That Actually Saves Your House
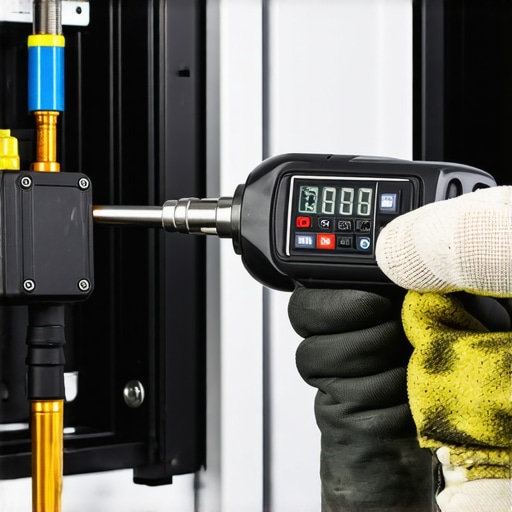
If you’re going to DIY any part of the maintenance, put down the standard screwdriver. You need a high-quality torque wrench. I cannot stress this enough: almost every charger failure I’ve investigated was caused by a lug that was ‘hand-tight’ rather than ‘spec-tight.’ I learned this the hard way when I found a scorched wire inside a sub-panel because the vibration of the house had backed a screw out just a fraction of a millimeter. This is exactly why your main lugs might be loose after a year of charging. When you are tightening things back up, you must follow the specific torque wrench settings for a wall connector or your specific brand. Under-torqueing causes high resistance and heat; over-torqueing can strip the threads or crush the wire, leading to a weak point. I also keep a small kit of the essential spare parts to keep for your home charging unit, including extra fuses and a spare holster, because things always break at 11:00 PM on a Sunday.
Don’t Let Your Lugs Go Loose
Looking ahead, the trend is moving toward bidirectional charging (V2G), where your car actually feeds power back into your house during a blackout. This is going to put even more strain on your panel because the energy flows both ways. You might find that your current setup needs panel upgrade strategies to meet ev charging code requirements in 2025 to handle that bidirectional heat. If you’re planning on adding a second EV soon, stop trying to daisy-chain chargers and look into why your garage needs a sub-panel for multiple chargers. It’s the only way to scale without constantly tripping the main breaker. Advanced Tip: Buy a $20 infrared thermometer from a hardware store. While your car is charging at full speed, point it at your breaker. If it’s over 140°F (60°C), call an electrician immediately. You’ve likely got a loose connection or a failing breaker that needs to be addressed before it fails permanently.
The Hardest Realities About High-Voltage Living
After a year of living with a Level 2 setup, I’ve realized that the installation process never truly ends. One major lightbulb moment for me was discovering that your car’s software and your charger’s hardware are in a constant, silent negotiation. If you’ve ever wondered why your charging speed drops suddenly after 20 minutes, it is usually not a malfunction; it is a thermal safety protocol. I also learned that knowing how to fix the grounding fail that ruins ev permits is often the difference between a system that works and one that ghosts you when it rains. Finally, do not ignore your panel’s health. I’ve seen enough mystery trips to know that upgrading your panel for better ev charging performance is more about daily reliability than just raw power draw.
Gear That Keeps My Garage From Melting Down
You do not need a professional electrician’s entire truck, but three specific items are non-negotiable for my peace of mind. First, a dedicated torque wrench is vital because the specific torque wrench settings for a wall connector are the only real way to prevent dangerous arcing. Second, I always keep a small bag of the essential spare parts to keep for your home charging unit, specifically a replacement holster and a few extra mounting screws. Third, a simple non-contact infrared thermometer helps you spot hot breakers before they fail. I trust these tools because they transition you from being a passive user to an active manager of your home’s high-voltage energy system.
Your Path to a Stress-Free Morning Commute
Setting up your home for an electric vehicle is a massive investment in your lifestyle, but it requires ongoing respect for the technology. By focusing on ensuring code compliance when installing ev chargers, you are protecting your home’s resale value and your family’s safety. Do not let the technical jargon of a panel upgrade or the temporary stress of EV charger troubleshooting keep you from enjoying that silent, smooth drive every morning. You have the tools and the code compliance knowledge now to do it the right way. Have you ever discovered a loose wire or a hot breaker during a routine check of your charging system? Let me know in the comments below!