It was 11:30 PM on a Tuesday. I had just finished a long drive back from the city, and all I wanted was to hear that satisfying clack of the contactor and see the green pulsing light on my Tesla Wall Connector. Instead, I got greeted by a rhythmic, angry red pulse. One, two, three blinks. Then a pause. Then one, two, three blinks again. My heart sank. Was my car broken? Was my house about to burn down? I stood there in my slippers, staring at my garage wall, feeling completely defeated by a piece of plastic and some copper. I’ve been there, and I know that sinking feeling in your stomach when your expensive tech decides to play difficult right when you need it most.
That Annoying Triple Flash Is Actually Trying to Save Your House
The truth is, a Tesla Wall Connector blinking red three times is the unit’s way of shouting, ‘Hey, it’s getting way too hot in here!’ Specifically, it indicates a high-temperature detection at the wall-mount terminals. When I first encountered this, I made the classic mistake of thinking it was just a software glitch. I tried the old turn it off and on again trick with the breaker, which worked for about ten minutes before the red lights returned. I eventually realized that my troubleshooting for common EV charger issues was missing the most critical factor: physical installation integrity. According to the National Fire Protection Association (NFPA), poor electrical connections are a leading cause of home electrical fires, often because loose wires create high resistance which generates intense heat. This is exactly what those three blinks are sensing. I learned the hard way that if you don’t follow the specific torque settings that prevent panel fires, you are basically inviting a thermal event into your garage. I hadn’t used a torque screwdriver because I thought hand-tight was good enough. It was a stupid mistake, and it almost melted my terminal block.
Is the Tesla Wall Connector Actually More Fussy Than Other Chargers?
You might be wondering if you bought a diva of a charger. Why does this happen to Tesla units so often? It is not that they are poorly made; it is that they are incredibly sensitive to safety. They monitor the temperature at the terminal block constantly. If you or your electrician took a shortcut—like using the wrong wire gauge or failing to verify code compliance for your EV charger installation—the Wall Connector will shut down to protect itself and your home. Have you ever walked into your garage and seen that dreaded red sequence staring back at you? It feels like the car is judging your DIY skills, doesn’t it? I am going to show you exactly how to diagnose this without losing your mind. We will look at the wire terminals, check for thermal damage, and ensure your setup meets common DIY mistakes that most people overlook. We are going to get you back to that peaceful green pulse tonight.
Stop the Power Before You Touch the Wires
You cannot troubleshoot a high-voltage connection while it is live. That is a recipe for a trip to the ER, not a fixed charger. Go to your main electrical panel and flip the breaker dedicated to the Wall Connector to the ‘Off’ position. I cannot stress this enough. When I first tried to ‘just peek’ at the terminals without killing the power, I realized how close my metal screwdriver was to the busbars. It was a wake-up call. Once the power is dead, use a T10 Security Torx bit to remove the two screws at the bottom of the Wall Connector and lift the glass cover off. You are looking for the terminal block where those thick power wires enter the unit.
Look for Signs of a Slow Burn
Inspect the plastic housing around the terminals. If those three red blinks were telling the truth, you might see slight discoloration—think brownish or yellowish tinting on the white plastic. In worse cases, you will see actual charring. This is why you need to use expert tips for common EV charger issues before the damage becomes permanent. If the wires look ‘crispy’ or the insulation is pulled back and melted, you need to strip the wire back to clean, shiny copper and start over. If the terminal block itself is melted, the unit is toast and needs replacement. This heat happens because a loose connection acts like a bottleneck for a river; the electricity has to fight to get through, creating friction and heat.
Why Your Hand-Tightening Just Isn’t Enough
This is where I failed. I used a standard screwdriver and tightened the lugs until my knuckles turned white. I thought that was ‘tight.’ It wasn’t. Tesla Gen 3 Wall Connectors require a very specific torque of 50 lb-in (5.6 Nm). Without a torque screwdriver, you are just guessing. I finally bought a digital torque wrench, and I was shocked at how much further I had to turn the screw to actually reach 50 lb-in. It felt like I was going to break it, but that is the level of compression required to prevent the microscopic gaps that cause arcing. Following the specific torque settings that prevent panel fires is the difference between a reliable charger and a fire hazard.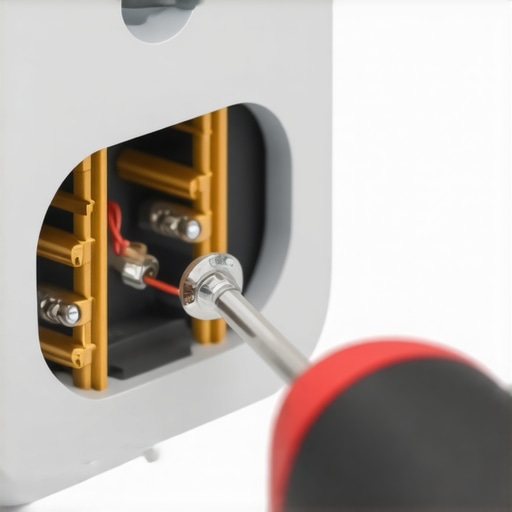
Don’t Let Aluminum Wires Melt Your Hardware
Check the color of your wires. Are they silver? If so, you have aluminum wiring, and that is a major problem for this specific application. Aluminum expands and contracts much more than copper when it gets hot. Over several charging cycles, this ‘creeping’ causes the connection to loosen, leading to those three red blinks. You should always verify your electrician actually used copper wire for the install. If you find aluminum, you must use specialized ‘CO/ALR’ connectors or, ideally, pull new copper wire. Ensure you are using the exact wire gauge you need for a 50-amp EV circuit—usually 6 AWG copper—to handle the continuous load without a voltage drop. When everything is tight and the wire material is correct, you are far less likely to experience why your breaker gets hot to the touch during charging. Reassemble the unit, flip the breaker back on, and watch for that solid green light. If you followed these steps, that red blink should be a memory.
Why a Panel Upgrade Isn’t Always the Silver Bullet
Many ‘experts’ will tell you that if your charger is overheating or those three red blinks won’t go away, you simply need a bigger panel. I disagree. In my experience, a full service upgrade is often a $3,000 solution to a $200 problem. While a 200-amp panel is great, you can often achieve the same reliability by learning how to load balance your home electrical system without a full panel swap. The issue usually isn’t the total capacity of your house; it is the localized heat at the point of connection. I have seen brand-new 200-amp installs fail because the installer used a budget breaker that wasn’t properly rated for a 100% continuous load. Have you ever fallen into this trap, thinking more power would fix a heat issue? Let me know in the comments below.
Why does my 60-amp breaker trip when the car only draws 48 amps?
This is the nuance that trips up most DIYers and even some journeyman electricians. Per the National Electrical Code (NEC), EV charging is considered a ‘continuous load,’ meaning it runs for more than three hours. Because of this, you have to derate the circuit by 80%. This is the real reason your circuit breaker trips at 90 percent charge or why the Wall Connector senses a thermal runaway. If you are using a 60-amp breaker to pull 48 amps, you are right at that 80% limit. If your garage is already 100 degrees in the summer, that breaker is going to get significantly hotter than it would in the winter. The Electrical Safety Foundation International (ESFI) reports that home electrical fires are frequently caused by components being pushed to their thermal limits without adequate ventilation or proper component matching. I always recommend looking for the specific breaker brand that keeps tripping on level 2 chargers before you assume the Wall Connector itself is faulty.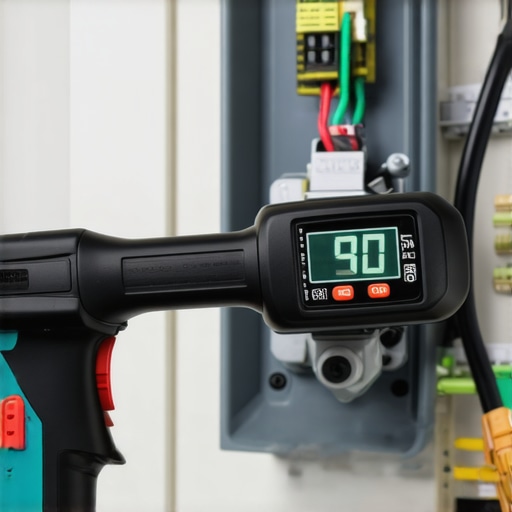
The Trap of the ‘Universal’ Breaker
One of the most dangerous mistakes I see is the use of ‘classified’ breakers—those ones that claim to fit in any panel. While they might physically snap into the busbar, the tension of the clip is often slightly different than the manufacturer’s original part. This creates a tiny air gap. In the world of high-voltage EV charging, an air gap is an invitation for arcing. This is why you must verify code compliance for your EV charger installation by ensuring the breaker brand matches the panel brand exactly. If you have a Square D panel, use a Square D breaker. Mixing brands is a recipe for why your breaker gets hot to the touch during charging, and it’s a nuance often missed in basic tutorials. We are not just trying to get the car to charge; we are trying to keep the house from becoming a statistic. If you’re still seeing red, it might be time to look at panel upgrade strategies to meet EV charging code requirements in 2025 that focus on thermal management rather than just raw amperage.
Don’t Wait for the Red Blink to Check Your Terminals
Once you have your charger back up and running, the real work begins: keeping it that way. I used to think that electrical work was ‘set it and forget it,’ but high-load appliances like EV chargers are more like performance car engines—they need periodic inspections. Every six months, I make it a habit to perform maintenance tasks that keep your charger running through the seasons. This involves more than just wiping off the dust. I actually pop the cover (with the breaker off, obviously) and check if those torque settings have held up. Heat causes expansion, and cooling causes contraction; over hundreds of charging cycles, this ‘thermal cycling’ can actually back a screw out just enough to start the high-resistance dance all over again. If you want to stay ahead of the curve, you should also learn how to update your charger software without calling a technician. Tesla frequently pushes firmware updates that optimize thermal management, and if your unit isn’t on your home Wi-Fi, you’re missing out on those critical safety patches.
The One Pro Tool Every EV Owner Should Borrow
If you really want to geek out and ensure your home is safe, stop guessing with your hands and start looking with infrared. I bought a small thermal camera attachment for my smartphone, and it changed how I view my entire electrical system. According to the InterNational Electrical Testing Association (NETA), thermal imaging is the most effective non-invasive method for identifying high-resistance connections before they lead to catastrophic failure. After an hour of charging at full 48-amp capacity, I scan the Wall Connector terminals and my main breaker. If I see a ‘hot spot’ that is significantly warmer than the surrounding wires, I know I have a loose connection that needs attention. It’s a pro-level move that helps you verify code compliance for your EV charger installation long after the inspector has left. 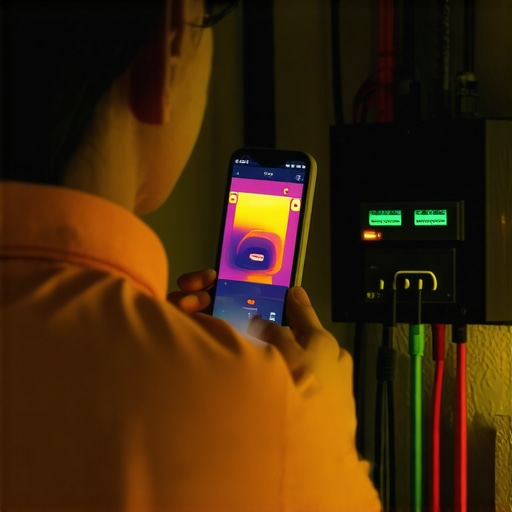
How to keep your charger healthy for the next decade
Long-term reliability is about reducing stress on the components. One thing I’ve started doing is ‘derating’ my charger in the app during the peak of summer. If I don’t need a full charge by morning, I’ll drop the amperage from 48A down to 32A. This significantly reduces the heat generated at the terminals and at the breaker, extending the life of the hardware. You should also periodically check your charging handle for debris. Learning how to clean the pins on your charging handle safely can prevent communication errors that look like hardware failures but are actually just poor contact points.
Add a Second Car Without Killing Your Main Service
The biggest question I get from friends is: ‘What happens when we get a second EV?’ Most people assume they need a massive panel upgrade for better EV charging performance, but that’s not always the case. If you have two Tesla Wall Connectors, you can use a feature called ‘Power Sharing.’ This allows both units to communicate and split the available current. It is a brilliant way to install a second EV charger for a multi-car household without overloading a 100-amp or 150-amp service. Instead of paying thousands to the utility company for a service upgrade, you’re using software to load balance your home electrical system without a full panel swap. I predict that within the next five years, this kind of ‘smart load management’ will be the standard for every home in America, as our grids struggle to keep up with the demand. My challenge to you: Go to your charger right now and check if it’s connected to your Wi-Fi. If it isn’t, spend the ten minutes to link it up—it might just save your terminal block from the next heatwave.
The Expensive Mistakes I’ll Never Make Again
After wrestling with my own installation for longer than I care to admit, I realized that the most common hurdles aren’t found in the manual. They are found in the subtle details of how we handle hardware under pressure. Here are the lightbulb moments that changed how I approach electrical work:
- Torque is a safety feature, not a recommendation: If you don’t hear that click or see that digital readout hit the exact number, you’re leaving your home to chance. Thermal cycling will find any weakness in a loose connection.
- Ambient garage heat is a silent killer: If your garage gets baked by the afternoon sun, your charger is already starting at a disadvantage. High-load charging produces its own heat; adding a 100-degree room to the mix is why you need to troubleshoot EV chargers for compliance pitfalls before summer hits.
- Visual inspections aren’t enough: Wires can look perfect on the outside while the copper inside is slowly degrading from micro-arcing. You have to feel for tension and look for those signs your main breaker is running dangerously hot.
The Tools That Saved My Sanity and My Safety
You don’t need a van full of gear, but there are three things I never touch a Wall Connector without. These have turned my guesswork into a precise science:
- Digital Torque Screwdriver: Forget the ‘hand-tight’ myth. A calibrated tool ensures every terminal is compressed exactly as the engineers intended, which is the only way to pass your electrical inspection on the first visit without sweating. #IMAGE_PLACEHOLDER_E#
- Infrared Thermal Camera: A smartphone attachment like the FLIR One is my favorite piece of tech. It lets me see ‘heat signatures’ before they turn into the red blink of death. It’s like having X-ray vision for your circuit breakers.
- The Tesla App’s Advanced Settings: Use the app to update your charger software without calling a technician. Keeping the firmware current ensures you have the latest thermal protection algorithms running in the background.
Drive Forward With Absolute Confidence
Facing a Tesla Wall Connector blinking red three times is a stressful rite of passage for many EV owners, but it’s one that ultimately makes you a more informed and safer homeowner. By respecting the physics of high-voltage electricity and using the right tools, you transform your garage from a point of worry into a high-performance fueling station. You’ve done the hard work of diagnosing the heat; now you can enjoy the peace of mind that comes with a rock-solid connection. Have you ever discovered a loose wire that you thought was tight? Let me know in the comments below!