I remember the Saturday morning I nearly ripped my charger off a 4×4 cedar post because I was too eager to get my new Tesla plugged in. I thought a couple of standard deck screws would hold that heavy cable and charging unit against the side of the post. Spoiler alert: they didn’t. Within a week, the whole setup was leaning like the Tower of Pisa, and I was terrified that a strong gust of wind would snap my expensive equipment right off the mount. It was a visceral realization that while a wooden post is a great, cost-effective solution for outdoor charging, it demands a level of respect and structural planning that many DIYers overlook in their excitement. If you are tired of looking at wobbly installs or are worried about the next storm, you are in the right place. We are going to fix that today.
Your Charger Needs a Solid Foundation to Survive the Elements
I’ll be the first to admit I made a massive rookie mistake early on. I used interior-grade fasteners because they were what I had in my toolbox. Wood is a living, breathing material; it expands and contracts with every season, and standard screws just can’t handle that movement combined with the weight of a Level 2 charger. To avoid a disaster, you need to be ensuring code compliance when installing EV chargers by opting for heavy-duty, galvanized lag bolts that bite deep into the center of the post. Setting up a remote charging point is a fantastic way to handle a long driveway or a detached parking spot, but you have to understand that mounting to wood requires specific mechanical protection for your wiring. I learned the hard way that understanding how to install a charger on a pedestal instead of a wall involves more than just a hole in the ground; you need to manage the vibration and tension that occurs every time you uncoil that 25-foot cable.
Can a basic wooden post actually pass a professional inspection?
You might be skeptical. After all, most commercial chargers sit on sleek, expensive metal pedestals. Can a pressure-treated 6×6 really do the job? According to the National Fire Protection Association (NFPA 70), specifically Article 625, EV charging equipment must be firmly secured to the surface on which it is mounted to prevent physical damage. While wood is a perfectly legal mounting surface, many inspectors will fail you on the spot if the post isn’t sunk deep enough to prevent swaying. If you’re feeling a bit lost in the jargon, how to find an electrician who actually understands ev codes is the best first step you can take to avoid a costly “do-over.” Another thing I didn’t consider was the height. I originally mounted mine too low because I didn’t want it to be an eyesore. Well, after the first heavy snowfall, I was digging my charging handle out of a frozen drift. The NEC actually suggests keeping these units between 18 and 48 inches off the ground, but I’ve found that 42 inches is the absolute sweet spot for both ergonomics and keeping the electronics away from ground-level moisture. Trust me, your lower back will thank you when you aren’t stooping over every single time you come home. Today, we are going to dive into the specific depth requirements, the type of wood that won’t rot out in three years, and the code compliance essentials for ev charger installations in 2025 so your setup is built to last. Have you ever had a DIY project look perfect on day one, only to start falling apart a month later? Drop a comment and tell me your story.
Stop the Sway by Burying One-Third of the Post
Think of your charging post like a sailboat mast; if the base isn’t secure, the whole thing is going over when the wind kicks up. I once helped a neighbor who thought a two-foot hole was enough for his 4×4. The first time he pulled the heavy cable to reach his truck, the post groaned and leaned five degrees. To prevent this, follow the 1/3 rule: if you want five feet of post above ground, you need at least two and a half feet below it, surrounded by bagged concrete. When digging, you must pay attention to the specific depth requirements for underground ev wiring to ensure your conduit doesn’t get crushed or severed by future landscaping. In most jurisdictions, you’re looking at 18 to 24 inches for PVC conduit. If you skimp here, the ground will shift during the winter freeze, and you’ll find your expensive charger tilted toward the mud by April.
Protect Your Circuit with Industrial-Grade Conduit
Never, under any circumstances, run bare wire up the side of a wooden post. I made the mistake of thinking a bit of plastic tubing would be ‘good enough’ until I accidentally nicked it with a string trimmer. It was a terrifying shower of sparks that could have been avoided with Schedule 80 PVC or Liquidtight conduit. This isn’t just about safety; it’s about passing your final check. One of the biggest hurdles is the conduit depth rule that fails more garage inspections than anything else—inspectors want to see that your wire is shielded from the moment it leaves the ground until it enters the charger’s chassis. 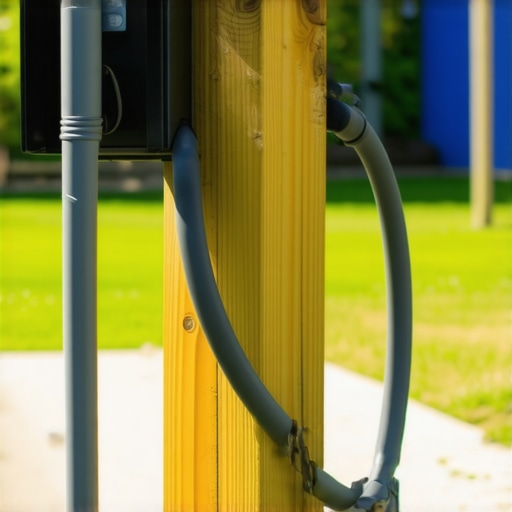
Drive Lag Bolts Like You Mean It
Forget those skinny wood screws. You need 1/4-inch or 5/16-inch galvanized lag bolts. Before you drive them in, drill a pilot hole. If you skip the pilot hole, you risk splitting a 4×4 right down the middle, which ruins the structural integrity of your mount. I remember sweating through a humid July afternoon trying to force a bolt into a knot in the wood; the wood split, and I had to start the whole installation over from scratch. While you are securing the physical unit, make sure you are also following how to ground your ev charger according to the latest standards. A wooden post provides zero natural grounding, so your internal ground wire must be perfectly bonded to the house’s main electrical system.
Don’t Let Voltage Drop Kill Your Charging Speed
Wooden posts are often far from the main panel, which introduces the danger of a long wire run. If your post is 50 feet away, you can’t just use standard household wire. You need to verify the exact wire gauge you need for a 50 amp ev circuit to account for that distance. I’ve seen DIYers install a perfect post only to wonder why your charging station isnt reaching its full 48 amp potential. Usually, it’s because the wire is too thin, causing a voltage drop that the car’s computer interprets as a safety issue, subsequently throttling your speeds. Using thick copper is non-negotiable here, as it handles the heat of a continuous 8-hour charge much better than aluminum in these high-vibration outdoor environments.
Most homeowners assume that if their lights don’t flicker and the breaker doesn’t trip, their outdoor charging setup is a success. But here is the contrarian truth: your electrical panel doesn’t care about ‘success,’ it cares about heat. I see so many people rush into a full 200-amp service overhaul when they could have simply looked into how to load balance your home electrical system without a full panel swap. We are often told that more power is always better, but in the world of high-load continuous draws, efficiency and heat management beat raw amperage every time. If you just throw a bigger breaker at a problem without addressing the ‘thermal soak’ that happens during a six-hour charging session, you are just masking a fire hazard.
Is Your Panel Actually Ready for an Eight-Hour Heat Soak?
The biggest ‘trap’ I see advanced DIYers fall into is ignoring the physical connection points inside the panel. We talk about wire gauge all day, but we rarely talk about torque. According to the Electrical Safety Foundation International (ESFI), nearly half of all home electrical fires are caused by arc faults or thermal failures at the connection point. When you are pulling 40 or 48 amps for hours, the metal expands. If those lugs aren’t set to the specific torque settings that prevent panel fires during high-load charging, that expansion creates a tiny gap. That gap creates an arc, and that arc creates a puddle of molten plastic where your breaker used to be. I once opened a panel where the homeowner had ‘hand-tightened’ everything, and the neutral bar was literally glowing. It’s a terrifying reminder that the hidden danger of loose neutral wires in your electrical panel is magnified tenfold by an EV charger.
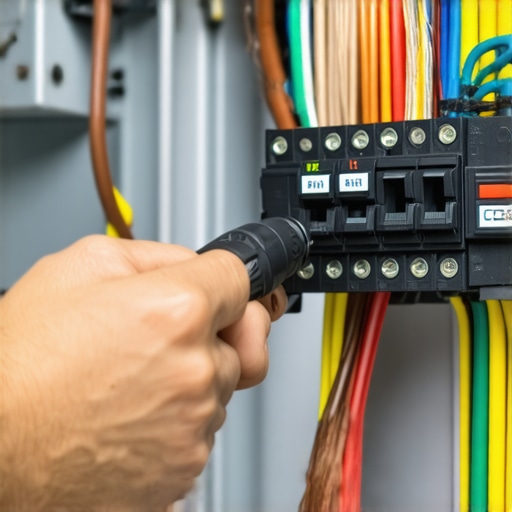
Another nuance that catches people off guard is the ‘double GFCI’ headache. Most modern Level 2 chargers have built-in Ground Fault Circuit Interrupter (GFCI) protection. If you install a GFCI breaker in your panel to feed that charger, the two systems will often fight each other, leading to why your ev charger trips the gfci even when not in use. It’s a frustrating cycle of troubleshooting where everything looks fine on paper, but the car refuses to charge. This is where panel upgrade strategies to meet ev charging code requirements in 2025 become vital; you have to know when the code requires a GFCI breaker and when the charger’s internal protection is sufficient. Have you ever spent a weekend chasing a ‘ghost’ trip in your breaker box? Let me know in the comments, and we can figure out if it was a torque issue or a hardware conflict. Taking the time to get these invisible details right is what separates a ‘working’ charger from a safe one.
Once the dust settles and your wooden post is rock solid, the real work shifts from construction to long-term reliability. I’ve seen beautiful installations fail within eighteen months simply because the owner treated it like a ‘set it and forget it’ appliance. Unlike a standard outdoor light, an EV charger is a high-performance machine that handles massive throughput daily. If you want to avoid the headache of a dead car on a Monday morning, you need a proactive maintenance strategy.
Why I Carry an Infrared Thermometer in My Tool Bag
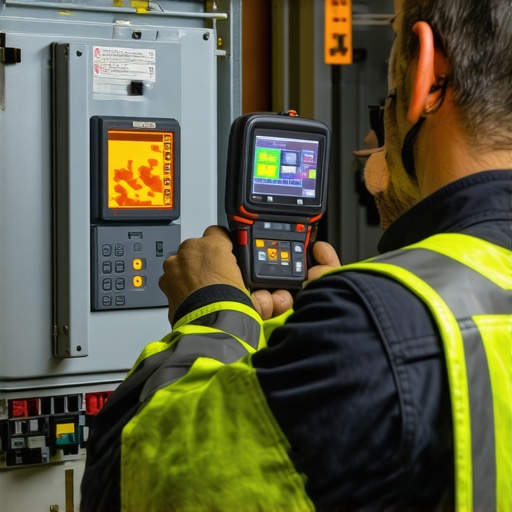
The most important tool in my kit isn’t a screwdriver—it’s a non-contact infrared thermometer. Every few months, while the car is pulling its maximum amperage, I open the panel and check the temperatures of the EV breaker. I’m looking specifically for 3 signs your main breaker is running dangerously hot during overnight charging. If I see a 20-degree Fahrenheit difference between the EV breaker and its neighbors, I know a connection is loosening. This simple five-minute check is exactly how to verify code compliance for your ev charger installation over the long haul. Remember, the NFPA 70B standard (Recommended Practice for Electrical Equipment Maintenance) emphasizes that thermal anomalies are the leading indicator of impending electrical failure. Don’t wait for the smell of ozone to tell you something is wrong.
How do I keep my outdoor charger running for a decade?
Outdoor units face a brutal cycle of humidity, dust, and insects. Spiders love the warmth inside a charger chassis, and their webs can actually hold moisture against sensitive circuit boards. I make it a habit to perform 3 maintenance tasks that keep your outdoor charger running through winter, which includes a quick blast of compressed air and checking the seal on the conduit entry points. You should also learn how to clean the pins on your charging handle safely using a dedicated electronic contact cleaner. Oxidized pins increase resistance, which leads to heat and eventually melts the plastic housing of your expensive handle.
Software is the New Hardware
We often forget that these units are basically computers strapped to a power line. If your app starts lagging, you’ll need to dive into troubleshooting ev charger connectivity problems before the unit loses its ability to receive critical safety patches. I always recommend learning how to update your charger software without calling a technician so you can stay ahead of bug fixes that improve load management. Looking toward the future, I predict we will see a massive shift toward bidirectional charging (V2H). Your current installation is a stepping stone. By following panel upgrade strategies to meet ev charging code requirements in 2025, you are setting the foundation for a home that can be powered by your car during a blackout. Stop thinking about this as just a plug; think of it as a bridge to your home’s future energy independence. My challenge to you: Grab a torque wrench this weekend and double-check those breaker lugs against the specific torque settings that prevent panel fires during high-load charging. It’s the single best thing you can do for your home’s safety.
What Most Manuals Forget to Tell You About Post Mounts
Reflecting on my own journey, the biggest lightbulb moment wasn’t about the electrical code—it was about the environment. Wood isn’t just a static piece of lumber; it’s a sponge that reacts to every rainstorm and heatwave. I learned that checking your lag bolts after the first full season of use is non-negotiable. You’d be surprised how much a 6×6 can shrink in the summer heat, leaving your charger just a tiny bit looser than it was on day one. Another hard truth? Most people overlook the impact of sun exposure on their conduit. If you don’t use UV-rated materials, that ‘solid’ setup will become brittle within five years. Avoiding the most common diy mistakes in home charger installations means thinking about how the installation will look and feel in 2030, not just next week.
My Go-To Gear for a Bulletproof Install
If you’re serious about doing this right, you need more than a standard screwdriver set. I never start a job without a high-quality torque wrench to ensure I’m hitting the specific torque settings that prevent panel fires during high-load charging. For the post itself, I highly recommend using structural timber screws with a built-in washer head; they provide far better clamping force than traditional bolts. I also keep a bottle of electronic contact cleaner handy—knowing how to clean the pins on your charging handle safely is the simplest way to prevent expensive repairs down the road. Finally, a decent infrared thermometer is worth its weight in gold for periodic safety checks on your breaker.
Building a Foundation for Your Future Energy Freedom
Installing your own charging station is more than just a convenience; it’s a major step toward taking control of your home’s energy ecosystem. Whether you are dealing with ev charger troubleshooting expert tips for common issues or planning for panel upgrades for ev chargers what you need to know, you are building something that adds tangible value to your property. Don’t be intimidated by the technical requirements or the depth of the concrete. By taking the time to how to verify code compliance for your ev charger installation, you ensure that your home remains a safe haven for your family and your new vehicle. You’ve got the knowledge, the tools, and the plan—now it’s time to get that post in the ground. Have you run into any unexpected issues with your local building inspector during your EV project? Let me know in the comments below!