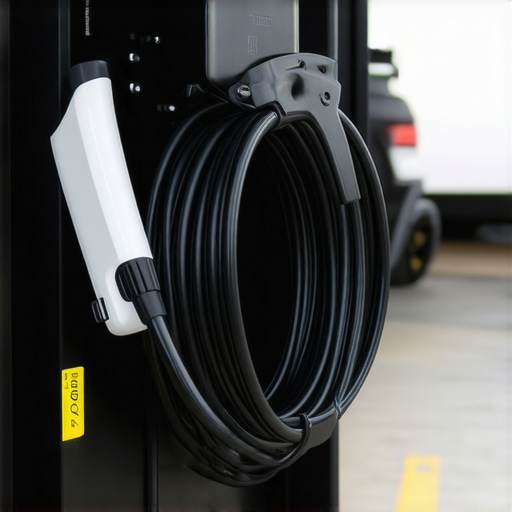
I stood in my driveway at 6:00 AM, wrestling with what felt like a frozen python. My EV charging cable, which is usually quite manageable, had turned into a rigid, unyielding rod of plastic that refused to coil. I actually felt the plastic creak as I tried to force it back onto the holster. It was a cold realization: if I kept doing this, I was going to break my car’s charging port or the cable itself. This isn’t just a minor inconvenience; it’s a mechanical failure waiting to happen. Today, I’m going to walk you through exactly why this happens and the simple steps you can take to keep your gear moving when the temperature drops. Have you ever felt like you were going to snap your charger handle off just to get it out of the car?
Stop Fighting Your Frozen Charging Cable Every Morning
The science behind a stiff cable is actually pretty simple, but the consequences are expensive. Most standard charging cables are insulated with PVC, which is great for cost-cutting but terrible for sub-zero mornings. When it gets cold, the molecules in that plastic lock up. I learned the hard way that forcing it is a recipe for disaster. A few winters ago, I ignored the resistance and shoved a frozen connector into my car, which led to a frustrating check charger warning on my dashboard. It turns out, I’d slightly bent one of the pins because the cable wouldn’t allow for a natural angle of entry.
The physical strain on your equipment is real. If you’re struggling with a cord that won’t bend, you’re also putting massive leverage on your home’s outlet or the internal wiring of your wall box. In extreme cases, this can lead to loose main lugs or cracked insulation that invites moisture in. If your charger is mounted inside, you might even find that a frozen cord can lead to mounting a charger on drywall without it ripping out becoming a serious concern due to the extra tension. According to research from the U.S. Department of Energy, extreme cold can increase the brittleness of standard polymers by over 300%, making them prone to cracking under even slight pressure. We need to look at why some EV chargers work better with cold weather and how you can avoid the ‘frozen snake’ syndrome altogether.
Does a High-End Cable Actually Make a Difference in the Snow?
You might think that ‘winter-rated’ is just a fancy way for companies to charge you an extra fifty bucks, but the material science says otherwise. High-quality cables use TPE (Thermoplastic Elastomer) instead of standard PVC. TPE stays flexible down to -40 degrees, while PVC starts turning into a brick at the freezing mark. Early in my EV journey, I made the amateur mistake of thinking I could bypass the issue by using an extension cord for Level 1 charging because it was thinner and ‘felt’ more flexible. Not only was that a massive fire hazard, but the thin insulation actually cracked within a week of use. Investing in the right hardware—or at least knowing how to protect what you have—is the only way to survive a northern winter without a trip to the repair shop.
Keep the Heat Where It Matters
To stop the ‘frozen snake’ syndrome, you have to treat your equipment with a bit of tactical warmth. If your charger is mounted outdoors, you are fighting a constant battle with the elements. I remember one particularly brutal February where I left my cable draped over a metal fence rail overnight. By 7:00 AM, the cold metal had leached every bit of residual heat from the cord, turning it into a literal ice sculpture. I had to bring the cable inside the house for twenty minutes just to get it flexible enough to reach the car. Now, I always make sure to plug in immediately after a drive. The residual heat from the car’s charging process keeps the handle and the cable end just a few degrees above the ambient air, which is often enough to prevent the dreaded lock-up. If you can’t avoid an outdoor setup, you must prioritize how to protect your outdoor ev charger from heavy rain and snow to keep moisture from entering the sensitive electronics.
The Right Way to Coil Without Cracking the Core
When plastic gets cold, it develops a ‘memory’ of the shape it was last held in. If you force a frozen cable into tight, aggressive circles, you are creating micro-fractures in the internal insulation. Think of it like a frozen garden hose; if you kink it, the damage is permanent. I use the ‘over-under’ method, which is a technique used by stagehands to keep massive power cables from tangling or fraying. By alternating the direction of the loops, you neutralize the internal tension of the copper strands. This is especially vital if you are already dealing with ev charger troubleshooting expert tips for common issues because a stressed cable is the leading cause of internal continuity breaks. Keeping the loops wide and loose is the best way to ensure your hardware lasts more than two seasons.
Don’t Let the Cold Pull Your Wall Box Apart
The weight of a heavy, frozen cable can act as a lever against your wall mount. In the summer, the cable drapes naturally, but in the winter, that rigid plastic can pull sideways or outward on the charger’s frame. I once saw a DIY install where the owner hadn’t accounted for this, and the constant tugging of a stiff 25-foot cord actually started to pull the mounting screws out of the siding. This is why following the guidelines for the best height for a wall-mounted charger to avoid cord strain is critical. By mounting the unit at chest height, you allow the cable to hang in a more vertical, natural orientation, reducing the torque on the internal connections. If those connections get loose, you’ll eventually face the problem of why your main lugs might be loose after a year of charging, which is a significant fire hazard.
Solve the Sticking Handle Before It Snaps
The most frustrating part of a winter morning is when the handle refuses to release from the car. This usually isn’t a software error; it’s a physical ice bridge that has formed inside the latch. I used to carry a small bottle of de-icer, but that can actually degrade the plastic over time. A better, long-term solution is applying a tiny amount of non-conductive dielectric grease to the mechanical latch (not the electrical pins!). This simple maintenance step is the pro’s secret for how to stop your charger handle from sticking in the port. If you find your car is particularly sensitive to the cold, it’s worth investigating why some EV chargers work better with cold weather than others, as some brands use internal heaters or specific latch designs to combat the freeze.
While we’re talking about hardware fighting the elements, let’s go a layer deeper into the electrical panel itself. Most homeowners assume that if their car isn’t charging at full speed, it’s just the ‘cold battery’ phenomenon. But here is a contrarian truth: your home’s electrical infrastructure might be the actual bottleneck, and a panel upgrade isn’t always the mandatory fix everyone claims it is. In my experience, homeowners rush into an expensive 200-amp service change when they could have simply used a load-management strategy. Learning how to use load shedding devices to avoid a full service upgrade can save you thousands while still meeting modern safety standards.
Can your current panel handle the 80% continuous load rule?
This is where the nuance of National Electrical Code (NEC) Article 625 comes into play. Most people don’t realize that an EV charger is classified as a ‘continuous load,’ meaning it draws full power for more than three hours. This requires your circuit breaker to be ‘derated.’ If you have a 48-amp charger, you absolutely must have a 60-amp breaker. If you ignore this, you’ll find that why your breaker gets hot to the touch during charging becomes a daily safety hazard. In winter, this heat is even more dangerous because the temperature differential between the freezing garage and the internal breaker components can lead to condensation and premature corrosion of the busbar.
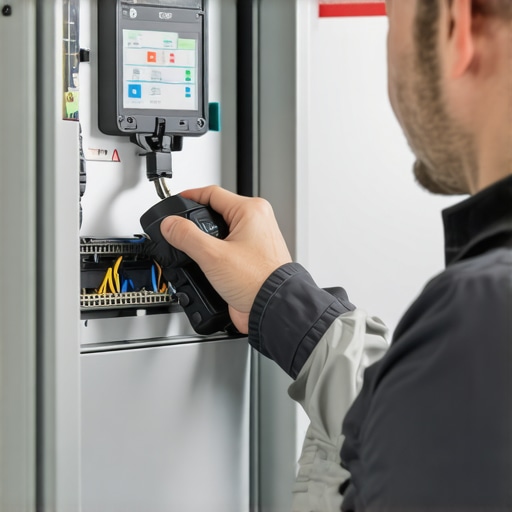
There is also a massive ‘oops’ factor when it comes to the hardware you choose. I’ve seen countless DIYers buy the cheapest NEMA 14-50 outlet they can find at a big-box store. Those $15 outlets are designed for ranges that cycle on and off, not for the relentless pull of an EV. If you use a consumer-grade outlet, it will eventually melt. You need a commercial-grade receptacle to handle the heat cycles, which is why how to pick a nema 14-50 outlet that wont melt under pressure is the most important research you can do before your install. Furthermore, if you are working with older infrastructure, ignoring code compliance essentials for ev charger installations in 2025 could void your homeowner’s insurance if a fire occurs.
The terminal mistake that fries motherboards in winter
Another nuance often missed is the ‘torque’ requirement. When the temperature fluctuates, metal expands and contracts. If your electrician didn’t use a calibrated torque wrench on your charger’s terminals, those connections will loosen over time. This leads to arcing, which is the primary reason the mistake that causes ev charger motherboards to fry during storms or even during normal operation occurs. A loose neutral wire can also cause voltage spikes that your car’s sensitive onboard charger won’t appreciate. Before you assume your charger is broken, check for troubleshooting ev chargers common compliance pitfalls and fixes to see if the issue is actually in the wiring. Have you ever fallen into the trap of thinking a bigger panel was your only answer, or have you experienced a ‘mystery’ charger failure? Let me know in the comments below.
I actually carry a compact FLIR thermal camera in my glovebox now. It might sound like overkill, but you can’t smell or hear a loose connection until the plastic starts to liquefy. Seeing a ‘hot spot’ on a 60-amp breaker during a peak session is the difference between a five-minute fix and an emergency call-out. If you aren’t ready to invest in thermal imaging, the next best thing is a dedicated digital torque wrench. I personally use the Klein Tools 56403 because it allows me to hit the exact inch-pound specifications required by the charger manufacturer. Remember, hand-tight isn’t ‘code-tight,’ and a loose lug is a fire waiting to happen. This level of precision is exactly upgrading your panel for better ev charging performance looks like in the real world.
Ditch the Guesswork with a Thermal Camera
The standard NFPA 70B (Recommended Practice for Electrical Equipment Maintenance) suggests that infrared inspections are the gold standard for preventing catastrophic failure in high-load systems. Your EV charger is the single most demanding appliance in your home, often running at 80% capacity for eight hours straight. By scanning your panel once a quarter, you can catch why your breaker gets hot to the touch during charging before the heat damages the busbar. If you see a temperature spike that exceeds 150°F at the terminal, shut it down. That’s a clear sign of oxidation or a loose connection that needs immediate attention.
How do I maintain my home charging station over time?
Maintenance isn’t just about the wires; it’s about the software and the physical interface. Once a month, I inspect the J1772 or NACS pins for any signs of blackening or pitting, which indicates arcing. I also make it a habit to check for software updates. Knowing how to update the firmware on your smart charging station is vital because manufacturers often release patches that improve thermal management or fix communication handshaking issues with newer car models. I also suggest keeping a small kit of the essential spare parts to keep for your home charging unit, such as a replacement holster or a spare gasket, so a minor crack doesn’t turn into a week of gas-station charging.
Why Bi-Directional Charging Will Change Your Panel Forever
Looking ahead, the next big shift isn’t just about faster charging—it’s about your car powering your house. Bi-directional charging (V2H) is the trend that will define the next five years. We are moving toward a reality where your EV is a giant rolling Powerwall. This will require even more robust panel upgrade strategies to meet ev charging code requirements in 2025, as your panel will need to handle two-way power flow. If you’re installing a charger today, you should be looking at how to add an ev charger without a 200 amp panel upgrade using smart load shedding, because the complexity of these systems is only going to increase. My advice? Go out to your garage tonight after your car has been charging for two hours. Touch the conduit. If it’s uncomfortably hot, you’ve got work to do.
The Hardest Lessons I Learned About Charging in the Snow
After a decade of electric driving, I’ve realized that winter maintenance is 90% preparation and 10% reaction. One of my biggest lightbulb moments was the ‘slack’ rule. I used to pull my cable tight to reach the car, but in the cold, that tension is a death sentence for your port. Now, I always leave a generous, loose loop to account for the plastic’s contraction. I’ve seen neighbors ignore this and end up needing ev charger troubleshooting expert tips for common issues because their internal contacts were literally pulled out of alignment by a stiff cord.
Another hard-earned insight: snow melt is your enemy. If you plug in while snow is still on the handle, it melts, runs into the latch, and then freezes solid an hour later. I now make it a habit to wipe down the connector with a microfiber cloth before every session. This simple step is just as important as ensuring code compliance when installing ev chargers because even a perfectly coded system can’t overcome a physical ice bridge. Finally, trust your ears. If you hear excessive buzzing, don’t ignore it. It could be a sign of thermal stress in the panel, leading you to wonder why your ev charger is causing your tv to flicker during peak winter loads.
My Essential Toolkit for Zero-Degree Charging
You don’t need a specialized laboratory, but these three items have saved my morning more times than I can count. First, a dedicated digital torque wrench (like the Klein Tools 56403) is vital for checking your panel lugs; a loose connection in the summer is a fire hazard in the winter. Second, I keep a digital copy of the latest standards for code compliance essentials for ev charger installations in 2025 to ensure my setup meets modern safety requirements. Lastly, I always keep a small stash of the essential spare parts to keep for your home charging unit, specifically a spare wall holster, because cold plastic is notoriously brittle and prone to snapping under pressure.
Protect Your Investment and Keep Your Gear Moving
Living with an electric vehicle in a northern climate doesn’t have to be a battle against the elements. By understanding the physical limits of your equipment and keeping a close eye on your home’s electrical health, you turn a potential morning disaster into a seamless part of your routine. Whether you are currently researching panel upgrades for ev chargers what you need to know or simply trying to survive the next blizzard, remember that a proactive approach is the best way to keep your EV charger running smoothly. Your car is a powerhouse of technology—don’t let a little ice stand in its way. Have you ever found yourself wrestling with a frozen cable, or did a breaker trip in the middle of a cold snap? Let me know your winter charging stories in the comments below!