I remember standing in my cramped utility room, tape measure in one hand and a heavy Level 2 charger in the other, feeling like a genius for finding the ‘perfect’ spot right next to the water heater. It was close to the panel, out of the way, and seemed like a no-brainer. Then my buddy, a retired inspector, walked in, took one look at my setup, and just started shaking his head. I had made the classic rookie mistake: I forgot that electricity and water—or gas—are the worst of neighbors. That afternoon was a wake-up call that sent me diving into the National Electrical Code (NEC) for weeks. Today, I want to share exactly what I learned so you don’t have to drill unnecessary holes in your drywall or, worse, create a fire hazard in your own garage. We are going to break down the clearance requirements, the ‘working space’ mandates, and the specific pitfalls that catch homeowners off guard every single year.
Stop Before You Bolt Your Charger Next to the Tank
Most of us look at a wall and see empty space, but an electrician looks at a wall and sees ‘zones.’ When I first started, I thought as long as the wires didn’t touch the pipes, I was golden. I was so wrong. One of the most common DIY mistakes in home charger installations is ignoring the dedicated space required for electrical equipment. According to the National Fire Protection Association (NFPA) in the NEC 110.26, you generally need a clear working space that is 30 inches wide, 3 feet deep, and 6.5 feet high. If your water heater encroaches on that box, you’ve already failed. I learned this the hard way when I realized why you should never mount your charger directly under a water pipe; even a tiny bit of condensation from a cold-water intake can drip into your expensive hardware over time. It’s not just about the distance; it’s about accessibility and preventing a ‘cascading failure’ where a plumbing leak turns into a full-blown electrical fire. Have you ever had to move a heavy piece of equipment because an inspector told you it was two inches too close to a gas line?
Is a Few Inches of Clearance Actually Worth the Hassle?
Many homeowners think these rules are just bureaucratic red tape designed to make life difficult. However, the reality is that these distances exist for the ‘worst-case scenario.’ If your water heater’s pressure relief valve blows, you do not want a jet of scalding water hitting a high-voltage circuit. You also need to ensure you are ensuring code compliance when installing ev chargers to maintain your home insurance validity. If you’re squeezed for space, you might need to look at panel upgrade strategies to meet ev charging code requirements in 2025, which often involve relocating circuits to safer areas. In my early days, I didn’t realize that even if the tank is electric, the proximity can cause ambient heat issues that lead to signs your main breaker is running dangerously hot. We’re going to look at the exact measurements you need to keep your home safe and your car charging smoothly.
Give Your Charger Six Feet of Breathing Room
Think of the NEC 110.26 working space like a ‘no-fly zone.’ You need a rectangle of clear air that is 30 inches wide, 36 inches deep, and 6.5 feet high directly in front of the charger. I remember a job in a tight two-car garage where the owner had a stack of heavy winter tires right where the charger needed to go. He argued that he could just move them when needed, but the inspector didn’t care about ‘intent.’ The space must be clear at all times. This isn’t just for you to plug in comfortably; it’s so an electrician can jump back if something arcs. When you are verifying code compliance for your ev charger installation, check the specific panel space requirements for a level 2 install first. If that water heater or a storage shelf clips even an inch of that 30-inch width, you’re looking at a teardown.
Stay Away from the Gas Meter
This is the one that gets people into real trouble. In my second year of doing this, I almost mounted a Tesla Wall Connector three feet from a gas regulator because it was the ‘cleanest’ spot for the conduit. My mentor stopped me just in time. Most local codes require a minimum of 36 inches of horizontal clearance from a gas meter or regulator. Why? Because gas regulators occasionally vent small amounts of gas. If your charger has a minor internal fault and creates a spark at the exact moment that regulator vents, your garage becomes a combustion chamber. Always check the exact distance your charger must be from the gas meter in your specific jurisdiction, as some local utilities demand five feet instead of three.
Don’t Let Your Panel Choke on the Load
Before you ever strip a wire, you have to know if your house can actually eat what the car wants to serve. Adding a 50-amp breaker to a 100-amp panel that is already running a central AC, an electric range, and a dryer is like trying to run a marathon while breathing through a straw. You need to sit down and calculate if your 100-amp service can handle a daily commute. I once saw a DIYer skip this step; every time his car started charging, his kitchen lights dimmed so low it looked like a seance was happening. It’s not just annoying; it’s a sign that the bus bars are struggling. If you’re at capacity, you might need to load balance your home electrical system without a full panel swap by using a smart energy management system.
Tighten Every Lug Like Your House Depends on It
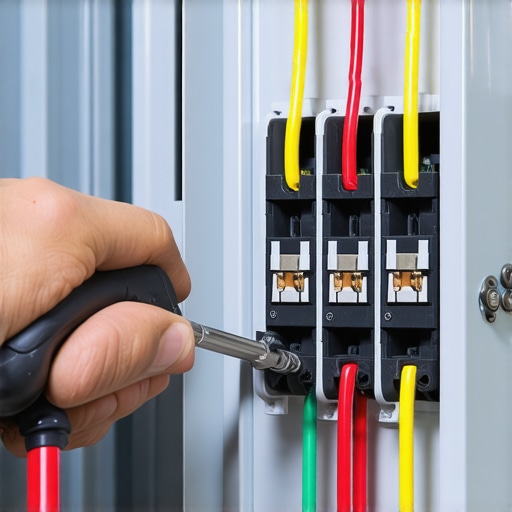
Even if your spacing is perfect, a loose connection is a silent killer. High-current loads like EV charging create immense heat. If a wire is slightly loose, that heat causes the metal to expand and contract until the connection becomes even looser, eventually leading to a fire. This is why you must use a torque screwdriver to meet the specific torque settings that prevent panel fires during high load charging. Hand-tight is never enough for a 50-amp continuous load. Also, make sure you verify your electrician actually used copper wire for the install. Aluminum can work, but it requires different torque and terminal ratings that most residential chargers aren’t built for. Stick with copper to ensure you don’t find signs your main breaker is running dangerously hot later on.
You’ve got the clearances down and the tape measure put away, but let’s dig deeper into the gear inside the box. Most people assume that if a charger comes with a plug, using an outlet is the most ‘flexible’ way to go. I actually disagree. In my experience, a NEMA 14-50 outlet is a weak point you simply don’t need. When you’re pulling 40 amps for eight hours straight, every mechanical connection—the plug blades, the socket tension—is a potential point of failure. I always advocate for the benefit of a hardwired charger over a NEMA plug because it eliminates those points of resistance entirely. According to a study by the Electrical Safety Foundation International (ESFI), nearly half of home electrical fires are caused by faulty or overloaded outlets and wiring; given that an EV is the highest continuous draw most homes will ever see, why add an extra socket to the mix?
Stop Treating Your Charger Like a Toaster
The ‘oops’ factor usually hits about three months after the install. I’ve seen homeowners buy the cheapest 50-amp breaker they could find at a big-box store, only to find it doesn’t quite seat right in their specific panel. Even if it ‘clicks’ in, using a different brand than your panel manufacturer can lead to micro-arcing. It’s why you need to know about the specific breaker brand that keeps tripping on level 2 chargers. It’s not just about the numbers on the handle; it’s about the physical metallurgy of the bus bar connection. If you aren’t careful, you’ll be looking for ev charger troubleshooting expert tips for common issues before your first tire rotation.
Why does your charger trip the GFCI while it is just sitting there?
This is a classic ‘nuance’ problem that drives people crazy. Many modern EV chargers have sensitive internal GFCI protection built into their circuitry. If you install a GFCI breaker in the main panel as well—which many local codes technically require for outlets—these two systems can ‘fight’ each other. You end up with ‘nuisance tripping’ where your ev charger trips the gfci even when not in use. This is where troubleshooting ev chargers common compliance pitfalls and fixes becomes an art form. You have to balance the inspector’s strict demands with the hardware’s engineering reality. Often, upgrading your panel for better ev charging performance means more than just adding space; it means choosing components that play nice together. If you find yourself constantly resetting a breaker that isn’t even hot, you’ve likely fallen into this dual-GFCI trap. Have you ever had a breaker trip for no apparent reason? Let me know in the comments.
Keep Your Connection From Melting with the Right Tools
I’ve spent too many Sunday mornings helping neighbors with ev charger troubleshooting expert tips for common issues because they treated their charger like a ‘set it and forget it’ appliance. If you want this setup to last 15 years, you need a different mindset and a few specific tools. I personally keep a Wera torque screwdriver in my garage drawer specifically for the charger lugs. Why? Because the NFPA 70B: Standard for Electrical Equipment Maintenance explicitly states that improper torque is a leading cause of electrical failure in high-load systems. A regular screwdriver relies on ‘feel,’ but a torque driver provides a calibrated click once you reach the exact inch-pounds required by the manufacturer. Every six months, I do a quick ‘sniff test’ near the panel and the charger—if it smells like ozone or burnt plastic, something is wrong. I also use a thermal camera attachment for my phone to see if my breakers are glowing under load. If you see bright purple spots on your bus bar, it’s time for upgrading your panel for better ev charging performance before that heat permanently damages your equipment.
How do I keep my charger running like new for the next decade?
The biggest enemy isn’t just internal heat; it’s the external environment. If your charger is mounted in a carport or near an open garage door, you need to be proactive. I’ve seen ants nest inside a wall connector and short out the main board because the owner didn’t check the seals. Use a soft brush and follow the guide on how to clean the pins on your charging handle safely once every season. Dust and light oxidation in those pins increase electrical resistance, which slows down your charging speed and generates extra heat at the handle. If you’re in a cold climate, check out these 3 maintenance tasks that keep your outdoor charger running through winter to prevent the heavy cable from cracking under tension.
Software is the New Copper
Most ‘smart’ chargers are really just tiny computers with high-voltage relays. When your app stops responding, it’s usually not a hardware failure; it’s your 2.4GHz Wi-Fi failing to penetrate the garage’s concrete or metal siding. I always suggest troubleshooting ev charger connectivity problems by checking your router’s signal strength at the mounting point before you even drill the first hole. If the connection is flaky, you might miss a critical firmware update that improves charging efficiency. Learning how to update your charger software without calling a technician is the easiest way to fix software bugs that the manufacturer discovered months after your purchase. I’ve seen updates actually solve ‘ghost’ tripping issues that homeowners originally blamed on their breakers.
Future Proofing Your Garage Energy
Looking ahead, we are moving toward Vehicle-to-Home (V2H) systems. Your car won’t just take power; it will feed your house during a blackout. This is why ensuring code compliance when installing ev chargers is so vital today. If your wiring isn’t up to the current standard, you’ll be blocked from these future bi-directional upgrades. I predict that by 2027, smart panels will be the norm, making panel upgrade strategies to meet ev charging code requirements in 2025 look like the first step in a much bigger home energy revolution. Grab your torque wrench and check those lugs this weekend—your future self will thank you for the five minutes of maintenance.
Why 30 Inches of Space is Non-Negotiable for Your Safety
I’ve learned the hard way that ‘eyeballing it’ is the fastest way to fail an inspection. One major lightbulb moment for me was realizing that the working space around your panel isn’t just for the electrician’s convenience; it’s a buffer for your home’s survival. If you’re struggling with a cramped utility room, don’t try to cheat the measurements. Instead, look into panel upgrade strategies to meet ev charging code requirements in 2025 that prioritize safe placement. I used to think a few inches didn’t matter until I saw a breaker arc—that space is there so you can get away from the flash. Another myth I often hear is that any ‘heavy duty’ wire will do; in reality, you must verify your electrician actually used copper wire for the install to avoid the oxidation and heat issues common with aluminum in high-load scenarios.
The Small Tools That Save Your Main Panel
If you’re taking this on yourself, I can’t recommend a calibrated torque screwdriver enough. It sounds like overkill until you realize that over-tightening can damage terminals just as much as a loose connection. I also suggest keeping the latest NEC handbook or a simplified guide nearby, specifically focusing on ensuring code compliance when installing ev chargers. For those who want to be proactive, a simple thermal leak detector can help you spot if a breaker is running hot before it ever trips. These are the small investments that prevent you from needing ev charger troubleshooting expert tips for common issues later down the road. I also keep a printed copy of my local permit requirements pinned to the garage wall to avoid any confusion during the final walk-through.
Build a Home Energy System That Lasts
At the end of the day, installing a charger is about more than just plugging in a car; it’s about modernizing your home for the next generation of energy. By taking the time to handle your panel upgrade correctly and respecting the clearances today, you are setting yourself up for a hassle-free transition to a more sustainable lifestyle. Don’t be afraid to ask for help or double-check a measurement—it’s always better to move a bracket now than to rewire a garage later. Your home is your biggest investment, and your EV is likely the second; treat them both with the respect they deserve by verifying code compliance for your ev charger installation before you flip that switch for the first time. Have you run into any surprising space constraints in your garage while planning your install? Let me know in the comments below!