It was 3:15 AM on a chilly Tuesday when my phone started buzzing with a frantic alert from my car’s app: “Charging Interrupted.” I groaned, threw on a bathrobe, and stumbled out to the garage, expecting a simple utility hiccup. Instead, I was hit by a sharp, chemical stench of burning plastic. I rushed over to the wall and saw my heavy-duty charging cable drooping slightly in the socket. When I pulled the plug, a wisp of gray smoke escaped, and the faceplate of my brand-new NEMA 14-50 outlet was warped, charred, and literally dripping. I had fallen into a classic trap, and it terrified me.
The Midnight Meltdown Is More Common Than You Think
When I first installed my home setup, I figured a plug is a plug. I bought a cheap receptacle online, hooked up the wires, and thought I was set for life. What I didn’t realize—and what many homeowners learn the hard way—is that EV charging is not like running a clothes dryer. Your dryer runs for an hour at a time; your electric vehicle draws massive, continuous current for eight hours straight while you sleep. This relentless electrical draw acts like a magnifying glass on any minor flaw in your system, turning tiny contact resistances into literal furnace-like heat.
Today, we are going to unpack exactly why these overnight meltdowns happen, how to diagnose the weak points in your garage, and how to fix this hazard before it puts your family in danger. If you are currently using a plug-in setup, you might even want to explore the critical difference between hardwired and plug-in chargers to see why eliminating the plug altogether is often the safest path forward.
Are EV Outlets Just Not Built for This Much Power?
It is easy to blame the vehicle or the outlet design itself, but the real culprit is almost always component quality and installation technique. Many standard-grade NEMA 14-50 receptacles sold at big-box hardware stores are meant for occasional appliance use, not the brutal duty cycle of a modern EV. According to safety research from the National Fire Protection Association (NFPA), sustained high-amperage continuous loads require commercial-grade, heavy-duty receptacles specifically designed to handle high thermal stress without degrading.
Early on, I made the classic mistake of using a cheap, fifteen-dollar residential-grade outlet. I also skipped a crucial step during installation: I did not use a torque wrench on the terminal screws. This resulted in loose connections that grew hotter with every single charging session. If your setup is currently showing signs of distress, it is vital to learn how to spot arc faults before they kill your charging session or worse, spark a fire. Have you ever walked out to your garage and noticed a strange hot plastic smell, or had your overnight charging sessions mysteriously cut short?
Step-by-Step Guide to Diagnosing and Fixing a Hot Charging Setup
To fix an overheating outlet, you have to treat your home electrical system like a high-pressure water pipe. If there is even a tiny restriction in the pipe, pressure builds up and creates friction. In an electrical circuit, that friction is resistance, and resistance instantly equals heat. When I finally decided to rebuild my garage setup after my near-miss, I realized I had to treat every single connection with surgical precision.
Ditch the Cheap Receptacle for an Industrial-Grade Beast
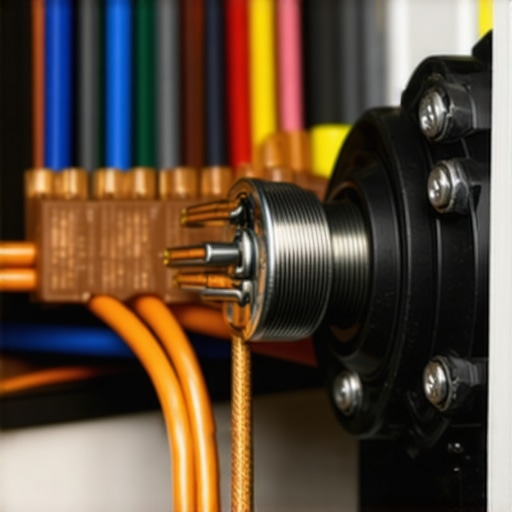
The first physical change you must make is replacing your builder-grade outlet. Standard fifteen-dollar outlets use spring-loaded pressure clips to hold the copper wire in place. Over time, the constant heating and cooling cycles cause these clips to lose their tension, creating a microscopic gap. This gap invites electrical arcing. You need a heavy-duty, industrial-grade receptacle like a Hubbell or Bryant NEMA 14-50, which uses robust clamp terminals to lock the wire down. When you make this physical upgrade, it is also the perfect time to ensure you are not making 3 small mistakes that turn your garage panel into a fire hazard.
Grab a Torque Wrench to Eliminate Loose Connections
I used to think tightening screws by hand until they felt snug was good enough. It wasn’t. When I rebuilt my connection, I actually looked up the manufacturer specification sheet and saw it required exactly 75 inch-pounds of torque. I bought a specialized torque screwdriver, set it, and was shocked by how much tighter I had to turn the screw compared to my manual estimation. Tightening by feel is a recipe for disaster because copper relaxes under heavy thermal loads. Taking the time to execute the forgotten torque test that prevents panel fires is the single most effective insurance policy you can have for your garage.
Verify Your Wire Gauge and Material
Another common bottleneck is the wire itself. Underestimating the load of an EV will lead to significant voltage drops and heat buildup. I once helped a neighbor troubleshoot his sluggish charging speeds and constantly hot conduit. When we pulled off his panel cover, I immediately saw the problem: the installer had run thin 8 AWG aluminum wire for a 40-amp continuous load. Aluminum expands and contracts much more than copper, which quickly leads to loose terminals. For a 50-amp circuit running a continuous 40-amp load, you should always run 6 AWG copper wire. If you suspect your installer cut corners, check out these 4 signs your electrician used the wrong gauge wire before your system suffers permanent thermal damage.
Assess Your Main Panel for Thermal Bottlenecks
Your outlet is only the final point of delivery; the power has to come from your main breaker panel. If your main panel is already operating near capacity, adding a continuous 40-amp or 48-amp load will cause the entire bus bar to heat up. During my troubleshooting phase, I started noticing that my main breaker felt warm to the touch even when the car wasn’t charging. I had to learn how to identify 5 signs your main breaker is overwhelmed by a new level 2 charger to prevent a total system blackout. In many older homes, the ultimate solution to this compounding heat issue is investing in strategic upgrades, which is why understanding panel upgrades for ev chargers: what you need to know becomes so critical for long-term safety and performance.
When it comes to high-amperage continuous loads, the electrical community is divided by a major misconception. Most homeowners, and even some general contractors, believe that simply passing a local municipal inspection means their system is 100% optimized and safe. But in my experience, meeting the bare minimum electrical code is actually a recipe for thermal stress and early component failure.
Why does a code-compliant EV charger setup still melt?
The National Electrical Code (NEC) is designed to prevent your house from burning down, not to ensure your equipment lasts for decades or operates at peak efficiency. For example, code allows for a standard 125% continuous load safety margin. However, when you run a Level 2 charger at 40 amps on a 50-amp circuit for eight hours straight, the sustained ambient heat inside your panel can hover just below the thermal trip limit of a standard breaker. According to studies by the National Fire Protection Association (NFPA), standard thermal-magnetic breakers degrade prematurely when subjected to these persistent, near-limit temperatures. They can become “soft” over time, leading to nuisance trips or failing to trip altogether when a real fault occurs.
This is what I call the “inspector’s trap.” The inspector signs off because the wire gauge matches the breaker size on paper, but they do not test the actual thermal dynamics of your specific panel under load. If you are currently dealing with mysterious shutoffs, you need to understand ev charger troubleshooting expert tips for common issues to determine if your hardware is silently cooking itself from the inside out.

Another nuance that most DIYers and standard installers overlook is how different manufacturers handle bus bar connections. Even if you perform the forgotten torque test that prevents panel fires, a breaker from one manufacturer crammed into a competitor’s panel panel can create microscopic gaps. This mismatched contact point increases resistance, causing your main breaker to run hot. If you want to dive deeper into system health, learning how to verify code compliance for your ev charger installation with an eye for these manufacturer mismatches will save you thousands of dollars down the road.
Ultimately, the safest way to bypass these thermal bottlenecks is to eliminate the plug-in receptacle entirely and opt for a hardwired unit. If you must use an outlet, ensure you are not relying on standard residential-grade materials. Have you ever fallen into this trap? Let me know in the comments below.
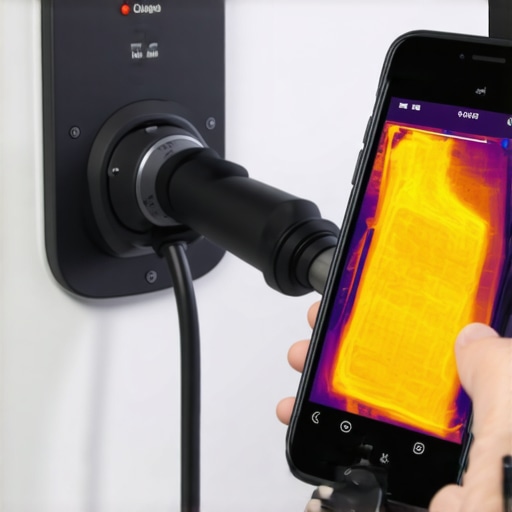
To keep your charging setup operating at peak performance year after year, you cannot just set it and forget it. I highly recommend investing in a specialized tools kit that includes an infrared thermal camera. Personally, I use a Flir One Gen 3 thermal camera that plugs directly into my phone. Every six months, while my car is drawing maximum power, I plug in the camera and scan my garage wall, the outlet, and the main electrical panel. Under a thermal lens, a loose connection glows like a miniature sun before it ever has a chance to melt plastic or trip a breaker. If you notice any unusual temperature spikes during your scan, you may need to look into ev charger troubleshooting expert tips for common issues to pinpoint the exact failing terminal.
How do I maintain my EV charging hardware over time?
Beyond thermal scans, physical maintenance of the physical connections is paramount. Every year, shut off the breaker, open up the outlet box or hardwire terminal, and run the forgotten torque test that prevents panel fires. Copper wire actually cold-flows under continuous pressure, meaning those tight screws can naturally loosen over time. Additionally, make sure to inspect your connector handle for dirt and moisture. Keeping the contact pins clean prevents micro-arcing inside your car’s charge port. If your handle gets dirty, you can learn how to clean your charger ports without damaging them using quick-evaporating electronic contact cleaners.
As the EV landscape evolves, maintaining code compliance will only get more complex. For instance, the upcoming changes outlined in the National Electrical Code (NEC) Article 625 updates point toward mandatory smart load management and dynamic shedding. In the very near future, home charging will shift away from static circuits toward automated systems that balance the load dynamically. To keep your home ahead of these changes, you can explore upgrading your panel for better ev charging performance to accommodate smart technologies. If you want to ensure your setup is fully optimized right now, I highly challenge you to try the thermal camera scan this weekend—it is the ultimate way to catch hidden hazards before they catch you off guard.
3 Unexpected Realities of Long-Term Level 2 Home Charging
Over the years of maintaining my own setup and helping dozens of other EV owners troubleshoot their systems, I have run into a few harsh truths that you won’t find in the glossy product brochures. First, a high-amperage continuous draw behaves more like commercial manufacturing equipment than any standard home appliance. If you treat your charger like a computer monitor or a microwave, you are setting yourself up for failure. Second, even the most expensive smart features cannot save a poorly terminated physical wire. Your app might tell you everything is green, but physical resistance does not report to software until a total failure occurs. Finally, investing in premium hardware early is infinitely cheaper than paying for an emergency electrical visit at 2:00 AM after a melt down.
If you suspect your current setup is showing signs of thermal distress, taking a proactive approach is your only real defense. It helps to understand ev charger troubleshooting expert tips for common issues before you find yourself stranded with a dead battery or a damaged garage wall.
The Essential Diagnostic Kit for Every EV Garage
You do not need to be a licensed commercial electrician to monitor the health of your charging circuit, but you do need the right diagnostic tools. Here are the three non-negotiable items I keep in my garage cabinet to ensure my system stays safe:
- A Compact Thermal Imaging Camera: This is the single most valuable investment you can make. Scanning your panel and receptacle under full load instantly reveals high-resistance connections that are completely invisible to the naked eye.
- A Certified Torque Screwdriver: Because copper wires naturally cold-flow and loosen under sustained thermal cycles, periodically running the forgotten torque test that prevents panel fires keeps your terminal connections locked down exactly to manufacturer specifications.
- A Non-Contact Voltage Tester: This simple safety tool ensures the power is completely killed before you ever open up a faceplate to inspect your wiring gauge or physical terminals.
Take Control of Your Garage Safety Today
Preventing an electrical fire in your garage does not require luck; it requires deliberate, methodical maintenance and a refusal to cut corners with cheap materials. By upgrading to industrial-grade components, ensuring your wire gauge is correct, and choosing a dedicated hardwired connection whenever possible, you can sleep soundly knowing your home is charging safely through the night. If you suspect your panel is already operating at its thermal limit under load, it may be time to evaluate upgrading your panel for better ev charging performance to guarantee your system remains highly resilient.
Have you ever noticed your charging plug or garage breaker feeling unusually hot to the touch after an overnight charging session? Let me know in the comments below.