I was three hours into digging a trench across my flower bed, sweat stinging my eyes and my lower back screaming, when I heard that heart-stopping clink. I hadn’t hit a treasure chest. I had sliced right through a buried irrigation line because I was trying to save time by digging a shallow path. That moment of muddy frustration taught me a hard lesson: when it comes to electricity, ‘close enough’ is a recipe for disaster. I assumed a few inches of dirt offered plenty of protection, but the city inspector quickly set me straight. That single mistake cost me an entire weekend of re-digging and a very awkward conversation with my wife about why the lawn looked like a construction zone. Today, I am going to make sure you do not repeat my mistakes by breaking down exactly how deep you need to go to keep your home safe and your installation legal.
Stop Digging Until You Know These Numbers
If you are planning to run power to a pedestal or a detached garage, the depth of your trench is a critical safety requirement. This is not just about avoiding the lawnmower; it is about protecting your home from electrical fires and short circuits. We are going to look at the specific requirements for different materials so you can focus on ensuring code compliance when installing ev chargers without wasting energy on an unnecessarily deep hole. The National Electrical Code (NEC) Table 300.5 is the definitive guide for this, and it is surprisingly strict. For example, while rigid metal conduit can sometimes be buried just 6 inches deep, standard PVC requires much more cover to prevent accidental ‘dig-ins.’ According to the National Fire Protection Association, improper burial depth remains a leading cause of preventable outdoor electrical accidents.
Is all that extra digging really worth the sweat?
I get it. Shaving off six inches of depth feels like a massive win when you are battling tree roots and heavy clay. You might wonder if anyone will even notice. Trust me, they will. I once tried to take a shortcut by using liquid-tight conduit for outdoor charger exposed runs in a spot that legally required a deep-buried rigid pipe. It was a classic permit error that stops 40% of residential charging installs, and I had to rip the whole thing out and start over. Have you ever started a DIY project only to realize you were way out of your depth? I would love to hear your trenching horror stories—reach out and let me know if you are currently facing a stubborn inspector!
Pick the Right Material to Save Your Back
When I first started my backyard project, I thought I could just throw some wire in a hole and call it a day. I quickly learned that your choice of ‘armor’ dictates exactly how much manual labor you are signing up for. If you opt for Rigid Metal Conduit (RMC), you only have to go 6 inches deep. It is the heavyweight champion of protection, but it is expensive and a nightmare to bend. On the other hand, Schedule 40 PVC is the DIY darling because it is cheap and easy to work with, but the law says it needs 18 inches of cover. I once tried to muscle a 1-inch PVC pipe into a trench that was too narrow for the fittings, and I ended up snapping a joint halfway through the backfill process. It was a mess that taught me to always check the specific conduit size needed for a 50-amp circuit before buying my materials. If you are going the direct-burial route with UF cable (no conduit), you are looking at a full 24 inches. Think of it like this: the less physical protection the wire has, the more dirt you need to put between it and a stray shovel blade. 
Trench Depths That Keep the Inspector Happy
Digging is a game of inches, and the inspector will bring a tape measure. For most residential EV setups, that 18-inch mark for PVC is the sweet spot. However, if you are crossing under a driveway, the rules change—you are looking at 18 inches regardless of the conduit type to account for the weight of vehicles overhead. I remember one specific Saturday where I thought 15 inches ‘looked’ deep enough in the clay. The inspector arrived, poked his stick into the trench, and simply shook his head. I spent the next four hours hand-scraping three more inches of rock-hard earth. To avoid this, always aim for an extra two inches of depth to account for the bedding of sand you should place at the bottom. This prevents rocks from pressing against the pipe over time. This is also a great time to evaluate your capacity; often, upgrading your panel for better ev charging performance is necessary if you are adding a long outdoor run that pulls significant amperage.
Stop the Voltage Drop Before It Starves Your Car
Long trenches introduce a hidden enemy: resistance. Just like water loses pressure the further it travels through a garden hose, electricity loses ‘push’ over long distances. If your trench is over 100 feet, you might need to upsize your wire gauge to compensate for the voltage drop secret thats ruining your morning charge. I’ve seen chargers fail to even start a session because the voltage at the pedestal dropped below the car’s minimum threshold. While you are down there, pay close attention to your turns. Why your local inspector cares about conduit bending radius isn’t just about being picky; if those bends are too tight, you will never get the wire through. When you finally reach the panel, don’t just shove the wires in. Use a torque wrench on the lugs because the forgotten torque test that prevents panel fires is the final step in ensuring your hard work doesn’t go up in smoke.I’ve seen it a thousand times: a homeowner proudly shows me their 200-amp service panel and assumes they have unlimited headroom for a high-speed charger. But here is the truth that most DIY guides gloss over—available amperage is not the same as available capacity. Everyone says a 200-amp panel is the gold standard, but in my experience, a poorly balanced 200-amp panel is more dangerous than a well-managed 100-amp service. Even with a large main breaker, your existing high-draw appliances might already be pushing your system to the brink. This is where panel upgrade strategies to meet ev charging code requirements in 2025 become a necessity rather than a suggestion. If you skip a formal load calculation, you aren’t just risking a nuisance trip; you are risking a thermal event at the busbar. According to research by the Electrical Safety Foundation International (ESFI), nearly 20% of electrical fires in homes with updated panels are caused by ‘continuous load’ oversights, where the system wasn’t de-rated for devices that pull max power for hours on end, like your new EV. Knowing how to verify code compliance for your ev charger installation involves more than just looking at the breaker size; it requires a calculated look at your home’s total peak demand.
Will Your Grounding System Actually Void Your Warranty?
Many modern smart chargers are incredibly sensitive to ‘dirty’ power or weak grounds. I’ve visited several jobs where the charger was installed perfectly, yet it refused to initiate a session. The culprit? An old grounding rod that had corroded to the size of a pencil. This is the grounding rod mistake that voids your ev warranty because the car’s onboard computer detects the high resistance and shuts down the handshake to protect the battery. 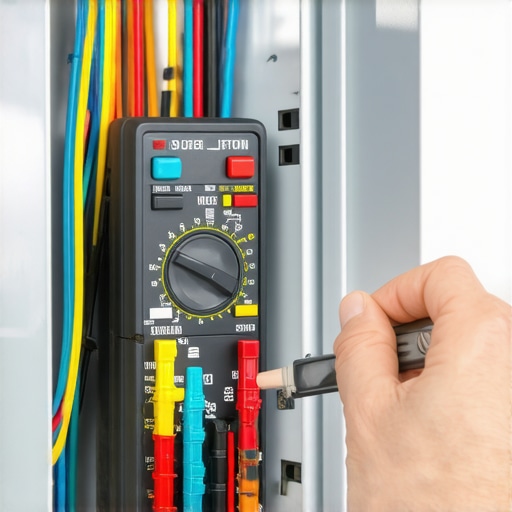 Beyond the ground, the biggest ‘trap’ I see is the handling of the neutral wire. Most people think ‘it’s just a return path,’ but the neutral wire error that fries car motherboards is a real, expensive nightmare. If that neutral connection isn’t seated perfectly, you can experience voltage swings that the car simply cannot handle. This is exactly why troubleshooting ev chargers common compliance pitfalls and fixes usually starts at the terminations, not the software. Finally, don’t just ‘snug’ the screws. You need a calibrated tool because the forgotten torque test that prevents panel fires is the only way to ensure those connections stay tight during the heat-cool cycles of daily charging. Have you ever fallen into this trap or had an inspector catch a minor grounding issue? Let me know in the comments.Once you have the wiring in place and the inspector is out of your hair, the real work of ownership begins. You cannot just ‘set it and forget it.’ I learned this the hard way when I noticed a slight discoloration on the plastic casing of a breaker after six months of heavy use. If I hadn’t been looking, that would have eventually turned into a costly service call. To prevent this, I swear by a few specific tools that most DIYers overlook. First, invest in a high-quality calibrated torque screwdriver, like a Wera or Wiha. You need to follow the specific torque wrench settings for a wall connector to a T. Why? Because thermal expansion is real. Every night your charger pulls 40+ amps, the wires heat up and expand; every morning they cool and contract. Over time, this ‘breathing’ can loosen a connection that felt solid on day one.
The Two Tools You Cannot Skip
Beyond the torque wrench, I always recommend a basic infrared thermal camera or even a cheap handheld laser thermometer. Once a month, while your car is drawing full power, point it at your breakers. If you see a temperature spike that looks significantly higher than the rest of the panel, you have a loose connection or a failing breaker. This is one of the most effective troubleshooting ev chargers common compliance pitfalls and fixes you can perform yourself. I once caught a terminal block that was hitting 160 degrees Fahrenheit just by doing a 30-second sweep with my FLIR camera. It saved me from a total system meltdown.
How Do I Keep My Charger Running Like New?
Maintenance isn’t just about the panel; it’s about the ‘business end’ of the cable sitting outside in the elements. If you live near the coast or in a humid climate, you have to know how to spot corrosion inside your outdoor charging pedestal before it ruins the electronics. I make it a habit to check the pins of my charging handle every time the seasons change. If you ever walk into your garage and wonder why your electrical panel smells like fish, shut the power off immediately—that is the smell of burning wire insulation and a sign that a ‘nuisance’ issue has become a fire hazard. According to the International Association of Electrical Inspectors (IAEI) in their ‘Electrical Inspection Manual,’ mechanical terminations under continuous load are prone to ‘creeping,’ which necessitates periodic re-verification of torque to maintain safety standards. 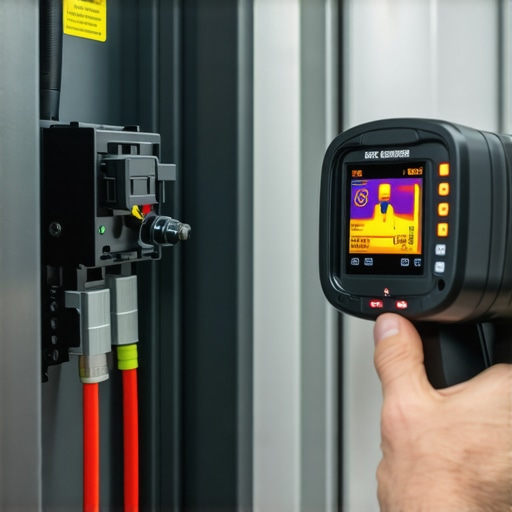
The Future Is Two-Way Traffic
Looking ahead, we are moving toward a world where your car doesn’t just take power—it gives it back. We are already seeing the rise of V2H (Vehicle-to-Home) technology. If you are doing an install today, think about how you might eventually want to learn how to use your ev as a backup home battery safely. This trend is going to make upgrading your panel for better ev charging performance even more valuable, as your electrical system becomes a bidirectional hub. I predict that within five years, the ‘standard’ install will include a smart gateway for automatic load shedding and grid-back-feeding. If you want to be ahead of the curve, I challenge you to do a thermal check on your panel this weekend while the car is charging. Grab a thermometer and see if any of your breakers are running ‘hot’—it’s the fastest way to verify your hard work is actually holding up.
Hard Lessons from My Muddy Backyard Trench
Looking back at my first attempt, I realize I spent way too much time worrying about the shovel and not enough about the system as a whole. First, I learned that ‘minimum depth’ is just that—a minimum. If you want true peace of mind, dig a little deeper. I also realized that the permit saving trick for older homes with fuse boxes often comes down to clear communication with your inspector before the first shovel hits the dirt. Lastly, don’t ignore the soil type; heavy clay can shift your conduit, so using a sand base is a lifesaver for long-term stability and avoiding future ground faults.
My Must-Have Kit for a Flawless Install
You don’t need a truckload of tools, but you do need the right ones. I never start a job without my Wera Torque Screwdriver. It is the only way to guarantee you are following the specific torque wrench settings for a wall connector and avoiding heat-related failures that plague DIY setups. I also highly recommend a non-contact voltage tester and a high-quality conduit bender if you aren’t using PVC. Using the right gear helps you stay focused on how to verify code compliance for your ev charger installation without getting frustrated by cheap hardware that breaks halfway through the project.
#IMAGE_PLACEHOLDER_E#
Build a System That Lasts a Lifetime
The transition to electric driving is one of the biggest changes you will make to your home’s infrastructure. It is easy to get caught up in the technicalities of wire gauges and trench depths, but remember that you are building something that powers your daily life. By prioritizing code compliance and regular maintenance, you ensure that your investment is safe for years to come. Don’t be afraid to take it slow and double-check your work—your future self will thank you for every extra inch you dug and every lug you torqued to perfection. Have you run into any ‘rocky’ surprises or unexpected roots while digging your own electrical trench? Let me know in the comments below!