I’ll never forget the morning I nearly tripped over my own charging cable while carrying three bags of groceries into the kitchen. My brand-new Level 2 charger was mounted exactly three feet too far from my car’s port. It looked great on the wall, but in practice, it was a disaster. I’d spent all that money on the unit, only to realize I hadn’t thought about how I actually move through my garage. It was a classic failure of planning. I just wanted it on the wall, and I didn’t think about the dance I’d have to do every single evening just to get the juice flowing.
Stop Putting Your Charger in the Easiest Spot
Most of us want to take the path of least resistance. When the electrician shows up, it’s tempting to just point at the wall closest to the main service panel and say, ‘Put it there.’ I get it. It’s cheaper and faster. But your garage isn’t just a box; it’s a workspace, a storage unit, and a high-traffic zone. If you place that station without thinking about your car’s charge port location or how you’ll maneuver around the vehicle, you’re going to regret it within a week. You need to tell if your electrical panel can actually handle a level 2 charger before you even pick up a drill.
Is a Level 2 Install Actually Worth the Headache?
You might be sitting there thinking, ‘Maybe I’ll just stick with the slow Level 1 plug-in.’ I felt that way for a month after my first installation fail. But the truth is, once you get the placement right, the convenience is life-changing. The real hurdle isn’t the technology; it’s the logistics. I made a huge mistake early on by ignoring the working space violation that fails more ev panel inspections than almost anything else. I tucked my charger behind a stack of storage bins, thinking I’d save room. Not only was it a pain to reach, but an inspector would have laughed me out of the room.
Think About Your Cable Reach and Daily Routine
Before you commit to a spot, park your car in the garage exactly how you do every night. Now, imagine walking from the driver’s side to the trunk, and then to the house door. Does the charging cable cross any of those paths? If it does, you’ve picked the wrong spot. According to the National Fire Protection Association (NFPA), home electrical fires are often linked to damaged cords or improper equipment use. A cable that gets stepped on or driven over because it’s poorly positioned is a major hazard. You also have to consider how to verify code compliance for your ev charger installation to ensure you aren’t creating a ‘trip and fall’ zone that also violates local safety standards. Have you ever found yourself doing a ‘jump-rope’ move over your charging cable just to get to your lawnmower? It shouldn’t be that way. We’re going to find a spot that works for your car and your life.I remember helping my neighbor, Dave, after he tried to DIY his Tesla Wall Connector. He had bought the cheapest wire he could find at a big-box store—it was way too thin for a sustained 48-amp load. Halfway through his first charge, his garage smelled like a burning hair salon. We caught it before the insulation turned to liquid, but it was a terrifying reminder that getting it to work isn’t the same as getting it right.
Map Out Your Electrical Backbone First
Before you even buy a mounting bracket, you need to understand the math of your home. A Level 2 charger isn’t just another appliance; it is a massive, continuous load that taxes your system for hours. You have to look into panel upgrades for ev chargers what you need to know if you are working with an older 100-amp service. Think of your electrical panel like a highway: if you add a massive semi-truck to a road already full of rush-hour traffic like your HVAC and electric oven, everything grinds to a halt.
Check If Your Panel Has the Guts for Level 2
Open your panel door and look past the breakers. You aren’t just looking for an empty slot; you are looking for total capacity. Many homeowners assume an empty space means they are good to go, but you actually need to tell if your electrical panel can actually handle a level 2 charger before you commit to the install. If your main breaker is only 100 amps and you have high-draw appliances, you might be at the limit. In those cases, I often recommend learning how to load balance your home electrical system without a full panel swap to avoid a massive service upgrade bill.
Skip the Plug and Go Hardwired
I am a huge advocate for hardwiring your unit directly into the circuit. While a NEMA 14-50 outlet seems convenient, the benefit of a hardwired charger over a nema plug is immense. Plugs can loosen over time, creating heat and potentially melting the outlet housing. When you hardwire, you remove a major point of failure. It also allows for higher charging speeds. Most plugs are capped at 40 amps of delivery, but a hardwired connection can often handle 48 or even 80 amps, depending on your vehicle’s capabilities.
Don’t Skimp on the Copper
If you are running a 60-amp circuit to get that fast 48-amp charging rate, you cannot use standard Romex you found in the bargain bin. You need to verify the exact gauge of wire you need for a 60 amp circuit to prevent voltage drops and overheating. I have seen 3 common wire sizing errors that melt breakers during long charging sessions more times than I can count. Using 6-gauge THHN wire in conduit is usually the gold standard for these runs because it handles heat better than jacketed cables.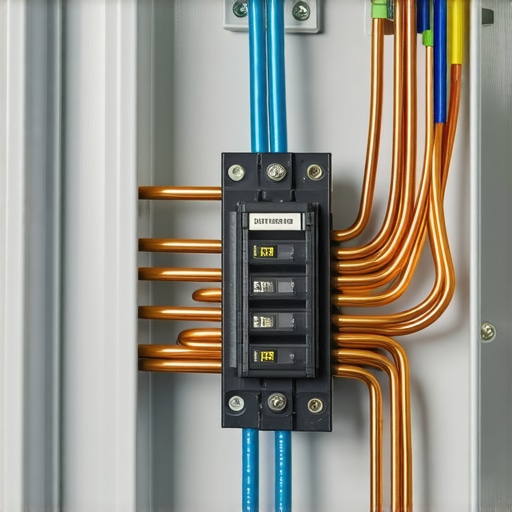
Tighten Every Screw to Spec
Here is the part that even pro electricians sometimes rush: the torque. It sounds trivial, but the forgotten torque spec that fails half of all panel inspections is a real safety concern. If those lugs aren’t tightened to the exact inch-pounds specified by the manufacturer, they will expand and contract as they heat up during a five-hour charging session. Over time, that creates a loose connection which leads to arcing. Taking the time for ensuring code compliance when installing ev chargers means you can sleep soundly while your car fills up in the garage without worrying about a fire.Everyone tells you that load management is a magic fix for a small service panel. In my experience, relying solely on software-based load balancing is a gamble that often masks underlying thermal stress on your busbars. While it’s true you can learn how to load balance your home electrical system without a full panel swap, you shouldn’t use it as an excuse to ignore the physical health of your hardware. A common trap I see is the ‘Double GFCI’ headache. Most modern Level 2 chargers have sensitive Ground Fault Circuit Interrupter (GFCI) protection built right into the motherboard. However, if your local inspector forces you to install a GFCI-protected breaker in the panel, these two systems can ‘fight’ each other, leading to mysterious nuisance trips that occur for no apparent reason. If you find your unit keeps shutting down, check if you are double-protecting a circuit that only needs one master. You should review troubleshooting ev chargers common compliance pitfalls and fixes before you start swapping out expensive hardware.
Why Does My Charger Speed Drop Randomly in the Middle of the Night?
It’s usually not a grid issue; it’s thermal throttling. The National Electrical Code (NEC) Article 625.42(B) allows for adjustable settings, but if your wire is slightly undersized or your connections aren’t perfect, the heat builds up until the charger forces a lower amperage to prevent a fire. This is why upgrading your panel for better ev charging performance is often more about reliability than just raw power. I’ve seen homeowners spend weeks chasing software bugs when the real culprit was a loose neutral wire in the electrical panel causing voltage imbalances.  These ‘ghost’ problems are the hardest to catch. Even a perfectly mounted unit will struggle if the internal backbone isn’t verified. Have you ever fallen into this trap where you thought it was a software glitch but turned out to be a hardware limit? Let me know in the comments. Before you finalize everything, make sure you know how to verify code compliance for your ev charger installation to avoid a costly ‘do-over’ after the inspector leaves. If you are feeling overwhelmed by the math of panel capacities, check out panel upgrade strategies to meet ev charging code requirements in 2025 for a roadmap to a safer setup.I’ve learned the hard way that a Level 2 charger isn’t a ‘set it and forget it’ appliance. If you treat it like a toaster, you’re in for an expensive surprise. My secret weapon is a FLIR thermal camera. You can see things the human eye—and even a standard voltmeter—will miss until it’s too late. When your car is pulling 48 amps, any tiny bit of resistance turns into a heat lamp. I use mine to spot a dangerous heat build up in your ev charging cable before the insulation starts to degrade. I remember a client who thought their charger was defective because it kept cutting out at 2 AM. We scanned the panel and found the main busbar hitting 160 degrees Fahrenheit because the breaker wasn’t seated perfectly. That’s a fire hazard, not a software bug.
See the Heat Before You Smell the Smoke
You don’t need a professional-grade rig; even a basic smartphone thermal attachment works wonders. It’s the most reliable way of ensuring code compliance when installing ev chargers because it proves your connections are physically sound under load. I’ve caught several ev charger troubleshooting expert tips for common issues just by scanning my panel once a quarter. If you notice the real reason your charging handle feels hot to the touch, it’s often because the internal resistance is climbing at the contact point.
How do I maintain my charging gear over the long haul?
Maintenance is mostly about cleanliness and torque. I keep a can of high-quality electronic contact cleaner and a set of nylon brushes in my garage. You need to know how to clean the pins on your charging handle safely because road salt, dust, and even humidity can create a thin film of oxidation on the pins. According to the Society of Automotive Engineers (SAE) J1772 technical specifications, the electrical interface depends on low contact resistance to prevent thermal runaway. If those pins get dirty, the handle gets hot, and your charging speed will inevitably throttle to protect the car. #IMAGE_PLACE_HOLDER_D#
Scrub Your Pins to Save Your Port
Beyond the physical hardware, the software is where most modern headaches live. I’ve seen so many people call an electrician when they really just needed a router reboot or a firmware push. If you’re dealing with troubleshooting ev charger connectivity problems, check your Wi-Fi signal strength at the mounting point first. Most chargers have tiny internal antennas. I always tell my friends to learn how to update your charger software without calling a technician because manufacturers push out ‘handshake’ fixes for new vehicle models all the time. If your charger suddenly stops talking to your EV after a car software update, a firmware flash on the charger side is usually the cure.
The Future of Home Power is Two-Way
Looking ahead, we’re moving toward Vehicle-to-Home (V2H) technology where your car acts as a giant battery for your house. This will make maintenance even more critical because the hardware will be working twice as hard—charging at night and discharging during peak hours. This increased duty cycle means those initial torque specs and cooling requirements are no longer optional. My big tip for you today: Tonight, after your car has been charging for at least two hours, carefully touch the charging handle. If it feels significantly hotter than a warm cup of coffee, stop the session and inspect those pins for debris or wear immediately.
What My Third Failed Inspection Taught Me About Code Compliance
I used to think that as long as the lights stayed on, the job was done. My third inspection failure changed that perspective entirely. First, never underestimate the inspector’s obsession with clear labeling; if your panel isn’t marked with the exact amperage and circuit location, you’re likely to fail. Second, I realized that the most common DIY mistakes in home charger installations usually stem from overconfidence in ‘good enough’ connections. Finally, grounding isn’t just a safety wire; it is active protection for your car’s sensitive electronics. I’ve seen 3 grounding errors that kill ev charger motherboards before the first year is up, and they are almost always preventable with a little patience.
The Survival Kit for Your High-Voltage Setup
To keep everything running smoothly, I rely on a few specific tools that go beyond the basic screwdriver. I swear by my Torque Screwdriver; without it, you are just guessing at the tightness of your lugs, which is the fastest way to cause a localized heat event. I also keep a FLIR Thermal Camera attachment for my phone to check why your main breaker runs hot during level 2 charging. For the academic side, the NEC 2024 Handbook is my personal bible for staying current on regulations. Lastly, a can of electronic contact cleaner is essential for maintaining those handle pins so you never deal with mysterious thermal throttling.
Stop Guessing and Start Charging Safely
Installing a high-power station is a major milestone in home ownership, but it is the attention to the ‘invisible’ details that separates a shaky install from a professional-grade setup. When you prioritize code compliance and take the time to audit your own work, you aren’t just following rules; you’re protecting your family and your vehicle. If you want to breeze through the process, make sure you know how to pass your electrical inspection on the first visit so you can spend more time on the road and less time in the garage fixing mistakes. Have you ever had an inspector flag something you thought was perfect? Let me know your ‘do-over’ story in the comments below!