I was so proud of my DIY setup. I had spent the entire weekend wrestling with conduit and felt like a total champion for getting the charger mounted exactly where I wanted it. But three weeks later, during a particularly humid Tuesday morning, I walked into the garage and heard a faint, rhythmic plink… plink… plink. My cold water main was sweating, and those droplets were landing right on the top casing of my brand-new Level 2 charger. I thought it was sealed well enough to handle a little moisture. I was wrong. That ‘minor’ condensation eventually found its way into the housing, leading to one of the most common DIY mistakes in home charger installations I have ever seen—and it was my own fault. Today, I am going to share exactly why you need to keep your high-voltage gear away from your plumbing and how to find a safer spot that keeps your warranty intact. Have you ever looked at your garage ceiling and realized your plumbing is a lot closer to your electronics than you thought? [image placeholder]
Water Pipes Are a Ticking Time Bomb for Your Circuit
Gravity never takes a day off. When you mount a charger directly under a water pipe, you are essentially playing a game of Russian Roulette with your home’s electrical system. Even if that pipe is not leaking today, things change. Pipes sweat in the summer. Seals fail. Joints weep. Water and electricity are the ultimate ‘frenemies’—they are drawn to each other, but the results are always catastrophic for your wallet. According to data from the National Fire Protection Association (NFPA), electrical failures or malfunctions remain a leading cause of home fires, and introducing moisture into high-voltage equipment like a 40-amp or 50-amp charger significantly spikes that risk. It is not just about the charger dying; it is about preventing a short circuit that could travel back to your main panel.
Is a little condensation really that dangerous?
You might think a few drips of sweat from a cold pipe won’t hurt a rugged plastic casing. However, most EV chargers are not NEMA 4X rated for constant water exposure; many are only NEMA 3R. While 3R is built to handle falling rain, it is not designed for water pooling on the top edge or running down the backplate into the wall penetration. When you are ensuring code compliance when installing EV chargers, the inspector is not just looking at your wire gauge. They are looking at the environment. If they see a water source directly above an electrical enclosure, you are going to fail that inspection faster than you can say ‘short circuit.’ I had to learn the hard way that the code-required safety distance between a charger and a sink or water source exists for a reason.
Find a Dry Home for Your High-Voltage Hardware
The goal is to keep your equipment bone-dry, even during the worst plumbing mishaps. Before you drill that next hole, look up. If there is a copper or PVC pipe running overhead, move your mounting point at least a few feet to the side. Taking the time to find the best spot in your garage for a level 2 install now will save you the heartbreak of a fried motherboard later. Trust me, explaining to your spouse why the car won’t charge because the ‘pipe sweated’ is a conversation you want to avoid.
Map Out Your Dry Zones Before Drilling
Identifying the perfect spot is not just about where your car’s charge port lands; it is about anticipating every possible leak in your garage. I recommend a ‘blue tape survey.’ Take a roll of painter’s tape and mark every vertical line directly beneath a water pipe, drain line, or HVAC condenser line. These are your ‘No-Go Zones.’ If you are looking at how to verify code compliance for your ev charger installation, you will find that physical protection and environmental separation are non-negotiable. I once saw a guy mount his unit right next to a utility sink. He thought it was fine because it was ‘indoors,’ but every time he washed his hands, soap and water splashed the casing. He spent months troubleshooting ev charger connectivity problems because moisture had corroded the communication pins before we finally moved it to a bone-dry wall. 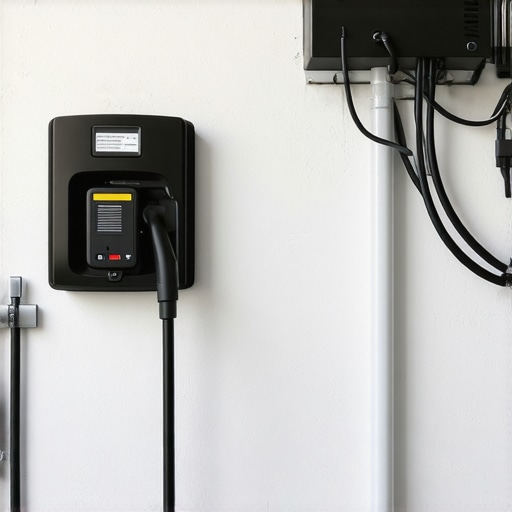
How to Know If Your Panel Needs a Boost
Before you commit to a location, you have to look at the ‘brain’ of your house. Think of your electrical panel like a highway; if it is already packed with traffic from your AC, oven, and dryer, adding a 50-amp charger is like trying to merge a massive semi-truck into the fast lane during rush hour. You might need to look into upgrading your panel for better ev charging performance if your current service is under 200 amps. If you skip this, your main breaker will start singing a low hum every time your car starts its midnight snack.
The Hardwired Advantage for Long-Term Safety
While plug-in models are popular, a hardwired connection is often the gold standard for safety. It eliminates a major point of failure—the outlet itself. When you are ensuring code compliance when installing ev chargers, hardwiring also allows for higher amperage settings in many jurisdictions. It significantly reduces the risk of the ‘melting outlet’ syndrome that plagues many DIYers who use cheap, non-industrial grade receptacles.
Stop Hidden Heat Before It Melts Your Port
Once the hardware is on the wall, your job is not quite done. You need to monitor the thermal output. High-voltage charging creates a lot of energy that naturally turns into heat. Every few weeks during the first month of use, safely feel the charging cable and the area around the circuit breaker. You are learning how to spot a dangerous heat build-up in your ev charging cable before it becomes a fire hazard. If the cable is too hot to hold comfortably, you likely have a resistance problem or a loose connection. You should also double-check that you know how to ground your ev charger according to the latest standards, as a poor ground is a silent killer for sensitive vehicle electronics. It is far better to catch a loose neutral wire now than to deal with the aftermath of a ‘thermal event’ in your garage later.
We need to talk about the ‘Open Slot Myth’ because it is the single most common reason for failed inspections and flickering lights. Most DIYers look at their electrical panel, see two empty vertical spaces, and assume they are ready for a Level 2 install. But here is the hard truth: physical space is not the same as electrical capacity. I have seen panels with plenty of room physically that were already running at 95% capacity during peak hours. If you just slap a 50-amp breaker in there without performing a proper load calculation, you are essentially asking your main breaker to fail under stress.
Physical Slots Do Not Guarantee Power Capacity
Everyone tells you that as long as you have the room, you are good to go, but in my experience, the ‘busbar’ tells a different story. If your home still runs on a 100-amp service, adding a high-draw EV charger can push your system past its limit. This is often why your main breaker hums when the ev is plugged in; it is literally vibrating from the magnetic stress of an overcurrent condition. Before you touch a screwdriver, you need to learn how to calculate if your 100 amp service can handle a daily commute. According to the Electrical Safety Foundation International (ESFI), overloading aged circuit breakers is a primary contributor to residential electrical fires. It is much cheaper to spend a few minutes on math than to replace a scorched busbar later.
Why does the car charge fine for an hour and then stop?
This is a sophisticated nuance that trips up even seasoned enthusiasts. It is usually not the charger; it is the thermal trip curve of your breaker. Cheap or aging breakers can become ‘weak’ over time. As they heat up from the continuous 40-amp draw, they trip even if you haven’t technically hit 50 amps. This is where ev charger troubleshooting expert tips for common issues become vital. You might think it is a software glitch, but it is often just physics. If you are stuck, you should look into how to load balance your home electrical system without a full panel swap using smart energy management modules that throttle the car when the dryer kicks on.
Watch Out for the Double-Tap Trap
One of the ‘traps’ I see most often in older homes is the ‘double-tapped’ breaker. This happens when someone tries to jam two wires into a single breaker terminal to save space. It is a major code violation because it creates a loose connection that generates massive heat. When you are ensuring code compliance when installing ev chargers, you must check for this. A loose wire is more than a nuisance; the hidden danger of loose neutral wires in your electrical panel can lead to voltage surges that fry your car’s sensitive onboard inverter. Always use a dedicated circuit, and always torque your connections to the manufacturer’s specific inch-pound rating. Have you ever fallen into the ‘open slot’ trap or found a double-tapped breaker in your panel? Let me know in the comments. If you are unsure about your current setup, it is worth looking at panel upgrade strategies to meet ev charging code requirements in 2025 to ensure your home remains a safe place to plug in.
Stop Heat Before It Stops Your Commute
Once you have cleared the hurdle of code compliance and installation, the real work shifts to long-term reliability. I’ve realized that a charger isn’t a ‘set it and forget it’ appliance like a microwave. It’s moving high current for hours on end, which leads to physical wear and tear. One tool I swear by is a basic infrared thermometer—or, if you’re feeling fancy, a thermal imaging attachment for your phone. Every few months, I take a reading of the breaker while the car is pulling its full 48 amps. If I see temperatures spiking above 140°F (60°C) at the terminals, I know I have a loose connection or a breaker that is starting to fail. Learning how to spot a dying breaker before it shuts down your charging session is the difference between waking up to a full battery and being stranded with 10% charge. Beyond thermal monitoring, you absolutely need a torque screwdriver. Most DIYers just ‘hand tighten’ until it feels snug, but the National Electrical Code (NEC) Section 110.14(D) requires a calibrated tool to hit specific inch-pound ratings. If you’re slightly off, the connection will loosen over time as it expands and contracts, which is exactly how you end up troubleshooting ev chargers common compliance pitfalls and fixes months after you thought the job was finished.
How do I maintain my home charging station over time?
Maintenance is mostly about cleanliness and thermal management. You should periodically check the actual J1772 or NACS handle. Dust, spider webs, and even slight oxidation on the brass pins can increase resistance. I use a can of compressed air and a specialized contact cleaner to keep the connection crisp. Knowing how to clean the pins on your charging handle safely is a five-minute job that prevents expensive damage to your car’s inlet. Additionally, don’t ignore the digital side of things. Most modern chargers are basically computers on walls, and firmware bugs can cause ‘phantom’ charging interruptions. I always check for manufacturer updates via the app. If you’re struggling with the interface, you can usually find ways how to update your charger software without calling a technician to save yourself a service call fee.
The Future of Your Garage Is Bidirectional
Looking ahead, we are moving toward a world where your car isn’t just a sink for power—it’s a reservoir. Systems like Ford’s Intelligent Backup Power are pushing us toward Vehicle-to-Home (V2H) technology. This makes ensuring code compliance when installing ev chargers even more complex because you’re essentially installing a mini-power plant. According to the technical guidelines from the SAE International J1772 standards committee, the standardization of bidirectional hardware will eventually require every home to have a smart gateway. If you are already looking into panel upgrades for ev chargers what you need to know, think about future-proofing for this shift now. Moving forward, keeping things running will involve more networking and software logic than just tightening lugs. My advice? Grab a thermal pen this weekend and scan your panel while the car is charging. Catching one hot wire today could save your entire house tomorrow.
Completing your installation is a massive milestone, but the journey to a reliable, safe charging experience doesn’t end when the permit is signed. Over the years, I have discovered that the real challenges appear after the first thousand miles. Here is the insider knowledge I wish someone had handed me on day one.
[image placeholder]
Three Hard Truths About Living with a Level 2 Charger
I learned the hard way that high-voltage circuits behave differently than the rest of your home’s wiring. First, ‘Cold Creep’ is a real phenomenon where thermal expansion and contraction can actually loosen your connections over several seasons. If you don’t periodically re-torque your lugs, you are inviting resistance and heat. Second, you should never ignore a ‘burnt fish’ smell near your garage; that is the chemical signature of melting insulation and a primary sign of ev charger troubleshooting expert tips for common issues. Finally, remember that your capacity changes with the seasons. Your panel might handle the charger perfectly in the spring, but once the air conditioners start pulling hard in July, you might finally understand why your main breaker hums when the ev is plugged in.
My Personal Toolkit for Electrical Peace of Mind
To keep my system running without a hitch, I rely on a few specific tools and resources that go beyond the basic screwdriver. I always keep a calibrated torque wrench in my garage because ensuring code compliance when installing ev chargers requires precise pressure on every terminal. I also recommend every EV owner own a simple infrared thermometer; it is the fastest way of how to spot a dying breaker before it shuts down your charging session by checking for heat spikes at the panel. For technical questions, I always refer back to the NFPA 70 Handbook, which provides the ‘why’ behind the rules, making it easier to spot troubleshooting ev chargers common compliance pitfalls and fixes before they become dangerous.
You Are Now Your Own Best Electrical Inspector
By taking these steps, you have moved from a casual user to a steward of your home’s energy system. You have the power to monitor, maintain, and protect your investment for the long haul. EV ownership is as much about the infrastructure in your garage as it is about the car in your driveway. Stay vigilant, keep your connections tight, and enjoy the peace of mind that comes with a professionally managed home charging setup. Have you ever noticed your garage lights flickering slightly when your car begins its midnight charge? Let me know in the comments below!