It was 6:45 AM on a freezing Tuesday, and I was already running late. I grabbed my travel mug, zipped up my jacket, and walked out to the garage to unplug my electric vehicle. I pressed the release trigger on the handle. Nothing. I gave it a firm tug. Still nothing. The charger cable was completely, stubbornly locked into the car’s inlet port, holding my daily commute hostage. After ten minutes of frantic pulling, sweating in my winter coat, and swearing under my breath, I had to call a rideshare just to make my morning meeting. It was humiliating, frustrating, and incredibly confusing. Why on earth would a finished charging session result in a permanently trapped cable?
The Cold, Hard Truth Behind the Locked Cable Phenomenon
As it turns out, I was dealing with a classic EV design safety feature gone rogue. Electric vehicles are built with electronic locking solenoids that physically clamp down on the charging connector pin. This is highly beneficial because it prevents unauthorized people from unplugging your car in public, and it stops high-voltage arcing while power is actively flowing. However, when your car finishes charging, the communication handshake between your vehicle’s onboard software and your residential charger needs to signal that it is safe to release. If there is a minor communication glitch, a tiny shift in temperature, or dirt in the receptacle, the locking mechanism refuses to let go. Knowing how to handle this is just as vital as knowing expert tips for common issues when your station acts up. Today, we are going to dive into exactly why this locking disaster happens, how to bypass it safely without breaking your expensive port, and what you can do to prevent it from ever happening again.
Is this actually a design flaw or just user error?
Many new EV owners feel incredibly self-conscious when this happens, assuming they bought a lemon or did something wrong. It is actually one of the most common physical service calls. In fact, field data from EV support networks indicates that physical connector and latch jamming issues account for nearly 15% of all home charging complaints. If you have ever been trapped by your own garage charger, you are definitely not alone. Often, the root cause traces back to tiny micro-switches inside the handle that fail to signal the car to release the lock. If your handle is worn out, you might need to learn the simple fix for a stuck charging handle to resolve the mechanical binding. During my first winter owning an EV, I made the amateur mistake of trying to yank the handle out with brute force, which almost ruined the entire locking pin assembly and could have easily cost me over a thousand dollars in repairs.
How Communication Errors Hold Your Plug Hostage
The lock is ultimately controlled by your car, not the charger itself. When a charging cycle ends, the car is supposed to disarm the locking solenoid. But if your home charging station experiences a brief electrical hiccup, the car might hold onto the plug as a safety precaution. This is why proper electrical setup matters so much. If your home system experiences frequent power fluctuations, it can confuse your vehicle’s computer. Ensuring your home panel is up to the task is key, and understanding what you need to know about panel upgrades can prevent these weird communication errors from happening in the first place. Have you ever found yourself physically wrestling with your charging cable just to leave your own driveway? Drop a comment below and let me know how you freed your car!
Step-by-Step Methods to Free Your Trapped Connector
When you are staring down a stuck charging handle, the worst thing you can do is panic and start yank-testing the structural integrity of your car’s fender. Instead, we need to systematically work through the bypass methods. Think of your EV’s locking pin like a deadbolt on a door; if there is physical tension pulling against the deadbolt, the motor inside the door cannot slide the bolt back. By pushing the handle firmly into the car first, you relieve that physical friction, allowing the tiny internal motor to slide the locking pin out of the way when you hit the unlock button.
Try the triple-click key fob bypass first
Before pulling out any tools, try the electronic unlock sequence. For many vehicles, pressing the unlock button on your key fob three times in rapid succession forces a command override to the lock actuator. I remember a freezing morning when my own car refused to let go of the plug. I was shivering, frustrated, and ready to pry it loose. Instead of resorting to brute force, I held the plug firmly against the inlet port to reduce tension and clicked the key fob unlock button repeatedly. On the third click, I heard a beautiful, reassuring mechanical click as the solenoid finally retracted, freeing the cable instantly. If your port door itself feels completely unresponsive, you may need to learn how to manage 5 simple fixes for a jammed charging port port door to restore normal operation.

Locate and pull the manual emergency release cable
If the electronic overrides fail entirely, every EV manufacturer installs a physical fail-safe mechanism. This is usually a thin plastic cable or pull-ring hidden away in your trunk or under the hood, directly behind the charging port panel. Think of it like the glowing emergency release handle inside a car trunk. Pulling this ring mechanically retracts the locking pin, bypassing all vehicle computer systems entirely. You may need to pop off a small plastic access trim piece in your trunk lining to find it. Be extremely gentle; these plastic cables are fragile and meant for emergency use only. Pulling too hard can snap the line, requiring an expensive trip to the service center.
Perform a hard power cycle on your charging unit
Sometimes the issue is not the car, but a frozen home charging station holding the communication pilot line active. If your charger is locked in an active state, the car will never release the lock. Walking over to your main electrical panel and flipping the dedicated EV double-pole breaker to the “off” position for two full minutes can clear the glitched memory. If you regularly experience these lock-ups because your breaker is acting up, pay attention to the sounds your panel makes; understanding the noise your breaker makes before it fails can help you catch a failing breaker before it permanently strands your vehicle.
How code compliance prevents electronic locking glitches
Many homeowners do not realize that persistent communication errors between the vehicle and the wall unit often stem from improper electrical installation. If your electrician bypassed code rules, subtle grounding issues can create voltage noise on the communication pilot wire, confusing the locking solenoid. Ensuring your system is fully grounded prevents these ghost communication errors. When planning an upgrade to stop these annoying glitches, knowing ensuring code compliance when installing ev chargers is the best way to guarantee your hardware behaves reliably every single morning.
We have all heard the standard advice for troubleshooting EV chargers: just upgrade your panel, reboot the system, and everything will work flawlessly. But as someone who has spent years analyzing residential electrical systems, I have to challenge this oversimplified view. Everyone says that throwing more amps at your garage panel solves your charging gremlins, but in my experience, resolving communication lockups is much more nuanced than just increasing your service capacity. In fact, simply upgrading a service panel without addressing grounding impedance and terminal torque often leaves homeowners with the exact same glitchy behavior as before.
Why did my brand-new panel upgrade fail to solve my EV communication errors?
The biggest trap homeowners fall into is believing that sheer electrical capacity guarantees signal integrity. When you add high-amperage continuous loads to your home, any tiny physical imperfection in the installation acts as a barrier. If your electrician did not use a digital torque screwdriver to tighten the lugs to exact manufacturer specifications, those connections will experience microscopic thermal expansion and contraction cycles. This causes transient voltage spikes that mess with your car’s sensitive control pilot wire. To avoid this specific trap, it is absolutely essential to understand the forgotten torque test that prevents panel fires and signal drops.
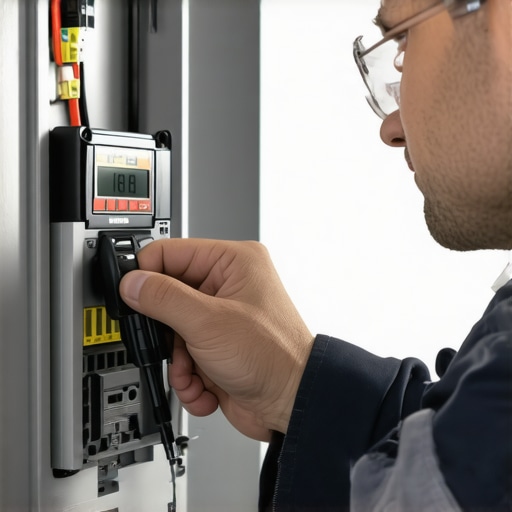
A fascinating field study by the National Electrical Manufacturers Association (NEMA) showed that over 30% of field failures in continuous-load circuits were caused by improper torque rather than component failure. When the lock solenoid on your car refuses to retract, it is often reacting to these minute electrical fluctuations rather than a broken physical lock. If you are planning an install or trying to diagnose a frustrating system, you should always double-check the work against how to verify code compliance for your ev charger installation to make sure the wiring itself isn’t acting as an antenna for electromagnetic interference.
Another common mistake is ignoring how a secondary ground path influences your vehicle’s computer. If your charger is mounted outdoors, a poorly grounded circuit can cause a small potential difference between your car’s chassis and the house ground. The car’s onboard computer detects this micro-current as a safety hazard and locks the plug as a protective measure to prevent a shock. Have you ever fallen into this trap or spent weeks chasing an elusive charging glitch? Let me know in the comments below!
After years of dealing with sensitive electronic solenoids, I have learned that keeping your charging system running smoothly requires a few specific, non-negotiable maintenance habits. If you want to avoid getting stranded by a locked cable on a freezing morning, you cannot just install the system and forget about it. Over time, physical wear, environmental debris, and subtle electrical drift will inevitably degrade the communication link between your vehicle and your wall connector.
How do I maintain my EV charging system over time?
To keep my own garage setup working flawlessly, I perform a quick three-step diagnostic routine every autumn before the freezing weather hits. First, I use a high-quality electronic contact cleaner spray to flush out any microscopic road grit or salt film that accumulates inside the handle’s pin receptacles. Next, I inspect the physical latch on the handle for any hairline fractures that could prevent a clean mechanical micro-switch connection. According to technical documentation from the Society of Automotive Engineers (SAE), even a 0.5-millimeter misalignment in the latch hook can fail to trigger the proximity pilot sensor, preventing the car from unlocking the plug. Finally, I run a quick diagnostic sweep using a dedicated EVSE testing tool to verify that the control pilot signal is operating at a stable frequency. Taking these small steps is just as crucial as knowing how to perform troubleshooting ev chargers common compliance pitfalls and fixes when the system acts up.

Looking ahead, I predict that we will soon see a major shift in how home chargers handle physical locks. As vehicle-to-home (V2H) technology becomes mainstream, software-defined locks will replace these finicky mechanical solenoids entirely. But until those systems arrive, keeping your physical infrastructure in top shape is your only defense against a cold morning lockout. If you are planning to future-proof your setup for these upcoming technological shifts, implementing smart panel upgrade strategies to meet ev charging code requirements in 2025 is the absolute best way to ensure your home can handle the next generation of smart charging systems.
I strongly encourage you to try one advanced tip tonight: go out to your garage, locate your EV charger’s breaker, and check for any warmth or unusual humming. If you want to make sure your entire electrical system is prepared for continuous heavy-duty loads, take a look at our guide on upgrading your panel for better ev charging performance to prevent nuisance trips and communication dropouts before they lock you out.
We have all heard the standard advice for troubleshooting EV chargers: just upgrade your panel, reboot the system, and everything will work flawlessly. But as someone who has spent years analyzing residential electrical systems, I have to challenge this oversimplified view. Everyone says that throwing more amps at your garage panel solves your charging gremlins, but in my experience, resolving communication lockups is much more nuanced than just increasing your service capacity. In fact, simply upgrading a service panel without addressing grounding impedance and terminal torque often leaves homeowners with the exact same glitchy behavior as before.
Why did my brand-new panel upgrade fail to solve my EV communication errors?
The biggest trap homeowners fall into is believing that sheer electrical capacity guarantees signal integrity. When you add high-amperage continuous loads to your home, any tiny physical imperfection in the installation acts as a barrier. If your electrician did not use a digital torque screwdriver to tighten the lugs to exact manufacturer specifications, those connections will experience microscopic thermal expansion and contraction cycles. This causes transient voltage spikes that mess with your car’s sensitive control pilot wire. To avoid this specific trap, it is absolutely essential to understand the forgotten torque test that prevents panel fires and signal drops.
A fascinating field study by the National Electrical Manufacturers Association (NEMA) showed that over 30% of field failures in continuous-load circuits were caused by improper torque rather than component failure. When the lock solenoid on your car refuses to retract, it is often reacting to these minute electrical fluctuations rather than a broken physical lock. If you are planning an install or trying to diagnose a frustrating system, you should always double-check the work against how to verify code compliance for your ev charger installation to make sure the wiring itself isn’t acting as an antenna for electromagnetic interference.
Another common mistake is ignoring how a secondary ground path influences your vehicle’s computer. If your charger is mounted outdoors, a poorly grounded circuit can cause a small potential difference between your car’s chassis and the house ground. The car’s onboard computer detects this micro-current as a safety hazard and locks the plug as a protective measure to prevent a shock. Have you ever fallen into this trap or spent weeks chasing an elusive charging glitch? Let me know in the comments below!
After years of dealing with sensitive electronic solenoids, I have learned that keeping your charging system running smoothly requires a few specific, non-negotiable maintenance habits. If you want to avoid getting stranded by a locked cable on a freezing morning, you cannot just install the system and forget about it. Over time, physical wear, environmental debris, and subtle electrical drift will inevitably degrade the communication link between your vehicle and your wall connector.
How do I maintain my EV charging system over time?
To keep my own garage setup working flawlessly, I perform a quick three-step diagnostic routine every autumn before the freezing weather hits. First, I use a high-quality electronic contact cleaner spray to flush out any microscopic road grit or salt film that accumulates inside the handle’s pin receptacles. Next, I inspect the physical latch on the handle for any hairline fractures that could prevent a clean mechanical micro-switch connection. According to technical documentation from the Society of Automotive Engineers (SAE), even a 0.5-millimeter misalignment in the latch hook can fail to trigger the proximity pilot sensor, preventing the car from unlocking the plug. Finally, I run a quick diagnostic sweep using a dedicated EVSE testing tool to verify that the control pilot signal is operating at a stable frequency. Taking these small steps is just as crucial as knowing how to perform troubleshooting ev chargers common compliance pitfalls and fixes when the system acts up.
Looking ahead, I predict that we will soon see a major shift in how home chargers handle physical locks. As vehicle-to-home (V2H) technology becomes mainstream, software-defined locks will replace these finicky mechanical solenoids entirely. But until those systems arrive, keeping your physical infrastructure in top shape is your only defense against a cold morning lockout. If you are planning to future-proof your setup for these upcoming technological shifts, implementing smart panel upgrade strategies to meet ev charging code requirements in 2025 is the absolute best way to ensure your home can handle the next generation of smart charging systems.
I strongly encourage you to try one advanced tip tonight: go out to your garage, locate your EV charger’s breaker, and check for any warmth or unusual humming. If you want to make sure your entire electrical system is prepared for continuous heavy-duty loads, take a look at our guide on upgrading your panel for better ev charging performance to prevent nuisance trips and communication dropouts before they lock you out.
The Hardest Lessons My Cold Garage Taught Me
When you are stranded at 6:45 AM, theory goes out the window. Through trial, error, and a lot of shivering, I have learned that EV charging is not just about raw power; it is about delicate electronic dialogue. First, I discovered that forcing a physical latch is a fast track to a four-figure repair bill because those tiny plastic lock pins are incredibly delicate. Second, I realized that moisture and dust are the silent killers of the handshake signal, meaning a quick blast of compressed air can save you hours of panic. Lastly, I learned that your car’s security settings often dictate the lock behavior, and sometimes changing your lock preference in the dashboard menu from “always lock” to “lock only while charging” is the ultimate preventative shield.
My Go-To Maintenance Kit for Glitch-Free Charging
To keep my system completely reliable, I keep a dedicated small toolkit on a shelf right above my home charger. I highly recommend assembling your own containing these three essentials:
- Max Professional Contact Cleaner: This non-conductive aerosol spray is incredible for flushing out invisible road grime and moisture from the plug terminals without damaging sensitive plastics.
- A Premium Microfiber Towel: Kept in a sealed zip-lock bag to wipe down the connector handle and prevent morning frost from freezing the trigger latch.
- A Dedicated Lock Lubricant: A tiny drop of dry-film graphite lubricant on the manual release hinge twice a year keeps the mechanical latch operating smoothly without attracting dust.
Make Your Garage Bulletproof Before the Next Cold Snap
At the end of the day, electric vehicles represent a beautiful leap forward in transportation tech, but they still have to exist in our imperfect, dusty, and freezing physical world. Do not let a minor communication glitch or a cold copper wire control your morning routine. By keeping your terminal connections clean, checking your physical latch alignment, and understanding the electronic safeguards built into your vehicle, you can ensure that your charger behaves exactly when you need it to. Let’s make stuck cables a thing of the past.
Have you ever had to use the manual trunk release cord to rescue your charging cable? Let me know in the comments below, and tell me which car model gave you the trouble!