It is 6:45 AM on a freezing Tuesday morning. I am standing in my driveway in my slippers, clutching a travel mug of coffee, and staring in absolute disbelief at my car. I pressed the dashboard button, tapped the key fob, and even gave the little plastic flap a gentle, encouraging nudge, but nothing happened. My EV charging port door was completely jammed shut, and my battery was sitting at a nerve-wracking twelve percent. I was officially stuck. That helpless feeling of being locked out of your own car’s fuel tank is exactly why I wanted to talk about this today. We buy these high-tech machines only to be defeated by a tiny, stubborn piece of plastic or a speck of road grit.
Today, we are going to walk through the most common reasons your port door refuses to budge and how to get it open safely without scratching your paint or breaking the delicate internal latch. You do not need an expensive trip to the dealership for this. In fact, most of these issues are incredibly easy to resolve right in your own garage with things you already have lying around. Let us get your car back in business so you can plug in and get on with your day.
The Day I Learned My Lesson the Hard Way
I will be the first to admit that I have made some silly mistakes. Years ago, when I encountered my very first stuck charge port door, I lost my patience. I grabbed a flathead screwdriver from my toolbox, wrapped it in a thin paper towel, and tried to pry the door open. *Snap.* Not only did I scratch the clear coat, but I also broke the delicate plastic actuator rod inside. A simple, free fix instantly turned into a costly replacement. It was a classic rookie mistake, much like the common blunders people make when troubleshooting EV chargers without checking the basics first. I learned the hard way that patience and a gentle touch will save you hundreds of dollars and a massive headache.
Is a stuck port door actually a sign of a bigger electrical failure?
Many EV owners immediately panic and assume a jammed door means their entire onboard charging system or home wall connector has fried. Rest assured, it is almost always a mechanical hiccup rather than a catastrophic electrical meltdown. According to automotive engineering data compiled by the Idaho National Laboratory, physical wear on external vehicle trim and latch mechanisms is far more common than high-voltage component failure under normal operating conditions. Most of the time, the culprits are simple road debris, frozen condensation, or a misaligned latch pin rather than an issue requiring a massive panel upgrade or deep electrical diagnostics.
Why Do These Flaps Get Stuck in the First Place?
Before we start poking around, we need to understand what we are fighting against. Your port door is exposed to the absolute worst of the elements: highway salt, torrential rain, freezing slush, and pollen. Over time, this grime works its way into the hinge pivot and the spring-loaded plunger. If you have ever experienced the simple fix for a stuck charging handle, you know how easily outdoor grime can seize up moving parts. When the electric actuator tries to pull the latch back, the friction is simply too high, and the door stays locked. Have you ever walked out to your car in the morning only to find yourself locked out of your charging port? Drop a comment below and let me know how you handled it—or if you ended up calling an Uber in a panic like I almost did!
Step-by-Step Recovery Methods for a Frozen or Jammed Flap
When you are standing in the driveway with a frozen or jammed flap, panic is your worst enemy. Think of your vehicle’s locking pin like a small deadbolt on a home entry door. If you pull on the door while trying to turn the key, the deadbolt binds in the strike plate and refuses to retract. Your EV’s motorized pin operates under the same physical constraint. Prying at the flap only increases the friction on that tiny internal pin. Instead, you need to neutralize that friction.
Try the Two-Finger Pressure Technique
I remember a freezing winter morning last January when my own charging port seemed permanently fused. My battery was sitting on empty, and the lock motor was just making a weak clicking sound. Instead of grabbing a tool, I firmly pressed directly over the latching mechanism with my thumb to relieve pressure on the internal pin, and simultaneously hit the unlock button on my key fob. The relief was instant: a loud click, and the door popped open. Relieving that physical tension allows the tiny electric actuator to slide back freely. If you find the mechanism is acting up regularly or you hear no clicking at all, you might be dealing with a wider power issue. It is always wise to check the quick reset trick for non-responsive charging ports to ensure the car’s computer hasn’t simply glitched. 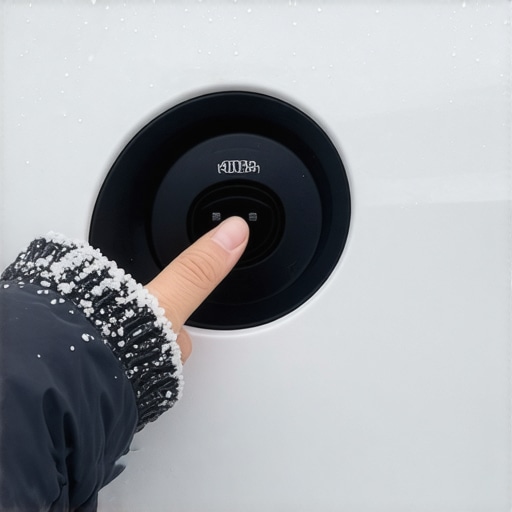
Locate Your Car’s Hidden Manual Release Cable
When manual pressure fails, it is time to bypass the electric motor entirely. Almost every electric vehicle has a physical failsafe built into the trunk or under the hood. This is a mechanical pull-string, often bright green or orange, designed specifically for emergencies. On my vehicle, it is hidden behind a small plastic access panel on the interior wall of the trunk, right behind where the charge port sits. Finding this cable can save you a massive headache, much like knowing how to find the data port on your smart charger when troubleshooting connectivity issues. Give that cable a gentle but firm tug; you will hear a mechanical snap as the latch releases, allowing the door to swing free.
Clear Away Ice and Hidden Debris Safely
If the lock mechanism is clicking but the door is physically frozen shut by ice or road salt, do not use boiling water. The extreme temperature shock can crack your paint, warp the plastic housing, or short out the delicate electronics inside. Instead, fill a plastic ziplock bag with warm water and hold it against the door like a warm compress. This melts the ice safely without getting moisture inside the electrical contacts. Once you get the door open, make sure to dry the area completely. You should also take a moment to review how to clean your charger ports without damaging them so that road salt and grit do not build up and cause the mechanism to seize up again next week.
The Deeper Reality of EV Troubleshooting Misconceptions
While most drivers focus on manual overrides and physical ice-removal hacks, advanced troubleshooting is where many enthusiasts go wrong. The common belief is that a stuck charger door is always a simple mechanical alignment issue or a frozen lock. Everyone says to just keep pushing the door or cycling the lock button, but in my experience, continuously forcing a stuck actuator without diagnostic context can permanently fry the motor. This is why we must dig deeper into the physical and electrical realities under the hood.
When you repeatedly trigger the key fob while the latch is physically bound, you draw excess current through the vehicle’s low-voltage circuit. If you are not careful, you can turn a minor sticky latch into a complex electrical fault. For those looking to diagnose broader charging failures, falling into troubleshooting EV chargers errors by overlooking simple physical blocks can lead to misdiagnosing a simple car issue as a larger charger failure. It is critical to recognize where the vehicle’s physical limits end and the electrical grid’s limits begin.
Are you overlooking the code compliance trap during home installation?
One of the most sophisticated mistakes I see smart home and EV hobbyists make involves the connection between their charger installation and their home’s electrical capacity. According to a comprehensive residential infrastructure study by the National Fire Protection Association (NFPA), home electrical failures involving vehicle charging systems are almost always linked to faulty branch circuit wiring and improper load calculations rather than defective vehicle inlets. Many owners assume that if their home panel has an empty physical slot, they can just run a new wire for a Level 2 charger without checking if they actually have the electrical headroom.
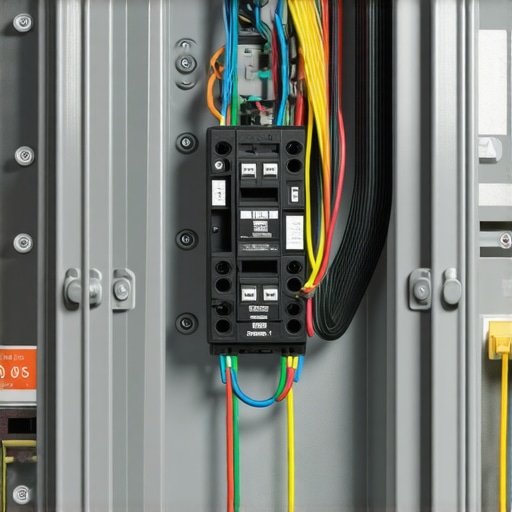
Doing this without reviewing panel upgrades for EV chargers is a recipe for disaster. If you overload your service entrance, you risk nuisance tripping or even electrical fires. It is not just about getting the charger to work; it is about ensuring your setup meets strict local standards. You should always verify your load limits and read up on code compliance essentials for EV charger installations in 2025 to protect your home’s equity and your family’s safety. Have you ever fallen into this trap of assuming a free slot means your panel can handle the extra load? Let me know in the comments below!
The High-Voltage Grounding Mistake That Mimics a Broken Port
Another subtle nuance that confuses EV owners is when a faulty ground at the home charger makes it look like the car’s charge port has physically failed. When you plug in, your car performs a handshake sequence with the station. If the station detects a weak ground, it refuses to lock the charge port door or latch the plug. Drivers often assume the lock actuator in their car’s port has broken and start prying at it, when the real culprit is poor wiring back at the subpanel. If you are experiencing mysterious handshake failures, you are likely dealing with the grounding rod mistake that stops your car from charging entirely. Take a step back, stop prying on your delicate car plastics, and look at the foundation of your electrical supply before you break an expensive automotive component.
My Personal Toolkit for Keeping the Charge Port Flawless
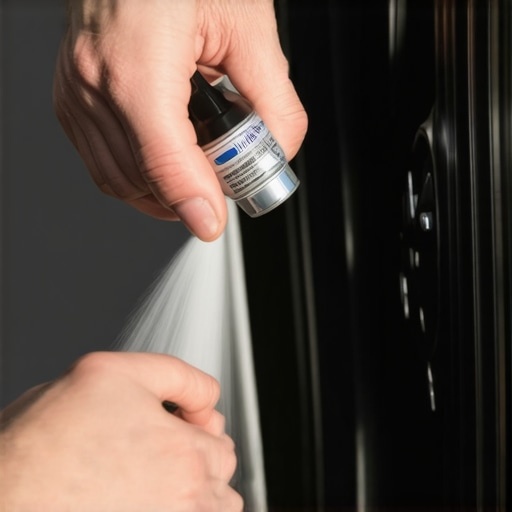
Over the years, I have refined a simple toolkit that completely prevents these stubborn physical blocks from happening. I do not use heavy greases or standard WD-40, which actually attract road grit and build up a sticky sludge over time. Instead, I personally rely on a quick spray of CRC dry film PTFE lubricant. This specialized dry lubricant creates a slick, microscopic barrier on the hinge and latch pin without leaving any wet residue to trap dirt. Every three months, I also run a specialized soft-bristle nylon brush around the inner weather stripping to sweep out highway salt. Maintaining these small physical components is just as vital as keeping your software updated or knowing how to stop your smart charger from losing wi-fi every night. Taking five minutes for basic upkeep keeps everything running smoothly and prevents unexpected morning delays.
How do I maintain my EV charging components over time?
Long-term reliability comes down to consistent, light maintenance of both your vehicle’s port and your home electrical setup. Automotive engineers at the Society of Automotive Engineers (SAE) note in their charging interface standards that micro-abrasions from road grit are the leading cause of latch failures in cold climates. Beyond lubricating the hinge, make sure you examine your home charging connector. Inspect the pins for discoloration, which indicates heat buildup, and make sure you understand why your charging cable gets stiff in the winter and how to fix it. Protecting the cable from freezing and laying it down without tight kinks prevents internal copper fatigue, ensuring that your home system continues to supply clean, steady power without overloading your vehicle’s sensitive ports.
Looking ahead, the industry is transitioning away from manual spring doors toward fully automated, heated charging ports that run off the vehicle’s thermal management system. Until those systems become standard on every budget EV, the responsibility rests on us to keep our current hardware clean and compliant. If you want to avoid expensive diagnostic fees, I highly recommend checking your manual release cable tonight before you actually need it in an emergency. If you suspect your charging issues might stem from a wider electrical issue rather than a simple sticky latch, do not hesitate to reach out to a professional through our contact us page to ensure your home power delivery is safe, compliant, and performing at its absolute best.
What Experts Won’t Tell You About Stuck Charging Port Doors
Over my years of driving and servicing electric vehicles, I have realized that the official owner’s manuals leave out the real-world scenarios. Manufacturers want you to believe their designs are flawless, but winter road salt and sub-zero temperatures tell a different story. The biggest secret is that your car’s physical locking mechanism is incredibly sensitive to voltage fluctuations. If your vehicle’s 12-volt battery is slightly weak, it might have enough power to unlock the passenger doors but fail to supply the quick surge of amperage required to pull back a sticky charge port actuator pin.
Another eye-opener is the sheer amount of road debris that accumulates behind the hinge housing. While you might only see a tiny speck of dust on the outside, a thick layer of fine grit often builds up inside the spring cavity. This micro-debris acts like sandpaper, slowly grinding down the plastic gears of the actuator until they eventually strip. Regular physical inspections and quick, dry-lubricant maintenance are what actually keep you on the road—not waiting for a software update to solve a physical friction problem.
The Essential Toolkit I Keep in My Glovebox
You do not need a massive garage setup or expensive specialty tools to keep your vehicle’s ports functioning flawlessly. I have narrowed my personal emergency kit down to just three highly effective items that fit right in my glove compartment. First, a high-quality can of CRC dry film PTFE lubricant. Unlike standard lubricants, this dry spray leaves no wet residue, ensuring that highway dust and road salt do not stick to your hinge points.
Second, I always carry a soft-bristled nylon detailing brush to sweep away salt crust and pollen before they can migrate into the latch housing. Finally, a simple heavy-duty plastic ziplock bag. It sounds incredibly low-tech, but filling this bag with warm tap water is the safest, most efficient way to melt away morning ice sheet blockages without risking thermal shock to your paint or sending moisture directly into the high-voltage connections. These three simple items have saved me from calling a tow truck on more than one freezing morning.
Take Control of Your Daily Charging Experience
Getting stranded in your own driveway because of a stubborn piece of plastic is incredibly frustrating, but it doesn’t have to ruin your morning. Armed with the right techniques, a gentle touch, and a basic understanding of your vehicle’s physical override systems, you can confidently handle any stuck latch or frozen hinge. Do not let a minor mechanical hiccup make you doubt your switch to electric driving.
If you suspect that your charging hurdles are rooted in deeper electrical delivery issues rather than a simple sticky latch, it is always best to consult a professional. Take a moment to read our guide on troubleshooting EV chargers to understand how your home station interacts with your vehicle. If you need a certified technician to inspect your home wiring or evaluate your service capacity, do not hesitate to reach out to us directly through our contact us page to get your home power infrastructure running perfectly.
Have you ever had to use your car’s hidden manual release cable in an emergency, or did you manage to get your door open using the two-finger pressure trick? Let me know your experiences in the comments below!